About building Angular2 development environment (detailed tutorial)
Not long ago, WebStorm's frequent freezes finally made me unbearable. I decided to change to a lightweight editor, tried Emacs, Sublime Text, and finally chose vscode. The following article mainly introduces you to the relevant information about VS Code in the Angular2 development environment construction tutorial. Friends in need can refer to it.
Preface
VSCode is a lightweight editor launched by Microsoft. It adopts the same UI interface as VS and is equipped with appropriate plug-ins. Can optimize the front-end development experience.
Layout: The left side is the file manager used to display all the files and folders to be edited, followed by `Explorer`, `Search`, `GIT`, `Debug`, `Plugins` , the right side is the editing area for opening files, and up to three editing areas can be opened to the side at the same time.
Bottom column: `Git Branch`, `error&warning`, `Encoding format`, etc.
1. Set up the development environment Node Js
The Angular2 development environment mainly relies on Node Js and Npm,
requires node 6.9 .x and npm 3.x.x or above.
To view the version command, use node -v and npm -v.
2. For Angular2 or above, use the Angular CLI command line tool
You can quickly create projects, add files, and perform a host of development tasks, such as testing, packaging, and publishing.
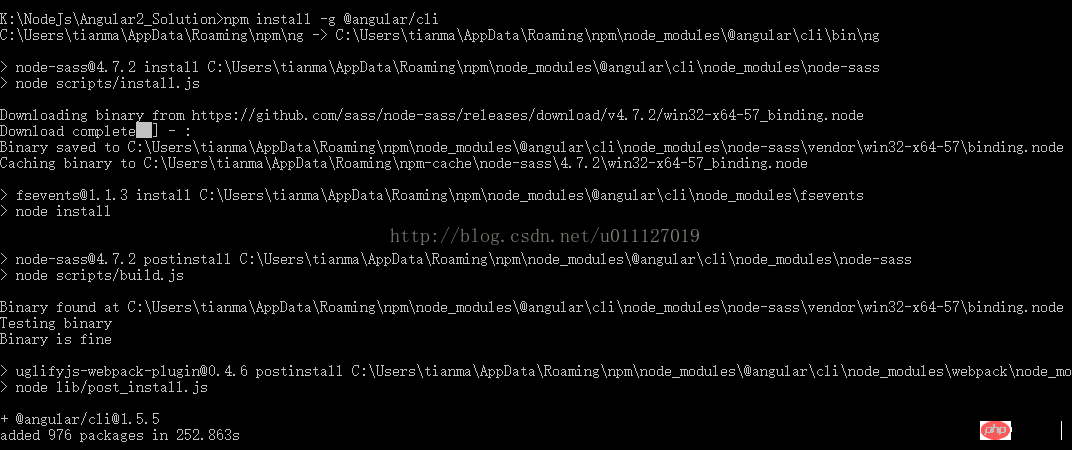
Then install Angular CLI globally.
npm install -g @angular/cli
Note: The installation process may be slow and you need to wait for a few minutes.

3. Create a new project
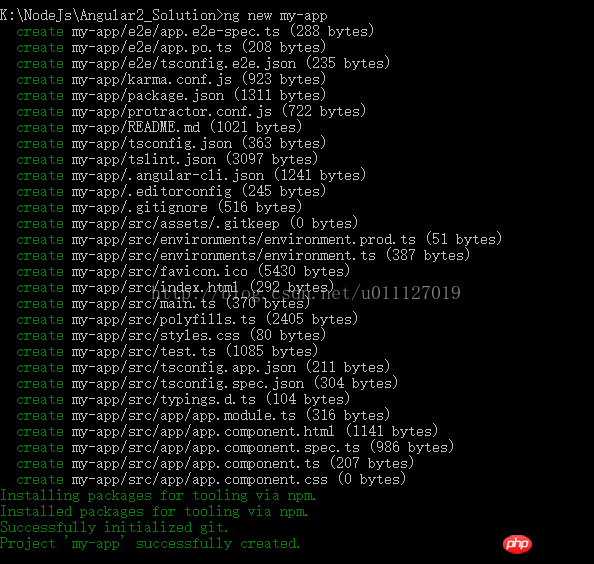
Run the following commands to generate a new project and the skeleton of the application Code:
ng new my-app
Note: The first installation process is also slow, please wait patiently for a few minutes,

4. Start the development server
Enter the project directory and start the server
cd my-app
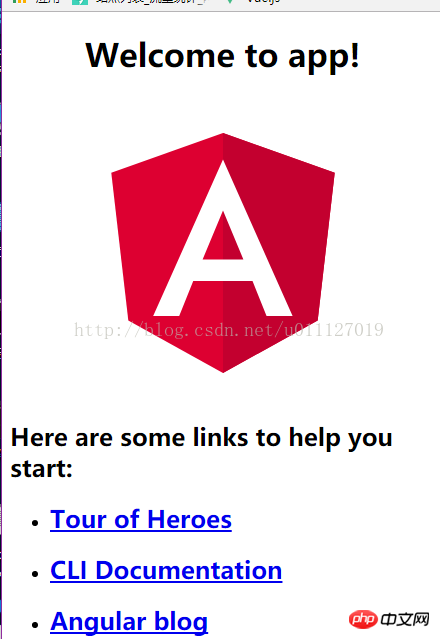
ng serve --open
ng serveThe command will start Development server that listens for file changes and rebuilds the application when those files are modified.
Use the --open (or -o) parameter to automatically open the browser and access http://localhost:4200/.

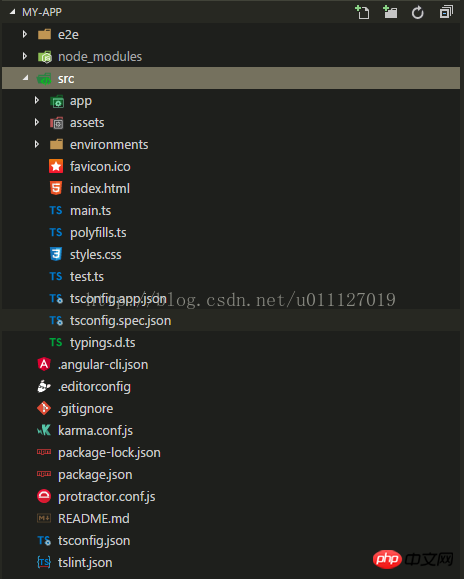
5. Open the project in VS Code


How to implement floating collision in JS
How to control the mouse to refuse to click the button in JS
How to get the current time difference using JS
How to implement object management of url in js
In JavaScript How to use Generator
The above is the detailed content of About building Angular2 development environment (detailed tutorial). For more information, please follow other related articles on the PHP Chinese website!

Hot AI Tools

Undresser.AI Undress
AI-powered app for creating realistic nude photos

AI Clothes Remover
Online AI tool for removing clothes from photos.

Undress AI Tool
Undress images for free

Clothoff.io
AI clothes remover

Video Face Swap
Swap faces in any video effortlessly with our completely free AI face swap tool!

Hot Article

Hot Tools

Notepad++7.3.1
Easy-to-use and free code editor

SublimeText3 Chinese version
Chinese version, very easy to use

Zend Studio 13.0.1
Powerful PHP integrated development environment

Dreamweaver CS6
Visual web development tools

SublimeText3 Mac version
God-level code editing software (SublimeText3)

Hot Topics
 1387
1387
 52
52
 How to define header files for vscode
Apr 15, 2025 pm 09:09 PM
How to define header files using Visual Studio Code? Create a header file and declare symbols in the header file using the .h or .hpp suffix name (such as classes, functions, variables) Compile the program using the #include directive to include the header file in the source file. The header file will be included and the declared symbols are available.
 What computer configuration is required for vscode
Apr 15, 2025 pm 09:48 PM
VS Code system requirements: Operating system: Windows 10 and above, macOS 10.12 and above, Linux distribution processor: minimum 1.6 GHz, recommended 2.0 GHz and above memory: minimum 512 MB, recommended 4 GB and above storage space: minimum 250 MB, recommended 1 GB and above other requirements: stable network connection, Xorg/Wayland (Linux)
 How to solve the problem of vscode Chinese annotations becoming question marks
Apr 15, 2025 pm 11:36 PM
How to solve the problem that Chinese comments in Visual Studio Code become question marks: Check the file encoding and make sure it is "UTF-8 without BOM". Change the font to a font that supports Chinese characters, such as "Song Style" or "Microsoft Yahei". Reinstall the font. Enable Unicode support. Upgrade VSCode, restart the computer, and recreate the source file.
 How to switch Chinese mode with vscode
Apr 15, 2025 pm 11:39 PM
VS Code To switch Chinese mode: Open the settings interface (Windows/Linux: Ctrl, macOS: Cmd,) Search for "Editor: Language" settings Select "Chinese" in the drop-down menu Save settings and restart VS Code
 Common commands for vscode terminal
Apr 15, 2025 pm 10:06 PM
Common commands for VS Code terminals include: Clear the terminal screen (clear), list the current directory file (ls), change the current working directory (cd), print the current working directory path (pwd), create a new directory (mkdir), delete empty directory (rmdir), create a new file (touch) delete a file or directory (rm), copy a file or directory (cp), move or rename a file or directory (mv) display file content (cat) view file content and scroll (less) view file content only scroll down (more) display the first few lines of the file (head)
 How to set vscode in Chinese
Apr 15, 2025 pm 09:27 PM
There are two ways to set up a Chinese language in Visual Studio Code: 1. Install the Chinese language package; 2. Modify the "locale" settings in the configuration file. Make sure Visual Studio Code version is 1.17 or higher.
 How to set vscode
Apr 15, 2025 pm 10:45 PM
To enable and set VSCode, follow these steps: Install and start VSCode. Custom preferences including themes, fonts, spaces, and code formatting. Install extensions to enhance features such as plugins, themes, and tools. Create a project or open an existing project. Use IntelliSense to get code prompts and completions. Debug the code to step through the code, set breakpoints, and check variables. Connect the version control system to manage changes and commit code.
 vscode Previous Next Shortcut Key
Apr 15, 2025 pm 10:51 PM
VS Code One-step/Next step shortcut key usage: One-step (backward): Windows/Linux: Ctrl ←; macOS: Cmd ←Next step (forward): Windows/Linux: Ctrl →; macOS: Cmd →


