This article mainly introduces the detailed explanation of Vue components and parent-child component communication in Vue2.0 learning. The editor thinks it is quite good, so I will share it with you now and give it as a reference. Let’s follow the editor and take a look.
What are components?
The components in vue are actually part of the page, such as every component in the computer (such as hard disk, keyboard, mouse). It has independent logic or interface, and at the same time can be based on The specified interface rules are integrated with each other to become a complete application.
The page is composed of parts like this, such as navigation, lists, pop-up windows, drop-down lists, etc. The page is just a container for these components. The components are freely combined to form a fully functional interface. When a component is not needed or you want to replace it, you can replace and delete it at any time without affecting the operation of the entire application.
The core idea of front-end componentization is to split a huge and complex thing into small things with reasonable granularity.
What are the benefits of using components?
1. Improve development efficiency
2. Convenient for reuse
3. Simplify debugging steps
4. Improve the maintainability of the entire project
5. Facilitate collaborative development
Component in vue
The component in vue is a custom tag, and the compiler of vue.js adds special functions to it
Component in vue You can also extend native html elements to encapsulate reusable code
Basic components of components: style structure, behavior logic, data
Registered components
Global registration
Can be used in any template, you must register before use
Syntax: use Vue.component(component name, option object)
Component name naming convention: camel case, kebab
Use components in html: use kebab naming method
For example, register Vue.compontent('my-compontent',{}) ,When using
<p id="app">
<h2>自定义下拉框</h2>
<cus-list></cus-list>
<cus-list></cus-list>
</p>
<script type="text/javascript" src='https://i0.jrjimg.cn/zqt-red-1000/focus/focus2017YMZ/teamFrighting/js/vue.min.js'></script>
<script type="text/javascript">
// 全局注册组件
Vue.component('cus-list',{
data(){
return {
}
},
template:`
<section>
<p>
<p>
<input type="text">
<input type="button" name="" value="">
<span></span>
</p>
</p>
</section>
`
})
new Vue({
el:"#app",
data:{
}
})
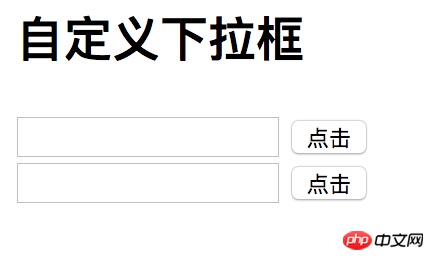
</script>When using, you only need to call this component on the page to use it and it can be reused.

Component.png
Local registration
Registered through the option object in the component instance, only in the Components registered locally using
<p id="app">
<h2>自定义下拉框</h2>
<cus-list></cus-list>
<cus-list></cus-list>
</p>
<script type="text/javascript" src='https://i0.jrjimg.cn/zqt-red-1000/focus/focus2017YMZ/teamFrighting/js/vue.min.js'></script>
<script>
new Vue({
el:"#app",
components:{
'cus-list':{
template:`
<section>
<p>
<p>
<input type="text">
<input type="button" name="" value="">
<span></span>
</p>
</p>
</section>
`
}
},
data:{
}
})
</script>in the registered scope can only be used in the scope of the current instance, and can also be reused in the scope. The effect is as follows.

Component.png
Communication between parent and child components
Communication between parent component and child component
Parent component===》Child component (using props)
The scope of the component instance is isolated, and the child component cannot directly use the data of the parent component.
You can use custom properties to bind data on the component, and use props to customize the property name to be displayed in the component.
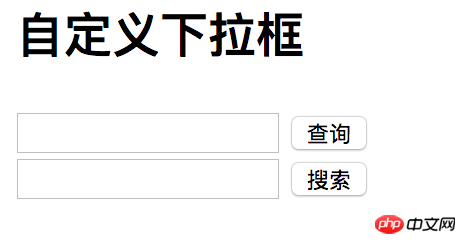
That is to say, remember one sentence. When a parent component passes a value to a child component, it is to add an attribute to the component when calling the component, and then use props to receive it in the component. It can be used according to the attribute name in the component. .
<p id="app">
<h2>自定义下拉框</h2>
<cus-list btn-value="查询"></cus-list>
<cus-list btn-value="搜索"></cus-list>
</p>
<script type="text/javascript" src='https://i0.jrjimg.cn/zqt-red-1000/focus/focus2017YMZ/teamFrighting/js/vue.min.js'></script>
<script>
Vue.component('cus-list',{
data(){
},
props:['btnValue'],
template:`
<section>
<p>
<p>
<input type="text">
<input type="button" name="" :value="btnValue">
<span></span>
</p>
</p>
</section>
`
})
new Vue({
el:"#app",
data:{
}
})
</script>Page effect

props pass value.png
The child component communicates with the parent component
Sub component===》Parent component
You need to use custom time. The parent component uses $on to listen to custom events, and $emit triggers the customization that the parent component cares about. event.
1. Define the event content in the sub-component
2. v-on custom events in the parent component are received v-on:receive="changeValue"
3. When the child component event is triggered, $emit notifies the parent component of this.$ emit("receive",item);
4. The parent component provides corresponding feedback according to the custom event changeValue:function(value){this.val = value;}
Look at the following case, When you click input, a drop-down list box appears, select the corresponding list, and the list content appears in the input box.
<p id="app">
<h2>自定义下拉框</h2>
<cus-list select-Value="搜索" v-bind:list="list1" >
</cus-list>
</p>
<script type="text/javascript" src='https://i0.jrjimg.cn/zqt-red-1000/focus/focus2017YMZ/teamFrighting/js/vue.min.js'></script>
<script type="text/javascript">
// 全局注册组件
Vue.component('cus-list',{
data(){
return {
selectShow:false,
val:''
}
},
props:['selectValue','list'],
template:`
<section>
<p>
<p>
<input type="text" @click="selectShow = !selectShow" :value="val">
<input type="button" name="" :value="selectValue">
</p>
<list-li :list="list" v-show="selectShow" v-on:receive="changeValue"></list-li>
</p>
</section>
`,
methods:{
changeValue:function(value){
this.val = value;
}
}
})
Vue.component('list-li',{
props:['list'],
template:`
<ul>
<li v-for="item of list" @click="clickLi(item)">{{item}}</li>
</ul>
`,
methods:{
clickLi:function(item){
this.$emit("receive",item);
}
}
})
new Vue({
el:"#app",
data:{
list1:['宋仲基','余文乐','鹿晗','陈小春','黄晓明','易烊千玺']
}
})
</script>The above is what I compiled for everyone. I hope it will be helpful to everyone in the future.
Related articles:
How to solve the conflict between Django and Vue syntax
How to crawl website images in nodejs
About ES6/JavaScript usage skills (detailed tutorial)
How to dynamically set placeholder prompt text using WeChat applet
The above is the detailed content of How to implement component and parent-child component communication in Vue2.0. For more information, please follow other related articles on the PHP Chinese website!


