Analysis of JS file upload artifact bootstrap fileinput
This article mainly introduces the JS file upload artifact Bootstrap FileInput. The style is very beautiful and supports uploaded file preview, ajax synchronous or asynchronous upload, drag and drop file upload and other cool functions. It has certain reference value. If you are interested, Friends, you can refer to the
Bootstrap FileInput plug-in. It is so powerful that there is no reason not to use it. However, it is rare to find the complete usage method of this plug-in in China, so I went to its official website to translate the English documentation. I put it here for students who are not good at English to refer to it. Also attached is a piece of code sent by the caller and received by the servlet side, to be continued.

Introduction:
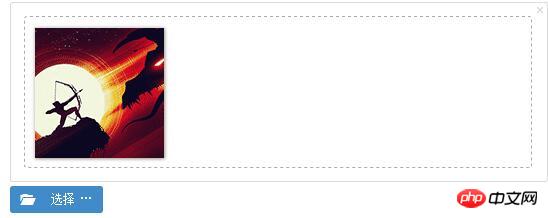
An enhanced HTML5 file input plug-in for Bootstrap 3.x. This plug-in provides file preview for multiple types of files, and provides multiple selection and other functions. This plugin also provides you with an easy way to install an advanced file selection/upload control version to work with Bootstrap CSS3 styles. It greatly enhances the file input function by providing preview support for many types of files, such as pictures, text, html, video, sound, flash and objects. In addition, it also includes AJAX-based upload, drag and drop, and remove file functions, a visual upload progress bar, and an optional add or delete file preview function.
Tips: This plug-in is dedicated to using a large number of css3 and html5 functions under added jquery. Emphasis: You may find css3 or html5 or both. Mixing is required in many implementations.
This plugin was first inspired by a blog post and Jasny'sFile Input plugin. However, this plug-in has now added many functions and enhancements, providing developers with a mature and complete file management tool and solution.
With the release of version 4.0.0, this plug-in now supports Ajax-based uploads using html5 Formdata and XHR2 protocols supported by a variety of modern browsers. And it also has native built-in support for AJAX-based file deletion on the server side. Therefore, it can add more powerful functions to add and remove files online. This plugin also adds drag-and-drop support for most modern browsers. It also already provides native support for Ajax uploads. In case, the browser does not support FormData or XHR2, this plug-in will downgrade to a normal form.
Introduction to the file upload plug-in File Input
Generally, we need to introduce the following two files before the plug-in can be used normally:
bootstrap-fileinput/css/fileinput.min.css
bootstrap-fileinput/js/fileinput.min.js
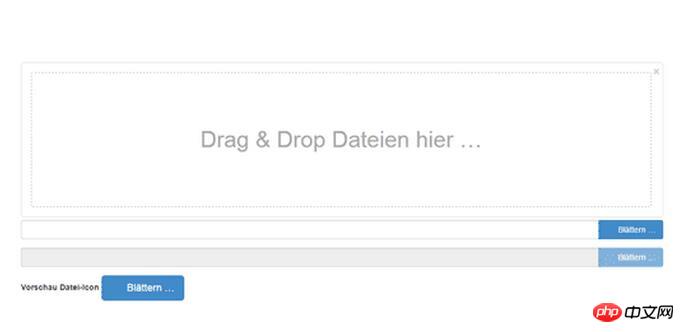
The simple interface effect is the same as many upload file controls, which is acceptable Various types of files. Of course, we can also specify functions such as specific file types to be accepted.

If you need to consider Chinese culture, you also need to introduce the file:
bootstrap-fileinput/js/fileinput_locale_zh.js
In this MVC-based Bundles collection, we can just add the files they need to the collection.
//添加对bootstrap-fileinput控件的支持
css_metronic.Include("~/Content/MyPlugins/bootstrap-fileinput/css/fileinput.min.css");
js_metronic.Include("~/Content/MyPlugins/bootstrap-fileinput/js/fileinput.min.js");
js_metronic.Include("~/Content/MyPlugins/bootstrap-fileinput/js/fileinput_locale_zh.js");In this way, we can present Chinese interface instructions and prompts on the page

Usage of file upload plug-in File Input
Generally, we can define a general JS function to initialize the plug-in control, as shown in the following JS function code.
//初始化fileinput控件(第一次初始化)
function initFileInput(ctrlName, uploadUrl) {
var control = $('#' + ctrlName);
control.fileinput({
language: 'zh', //设置语言
uploadUrl: uploadUrl, //上传的地址
allowedFileExtensions : ['jpg', 'png','gif'],//接收的文件后缀
showUpload: false, //是否显示上传按钮
showCaption: false,//是否显示标题
browseClass: "btn btn-primary", //按钮样式
previewFileIcon: "<i class='glyphicon glyphicon-king'></i>",
});
}In the page code, we place a file upload control, as shown in the following code.
<p class="row" style="height: 500px">
<input id="file-Portrait1" type="file">
</p>
The initialization code of our script code is as follows:
//初始化fileinput控件(第一次初始化)
initFileInput("file-Portrait", "/User/EditPortrait");This is complete After the control has been initialized, if we need to upload a file, we need JS code to handle the client upload event, and we also need the MVC background controller to handle the file saving operation.
For example, my code for saving form data is as follows.
//添加记录的窗体处理
 formValidate("ffAdd", function (form) {
 $("#add").modal("hide");
 //构造参数发送给后台
 var postData = $("#ffAdd").serializeArray();
 $.post(url, postData, function (json) {
 var data = $.parseJSON(json);
 if (data.Success) {
 //增加肖像的上传处理
 initPortrait(data.Data1);//使用写入的ID进行更新
 $('#file-Portrait').fileinput('upload');
 //保存成功 1.关闭弹出层,2.刷新表格数据
 showTips("保存成功");
 Refresh();
 }
 else {
 showError("保存失败:" + data.ErrorMessage, 3000);
 }
 }).error(function () {
 showTips("您未被授权使用该功能,请联系管理员进行处理。");
 });
});We noticed the processing logic code part for file saving:
//增加肖像的上传处理
initPortrait(data.Data1);//使用写入的ID进行更新
$('#file-Portrait').fileinput('upload');
The first line of code is to reconstruct the uploaded additional content, such as the user's ID information, etc., so that we can construct some additional data based on these IDs for background upload processing.
This function is mainly to reassign the ID to facilitate obtaining the latest additional parameters when uploading. This is the same as the processing mode of Uploadify.
//初始化图像信息
function initPortrait(ctrlName, id) {
var control = $('#' + ctrlName);
var imageurl = '/PictureAlbum/GetPortrait?id=' + id + '&r=' + Math.random();
//重要,需要更新控件的附加参数内容,以及图片初始化显示
control.fileinput('refresh', {
uploadExtraData: { id: id },
initialPreview: [ //预览图片的设置
"<img src='" + imageurl + "' class='file-preview-image' alt='肖像图片' title='肖像图片'>",
],
});
}We saw earlier that the address I uploaded is: "/User/EditPortrait". I will also announce this background function, hoping to give everyone a Complete case code study.
/// <summary>
 /// 上传用户头像图片
 /// </summary>
 /// <param name="id">用户的ID</param>
 /// <returns></returns>
 public ActionResult EditPortrait(int id)
 {
 CommonResult result = new CommonResult();
 try
 {
 var files = Request.Files;
 if (files != null && files.Count > 0)
 {
 UserInfo info = BLLFactory<User>.Instance.FindByID(id);
 if (info != null)
 {
 var fileData = ReadFileBytes(files[0]);
 result.Success = BLLFactory<User>.Instance.UpdatePersonImageBytes(UserImageType.个人肖像, id, fileData);
 }
 }
 }
 catch (Exception ex)
 {
 result.ErrorMessage = ex.Message;
 }
 return ToJsonContent(result);
}这样我们就构建了上面的用户肖像的保存处理逻辑了,文件可以正常的保存到后台的文件系统里面,同时数据库里面记录一些必备的信息。
当然,除了用来处理用户的肖像图片,我们也可以用来构建图片相册的处理操作的。
//初始化fileinput控件(第一次初始化)
$('#file-Portrait').fileinput({
language: 'zh', //设置语言
uploadUrl: "/FileUpload/Upload", //上传的地址
allowedFileExtensions : ['jpg', 'png','gif'],//接收的文件后缀,
maxFileCount: 100,
enctype: 'multipart/form-data',
showUpload: true, //是否显示上传按钮
showCaption: false,//是否显示标题
browseClass: "btn btn-primary", //按钮样式
previewFileIcon: "<i class='glyphicon glyphicon-king'></i>",
msgFilesTooMany: "选择上传的文件数量({n}) 超过允许的最大数值{m}!",
});以上就是本文的全部内容,希望对大家的学习有所帮助,更多相关内容请关注PHP中文网!
相关推荐:
jQuery和CSS3实现仿花瓣网固定顶部位置带悬浮效果的导航菜单
The above is the detailed content of Analysis of JS file upload artifact bootstrap fileinput. For more information, please follow other related articles on the PHP Chinese website!

Hot AI Tools

Undresser.AI Undress
AI-powered app for creating realistic nude photos

AI Clothes Remover
Online AI tool for removing clothes from photos.

Undress AI Tool
Undress images for free

Clothoff.io
AI clothes remover

AI Hentai Generator
Generate AI Hentai for free.

Hot Article

Hot Tools

Notepad++7.3.1
Easy-to-use and free code editor

SublimeText3 Chinese version
Chinese version, very easy to use

Zend Studio 13.0.1
Powerful PHP integrated development environment

Dreamweaver CS6
Visual web development tools

SublimeText3 Mac version
God-level code editing software (SublimeText3)

Hot Topics
 1378
1378
 52
52
 How to get the bootstrap search bar
Apr 07, 2025 pm 03:33 PM
How to use Bootstrap to get the value of the search bar: Determines the ID or name of the search bar. Use JavaScript to get DOM elements. Gets the value of the element. Perform the required actions.
 How to do vertical centering of bootstrap
Apr 07, 2025 pm 03:21 PM
Use Bootstrap to implement vertical centering: flexbox method: Use the d-flex, justify-content-center, and align-items-center classes to place elements in the flexbox container. align-items-center class method: For browsers that do not support flexbox, use the align-items-center class, provided that the parent element has a defined height.
 How to write split lines on bootstrap
Apr 07, 2025 pm 03:12 PM
There are two ways to create a Bootstrap split line: using the tag, which creates a horizontal split line. Use the CSS border property to create custom style split lines.
 How to insert pictures on bootstrap
Apr 07, 2025 pm 03:30 PM
There are several ways to insert images in Bootstrap: insert images directly, using the HTML img tag. With the Bootstrap image component, you can provide responsive images and more styles. Set the image size, use the img-fluid class to make the image adaptable. Set the border, using the img-bordered class. Set the rounded corners and use the img-rounded class. Set the shadow, use the shadow class. Resize and position the image, using CSS style. Using the background image, use the background-image CSS property.
 How to resize bootstrap
Apr 07, 2025 pm 03:18 PM
To adjust the size of elements in Bootstrap, you can use the dimension class, which includes: adjusting width: .col-, .w-, .mw-adjust height: .h-, .min-h-, .max-h-
 How to set up the framework for bootstrap
Apr 07, 2025 pm 03:27 PM
To set up the Bootstrap framework, you need to follow these steps: 1. Reference the Bootstrap file via CDN; 2. Download and host the file on your own server; 3. Include the Bootstrap file in HTML; 4. Compile Sass/Less as needed; 5. Import a custom file (optional). Once setup is complete, you can use Bootstrap's grid systems, components, and styles to create responsive websites and applications.
 How to use bootstrap in vue
Apr 07, 2025 pm 11:33 PM
Using Bootstrap in Vue.js is divided into five steps: Install Bootstrap. Import Bootstrap in main.js. Use the Bootstrap component directly in the template. Optional: Custom style. Optional: Use plug-ins.
 How to use bootstrap button
Apr 07, 2025 pm 03:09 PM
How to use the Bootstrap button? Introduce Bootstrap CSS to create button elements and add Bootstrap button class to add button text


