WeChat applet implements night mode for skin
This article mainly introduces you to the relevant information about using WeChat applet to realize skin function, that is, to realize night mode. The article introduces it in detail through sample code, which has certain reference and learning value for everyone. Friends who need it Let’s take a look together below.
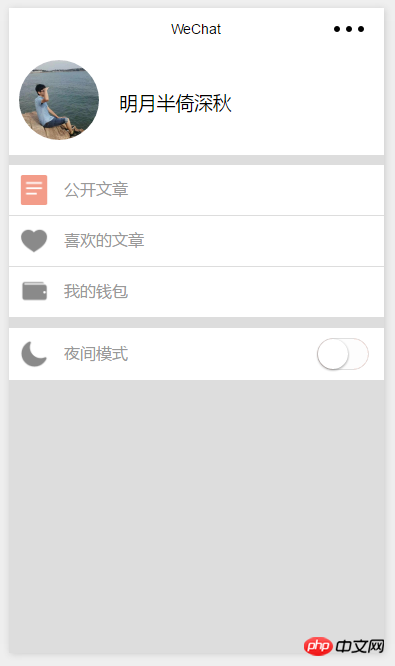
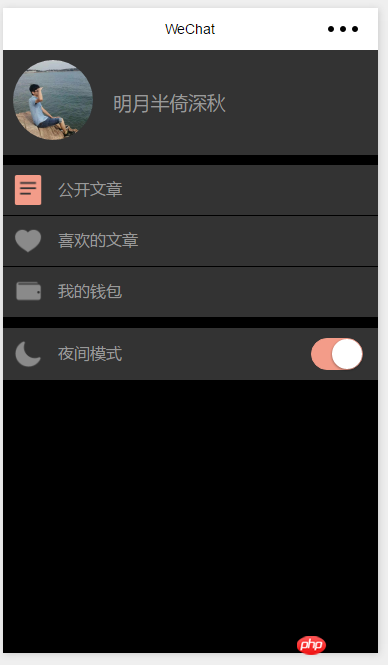
Old rule, show the renderings first


<switch bindchange="switchChange" color ="#F39C89" class="switch"/>
Page({
 data: {
 skinStyle: ""
 },
 onLoad: function (options) {
 },
 switchChange:function(e){
 var that =this
 var style
 //如果开启
 if(e.detail.value == true){
  style="dark"
 }else{
  //否则
  style.skin = ""
 }
 //保存信息
 that.setData({
  skinStyle: style
 })
 }
})/*夜间模式*/
/****个人信息页面****/
.dark-box{
background: #000 !important;
}
/*用户信息部分*/
.dark-box .user-box{
background: #333 !important;
color: #999;
}
/*列表部分*/
.dark-box .extra-box{
background: #333 !important;
}
.dark-box .extra-box .extra-item{
border-bottom: 1px solid #000 !important;
}
.dark-box .extra-box .item-head{
color: #999;
}
.dark-box .between-box{
background: #333 !important;
}
.dark-box .between-left{
background: #333 !important;
}
.dark-box .between-left .item-head{
color: #999;
}
/****个人信息页面结束****/This dark-box is the outermost and largest box (except the default page)
<view class="my-box {{skinStyle}}-box">Now with this way of writing, we can change the skin style just by controlling the value of the variable skinStyle
We can also write a blue-box skin and then set the variable Just set skinStyle to blue
@import "../../skin/dark.wxss";
To set it to a global variable, just getApp() first and then pass it over
var app=getApp()
Page({
 data: {
 skinStyle: ""
 },
 onLoad: function (options) {
 },
 switchChange:function(e){
 var that =this
 //设置全局变量
 if(e.detail.value == true){
  app.globalData.skin="dark"
 }else{
  app.globalData.skin = ""
 }
 that.setData({
  skinStyle: app.globalData.skin
 })
 }
})I only wrote one page, so only this page will change
var app=getApp()
Page({
 data: {
 skinStyle: ""
 },
 onLoad: function (options) {

 },
 switchChange:function(e){
 var that =this

 //设置全局变量
 if(e.detail.value == true){
  app.globalData.skin="dark"
 }else{
  app.globalData.skin = ""
 }
 that.setData({
  skinStyle: app.globalData.skin
 })
 //保存到本地
 wx.setStorage({
  key: "skin",
  data: app.globalData.skin
 })
 }
})We need to get the skin settings when the program is opened
So we need to get the skin-related information in app.js
 getSkin:function(){
 var that =this
 wx.getStorage({
  key: 'skin',
  success: function (res) {
  that.globalData.skin=res.data
  }
 })
}Because we did not set it when the page was loaded
 onLoad: function (options) {
  var that =this
  that.setData({
  skinStyle: app.globalData.skin
  })
}Now let’s take a look
 The skin is OK
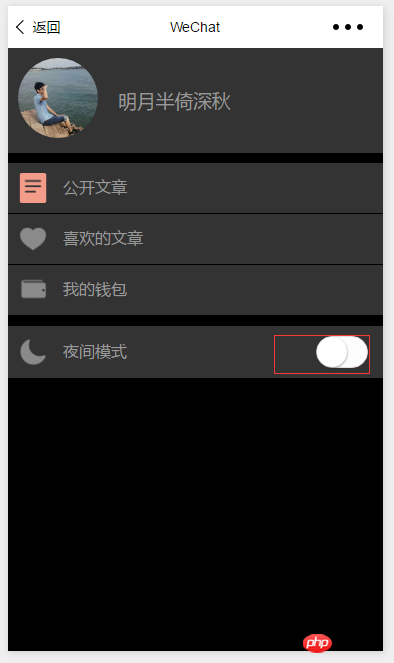
Because the switch has been reset
This is left to everyone to solve. Just make a judgment when starting up
Introduction to vidao’s video playback and barrage functions in WeChat Mini Program
WeChat Mini Program Develop a circular menu (imitation of the CCB circular menu)
The above is the detailed content of WeChat applet implements night mode for skin. For more information, please follow other related articles on the PHP Chinese website!

Hot AI Tools

Undresser.AI Undress
AI-powered app for creating realistic nude photos

AI Clothes Remover
Online AI tool for removing clothes from photos.

Undress AI Tool
Undress images for free

Clothoff.io
AI clothes remover

Video Face Swap
Swap faces in any video effortlessly with our completely free AI face swap tool!

Hot Article

Hot Tools

Notepad++7.3.1
Easy-to-use and free code editor

SublimeText3 Chinese version
Chinese version, very easy to use

Zend Studio 13.0.1
Powerful PHP integrated development environment

Dreamweaver CS6
Visual web development tools

SublimeText3 Mac version
God-level code editing software (SublimeText3)

Hot Topics
 1387
1387
 52
52
 Xianyu WeChat mini program officially launched
Feb 10, 2024 pm 10:39 PM
Xianyu's official WeChat mini program has quietly been launched. In the mini program, you can post private messages to communicate with buyers/sellers, view personal information and orders, search for items, etc. If you are curious about what the Xianyu WeChat mini program is called, take a look now. What is the name of the Xianyu WeChat applet? Answer: Xianyu, idle transactions, second-hand sales, valuations and recycling. 1. In the mini program, you can post idle messages, communicate with buyers/sellers via private messages, view personal information and orders, search for specified items, etc.; 2. On the mini program page, there are homepage, nearby, post idle, messages, and mine. 5 functions; 3. If you want to use it, you must activate WeChat payment before you can purchase it;
 How to solve the problem that the font size of Baidu Tieba Android version is too small and enable night mode
Dec 27, 2023 pm 08:45 PM
Baidu Tieba is a very popular interactive platform that many people use to exchange experiences with like-minded people. Nowadays, we use mobile phones very frequently, and Baidu Tieba Android version has become one of the must-have applications in many people’s mobile phones. However, recently many users have reported that the font size of Baidu Tieba Android version is too small, so how should we solve this problem? In addition, when using the Android version of Baidu Tieba at night, how to set up night mode to protect eyesight? How to solve the problem that the font size of Baidu Tieba on Android is too small? When browsing posts using Baidu Tieba, if you feel that the font is too small, you can click on the three dots in the upper right corner to find the option to adjust the text size and adjust it according to your personal needs. How to set the night mode of Baidu Tieba for Android? In the menu interface, still
 WeChat applet implements image upload function
Nov 21, 2023 am 09:08 AM
WeChat applet implements picture upload function With the development of mobile Internet, WeChat applet has become an indispensable part of people's lives. WeChat mini programs not only provide a wealth of application scenarios, but also support developer-defined functions, including image upload functions. This article will introduce how to implement the image upload function in the WeChat applet and provide specific code examples. 1. Preparatory work Before starting to write code, we need to download and install the WeChat developer tools and register as a WeChat developer. At the same time, you also need to understand WeChat
 How to enable night mode in Baidu browser
Jan 31, 2024 pm 11:57 PM
How to enable night mode in Baidu browser? The settings in Baidu Browser are very diverse, which can provide users with diverse Internet access modes and help users obtain the Internet environment that best suits them. When we use Baidu Browser, we can get a softer Internet environment by turning on night mode to reduce the burden on our eyes. If you also like to use this function, follow the editor to take a look at Baidu Browser. Night mode setting tutorial. How to enable night mode in Baidu Browser 1. Go to the [Baidu Browser] APP homepage and select [My] in the lower right corner; 2. Select [Settings] in the upper right corner; 3. Select the round button after [Night Mode] and wait. Just show blue.
 How to set night mode on Baicizhan How to set night mode on Baicizhan
Mar 12, 2024 pm 02:04 PM
How to set night mode on Baicizhan? Baicizhan is a very popular tool for learning English. The software provides users with a large number of learning topics and interesting learning methods. Users can choose the learning method that suits them according to their actual situation and effectively improve their English level. When we use this software at night, if we feel that the screen is too bright, we can set it to night mode and adjust it. How to set it up specifically? Interested friends, let’s take a look at the method explained by the editor. How to set up night mode on Baicizhan 1. Open Baicizhan, enter the sidebar, find settings, and click to enter. Both Android and iOS systems have the same location. Find "Master Bao Mode" in the settings, because the design of Master Bao from Baicizhan is very interesting, so
 How to set up night mode on Zhihu_How to set up night mode on Zhihu
Mar 22, 2024 pm 02:11 PM
1. Open the Zhihu APP and click [My] in the lower right corner; 2. You can see [Night Mode] on the My interface, click to set it. If you have any questions, go to Zhihu. Zhihu, a trustworthy Q&A community, has the mission of allowing everyone to obtain trustworthy answers efficiently. Zhihu relies on its serious, professional and friendly community atmosphere, structured, easy-to-access high-quality content, and Q&A-based content production platform.
 Implement the drop-down menu effect in WeChat applet
Nov 21, 2023 pm 03:03 PM
To implement the drop-down menu effect in WeChat Mini Programs, specific code examples are required. With the popularity of mobile Internet, WeChat Mini Programs have become an important part of Internet development, and more and more people have begun to pay attention to and use WeChat Mini Programs. The development of WeChat mini programs is simpler and faster than traditional APP development, but it also requires mastering certain development skills. In the development of WeChat mini programs, drop-down menus are a common UI component, achieving a better user experience. This article will introduce in detail how to implement the drop-down menu effect in the WeChat applet and provide practical
 How to know if a photo was clicked in night mode on iPhone
Feb 29, 2024 pm 04:31 PM
Apple's native camera app on iOS comes with a night mode that allows users to adjust the ISO, aperture and shutter speed of images to take bright and clear photos even in low-light environments. This feature results in pictures that are so high quality that others may have trouble telling that the photo was taken in night mode. So, how do you find out which photo was clicked in night mode? This is what we will explain in this article. What is night mode in iOS camera? To capture low-light subjects, photographers can play cleverly with camera settings. By adjusting the aperture, ISO value and shutter speed, you can extend the exposure time of the sensor and allow the camera to receive more light. Increasing the aperture allows more


