
 Backend Development
PHP Tutorial
Detailed explanation of scenarios and verification rules in Yii2
Backend Development
PHP Tutorial
Detailed explanation of scenarios and verification rules in Yii2
Detailed explanation of scenarios and verification rules in Yii2
The rules of Yii2 are used to verify model attributes. Scenario users define the models that need to be verified in different scenarios. The following article mainly introduces relevant information about scenarios (scenarios) and verification rules (rules) in Yii2. , the article introduces it in detail through sample code, friends in need can refer to it.
Preface
Scene, as the name suggests, is a situation, a scene. There are also scenes in yii2, which have similar meanings to the scenes you understand.
The essential functions of a system that interacts with users include collecting user data, verification and processing. In actual business, data often needs to be stored persistently. For security reasons, developers should firmly grasp the principle that "the input from the client is not trustworthy". The data sent from the client is filtered and cleaned before being stored or transferred to the internal system.
Yii2 recommends using the Model class to collect and verify user data, and the persistent ActiveRecord class is its subclass. The load and validate methods of the Model class are used to collect and verify client data respectively. Which data should be collected and which data needs to be verified under which scenarios are the themes of this article: scenarios and verification rules.
Not much to say below, let’s follow the editor to take a look at the detailed introduction.
System structure
#First introduce a simple business system: there are two roles of students and teachers in the system, used in the database Three tables are created to save role information:
user: [id, username, password, status, other common attributes]
student: [id, user_id, student_no, grade, class, other students Attributes]
teacher: [id, user_id, work_no, title, phone, other teacher attributes]
The actual business is not limited to the addition, deletion, query and modification operations of these three tables. In order to simplify the problem, only the data changes in the user and student tables will be discussed later (the teacher table is given so that readers will not think that the person who designed the database is stupid: it can be put into one table, why should it be separated!).
Student registration
Student registration is a typical operation of adding, deleting, checking and modifying, and sending points. A brief code example for student registration is as follows:
public function actionSignup()
{
 $data = Yii::$app->request->post();
 $user = new User();
 $user->load($data);
 if ($user->save()) {
  $student = new Student([
   "user_id" => $user->id,
  ]);
  $student->load($data);
  if ($student->save()) {
   // redirect to success page
  } else {
   $user->delete();
  }
 }
 // render error page
}I believe that anyone with experience using Yii2 can quickly set the rules of the User and Student classes based on the field constraints of the database. Write down the method. For example, the content of the User class file may be as follows:
namespace app\models;
class User extends \yii\db\ActiveRecord
{
 public function rules()
 {
  return [   [["username", "password", "status",], "required"],
   ["username", "unique"],
   // other rules
  ];
 }
 // other method
}Defines the validation rules for data. This is the first impression most people have on rules, and it is a good one. Impression: It fights back illegal data and allows normal data to enter the system. Security practices should try to define complete rules and fully verify data. It is also recommended that every Yii2 developer become familiar with the built-in core validators.
Modify information
Modifying information is also a typical add, delete, check and modify operation. There is not much difference between the implementation code and registration. Only two points are discussed here:
1. Verification of user password
When registering, it will be verified whether the user password is 8-16 digits. , the password rule may be: ["password", "string", "length" => [8, 16]] . It is not advisable to save passwords in clear text. When inserting into the database, at least MD5 encryption will be performed, and the password will become 32 bits. Assume that the user does not change the password when modifying the information. When saving again, the password rule verification error occurs (the length does not match) and cannot be saved!
How to solve this problem? Looking through the Yii documentation, I found that the when attribute in the rules can come to the rescue. One possible validation rule is:
public function rules()
{
 return [
   ["password", "string", "length" => [8, 16], 'when' => function ($model) {
    return $model->isNewRecord;
   }],
   // other rules
];Verify the password field only when registering (new data). Problem solved, perfect!
2. Prevent users from changing their passwords privately
Suppose there is a smart guy (such as Tom) who discovers that the system is made using the Yii framework and wants to do some damage. Show off your skills. When sending the form to modify the information, Tom adds &password=12345678. The system uses $user->load($data) to collect user input and update the password field, which brings the following consequences: the password field is not verified when the rules settings are updated, and 12345678 is directly saved to the database as the password value. middle. This operation caused a chain reaction: when the user logged in again, the encrypted password did not match the plain text password in the database, causing Tom to be unable to log in to the system. The annoying thing is that Tom is a thorn in the side. After being unable to log in, he harasses customer service all day long, which is not easy to worry about!
How to prevent this situation? One solution is to prevent password changes:
unset($data["password"]);
$user->load($data);
// 或者
$password = $user->password;
$user->load($data);
$user->password = $password;
Filter out the passwords entered by users, and the problem of changing passwords privately is solved.
But the problem is not over yet: Tom can turn to modify other fields, such as gender, ID card, etc. A more serious situation is that by modifying the user_id in student, you can change the information of any student. The matter is serious and the vulnerability needs to be fixed immediately.
可以按照密码的方法,逐个屏蔽受保护属性,但显得啰嗦难看(虽然好使)。如果受保护属性多,可以仅允许白名单进入,具体操作为:新增一个UpdateInfoForm类继承Model,属性是白名单属性合计。用UpdateInfoForm类过滤用户数据,校验通过后再更新到user和student中:
$form = new UpdateInfoForm();
$form->load($data);
if ($form->validate()) {
 $user->load($form->attributes);
 $student->load($form->attributes);
 // next biz
}这种方式更优雅,但仔细一想代价不小:属性和验证规则要重复写一遍;user和student保存时又重复校验属性。这种方式看起来优雅,实际上却冗余又低效。
scenario的登场,完美的解决解决上述问题。
场景(scenario)
分析上面问题,会发现关键点是批量赋值(massive assignment)和数据校验(validate)两个方法。如果对不同的场景指定赋值字段和检验规则,问题就迎刃而解。
Yii中的scenario有 安全属性 和 活跃属性 两个概念。安全属性用在批量赋值的load方法,只有安全属性才能被赋值;活跃属性用在规则校验的validate方法,在活跃属性集中并且定义了校验规则的属性才会被校验。活跃属性和安全属性的关系是,安全属性是活跃属性的子集。
\yii\base\Model类定义了默认场景:SCENARIO_DEFAULT(值为default)。默认场景下,出现在rules方法中的属性既是活跃属性,又是安全属性(这句话基本正确,看后续解释)。为不同场景指定活跃属性、安全属性以及校验器,可以通过覆盖senarios或rules两个方法实现(几乎每个Model类都会重写rules方法,senarios用得少)。
rules
先看rules方法。默认的属性加校验器定义方式,让每个属性既是安全属性,也是活跃属性。如果想让某个属性不是安全属性(不能通过load批量赋值),在属性名前加感叹号!即可。例如student中的user_id字段:
public function rules()
{
 return [
  ["!user_od", "required"],
  ["!user_id", "integer"],
  ["!user_od", "unique"],
  // other rules
 ];
}user_id是活跃属性,在写入数据库时会被校验。但它不是安全属性,不能通过load方法进行赋值,解决了安全隐患。
再看rules方法按场景区分校验器规则的做法:定义校验器时on属性指定规则在哪些场景下生效,except属性则排除一些场景(如果不指定on和except,规则对所有场景生效)。例如:
public function rules()
{
 return [
  ["password", "string", "length" => [8, 16], "on" => ["signup"]], // 仅在signup场景时才被验证
  ["status", "integer", "except" => ["signup"], // 除了signup场景,其他情况都校验
  // other rules
 ];
}在原来基础上新增感叹号和on/except属性,非常简便的就定义了非安全属性以及分场景指定校验规则。
scenarios
另外一种更清晰定义安全属性和活跃属性的做法是重写scenarios方法。scenarios方法返回一个数组,数组的键是场景名称,值是活跃属性集合(包饭安全属性)。例如student表的可能实现如下:
public function scenarios()
{
 return [
  self::SCENARIO_DEFAULT => ["!user_id", "grade", "class", xxxx],
  "update" => ["grade", "class", xxxx],
 ];
}默认情形下(学生报名),年级、班级这些信息是安全属性,但user_id不是,只能在程序内部赋值,并在插入数据时被校验;在修改信息时,user_id不是活跃属性,既不能被批量赋值,也不需要校验(事实上它不应该改变)。
scenarios方法只能定义活跃属性和安全属性,无法定义校验规则,需要和rules配合使用。
总结
金肯定义完善的数据校验规则
业务复杂时定义多个场景,仔细为每个场景定义安全属性和校验规则
优先使用rules;属性较多、rules复杂时,可以配合scenarios方法迅速理清安全属性和活跃属性
参考
http://www.yiiframework.com/doc-2.0/guide-input-validation.html
您可能感兴趣的文章:
MixPHP、Yii和CodeIgniter的并发压力测试的小结
PHP基于非递归算法实现先序、中序及后序遍历二叉树操作的示例
The above is the detailed content of Detailed explanation of scenarios and verification rules in Yii2. For more information, please follow other related articles on the PHP Chinese website!

Hot AI Tools

Undresser.AI Undress
AI-powered app for creating realistic nude photos

AI Clothes Remover
Online AI tool for removing clothes from photos.

Undress AI Tool
Undress images for free

Clothoff.io
AI clothes remover

AI Hentai Generator
Generate AI Hentai for free.

Hot Article
Hot Tools

Notepad++7.3.1
Easy-to-use and free code editor

SublimeText3 Chinese version
Chinese version, very easy to use

Zend Studio 13.0.1
Powerful PHP integrated development environment

Dreamweaver CS6
Visual web development tools

SublimeText3 Mac version
God-level code editing software (SublimeText3)
Hot Topics
 1371
1371
 52
52

 How to create a cumulative curve graph in Python?
Aug 23, 2023 pm 08:33 PM
How to create a cumulative curve graph in Python?
Aug 23, 2023 pm 08:33 PM
The ogive graph graphically represents the cumulative distribution function (CDF) of a set of data, sometimes called a cumulative frequency curve. It is used to examine data distribution and discover patterns and trends. Matplotlib, Pandas, and Numpy are some of the libraries and tools provided by Python for creating otive graphics. In this tutorial, we will look at how to use Matplotlib to generate ogive graphics in Python. To create a cumulative curve chart, we need to import the required libraries. In this example we will use Matplotlib, Pandas and Numpy. Matplotlib is a popular data visualization library for creating in Python
 How to create a constant in Python?
Aug 29, 2023 pm 05:17 PM
How to create a constant in Python?
Aug 29, 2023 pm 05:17 PM
Constants and variables are used to store data values in programming. A variable usually refers to a value that can change over time. A constant is a type of variable whose value cannot be changed during program execution. There are only six built-in constants available in Python, they are False, True, None, NotImplemented, Ellipsis(...) and __debug__. Apart from these constants, Python does not have any built-in data types to store constant values. Example An example of a constant is demonstrated below - False=100 outputs SyntaxError:cannotassigntoFalseFalse is a built-in constant in Python that is used to store boolean values
 How to personalize your iPhone on the latest iOS 17
Sep 21, 2023 am 08:17 AM
How to personalize your iPhone on the latest iOS 17
Sep 21, 2023 am 08:17 AM
How to Personalize Calls on iPhone Apple’s iOS 17 introduces a new feature called Contact Posters that allows you to personalize the look of your call screen on your iPhone. This feature allows you to design a poster using selected photos, colors, fonts, and Memoji as contact cards. So when you make a call, your custom image will appear on the recipient's iPhone exactly as you envisioned. You can choose to share your unique contact poster with all your saved contacts, or choose who can see it. Likewise, during a call exchange, you will also see other people's contact posters. Additionally, Apple lets you set specific contact photos for individual contacts, making calls from those contacts
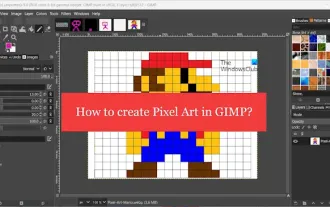 How to create pixel art in GIMP
Feb 19, 2024 pm 03:24 PM
How to create pixel art in GIMP
Feb 19, 2024 pm 03:24 PM
This article will interest you if you are interested in using GIMP for pixel art creation on Windows. GIMP is a well-known graphics editing software that is not only free and open source, but also helps users create beautiful images and designs easily. In addition to being suitable for beginners and professional designers alike, GIMP can also be used to create pixel art, a form of digital art that utilizes pixels as the only building blocks for drawing and creating. How to Create Pixel Art in GIMP Here are the main steps to create pixel pictures using GIMP on a Windows PC: Download and install GIMP, then launch the application. Create a new image. Resize width and height. Select the pencil tool. Set the brush type to pixels. set up
 How to create a folder on Realme Phone?
Mar 23, 2024 pm 02:30 PM
How to create a folder on Realme Phone?
Mar 23, 2024 pm 02:30 PM
Title: Realme Phone Beginner’s Guide: How to Create Folders on Realme Phone? In today's society, mobile phones have become an indispensable tool in people's lives. As a popular smartphone brand, Realme Phone is loved by users for its simple and practical operating system. In the process of using Realme phones, many people may encounter situations where they need to organize files and applications on their phones, and creating folders is an effective way. This article will introduce how to create folders on Realme phones to help users better manage their phone content. No.
 How to create a family with Gree+
Mar 01, 2024 pm 12:40 PM
How to create a family with Gree+
Mar 01, 2024 pm 12:40 PM
Many friends expressed that they want to know how to create a family in Gree+ software. Here is the operation method for you. Friends who want to know more, come and take a look with me. First, open the Gree+ software on your mobile phone and log in. Then, in the options bar at the bottom of the page, click the "My" option on the far right to enter the personal account page. 2. After coming to my page, there is a "Create Family" option under "Family". After finding it, click on it to enter. 3. Next jump to the page to create a family, enter the family name to be set in the input box according to the prompts, and click the "Save" button in the upper right corner after entering it. 4. Finally, a "save successfully" prompt will pop up at the bottom of the page, indicating that the family has been successfully created.
 How to create user interface via Python?
Aug 26, 2023 am 09:17 AM
How to create user interface via Python?
Aug 26, 2023 am 09:17 AM
In this article, we will learn how to create user interface using python. What is a graphical user interface? The term "graphical user interface" (or "GUI") refers to a set of visual element items that can be interacted with in computer software to display information and interact. In response to human input, objects may change appearance characteristics such as color, size, and visibility. Graphical components such as icons, cursors, and buttons can be enhanced with audio or visual effects (such as transparency) to create graphical user interfaces (GUIs). If you want more people to use your platform, you need to make sure it has a good user interface. This is because the combination of these factors can greatly affect the quality of service provided by your app or website. Python is widely used by developers because it provides
 How to create a Gantt chart using Highcharts
Dec 17, 2023 pm 07:23 PM
How to create a Gantt chart using Highcharts
Dec 17, 2023 pm 07:23 PM
How to use Highcharts to create a Gantt chart requires specific code examples. Introduction: The Gantt chart is a chart form commonly used to display project progress and time management. It can visually display the start time, end time and progress of the task. Highcharts is a powerful JavaScript chart library that provides rich chart types and flexible configuration options. This article will introduce how to use Highcharts to create a Gantt chart and give specific code examples. 1. Highchart
