 Web Front-end
 H5 Tutorial
 Use Canvas to imitate the method of loading small balls on Baidu Tieba client
Use Canvas to imitate the method of loading small balls on Baidu Tieba client
This article mainly introduces to you the implementation method of using Canvas to imitate Baidu Tieba client loading ball. The correlation after implementation is very similar. The article gives detailed sample code for your reference and study, which has certain benefits for everyone. It has reference value. Friends who need it can come and study together.
Preface
I recently saw two interesting demos, the renderings are as follows:
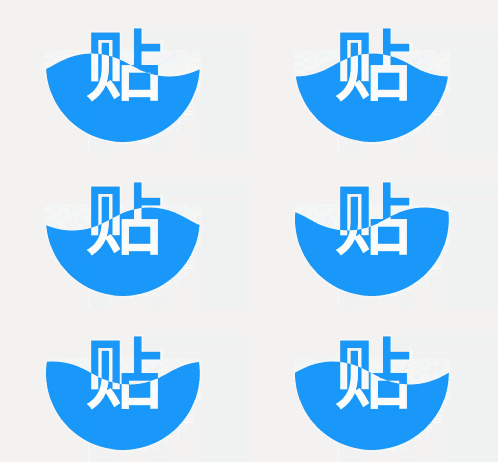
Today I took advantage of the free time on the weekend and imitated it using H5 Canvas. This article only implements the first rendering.
This is the effect I achieved:

Principle of implementation
The implementation principle is based on the article in the brief book and will not be repeated here. Now let's achieve this effect step by step.
Step 0: Draw a circle
The source code is as follows:
The running effect is as follows:
<!DOCTYPE html>
<html>
<head>
<meta charset="UTF-8">
<title>百度贴吧客户端Loading小球</title>
<style>
canvas {
border: 1px solid #ccc;
}
</style>
</head>
<body>
<canvas id="canvas" width="500" height="500"></canvas>
<script>
var canvas = document.getElementById('canvas')
var ctx = canvas.getContext('2d')
canvas.width = 500
canvas.height = 500
var grid = canvas.width / 4
var cx = canvas.width / 2 // 圆中心点 x 坐标
var cy = canvas.height / 2 // 圆中心点 y 坐标
function circle() {
ctx.beginPath()
ctx.arc(cx, cy, grid / 2, 0, 2 * Math.PI)
}
circle()
ctx.stroke()
</script>
</body>
</html>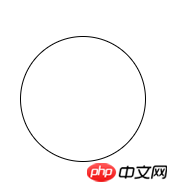
This demo only involves the simplest usage of Canvas.
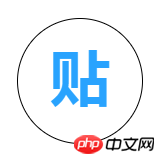
Step 1: Draw the blue word "Post"
Use ctx.fillText to draw a blue in the center of the circle The word "post". Text is bold and centered horizontally.
The code is as follows:
function text(fillStyle) {
    var fontSize = size / 250 * 120
    ctx.font = 'bold ' + fontSize + 'px Arial'
    ctx.textAlign = 'center'
    ctx.fillStyle = fillStyle
    ctx.fillText('贴', cx, cy + fontSize * 0.3)
}

text('#29a3fe')The effect is as follows:
Step 2: Draw blue waves
var waveSize = size / 6 // 波浪大小
var x = 0 // 波浪位置偏移大小

function curve() {
    ctx.beginPath()
    ctx.moveTo(cx - size + x + size / 2, cy)
    ctx.quadraticCurveTo(cx - size + size / 4 + x + size / 2, cy - waveSize, cx - size + size / 2 + x + size / 2, cy)
    ctx.quadraticCurveTo(cx - size + size * 3 / 4 + x + size / 2, cy + waveSize, cx - size + size + x + size / 2, cy)

    ctx.quadraticCurveTo(cx + size / 4 + x + size / 2, cy - waveSize, cx + size / 2 + x + size / 2, cy)
    ctx.quadraticCurveTo(cx + size * 3 / 4 + x + size / 2, cy + waveSize, cx + size + x + size / 2, cy)
    ctx.lineTo(cx + size + x + size / 2, canvas.height)
    ctx.lineTo(cx - size + x + size / 2, canvas.height)
    ctx.lineTo(cx - size + x + size / 2, cy)
    ctx.closePath()
}

ctx.fillStyle = '#29a3fe'
curve()
ctx.fill()The effect is as follows:
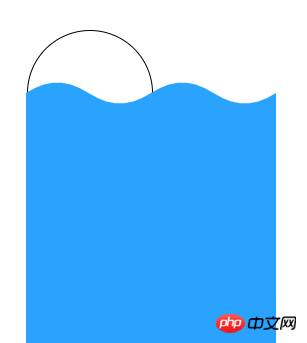
# #Step 3: Draw the white word "sticker"
curve()
ctx.clip()
text('#f00')
curve() creates a The difference between the wavy path and the third step is that ctx.fill() is not used to fill the path, but ctx.clip() is used to clip the path, so If so, the path drawn later (including text) can only be displayed within the clipping area.
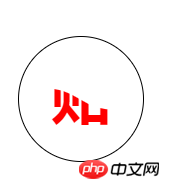
Step 4: Draw moving waves
function loop(){
    ctx.clearRect(0, 0, canvas.width, canvas.height)

    x -= 1.5
    x = x % size

    ctx.save()

    circle()
    ctx.stroke()

    ctx.fillStyle = '#29a3fe'
    curve()
    ctx.fill()

    ctx.restore()

    requestAnimationFrame(loop)
}
loop()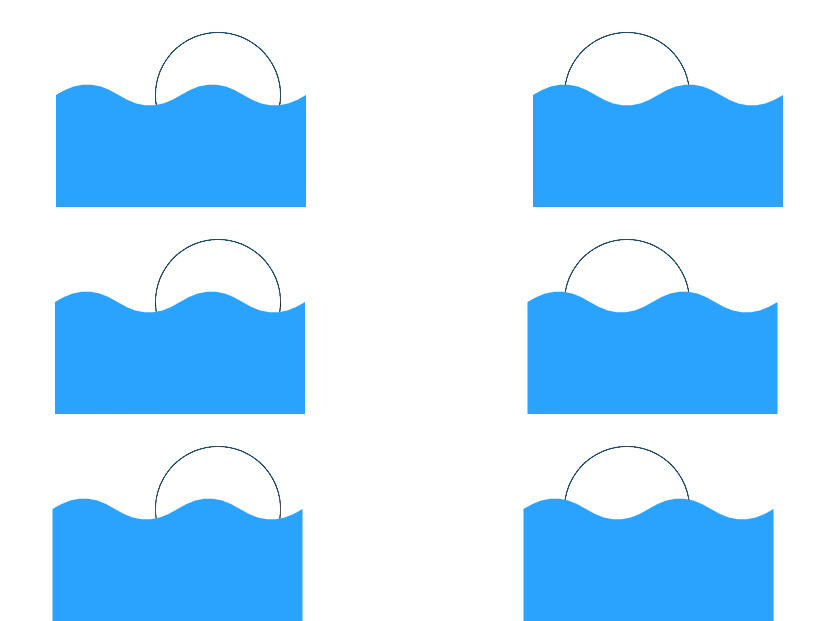
Step 5: Integrate the previous content
The effect is as follows:
Step 6: Cut the circle
Put the step 0:circle() ctx.stroke()
circle()
ctx.clip()
<!DOCTYPE html>
<html lang="en">
<head>
<meta charset="UTF-8">
<title>Title</title>
<style>
html,
body {
height: 100%;
}
canvas {
border: 1px solid #ccc;
}
</style>
</head>
<body>
<canvas id="canvas" width="500" height="500"></canvas>
<script>
var canvas = document.getElementById('canvas')
var ctx = canvas.getContext('2d')
canvas.width = 500
canvas.height = 500
var size = canvas.width / 4 // 圆的大小
var cx = canvas.width / 2 // 圆中心点 x 坐标
var cy = canvas.height / 2 // 圆中心点 y 坐标
var waveSize = size / 6 // 波浪大小
var x = 0 // 波浪位置偏移大小
function circle() {
ctx.beginPath()
ctx.arc(cx, cy, size / 2, 0, 2 * Math.PI)
}
function curve() {
ctx.beginPath()
ctx.moveTo(cx - size + x + size / 2, cy)
ctx.quadraticCurveTo(cx - size + size / 4 + x + size / 2, cy - waveSize, cx - size + size / 2 + x + size / 2, cy)
ctx.quadraticCurveTo(cx - size + size * 3 / 4 + x + size / 2, cy + waveSize, cx - size + size + x + size / 2, cy)
ctx.quadraticCurveTo(cx + size / 4 + x + size / 2, cy - waveSize, cx + size / 2 + x + size / 2, cy)
ctx.quadraticCurveTo(cx + size * 3 / 4 + x + size / 2, cy + waveSize, cx + size + x + size / 2, cy)
ctx.lineTo(cx + size + x + size / 2, canvas.height)
ctx.lineTo(cx - size + x + size / 2, canvas.height)
ctx.lineTo(cx - size + x + size / 2, cy)
ctx.closePath()
}
function text(fillStyle) {
var fontSize = size / 250 * 120
ctx.font = 'bold ' + fontSize + 'px Arial'
ctx.textAlign = 'center'
ctx.fillStyle = fillStyle
ctx.fillText('贴', cx, cy + fontSize * 0.3)
}
function loop(){
ctx.clearRect(0, 0, canvas.width, canvas.height)
x -= 1.5
x = x % size
ctx.save()
circle()
ctx.clip()
text('#29a3fe')
ctx.fillStyle = '#29a3fe'
curve()
ctx.fill()
curve()
ctx.clip()
text('#fff')
ctx.restore()
requestAnimationFrame(loop)
}
loop()
</script>
</body>
</html>html5 uses html2canvas to implement browser screenshots
HTML5 canvas drawing five-pointed star method
html5 uses canvas to achieve the flame effect that follows the cursor
The above is the detailed content of Use Canvas to imitate the method of loading small balls on Baidu Tieba client. For more information, please follow other related articles on the PHP Chinese website!

Hot AI Tools

Undresser.AI Undress
AI-powered app for creating realistic nude photos

AI Clothes Remover
Online AI tool for removing clothes from photos.

Undress AI Tool
Undress images for free

Clothoff.io
AI clothes remover

Video Face Swap
Swap faces in any video effortlessly with our completely free AI face swap tool!

Hot Article

Hot Tools

Notepad++7.3.1
Easy-to-use and free code editor

SublimeText3 Chinese version
Chinese version, very easy to use

Zend Studio 13.0.1
Powerful PHP integrated development environment

Dreamweaver CS6
Visual web development tools

SublimeText3 Mac version
God-level code editing software (SublimeText3)

Hot Topics
 1386
1386
 52
52
![VMware Horizon Client cannot be opened [Fix]](https://img.php.cn/upload/article/000/887/227/170835607042441.jpg?x-oss-process=image/resize,m_fill,h_207,w_330) VMware Horizon Client cannot be opened [Fix]
Feb 19, 2024 pm 11:21 PM
VMware Horizon Client cannot be opened [Fix]
Feb 19, 2024 pm 11:21 PM
VMware Horizon Client helps you access virtual desktops conveniently. However, sometimes the virtual desktop infrastructure may experience startup issues. This article discusses the solutions you can take when the VMware Horizon client fails to start successfully. Why won't my VMware Horizon client open? When configuring VDI, if the VMWareHorizon client is not open, an error may occur. Please confirm that your IT administrator has provided the correct URL and credentials. If everything is fine, follow the solutions mentioned in this guide to resolve the issue. Fix VMWareHorizon Client Not Opening If VMW is not opening on your Windows computer
![VMware Horizon client freezes or stalls while connecting [Fix]](https://img.php.cn/upload/article/000/887/227/170942987315391.jpg?x-oss-process=image/resize,m_fill,h_207,w_330) VMware Horizon client freezes or stalls while connecting [Fix]
Mar 03, 2024 am 09:37 AM
VMware Horizon client freezes or stalls while connecting [Fix]
Mar 03, 2024 am 09:37 AM
When connecting to a VDI using the VMWareHorizon client, we may encounter situations where the application freezes during authentication or the connection blocks. This article will explore this issue and provide ways to resolve this situation. When the VMWareHorizon client experiences freezing or connection issues, there are a few things you can do to resolve the issue. Fix VMWareHorizon client freezes or gets stuck while connecting If VMWareHorizon client freezes or fails to connect on Windows 11/10, do the below mentioned solutions: Check network connection Restart Horizon client Check Horizon server status Clear client cache Fix Ho
 PHP MQTT Client Development Guide
Mar 27, 2024 am 09:21 AM
MQTT (MessageQueuingTelemetryTransport) is a lightweight message transmission protocol commonly used for communication between IoT devices. PHP is a commonly used server-side programming language that can be used to develop MQTT clients. This article will introduce how to use PHP to develop an MQTT client and include the following content: Basic concepts of the MQTT protocol Selection and usage examples of the PHPMQTT client library: Using the PHPMQTT client to publish and
 How to solve the problem that the Baidu Netdisk webpage cannot start the client?
Mar 13, 2024 pm 05:00 PM
When many friends download files, they will first browse on the web page and then transfer to the client to download. But sometimes users will encounter the problem that the Baidu Netdisk webpage cannot start the client. In response to this problem, the editor has prepared a solution for you to solve the problem that the Baidu Netdisk webpage cannot start the client. Friends in need can refer to it. Solution: 1. Maybe Baidu Netdisk is not the latest version. Manually open the Baidu Netdisk client, click the settings button in the upper right corner, and then click version upgrade. If there is no update, the following prompt will appear. If there is an update, please follow the prompts to update. 2. The detection service program of Baidu Cloud Disk may be disabled. It is possible that we manually or use security software to automatically disable the detection service program of Baidu Cloud Disk. Please check it out
 How to delete your own posts in Baidu Tieba List of methods to delete your own posts
Mar 12, 2024 pm 05:25 PM
When we use this platform, we should all be familiar with some of the functions above. No matter what aspect we are in, we can see that there are a lot of posts on it. Of course, we can also post on it ourselves. Some posts and so on, so every time you will feel that some choices in different aspects are available, so today, in order to better understand the use of the above functions, and to ensure the quality of our posts, I directly It is possible to delete some of the posts above, but if you don’t know how to do it, today the editor will explain to you how to delete it. Friends who are interested and have ideas, please contact the editor now Let's take a look, I think you'll like it. Delete
 What versions of html2canvas are there?
Aug 22, 2023 pm 05:58 PM
The versions of html2canvas include html2canvas v0.x, html2canvas v1.x, etc. Detailed introduction: 1. html2canvas v0.x, which is an early version of html2canvas. The latest stable version is v0.5.0-alpha1. It is a mature version that has been widely used and verified in many projects; 2. html2canvas v1.x, this is a new version of html2canvas.
 Learn the canvas framework and explain the commonly used canvas framework in detail
Jan 17, 2024 am 11:03 AM
Explore the Canvas framework: To understand what are the commonly used Canvas frameworks, specific code examples are required. Introduction: Canvas is a drawing API provided in HTML5, through which we can achieve rich graphics and animation effects. In order to improve the efficiency and convenience of drawing, many developers have developed different Canvas frameworks. This article will introduce some commonly used Canvas frameworks and provide specific code examples to help readers gain a deeper understanding of how to use these frameworks. 1. EaselJS framework Ea
 uniapp implements how to use canvas to draw charts and animation effects
Oct 18, 2023 am 10:42 AM
How to use canvas to draw charts and animation effects in uniapp requires specific code examples 1. Introduction With the popularity of mobile devices, more and more applications need to display various charts and animation effects on the mobile terminal. As a cross-platform development framework based on Vue.js, uniapp provides the ability to use canvas to draw charts and animation effects. This article will introduce how uniapp uses canvas to achieve chart and animation effects, and give specific code examples. 2. canvas


