

Implementation of PHP using QQ mailbox to send emails

This article mainly introduces the implementation of using QQ mailbox to send emails in PHP. It has a certain reference value. Now I share it with you. Friends in need can refer to it
In PHP application development In , it is often necessary to verify the user's mailbox and send message notifications, and using PHP's built-in mail() function requires the support of the mail system.
If you are familiar with the IMAP/SMTP protocol, you can write an email sending program by combining the Socket function, but developing such a program is not easy.
Fortunately, the PHPMailer package is powerful enough, and it can be used to send emails more conveniently, saving us a lot of extra trouble.
PHPMailer
PHPMailer is an encapsulated PHP mail sending class that supports sending emails with HTML content and can add attachments for sending. It is not like PHP's own mail() function. It requires server environment support. You only need to set up the mail server with relevant information to realize the mail sending function.
PHPMailer project address:https://github.com/PHPMailer/PHPMailer
PHP extension support
PHPMailer requires PHP's sockets extension support, and logging into the QQ mailbox SMTP server must be encrypted through SSL, so PHP must also include openssl support.
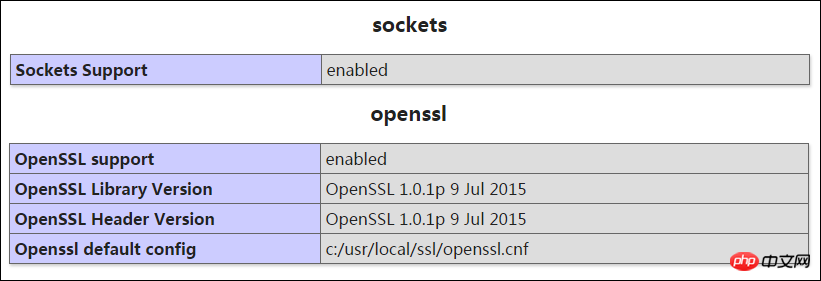
↑ Use the phpinfo() function to view socket and openssl extension information (wamp server enables this extension by default).
PHPMailer core files
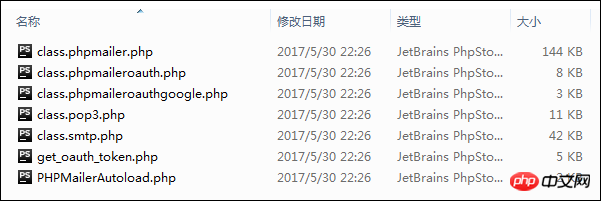
↑ In this article only class.phpmailer.php and PHPMailer/class.smtp.php are needed.
QQ Mailbox Settings
All mainstream mailboxes support the SMTP protocol, but not all mailboxes are enabled by default. You can manually enable it in the mailbox settings.
After providing the account and password, the third-party service can log in to the SMTP server and use it to control the mail transfer method.
Enable SMTP service
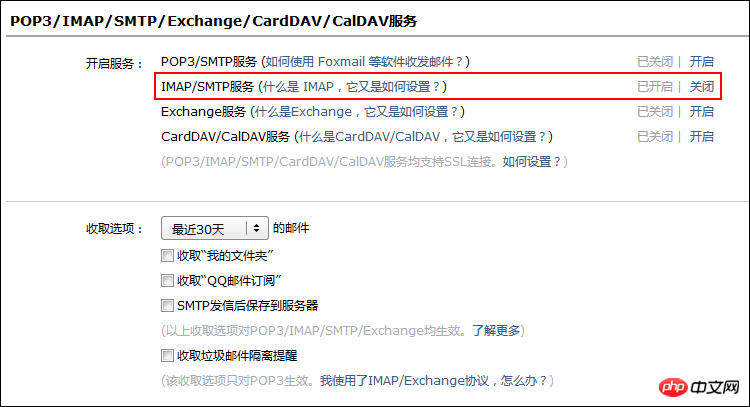
↑ Select the IMAP/SMTP service and click to enable the service.
Verify password
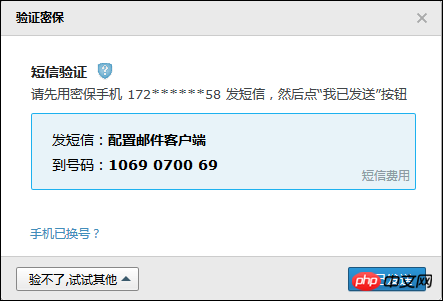
↑ Send the SMS "Configure Email Client" to 1069-0700-69.
Get the authorization code
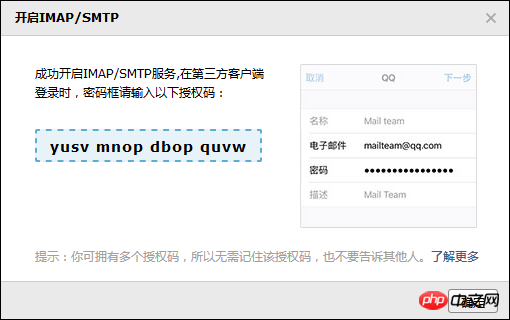
↑ The SMTP server authentication password needs to be kept properly (PS: There are no spaces in the password).
PHP sends mail
Basic code
The following code demonstrates the use of PHPMailer. Pay attention to the configuration process of the PHPMailer instance.
// 引入PHPMailer的核心文件
require_once("PHPMailer/class.phpmailer.php");
require_once("PHPMailer/class.smtp.php");
// 实例化PHPMailer核心类
$mail = new PHPMailer();
// 是否启用smtp的debug进行调试 开发环境建议开启 生产环境注释掉即可 默认关闭debug调试模式
$mail->SMTPDebug = 1;
// 使用smtp鉴权方式发送邮件
$mail->isSMTP();
// smtp需要鉴权 这个必须是true
$mail->SMTPAuth = true;
// 链接qq域名邮箱的服务器地址
$mail->Host = 'smtp.qq.com';
// 设置使用ssl加密方式登录鉴权
$mail->SMTPSecure = 'ssl';
// 设置ssl连接smtp服务器的远程服务器端口号
$mail->Port = 465;
// 设置发送的邮件的编码
$mail->CharSet = 'UTF-8';
// 设置发件人昵称 显示在收件人邮件的发件人邮箱地址前的发件人姓名
$mail->FromName = '发件人昵称';
// smtp登录的账号 QQ邮箱即可
$mail->Username = '12345678@qq.com';
// smtp登录的密码 使用生成的授权码
$mail->Password = '**********';
// 设置发件人邮箱地址 同登录账号
$mail->From = '12345678@qq.com';
// 邮件正文是否为html编码 注意此处是一个方法
$mail->isHTML(true);
// 设置收件人邮箱地址
$mail->addAddress('87654321@qq.com');
// 添加多个收件人 则多次调用方法即可
$mail->addAddress('87654321@163.com');
// 添加该邮件的主题
$mail->Subject = '邮件主题';
// 添加邮件正文
$mail->Body = '<h1>Hello World</h1>';
// 为该邮件添加附件
$mail->addAttachment('./example.pdf');
// 发送邮件 返回状态
$status = $mail->send();Encapsulation method
If you want to use PHPMailer to send emails directly, you need to perform cumbersome configuration, which will reduce efficiency to some extent.
In order to simplify the calling process, I made a secondary encapsulation based on it. You only need to configure the account, password and nickname to customize your own QQMailer class.
<?php
require_once 'PHPMailer/class.phpmailer.php';require_once 'PHPMailer/class.smtp.php';
class QQMailer
{
public static $HOST = 'smtp.qq.com'; // QQ 邮箱的服务器地址
public static $PORT = 465; // smtp 服务器的远程服务器端口号
public static $SMTP = 'ssl'; // 使用 ssl 加密方式登录
public static $CHARSET = 'UTF-8'; // 设置发送的邮件的编码
private static $USERNAME = '123456789@qq.com'; // 授权登录的账号
private static $PASSWORD = '****************'; // 授权登录的密码
private static $NICKNAME = 'woider'; // 发件人的昵称
/**
* QQMailer constructor.
* @param bool $debug [调试模式] */
public function __construct($debug = false)
{
$this->mailer = new PHPMailer();
$this->mailer->SMTPDebug = $debug ? 1 : 0;
$this->mailer->isSMTP(); // 使用 SMTP 方式发送邮件 }
/**
* @return PHPMailer
*/
public function getMailer()
{ return $this->mailer;
} private function loadConfig()
{ /* Server Settings */
$this->mailer->SMTPAuth = true; // 开启 SMTP 认证
$this->mailer->Host = self::$HOST; // SMTP 服务器地址
$this->mailer->Port = self::$PORT; // 远程服务器端口号
$this->mailer->SMTPSecure = self::$SMTP; // 登录认证方式
/* Account Settings */
$this->mailer->Username = self::$USERNAME; // SMTP 登录账号
$this->mailer->Password = self::$PASSWORD; // SMTP 登录密码
$this->mailer->From = self::$USERNAME; // 发件人邮箱地址
$this->mailer->FromName = self::$NICKNAME; // 发件人昵称(任意内容)
/* Content Setting */
$this->mailer->isHTML(true); // 邮件正文是否为 HTML
$this->mailer->CharSet = self::$CHARSET; // 发送的邮件的编码 } /**
* Add attachment
* @param $path [附件路径] */
public function addFile($path)
{ $this->mailer->addAttachment($path);
} /**
* Send Email
* @param $email [收件人]
* @param $title [主题]
* @param $content [正文]
* @return bool [发送状态] */
public function send($email, $title, $content)
{ $this->loadConfig(); $this->mailer->addAddress($email); // 收件人邮箱
$this->mailer->Subject = $title; // 邮件主题
$this->mailer->Body = $content; // 邮件信息
return (bool)$this->mailer->send(); // 发送邮件 }
}QQMailer.php
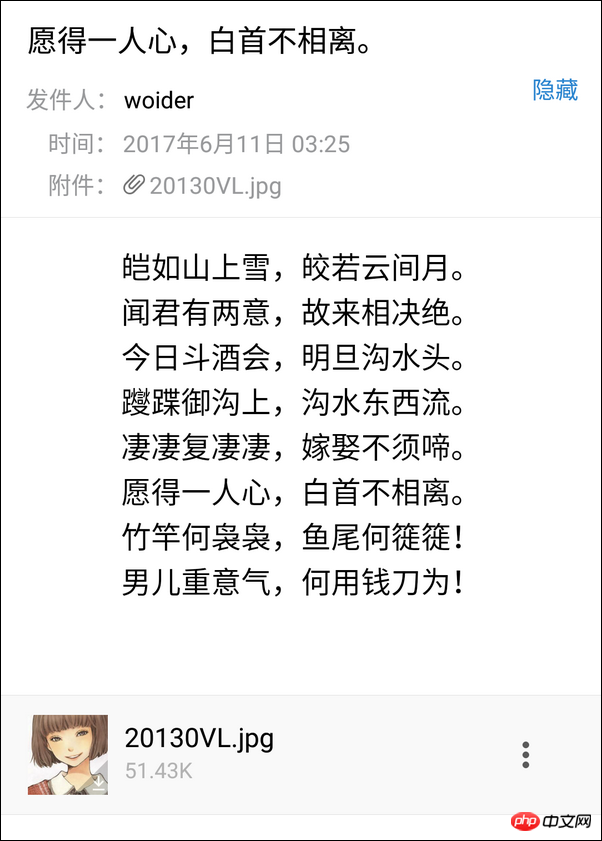
require_once 'QQMailer.php';// 实例化 QQMailer$mailer = new QQMailer(true);// 添加附件 $mailer->addFile('20130VL.jpg');// 邮件标题 $title = '愿得一人心,白首不相离。';// 邮件内容 $content = <<< EOF<p align="center">皑如山上雪,皎若云间月。<br>闻君有两意,故来相决绝。<br>今日斗酒会,明旦沟水头。<br>躞蹀御沟上,沟水东西流。<br>凄凄复凄凄,嫁娶不须啼。<br>愿得一人心,白首不相离。<br>竹竿何袅袅,鱼尾何簁簁!<br>男儿重意气,何用钱刀为!</p>EOF; // 发送QQ邮件 $mailer->send('123456789@qq.com', $title, $content);
Test results
php implements calling Baidu’s ocr text recognition interface
php method to implement arithmetic verification code
The above is the detailed content of Implementation of PHP using QQ mailbox to send emails. For more information, please follow other related articles on the PHP Chinese website!

Hot AI Tools

Undresser.AI Undress
AI-powered app for creating realistic nude photos

AI Clothes Remover
Online AI tool for removing clothes from photos.

Undress AI Tool
Undress images for free

Clothoff.io
AI clothes remover

AI Hentai Generator
Generate AI Hentai for free.

Hot Article
Hot Tools

Notepad++7.3.1
Easy-to-use and free code editor

SublimeText3 Chinese version
Chinese version, very easy to use

Zend Studio 13.0.1
Powerful PHP integrated development environment

Dreamweaver CS6
Visual web development tools

SublimeText3 Mac version
God-level code editing software (SublimeText3)
Hot Topics
 1382
1382
 52
52

 Alipay PHP SDK transfer error: How to solve the problem of 'Cannot declare class SignData'?
Apr 01, 2025 am 07:21 AM
Alipay PHP SDK transfer error: How to solve the problem of 'Cannot declare class SignData'?
Apr 01, 2025 am 07:21 AM
Alipay PHP...
 Explain JSON Web Tokens (JWT) and their use case in PHP APIs.
Apr 05, 2025 am 12:04 AM
Explain JSON Web Tokens (JWT) and their use case in PHP APIs.
Apr 05, 2025 am 12:04 AM
JWT is an open standard based on JSON, used to securely transmit information between parties, mainly for identity authentication and information exchange. 1. JWT consists of three parts: Header, Payload and Signature. 2. The working principle of JWT includes three steps: generating JWT, verifying JWT and parsing Payload. 3. When using JWT for authentication in PHP, JWT can be generated and verified, and user role and permission information can be included in advanced usage. 4. Common errors include signature verification failure, token expiration, and payload oversized. Debugging skills include using debugging tools and logging. 5. Performance optimization and best practices include using appropriate signature algorithms, setting validity periods reasonably,
 Describe the SOLID principles and how they apply to PHP development.
Apr 03, 2025 am 12:04 AM
Describe the SOLID principles and how they apply to PHP development.
Apr 03, 2025 am 12:04 AM
The application of SOLID principle in PHP development includes: 1. Single responsibility principle (SRP): Each class is responsible for only one function. 2. Open and close principle (OCP): Changes are achieved through extension rather than modification. 3. Lisch's Substitution Principle (LSP): Subclasses can replace base classes without affecting program accuracy. 4. Interface isolation principle (ISP): Use fine-grained interfaces to avoid dependencies and unused methods. 5. Dependency inversion principle (DIP): High and low-level modules rely on abstraction and are implemented through dependency injection.
 Explain the concept of late static binding in PHP.
Mar 21, 2025 pm 01:33 PM
Explain the concept of late static binding in PHP.
Mar 21, 2025 pm 01:33 PM
Article discusses late static binding (LSB) in PHP, introduced in PHP 5.3, allowing runtime resolution of static method calls for more flexible inheritance.Main issue: LSB vs. traditional polymorphism; LSB's practical applications and potential perfo
 How to automatically set permissions of unixsocket after system restart?
Mar 31, 2025 pm 11:54 PM
How to automatically set permissions of unixsocket after system restart?
Mar 31, 2025 pm 11:54 PM
How to automatically set the permissions of unixsocket after the system restarts. Every time the system restarts, we need to execute the following command to modify the permissions of unixsocket: sudo...
 How to send a POST request containing JSON data using PHP's cURL library?
Apr 01, 2025 pm 03:12 PM
How to send a POST request containing JSON data using PHP's cURL library?
Apr 01, 2025 pm 03:12 PM
Sending JSON data using PHP's cURL library In PHP development, it is often necessary to interact with external APIs. One of the common ways is to use cURL library to send POST�...
 Framework Security Features: Protecting against vulnerabilities.
Mar 28, 2025 pm 05:11 PM
Framework Security Features: Protecting against vulnerabilities.
Mar 28, 2025 pm 05:11 PM
Article discusses essential security features in frameworks to protect against vulnerabilities, including input validation, authentication, and regular updates.
 Customizing/Extending Frameworks: How to add custom functionality.
Mar 28, 2025 pm 05:12 PM
Customizing/Extending Frameworks: How to add custom functionality.
Mar 28, 2025 pm 05:12 PM
The article discusses adding custom functionality to frameworks, focusing on understanding architecture, identifying extension points, and best practices for integration and debugging.
