

Analysis of how NodeJS operates message queue RabbitMQ

This article mainly introduces the analysis of how NodeJS operates the message queue RabbitMQ. It has a certain reference value. Now I share it with you. Friends in need can refer to it
1. What is a message queue? ?
Message (Message) refers to the data transmitted between applications. Messages can be very simple, containing only text strings, or more complex, possibly containing embedded objects.
Message Queue (Message Queue) is a communication method between applications. Messages can be returned immediately after being sent. The message system ensures reliable delivery of messages. The message publisher just publishes the message to MQ and doesn't care who gets it, and the message consumer just gets the message from MQ regardless of who publishes it. In this way, neither the publisher nor the user needs to know the existence of the other party.
2. What are the commonly used message queues?
RabbitMQ, RocketMQ, ActiveMQ, Kafka, ZeroMQ, MetaMq.
Even now some NoSQL can also be used as message queues, such as Redis.
3. What are the usage scenarios of message queue?
Asynchronous processing
Application decoupling
Traffic peak clipping
4. Use cases
Large-scale companies will have their own log analysis system. How is the log system implemented?


Illustration: When a user accesses an application, we need to record the user's operation record and the system's exception log. The conventional approach is It saves the logs generated by the system to the server disk, starts scheduled tasks in the server, regularly transfers the log information from the disk to mq (producer), and also regularly takes out the messages in mq and saves them to the corresponding database, such as ElasticSearch or Hive.
5. How to install RabbitMQ?
The above case introduces a usage scenario of MQ. I am using RabbitMQ as an example here. Kafka may be used in real projects.
First install brew (mac as an example)
/usr/bin/ruby -e "$(curl -fsSL https://raw.githubusercontent.com/Homebrew/install/master/install)"
Install RabbitMQ
brew install rabbitmq
Run RabbitMQ
Enter /usr/local/Cellar/rabbitmq/3.7 .7. Execute
sbin/rabbitmq-server
Start plug-in
Enter /usr/local/Cellar/rabbitmq/3.7.7/sbin
./rabbitmq-plugins enable rabbitmq_management
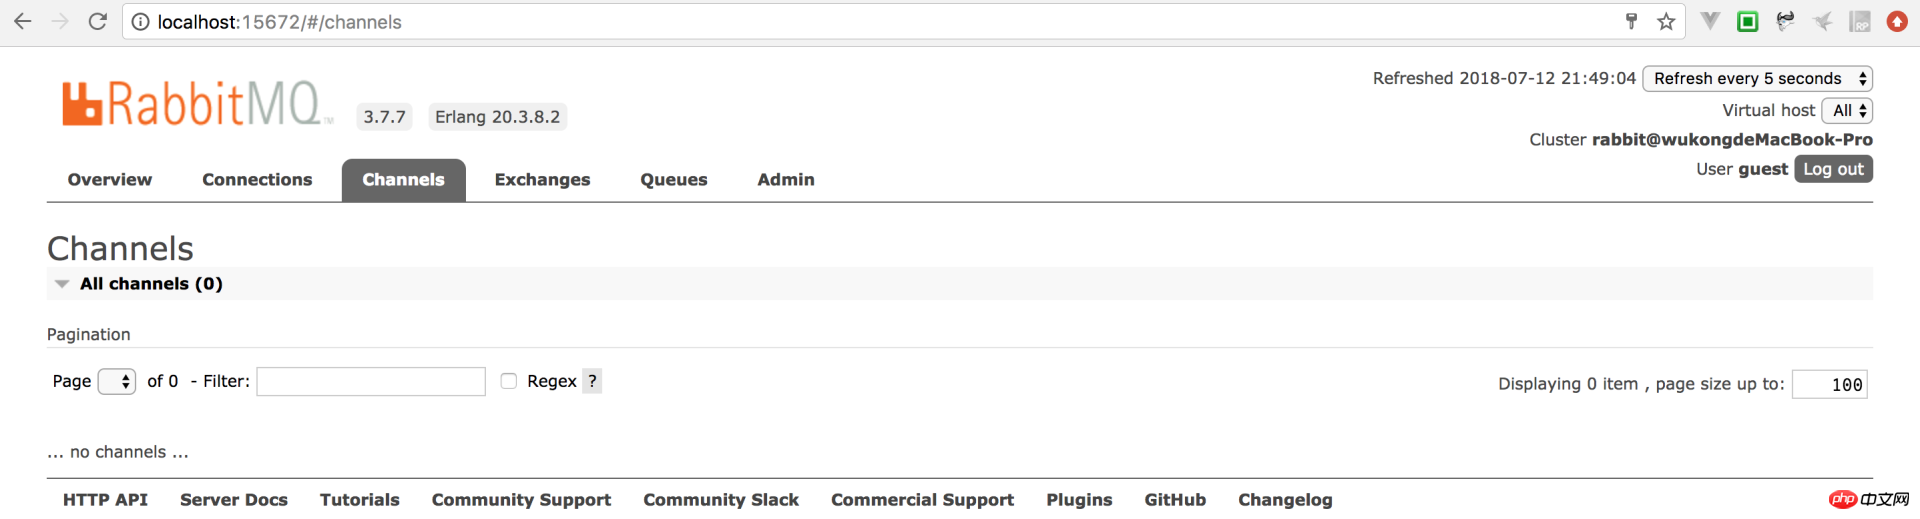
Log in to the management interface
Open the browser and enter: http://localhost:15672, RabbitMQ defaults to port 15672. Nodejs operates RabbitMQ
You can find several corresponding responses online Node SDK, here we recommend amqplib
1. Producer
/**
 * 对RabbitMQ的封装
 */
let amqp = require('amqplib');

class RabbitMQ {
    constructor() {
        this.hosts = [];
        this.index = 0;
        this.length = this.hosts.length;
        this.open = amqp.connect(this.hosts[this.index]);
    }
    sendQueueMsg(queueName, msg, errCallBack) {
        let self = this;

        self.open
            .then(function (conn) {
                return conn.createChannel();
            })
            .then(function (channel) {
                return channel.assertQueue(queueName).then(function (ok) {
                    return channel.sendToQueue(queueName, new Buffer(msg), {
                        persistent: true
                    });
                })
                    .then(function (data) {
                        if (data) {
                            errCallBack && errCallBack("success");
                            channel.close();
                        }
                    })
                    .catch(function () {
                        setTimeout(() => {
                            if (channel) {
                                channel.close();
                            }
                        }, 500)
                    });
            })
            .catch(function () {
                let num = self.index++;

                if (num <= self.length - 1) {
                    self.open = amqp.connect(self.hosts[num]);
                } else {
                    self.index == 0;
                }
            });
    }
}2. Consumer
/**
 * 对RabbitMQ的封装
 */
let amqp = require('amqplib');

class RabbitMQ {
    constructor() {
        this.open = amqp.connect(this.hosts[this.index]);
    }
    receiveQueueMsg(queueName, receiveCallBack, errCallBack) {
        let self = this;

        self.open
            .then(function (conn) {
                return conn.createChannel();
            })
            .then(function (channel) {
                return channel.assertQueue(queueName)
                    .then(function (ok) {
                        return channel.consume(queueName, function (msg) {
                            if (msg !== null) {
                                let data = msg.content.toString();
                                channel.ack(msg);
                                receiveCallBack && receiveCallBack(data);
                            }
                        })
                            .finally(function () {
                                setTimeout(() => {
                                    if (channel) {
                                        channel.close();
                                    }
                                }, 500)
                            });
                    })
            })
            .catch(function () {
                let num = self.index++;
                if (num <= self.length - 1) {
                    self.open = amqp.connect(self.hosts[num]);
                } else {
                    self.index = 0;
                    self.open = amqp.connect(self.hosts[0]);
                }
            });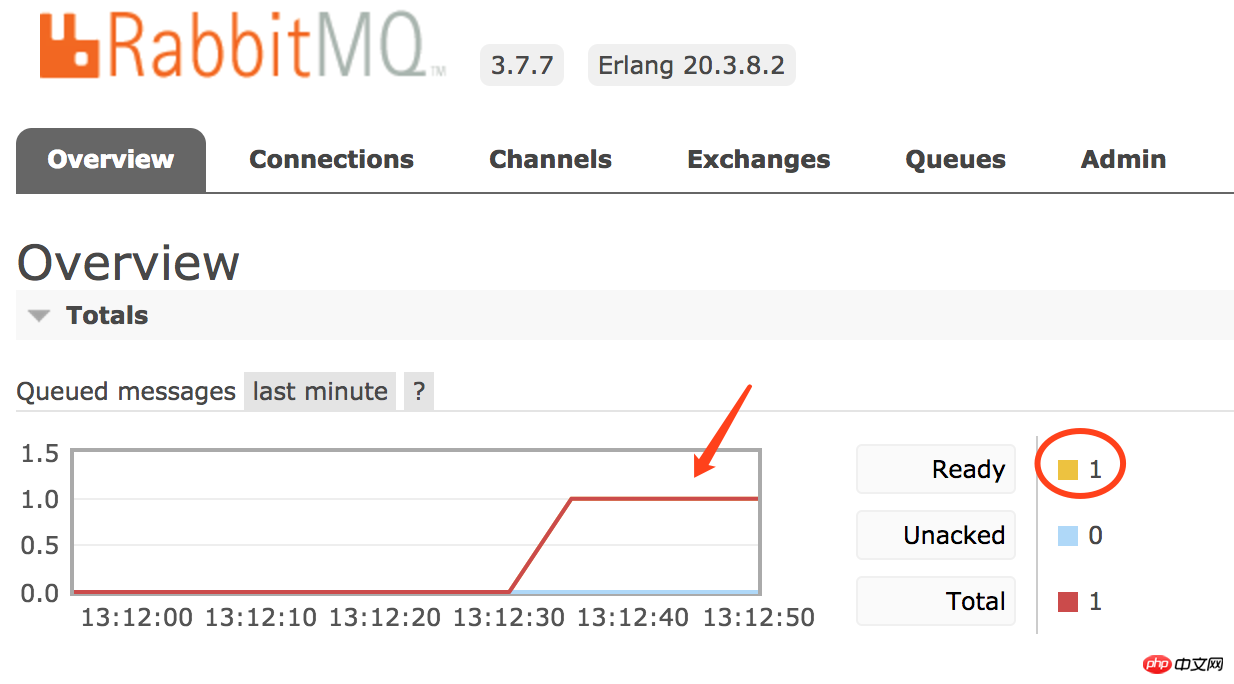
}3. Send a message to MQ through the producer and create a queue
let mq = new RabbitMQ();
mq.sendQueueMsg('testQueue', 'my first message', (error) => {
    console.log(error)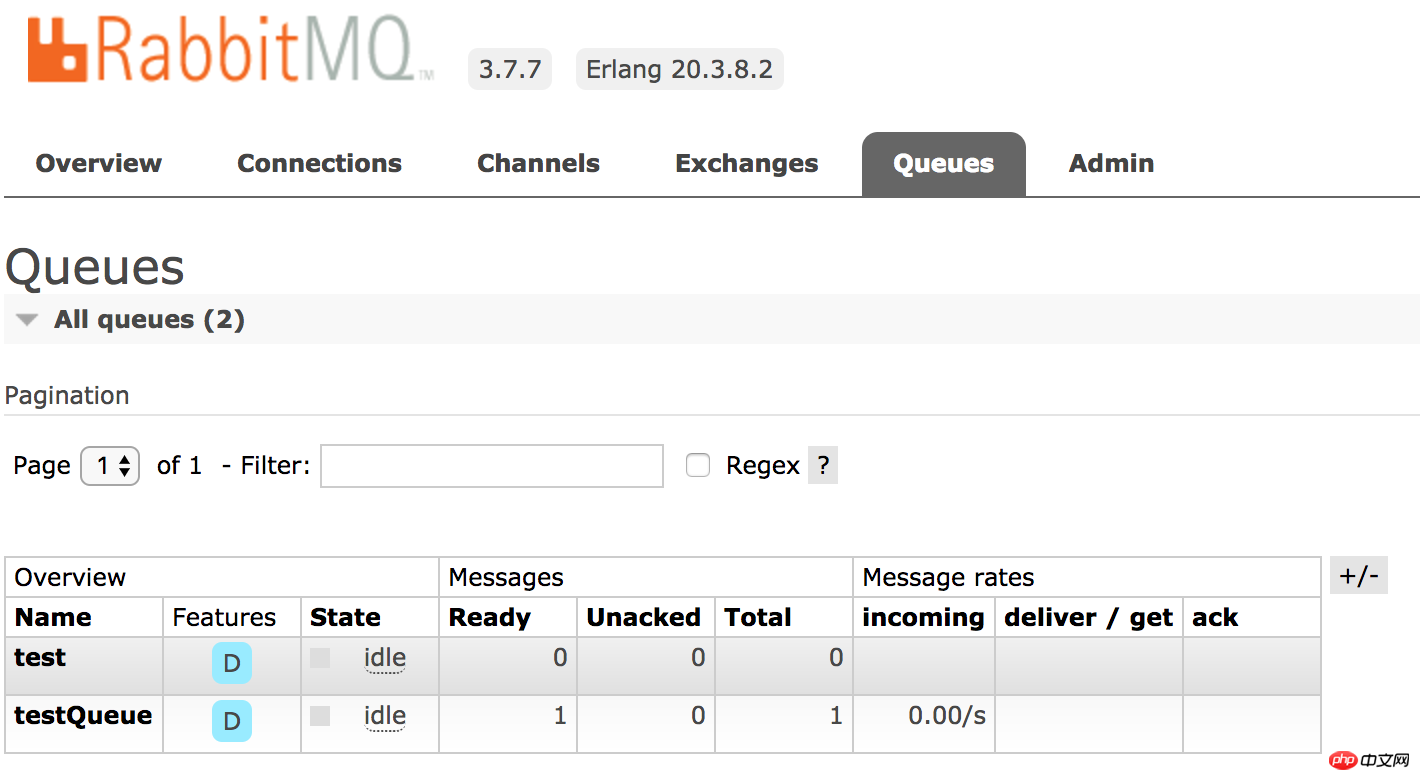
}) After execution, we opened the management platform and found that RabbbitMQ had received a message:
and RabbbitMQ added a new queue testQueue
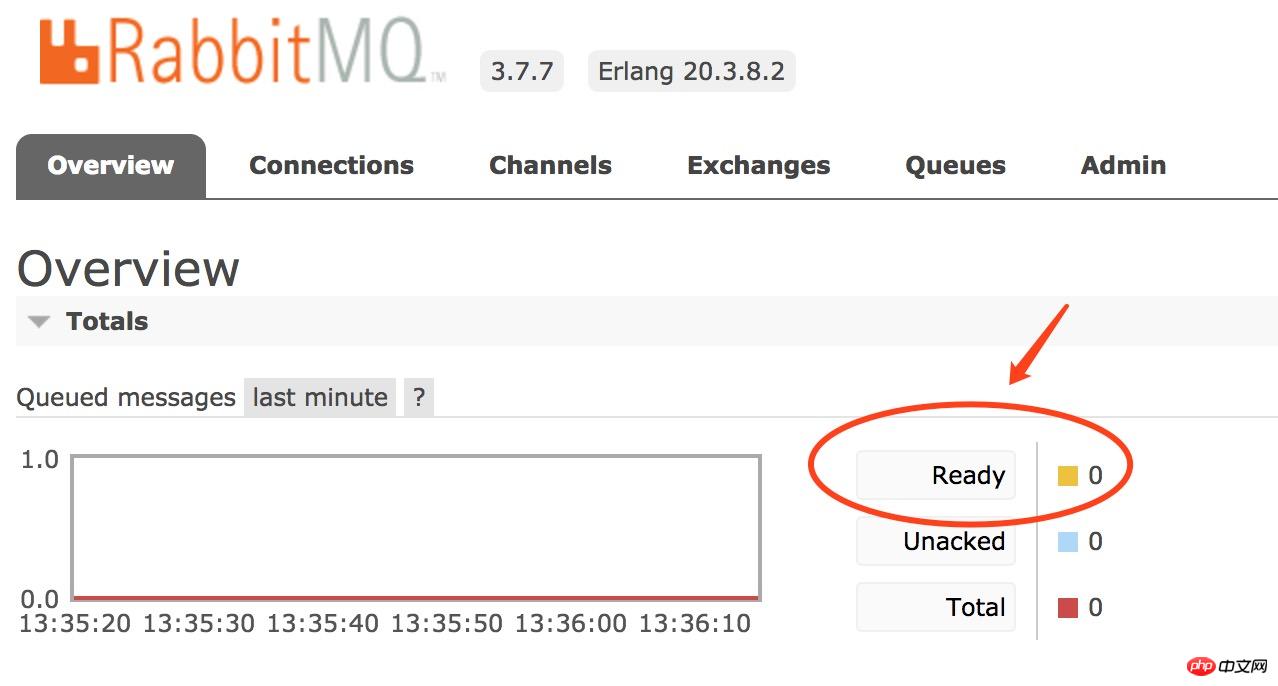
4. Get messages from the specified queue
let mq = new RabbitMQ();
mq.receiveQueueMsg('testQueue',(msg) => {
   console.log(msg)
})// 输出结果:my first message复制代码At this time, open the RabbitMQ management platform, and the number of messages has become 0
To summarize: We briefly talked about some knowledge related to message queues and RabbitMQ, and how we produce and consume messages through nodejs.
The above is the entire content of this article. I hope it will be helpful to everyone's study. For more related content, please pay attention to the PHP Chinese website!
Related recommendations:
How to implement the file download function using JavaScript
Call baidu-aip through node.js -SDK realizes the function of ID card recognition
The above is the detailed content of Analysis of how NodeJS operates message queue RabbitMQ. For more information, please follow other related articles on the PHP Chinese website!

Hot AI Tools

Undresser.AI Undress
AI-powered app for creating realistic nude photos

AI Clothes Remover
Online AI tool for removing clothes from photos.

Undress AI Tool
Undress images for free

Clothoff.io
AI clothes remover

AI Hentai Generator
Generate AI Hentai for free.

Hot Article
Hot Tools

Notepad++7.3.1
Easy-to-use and free code editor

SublimeText3 Chinese version
Chinese version, very easy to use

Zend Studio 13.0.1
Powerful PHP integrated development environment

Dreamweaver CS6
Visual web development tools

SublimeText3 Mac version
God-level code editing software (SublimeText3)
Hot Topics
 1386
1386
 52
52

 The difference between nodejs and vuejs
Apr 21, 2024 am 04:17 AM
The difference between nodejs and vuejs
Apr 21, 2024 am 04:17 AM
Node.js is a server-side JavaScript runtime, while Vue.js is a client-side JavaScript framework for creating interactive user interfaces. Node.js is used for server-side development, such as back-end service API development and data processing, while Vue.js is used for client-side development, such as single-page applications and responsive user interfaces.
 Is nodejs a backend framework?
Apr 21, 2024 am 05:09 AM
Is nodejs a backend framework?
Apr 21, 2024 am 05:09 AM
Node.js can be used as a backend framework as it offers features such as high performance, scalability, cross-platform support, rich ecosystem, and ease of development.
 How to connect nodejs to mysql database
Apr 21, 2024 am 06:13 AM
How to connect nodejs to mysql database
Apr 21, 2024 am 06:13 AM
To connect to a MySQL database, you need to follow these steps: Install the mysql2 driver. Use mysql2.createConnection() to create a connection object that contains the host address, port, username, password, and database name. Use connection.query() to perform queries. Finally use connection.end() to end the connection.
 What is the difference between npm and npm.cmd files in the nodejs installation directory?
Apr 21, 2024 am 05:18 AM
What is the difference between npm and npm.cmd files in the nodejs installation directory?
Apr 21, 2024 am 05:18 AM
There are two npm-related files in the Node.js installation directory: npm and npm.cmd. The differences are as follows: different extensions: npm is an executable file, and npm.cmd is a command window shortcut. Windows users: npm.cmd can be used from the command prompt, npm can only be run from the command line. Compatibility: npm.cmd is specific to Windows systems, npm is available cross-platform. Usage recommendations: Windows users use npm.cmd, other operating systems use npm.
 What are the global variables in nodejs
Apr 21, 2024 am 04:54 AM
What are the global variables in nodejs
Apr 21, 2024 am 04:54 AM
The following global variables exist in Node.js: Global object: global Core module: process, console, require Runtime environment variables: __dirname, __filename, __line, __column Constants: undefined, null, NaN, Infinity, -Infinity
 Is there a big difference between nodejs and java?
Apr 21, 2024 am 06:12 AM
Is there a big difference between nodejs and java?
Apr 21, 2024 am 06:12 AM
The main differences between Node.js and Java are design and features: Event-driven vs. thread-driven: Node.js is event-driven and Java is thread-driven. Single-threaded vs. multi-threaded: Node.js uses a single-threaded event loop, and Java uses a multi-threaded architecture. Runtime environment: Node.js runs on the V8 JavaScript engine, while Java runs on the JVM. Syntax: Node.js uses JavaScript syntax, while Java uses Java syntax. Purpose: Node.js is suitable for I/O-intensive tasks, while Java is suitable for large enterprise applications.
 Is nodejs a back-end development language?
Apr 21, 2024 am 05:09 AM
Is nodejs a back-end development language?
Apr 21, 2024 am 05:09 AM
Yes, Node.js is a backend development language. It is used for back-end development, including handling server-side business logic, managing database connections, and providing APIs.
 How to deploy nodejs project to server
Apr 21, 2024 am 04:40 AM
How to deploy nodejs project to server
Apr 21, 2024 am 04:40 AM
Server deployment steps for a Node.js project: Prepare the deployment environment: obtain server access, install Node.js, set up a Git repository. Build the application: Use npm run build to generate deployable code and dependencies. Upload code to the server: via Git or File Transfer Protocol. Install dependencies: SSH into the server and use npm install to install application dependencies. Start the application: Use a command such as node index.js to start the application, or use a process manager such as pm2. Configure a reverse proxy (optional): Use a reverse proxy such as Nginx or Apache to route traffic to your application
