

Follow me to learn PS Day 01: How to create a new Photoshop document

Learn PS from me
Day 01: How to create a new Photoshop document
Open the PS software and click " File-New", or use the shortcut key Ctrl "N" to create a new layer.

Name
After clicking OK, the following interface will appear

The name is the file name. You can enter it as you choose, or you can complete it in storage and then enter again.
Default

##The default is The predefined image size may vary depending on the selected preset. The corresponding width, height and resolution may also be inconsistent. Please note that the units may also be inconsistent, such as pixels, centimeters, feet, etc.
Resolution

pixels/inch". Now we set the width to be 500, the height to be 360, and the resolution to be 72 pixels
 Note: We generally set the resolution to 72 pixels /inch because most monitors display 72 pixels per inch of screen area. This means that the resolution set in the document is consistent with the resolution of the monitor, and there will not be much contrast in the subsequent renderings. At the same time, we should also be careful not to set the width and height too large. First, it will be difficult to operate, and second, it will slow down the computer and cause lag.
Color mode
 Bitmap mode: Each pixel of the bitmap mode image is only represented by 1 Bit representation, that is, its intensity is either 0 or 1, corresponding to the colors black and white respectively. We can choose the resolution and conversion method of the output image through the dialog box.
RGB mode: Corresponds to the three primary colors of Red (red), Green (green), and Blue (blue). Based on these colors, the colors are added to configure most of the colors that can be seen by the naked eye. It is Design the most commonly used color modes.
CMYK mode: It is a color mode only used for printing. The letters stand for Cyan, Magenta, Yellow and Black. These four colors form the CMYK color model through the subtractive color method. Black is added to neutralize the insufficient blackness produced by CMY. . The CMYK mode is essentially the same as the RGB mode, except in the principle of producing colors.
Grayscale mode: There are only gray sweaters and other colors in the grayscale image. It is a color mode widely used in image processing.
Lab mode: This mode represents color with a brightness component L and two color components a and b. It is Photoshop's internal color mode. It is an intermediate mode between RGB mode and CMYK mode. It is rarely used. .
Background content
 ## If you want the background of the new layer to be white, click "White". "Background Color" refers to the default background color last used as the background color of your new document. "Transparent" means that the background layer has no color value.
After all settings are completed, click "OK" and a new document will be created.
We can enlarge the image through "View - Zoom in" or the shortcut key Ctrl " ". "View - Zoom out" or shortcut key Ctrl "-" to zoom out the image.
The above is the detailed content of Follow me to learn PS Day 01: How to create a new Photoshop document. For more information, please follow other related articles on the PHP Chinese website!

Hot AI Tools

Undresser.AI Undress
AI-powered app for creating realistic nude photos

AI Clothes Remover
Online AI tool for removing clothes from photos.

Undress AI Tool
Undress images for free

Clothoff.io
AI clothes remover

Video Face Swap
Swap faces in any video effortlessly with our completely free AI face swap tool!

Hot Article
Hot Tools

Notepad++7.3.1
Easy-to-use and free code editor

SublimeText3 Chinese version
Chinese version, very easy to use

Zend Studio 13.0.1
Powerful PHP integrated development environment

Dreamweaver CS6
Visual web development tools

SublimeText3 Mac version
God-level code editing software (SublimeText3)
Hot Topics
 1387
1387
 52
52

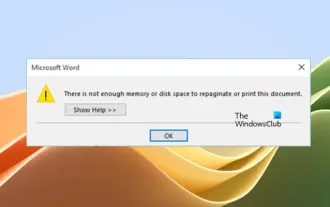 Insufficient memory or disk space to repagin or print this document Word error
Feb 19, 2024 pm 07:15 PM
Insufficient memory or disk space to repagin or print this document Word error
Feb 19, 2024 pm 07:15 PM
This article will introduce how to solve the problem of insufficient memory or disk space to repage or print the document in Microsoft Word. This error usually occurs when users try to print a Word document. If you encounter a similar error, please refer to the suggestions provided in this article to resolve it. Insufficient memory or disk space to repage or print this document Word error How to resolve the Microsoft Word printing error "There is not enough memory or disk space to repage or print the document." Update Microsoft Office Close memory-hogging applications Change your default printer Start Word in safe mode Rename the NorMal.dotm file Save the Word file as another
 How to add redline to Word document
Mar 01, 2024 am 09:40 AM
How to add redline to Word document
Mar 01, 2024 am 09:40 AM
It is 395 words, which is 495. This article will show you how to add red lines in Word documents. Redlining a document refers to making modifications to the document so that users can clearly see the changes. This feature is very important when multiple people are editing a document together. What redline means Marking a document Redlining means using red lines or callouts to indicate changes, edits, or revisions to a document. The term was inspired by the practice of using a red pen to mark printed documents. Redline comments are widely used in different scenarios, such as clearly showing recommended changes to authors, editors, and reviewers when editing a document. Propose changes and modifications in legal agreements or contracts Provide constructive criticism and suggestions on papers, presentations, etc. How to give W
 Can't open hyperlink in word document
Feb 18, 2024 pm 06:10 PM
Can't open hyperlink in word document
Feb 18, 2024 pm 06:10 PM
In recent years, with the continuous development of network technology, our lives are inseparable from various digital tools and the Internet. When processing documents, especially in writing, we often use word documents. However, sometimes we may encounter a difficult problem, that is, the hyperlink in the word document cannot be opened. This issue will be discussed below. First of all, we need to make it clear that hyperlinks refer to links added in word documents to other documents, web pages, directories, bookmarks, etc. When we click on these links, I
 Introduction to the process of extracting line drawings in PS
Apr 01, 2024 pm 12:51 PM
Introduction to the process of extracting line drawings in PS
Apr 01, 2024 pm 12:51 PM
1. Open the software and import a piece of material, as shown in the picture below. 2. Then ctrl+shift+u to remove color. 3. Then press ctrl+J to copy the layer. 4. Then reverse ctrl+I, and then set the layer blending mode to Color Dodge. 5. Click Filter--Others--Minimum. 6. In the pop-up dialog box, set the radius to 2 and click OK. 7. Finally, you can see the line draft extracted.
 Word document is blank when opening on Windows 11/10
Mar 11, 2024 am 09:34 AM
Word document is blank when opening on Windows 11/10
Mar 11, 2024 am 09:34 AM
When you encounter a blank page issue when opening a Word document on a Windows 11/10 computer, you may need to perform repairs to resolve the situation. There are various sources of this problem, one of the most common being a corrupted document itself. Furthermore, corruption of Office files may also lead to similar situations. Therefore, the fixes provided in this article may be helpful to you. You can try to use some tools to repair the damaged Word document, or try to convert the document to another format and reopen it. In addition, checking whether the Office software in the system needs to be updated is also a way to solve this problem. By following these simple steps, you may be able to fix Word document blank when opening Word document on Win
 How to automate tasks using PowerShell
Feb 20, 2024 pm 01:51 PM
How to automate tasks using PowerShell
Feb 20, 2024 pm 01:51 PM
If you are an IT administrator or technology expert, you must be aware of the importance of automation. Especially for Windows users, Microsoft PowerShell is one of the best automation tools. Microsoft offers a variety of tools for your automation needs, without the need to install third-party applications. This guide will detail how to leverage PowerShell to automate tasks. What is a PowerShell script? If you have experience using PowerShell, you may have used commands to configure your operating system. A script is a collection of these commands in a .ps1 file. .ps1 files contain scripts executed by PowerShell, such as basic Get-Help
 How to create a new simulator in the Lightning Simulator - How to create a new simulator in the Lightning Simulator
Mar 05, 2024 pm 03:04 PM
How to create a new simulator in the Lightning Simulator - How to create a new simulator in the Lightning Simulator
Mar 05, 2024 pm 03:04 PM
Recently, some users who have just downloaded and contacted the lightning simulator software asked the editor how to create a new simulator in the lightning simulator? The following content brings the method of creating a new simulator in the lightning simulator. Let us take a look below. Find the lightning simulator software. Double-click to open the Thunderbolt multi-opener. Click New/Copy Simulator. Click New Simulator. You can get a new simulator. Find the lightning simulator software, double-click to open the lightning multi-opener, click New/Copy Simulator, click New Simulator, and you will get a new simulator.
 Complete list of ps shortcut keys
Mar 11, 2024 pm 04:31 PM
Complete list of ps shortcut keys
Mar 11, 2024 pm 04:31 PM
1. Ctrl + N: Create a new document. 2. Ctrl + O: Open a file. 3. Ctrl + S: Save the current file. 4. Ctrl + Shift + S: Save as. 5. Ctrl + W: Close the current document. 6. Ctrl + Q: Exit Photoshop. 7. Ctrl + Z: Undo. 8. Ctrl + Y: Redo. 9. Ctrl + X: Cut the selected content. 10. Ctrl + C: Copy the selected content.
