This article introduces to you the detailed process of building a LAMP environment. It has certain reference value. Friends in need can refer to it. I hope it will be helpful to you.
After minimally installing CentOS 7, directly enter the ifconfig command, prompting "ifconfig command not found"
, indicating that the minimal installation does not install related software. We can use ip addr instead of ifconfig to view the network card details, or we can use yum install
net-tools to install the ifconfig command. Enter y twice during the installation process to complete the installation.
1. Apache
yum install httpd //Install Apache
Total download size: 3.0 M
Installed size: 10 M
Is this ok [y/d/N]:  //输入y,确认安装
Retrieving key from file:///etc/pki/rpm-gpg/RPM-GPG-KEY-CentOS-7
Importing GPG key 0xF4A80EB5:
 Userid     : "CentOS-7 Key (CentOS 7 Official Signing Key) <security>"
 Fingerprint: 6341 ab27 53d7 8a78 a7c2 7bb1 24c6 a8a7 f4a8 0eb5
 Package    : centos-release-7-5.1804.el7.centos.x86_64 (@anaconda)
 From       : /etc/pki/rpm-gpg/RPM-GPG-KEY-CentOS-7
Is this ok [y/N]:  //验证GPG密钥是否正确,输入y</security>
Running transaction check
Running transaction test
Transaction test succeeded
Running transaction
  Installing : apr-1.4.8-3.el7_4.1.x86_64                                                            1/5
  Installing : apr-util-1.5.2-6.el7.x86_64                                                           2/5
  Installing : httpd-tools-2.4.6-80.el7.centos.1.x86_64                                              3/5
  Installing : mailcap-2.1.41-2.el7.noarch                                                           4/5
  Installing : httpd-2.4.6-80.el7.centos.1.x86_64                                                    5/5
  Verifying  : mailcap-2.1.41-2.el7.noarch                                                           1/5
  Verifying  : httpd-tools-2.4.6-80.el7.centos.1.x86_64                                              2/5
  Verifying  : apr-util-1.5.2-6.el7.x86_64                                                           3/5
  Verifying  : apr-1.4.8-3.el7_4.1.x86_64                                                            4/5
  Verifying  : httpd-2.4.6-80.el7.centos.1.x86_64                                                    5/5

Installed:
  httpd.x86_64 0:2.4.6-80.el7.centos.1

Dependency Installed:
  apr.x86_64 0:1.4.8-3.el7_4.1  apr-util.x86_64 0:1.5.2-6.el7 httpd-tools.x86_64 0:2.4.6-80.el7.centos.1
  mailcap.noarch 0:2.1.41-2.el7

Complete!
Open the Apache service and set it The service starts automatically when the system starts: systemctl start httpd.servicesystemctl enable httpd.service
In order to be able to access the Web server from the outside, it must Open HTTP (80) and HTTPS (443) ports in the firewall. The default firewall on CentOS is firewalld, which can be configured using the firewalld-cmd command. firewall-cmd --permanent --zone = public --add-service = http firewall-cmd --permanent --zone = public --add-service = https firewall-cmd --reload //Restart firewalld
Detect whether the Apache service is open: systemctl status httpd.service
● httpd.service - The Apache HTTP Server
   Loaded: loaded (/usr/lib/systemd/system/httpd.service; disabled; vendor preset: disabled)
   Active: active (running) since Mon 2018-08-06 20:14:21 CST; 9s ago
     Docs: man:httpd(8)
           man:apachectl(8)
 Main PID: 1498 (httpd)
   Status: "Total requests: 0; Current requests/sec: 0; Current traffic:   0 B/sec"
   CGroup: /system.slice/httpd.service
           ├─1498 /usr/sbin/httpd -DFOREGROUND
           ├─1499 /usr/sbin/httpd -DFOREGROUND
           ├─1500 /usr/sbin/httpd -DFOREGROUND
           ├─1501 /usr/sbin/httpd -DFOREGROUND
           ├─1502 /usr/sbin/httpd -DFOREGROUND
           └─1503 /usr/sbin/httpd -DFOREGROUND

Aug 06 20:14:21 localhost systemd[1]: Starting The Apache HTTP Server...
Aug 06 20:14:21 localhost httpd[1498]: AH00558: httpd: Could not reliably determine the server's f...sage
Aug 06 20:14:21 localhost systemd[1]: Started The Apache HTTP Server.
Hint: Some lines were ellipsized, use -l to show in full.
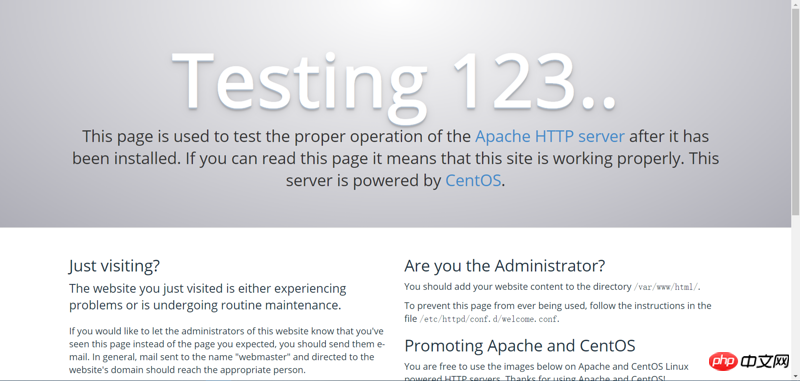
Use the browser to enter the IP address of the server:

2. MySQL/MariaDB
MariaDB database management system is a branch of MySQL, which is mainly maintained by the open source community and is licensed under GPL. One of the reasons for developing this branch is that after Oracle acquired MySQL, there was a potential risk of closing MySQL as a source, so the community adopted a branch approach to avoid this risk. MariaDB aims to be fully compatible with MySQL, including API and command line. It is currently the most popular MySQL database derivative and is also regarded as a substitute for the open source database MySQL. Here we use MariaDB instead of MySQL. The MySQL installation and operation methods are generally similar.When installing, replace mariadb with mysql;
Start, stop the service, check the status, and replace mariadb.service with mysql.service.
yum -y install mariadb-server mariadb //Install MariaDB
Installed:
  mariadb.x86_64 1:5.5.56-2.el7                   mariadb-server.x86_64 1:5.5.56-2.el7

Dependency Installed:
  perl.x86_64 4:5.16.3-292.el7                        perl-Carp.noarch 0:1.26-244.el7
  perl-Compress-Raw-Bzip2.x86_64 0:2.061-3.el7        perl-Compress-Raw-Zlib.x86_64 1:2.061-4.el7
  perl-DBD-MySQL.x86_64 0:4.023-6.el7                 perl-DBI.x86_64 0:1.627-4.el7
  perl-Data-Dumper.x86_64 0:2.145-3.el7               perl-Encode.x86_64 0:2.51-7.el7
  perl-Exporter.noarch 0:5.68-3.el7                   perl-File-Path.noarch 0:2.09-2.el7
  perl-File-Temp.noarch 0:0.23.01-3.el7               perl-Filter.x86_64 0:1.49-3.el7
  perl-Getopt-Long.noarch 0:2.40-3.el7                perl-HTTP-Tiny.noarch 0:0.033-3.el7
  perl-IO-Compress.noarch 0:2.061-2.el7               perl-Net-Daemon.noarch 0:0.48-5.el7
  perl-PathTools.x86_64 0:3.40-5.el7                  perl-PlRPC.noarch 0:0.2020-14.el7
  perl-Pod-Escapes.noarch 1:1.04-292.el7              perl-Pod-Perldoc.noarch 0:3.20-4.el7
  perl-Pod-Simple.noarch 1:3.28-4.el7                 perl-Pod-Usage.noarch 0:1.63-3.el7
  perl-Scalar-List-Utils.x86_64 0:1.27-248.el7        perl-Socket.x86_64 0:2.010-4.el7
  perl-Storable.x86_64 0:2.45-3.el7                   perl-Text-ParseWords.noarch 0:3.29-4.el7
  perl-Time-HiRes.x86_64 4:1.9725-3.el7               perl-Time-Local.noarch 0:1.2300-2.el7
  perl-constant.noarch 0:1.27-2.el7                   perl-libs.x86_64 4:5.16.3-292.el7
  perl-macros.x86_64 4:5.16.3-292.el7                 perl-parent.noarch 1:0.225-244.el7
  perl-podlators.noarch 0:2.5.1-3.el7                 perl-threads.x86_64 0:1.87-4.el7
  perl-threads-shared.x86_64 0:1.43-6.el7

Complete!
systemctl start mariadb.service
systemctl enable mariadb.service
mysql_secure_installation
NOTE: RUNNING ALL PARTS OF THIS SCRIPT IS RECOMMENDED FOR ALL MariaDB
      SERVERS IN PRODUCTION USE!  PLEASE READ EACH STEP CAREFULLY!

In order to log into MariaDB to secure it, we'll need the current
password for the root user.  If you've just installed MariaDB, and
you haven't set the root password yet, the password will be blank,
so you should just press enter here.

Enter current password for root (enter for none):  //输入当前root用户密码,直接回车

OK, successfully used password, moving on...

Setting the root password ensures that nobody can log into the MariaDB
root user without the proper authorisation.

Set root password? [Y/n]
New password:   //输入密码
Re-enter new password:   //确认密码
Password updated successfully!
Reloading privilege tables..
 ... Success!

By default, a MariaDB installation has an anonymous user, allowing anyone
to log into MariaDB without having to have a user account created for
them.  This is intended only for testing, and to make the installation
go a bit smoother.  You should remove them before moving into a
production environment.

Remove anonymous users? [Y/n]   //删除匿名用户,回车
 ... Success!

Normally, root should only be allowed to connect from 'localhost'.  This
ensures that someone cannot guess at the root password from the network.

Disallow root login remotely? [Y/n]   //不允许root用户远程登录,回车
 ... Success!

By default, MariaDB comes with a database named 'test' that anyone can
access.  This is also intended only for testing, and should be removed
before moving into a production environment.

Remove test database and access to it? [Y/n]   //删除测试数据库并访问它,回车
 - Dropping test database...
 ... Success!
 - Removing privileges on test database...
 ... Success!

Reloading the privilege tables will ensure that all changes made so far
will take effect immediately.

Reload privilege tables now? [Y/n]   //重新加载权限表,回车
 ... Success!

Cleaning up...

All done!  If you've completed all of the above steps, your MariaDB
installation should now be secure.

Thanks for using MariaDB!
3. PHP
yum install php //Install php
Total download size: 4.7 M
Installed size: 17 M
Is this ok [y/d/N]:   //允许安装,输入y
Downloading packages:
(1/4): libzip-0.10.1-8.el7.x86_64.rpm                                             |  48 kB  00:00:00
(2/4): php-5.4.16-45.el7.x86_64.rpm                                               | 1.4 MB  00:00:01
(3/4): php-common-5.4.16-45.el7.x86_64.rpm                                        | 565 kB  00:00:01
(4/4): php-cli-5.4.16-45.el7.x86_64.rpm                                           | 2.7 MB  00:00:02
---------------------------------------------------------------------------------------------------------
Total                                                                    2.1 MB/s | 4.7 MB  00:00:02
Running transaction check
Running transaction test
Transaction test succeeded
Running transaction
  Installing : libzip-0.10.1-8.el7.x86_64                                                            1/4
  Installing : php-common-5.4.16-45.el7.x86_64                                                       2/4
  Installing : php-cli-5.4.16-45.el7.x86_64                                                          3/4
  Installing : php-5.4.16-45.el7.x86_64                                                              4/4
  Verifying  : php-5.4.16-45.el7.x86_64                                                              1/4
  Verifying  : php-cli-5.4.16-45.el7.x86_64                                                          2/4
  Verifying  : libzip-0.10.1-8.el7.x86_64                                                            3/4
  Verifying  : php-common-5.4.16-45.el7.x86_64                                                       4/4

Installed:
  php.x86_64 0:5.4.16-45.el7

Dependency Installed:
  libzip.x86_64 0:0.10.1-8.el7    php-cli.x86_64 0:5.4.16-45.el7    php-common.x86_64 0:5.4.16-45.el7

Complete!
yum install php-mysql //Enter y during the installation process to complete the installation
systemctl restart httpd.service //After installing php , to restart the Apache service
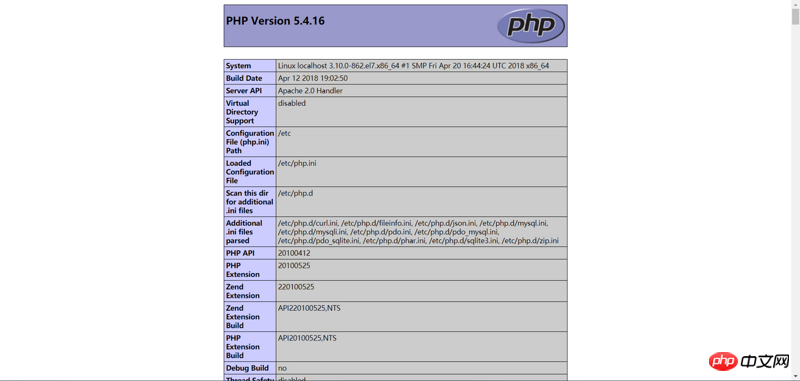
vi /var/www/html/index.php //Create a new php file and fill in the following content
<?php phpinfo();
?>

Operation steps of Nginx configuration file nginx.conf
Steps to modify the MySQL port number in the phpstudy integrated environment under Linux system
The above is the detailed content of How to set up a LAMP environment? Detailed process of building LAMP environment. For more information, please follow other related articles on the PHP Chinese website!


