 Web Front-end
 HTML Tutorial
 How does react-native implement automatic packaging? React-native automatic packaging method
How does react-native implement automatic packaging? React-native automatic packaging method
The content of this article is about how to implement automatic packaging in react-native? The react-native automatic packaging method has certain reference value. Friends in need can refer to it. I hope it will be helpful to you.
Have you also imagined that after writing the code, you don’t need to open xcode and android studio, but just execute a shell script to package both android and ios? And it will automatically be uploaded to Dandelion and App Store for you, and then the product will be automatically downloaded for testing. And you~~~ went directly to drink coffee.
Note: This article only describes how to use automatic script processing, so it is assumed that readers can package manually normally. If there are more complicated details, another chapter will be required.
Preparation materials
A macos host monitor, such as: mac-mini
Automatic build tools, such as: gitlab-runner, travis-ci, jenkins
Apple Developer Certification
The macos host needs to be used as the node of the build tool, and the following software or operations need to be installed:
git
xcode 9.4
xcode -> Settings-> accounts -> Add app_id used for Apple authentication or personal authentication
android studio
android sdk
java jdk 8
Note: If you don’t want to build a platform and just want to be simple, then you can integrate the following codes into one shell script and then execute it on your computer.
Packaging android
cd android
rm -rf build/ app/build/
./gradlew assembleRelease
The final apk file is at: android/app/build/outputs/apk/app-release.apk
Packaging ios
Build the basic package app first
cd ios
# 必须先创建目录
mkdir -p build
rm -rf build/archive.xcarchive build/ipa-*

# 获取目录名
project_list=`ls | grep .xcodeproj`
project_name=${project_list%%.*}

# 打包出app
# 这和你点击 xcode -> Product -> Archive 是一样的效果的。
xcodebuild clean
xcodebuild archive \
  -project ./${project_name}.xcodeproj \
  -scheme ${project_name} \
  -configuration Release \
-archivePath ./build/archive.xcarchiveThen we need to export the app to ipa format so that it can be uploaded to the App Store or test platform such as: Dandelion, fir.im
To transfer to the App Store, you need to export the official ipa package, and to transfer to Dandelion, you need to use the test ipa package (ad-hoc), so you need to execute it twice
cd ios

# 正式ipa包
xcodebuild -exportArchive \
    -archivePath ./build/archive.xcarchive \
    -exportPath ./build/ipa-app-store \
    -exportOptionsPlist ./exportOptions/app-store.plist \
    -allowProvisioningUpdates

# 测试ipa包
xcodebuild -exportArchive \
    -archivePath ./build/archive.xcarchive \
    -exportPath ./build/ipa-ad-hoc \
    -exportOptionsPlist ./exportOptions/ad-hoc.plist \
    -allowProvisioningUpdates
The above compilation will definitely fail because you are missing two files app-store.plist and ad-hoc.plist. You can actually find this yourself, that is, in the folder that is packaged and Exported in xcode, there will be an ExportOptions.plist file

According to whether you choose App Store or Ad Hoc when exporting, copy them into the project exportOptions/app-store.plist andexportOptions/ad-hoc.plist
Upload Dandelion
The Dandelion used by the author, fir readers can find it themselves
PGY_API_KEY=你的api_key
PGY_HOST=https://www.pgyer.com/apiv2/app/upload

# ios
IPA=`ls ./ios/build/ipa-ad-hoc/*.ipa`
curl \
    --form "file=@$IPA" \
    --form "_api_key=$PGY_API_KEY" \
    $PGY_HOST

# android
curl \
    --form "file=@./android/app/build/outputs/apk/app-release.apk" \
    --form "_api_key=$PGY_API_KEY" \
    $PGY_HOST
Upload to AppStore
In fact, it is uploaded to appstoreconnect.apple.com first, which is the same as when you click Upload To App Store in xcode
Verify first whether it can be uploaded
APP_STORE_ACCOUNT=证书创建者账号
APP_STORE_PASSWORD=密码
IPA=`ls ./ios/build/ipa-app-store/*.ipa`

/Applications/Xcode.app/Contents/Applications/Application\ Loader.app/Contents/Frameworks/ITunesSoftwareService.framework/Versions/A/Support/altool \
    --validate-app \
    --file "$IPA" \
    --type ios \
    --username $APP_STORE_ACCOUNT \
    --password $APP_STORE_PASSWORD
You can only upload if the verification is successful, otherwise the upload will fail. No need to waste time
APP_STORE_ACCOUNT=证书创建者账号
APP_STORE_PASSWORD=密码
IPA=`ls ./ios/build/ipa-app-store/*.ipa`

# xcode临时生成的目录,不删除可能导致上传到appStore时失败
rm -rf ~/.itmstransporter/ ~/.old_itmstransporter/

# 开始上传
/Applications/Xcode.app/Contents/Applications/Application\ Loader.app/Contents/Frameworks/ITunesSoftwareService.framework/Versions/A/Support/altool \
    --upload-app \
    --file "$IPA" \
    --type ios \
    --username $APP_STORE_ACCOUNT \
    --password $APP_STORE_PASSWORD
Upload android
From the author's research, only Xiaomi application upload is provided Interface, other application platforms must be uploaded manually.
Notes:
1. A certificate needs to be generated on each node machine. You need to generate it manually, or use xcode to automatically generate it for you. If you don't do this step, you can't package ios
2. For the first few times of packaging, mac will prompt you to enter the password. You need to enter it in time, and be sure to click the button to always allow
3. If you use gitlab-runner, then in. Using alias altool=xx in gitlab-ci.yml will be invalid, that is, altool cannot be recognized. I don’t know why.
4. You must use macos system for ios packaging. Trying to use linux will not be worth the gain. You can use linux for android packaging, but it's also very troublesome, so why not do it with ios?
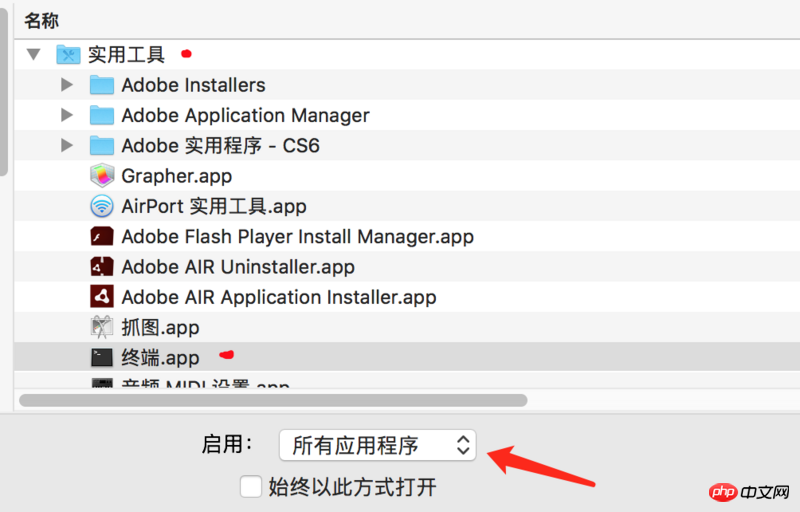
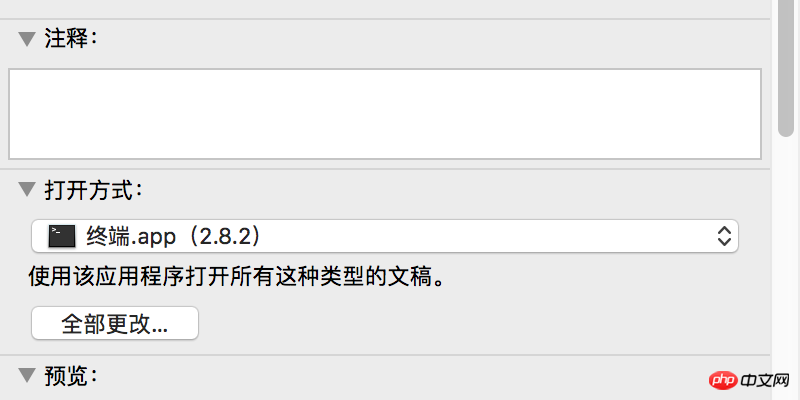
5. If macos is used as an automatically built sub-node, remember to make a startup script start.sh and add the script to the user-managed startup items. This sh file needs to be right-clicked to open the display introduction, and then set the opening method to terminal


Analysis of meta information meta tag attributes in HTML (with code)
About Gao Display of the basic controls of the German map WEB version
The above is the detailed content of How does react-native implement automatic packaging? React-native automatic packaging method. For more information, please follow other related articles on the PHP Chinese website!

Hot AI Tools

Undresser.AI Undress
AI-powered app for creating realistic nude photos

AI Clothes Remover
Online AI tool for removing clothes from photos.

Undress AI Tool
Undress images for free

Clothoff.io
AI clothes remover

Video Face Swap
Swap faces in any video effortlessly with our completely free AI face swap tool!

Hot Article

Hot Tools

Notepad++7.3.1
Easy-to-use and free code editor

SublimeText3 Chinese version
Chinese version, very easy to use

Zend Studio 13.0.1
Powerful PHP integrated development environment

Dreamweaver CS6
Visual web development tools

SublimeText3 Mac version
God-level code editing software (SublimeText3)

Hot Topics
 1386
1386
 52
52
 How to change the version of react native
Jan 19, 2023 pm 02:31 PM
How to change the version of react native: 1. Enter the React Native project directory and enter "react-native --version" on the command line; 2. View the React Native version managed by npm package; 3. Open the "package.json" file in the project , modify the dependencies field and change the "react-native" version to the target version.
 What to do if react native red screen error occurs
Jan 03, 2023 pm 02:37 PM
Solution to react native red screen error: 1. Create the folder assets in "android/app/src/main/"; 2. Execute the command "react-native bundle --platform android --dev false --entry-file index.android.js..."; 3. Execute "react-native run-android" in the project.
 What to do if react native update fails
Jan 09, 2023 am 10:41 AM
Solution to react native update failure: 1. Directly submit the IPA package to the App Store for review, and then upload the IPA package to the pushy platform; 2. Upload the archived IPA package to the pushy platform, and then submit the IPA package to iTunes connect; 3. . Compile a release mode package to the mobile phone through Xcode, then use iTunes to export the IPA package, and then upload the IPA to the pushy platform.
 What should I do if react-native cannot run?
Dec 30, 2022 am 09:36 AM
Solution to react-native not running: 1. Open the terminal, cd to the project folder, and then enter "npm install jpush-react-native jcore-react-native --save"; 2. Save the "node_modules" file in the project Delete the folder; 3. Close the process corresponding to port 8081 and re-run the project.
 How to implement react native routing jump
Jan 06, 2023 am 10:26 AM
How to implement react native route jump: 1. Use the "yarn add react-navigation" command to install "react-navigation"; 2. Use the "yarn add react-native-gesture-handler" command to install "react-native-gesture- handler" component; 3. Set up the initial route and then export it as a class component.
 What to do if react navigation reports an error
Dec 30, 2022 am 10:35 AM
Solution to react navigation error: 1. Configure "Stack.Navigator initialRouteName="Home"", and then restart "yarn android"; 2. Delete the packaged apk in the "android\app\build\outputs\apk\debug" directory file, delete the original apk package on the emulator or real machine, and then re-execute "yarn android".
 How to set the page background color in react native
Jan 03, 2023 am 10:31 AM
How to set the page background color in react native: 1. Install the "react-native-linear-gradient" component through "yarn add react-native-linear-gradient"; 2. By setting "<LinearGradient colors={['# on the page FFD801', '#FF8040', '#F75D59']} style= {...}" to achieve the background color.
 How to catch errors in react native
Jan 04, 2023 am 10:46 AM
Methods for react native to capture errors: 1. Open the corresponding react file; 2. Use the "require('ErrorUtils').setGlobalHandler(function(err) {...})" method to capture errors and give the user reasonable prompts .


