This article brings you the basics of Python image processing and the introductory functions of OpenCV. It has certain reference value. Friends in need can refer to it. I hope it will be helpful to you.
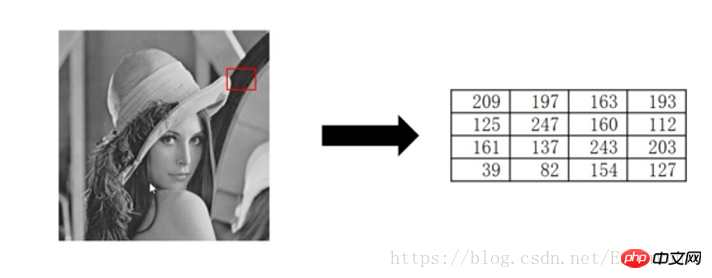
Images are composed of pixels, that is, small squares in the image. These small squares have a clear position and Color values are assigned, and the color and position of these small squares determine how the image appears. Pixel is the smallest unit in an image. Each bitmap image contains a certain number of pixels, which determine the size of the image on the screen.

#Images usually include binary images, grayscale images and color images.

##1. Binary image Binary image Any point in is either black or white, either white (pixel is 255) or black (pixel is 0). The process of converting a grayscale image into a binary image is often implemented by sequential traversal judgment. If the pixels >= 127, it is set to 255, otherwise it is set to 0.

2. Grayscale image In addition to black and white, grayscale images also have gray, which combines gray The degree is divided into 256 different colors, and the image looks clearer. Converting a color image into a grayscale image is the most basic preprocessing operation for image processing, which usually includes the following methods:
(1) Floating point algorithm: Gray=R*0.3 G*0.59 B*0.11
( 2) Integer method: Gray=(R*30 G*59 B*11)/100
(3) Shift method: Gray=(R*28 G*151 B*77)>>8;
(4) Average method: Gray=(R G B)/3; (This program uses algorithm)
(5) Only take green: Gray=G;
(6) Weighted average algorithm: According to light The brightness characteristics of R, G, and B are uniformly replaced with Gray to form a new color RGB (Gray, Gray, Gray). Use it to replace the original RGB (R, G, B) to create a grayscale image. Change the RGB values of the pixel matrix to convert the color image into a grayscale image.
 3. Color image
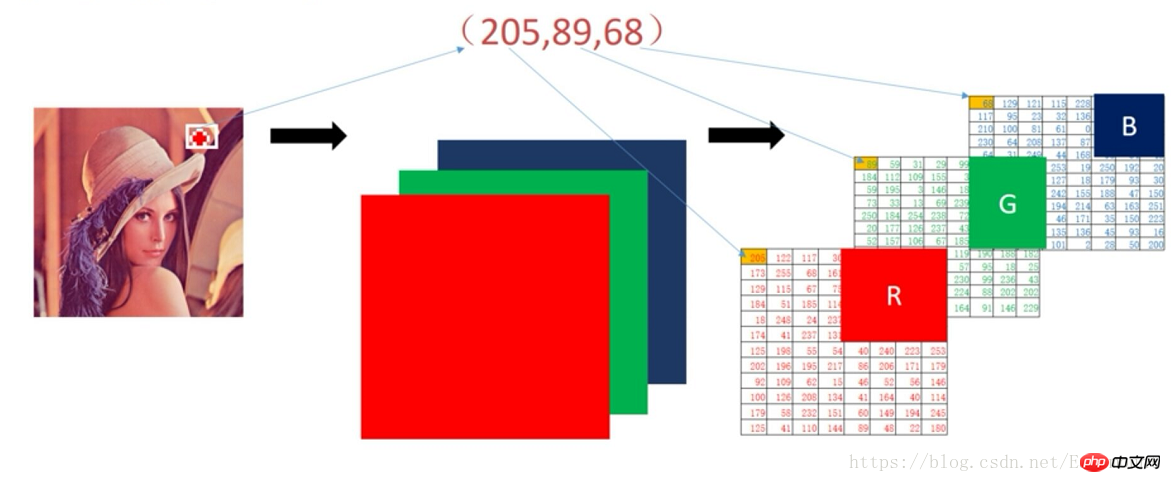
Color image is an RGB image. RGB represents the three primary colors of red, green and blue. All colors in the computer They are all composed of three primary colors in different proportions, that is, three-color channels.

2. OpenCV reads and writes images
 1. Read in the image
OpenCV reads images mainly by calling the following functions: img = cv2.imread(file name,[,parameter])
Parameter (1) cv2.IMREAD_UNCHANGED (image immutable)
Parameter (3) cv2.IMREAD_COLOR (read color image)
Parameter (4) cv2.COLOR_BGR2RGB (image channel BGR converted to RGB)
2. Display image
The display image calling function is as follows: cv2.imshow( Window name, image name)
3. Window wait
The calling function is as follows: cv2.waitKey(delay)
The keyboard binding function has one parameter, indicating the number of milliseconds to wait. It will wait for a specific number of milliseconds to see if there is input from the keyboard, and the return value is an ASCII value. If its parameter is 0, it means waiting for keyboard input indefinitely; parameter >0 means waiting for delay milliseconds; parameter
4. Delete all windows
Call the function as follows: cv2.destroyAllWindows() Delete all windows
cv2.destroyWindows() Delete the specified window
5. Write the picture
Call the function as follows:retval = cv2.imwrite(file address, file name )
# -*-
coding:utf-8 -*-import cv2
#读取图片
img = cv2.imread("test.jpg")
#显示图像
cv2.imshow("Demo", img)
#等待显示
cv2.waitKey(0)
cv2.destroyAllWindows()
#写入图像
cv2.imwrite("testyxz.jpg", img)
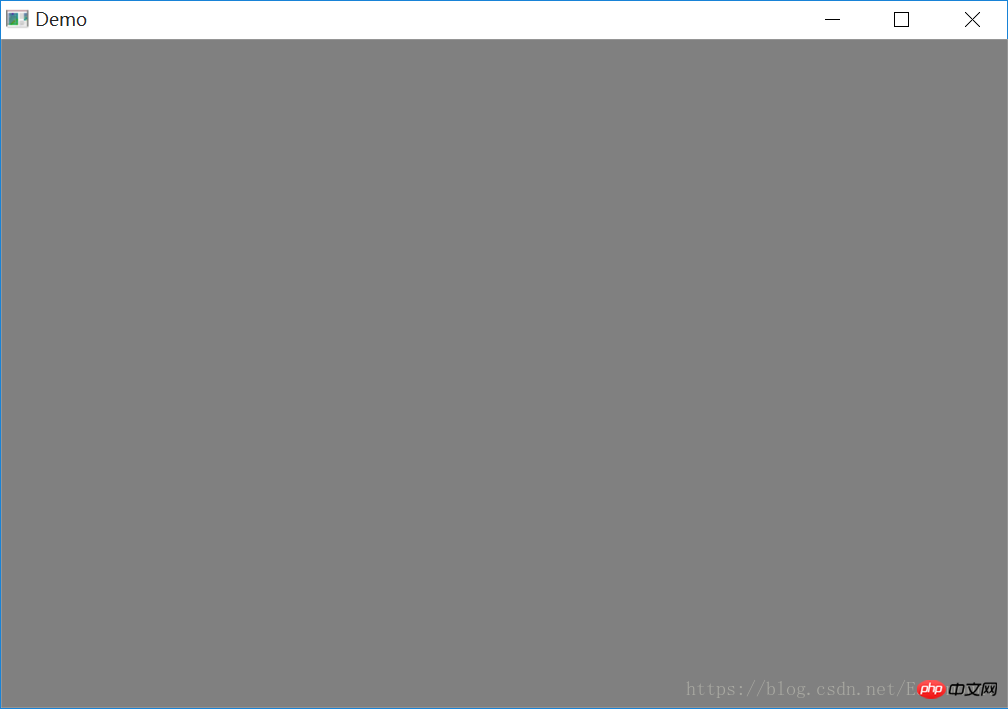
If there is no watiKey(0) function in the code, the running result will be as shown below:

同时
可以对代码进行升级,如下所示:
#无限期等待输入
k=cv2.waitKey(0)
#如果输入ESC退出
if k==27:
cv2.destroyAllWindows()1.读取像素
灰度图像直接返回灰度值,彩色图像则返回B、G、R三个分量。注意OpenCV读取图像是BGR存储显示,需要转换为RGB再进行图像处理。
灰度图像:返回值 = 图像(位置参数)
eg: test=img[88,42]
彩色图像:返回值 = 图像[位置元素, 0 | 1 | 2 ] 获取BGR三个通道像素
eg: blue=img[88,142,0] green=img[88,142,1] red=img[88,142,2]
2.修改图像
修改图像如果是灰度图像则直接赋值新像素即可,彩色图像依次给三个值赋值即可。
灰度图像:
img[88,142] = 255
彩色图像:
img[88,142, 0] = 255
img[88,142, 1] = 255
img[88,142, 2] = 255
彩色图像:方法二
img[88,142] = [255, 255, 255]
下面代码是获取像素及修改的操作。
# -*- coding:utf-8 -*-import cv2
#读取图片
img = cv2.imread("test.jpg", cv2.IMREAD_UNCHANGED)
test = img[88,142]print test
img[88,142] = [255, 255, 255]print test
#分别获取BGR通道像素
blue = img[88,142,0]print blue
green = img[88,142,1]print green
red = img[88,142,2]print red
#显示图像
cv2.imshow("Demo", img)
#等待显示
cv2.waitKey(0)
cv2.destroyAllWindows()
#写入图像
cv2.imwrite("testyxz.jpg", img)输出结果如下所示:
[158 107 64]
[255 255 255]
255
255
255
下面代码是将行为100到200、列150到250的像素区域设置为白色。
# -*- coding:utf-8 -*-import cv2
#读取图片
img = cv2.imread("test.jpg", cv2.IMREAD_UNCHANGED)
#该区域设置为白色
img[100:200, 150:250] = [255,255,255]
#显示图像
cv2.imshow("Demo", img)
#等待显示
cv2.waitKey(0)
cv2.destroyAllWindows()
#写入图像
cv2.imwrite("testyxz.jpg", img)运行结果如下图所示:

相关推荐:
Python零基础入门之八lambda的表达式和filter、map内置函数
The above is the detailed content of The basics of python image processing and the introductory functions of OpenCV. For more information, please follow other related articles on the PHP Chinese website!