The content of this article is about how to manually deploy a Java web project using a basic configuration of a cloud server ECS instance. It has certain reference value. Friends in need can refer to it. I hope it will be helpful to you. help.
Manual deployment of Java Web projects
Applicable objects
This document introduces how to use a basic configuration cloud server ECS Example deployment Java web project. It is suitable for individual users who have just started using Alibaba Cloud to build websites.
Configuration requirements
#The software versions listed here only represent the versions used in writing this document. When operating, please refer to the actual software version.
Operating system: CentOS 7.4
Tomcat version: Tomcat 8.5.23
JDK version: JDK 1.8.0_141
Installation Preparation
The CentOS 7.4 system has the firewall enabled by default. You can turn off the firewall, or refer to the official website documentation to add rules in the firewall to allow incoming rules for ports 80, 443, or 8080.
Turn off the firewall:
systemctl stop firewalld.service
Turn off the firewall auto-start function:
systemctl disable firewalld.service
Create a general user www, run tomcat:
useradd www
Release in the security group Port 8080. For specific operations, please refer to Adding Security Group Rules.
Create the website root directory:
mkdir -p /data/wwwroot/default
Create a new Tomcat test page:
echo Tomcat test > /data/wwwroot/default/index.jsp
chown -R www.www /data/wwwroot
Download the source code
wget https://mirrors.aliyun.com/apache/tomcat/tomcat-8/v8.5.23/bin/apache-tomcat-8.5.23.tar.gz
Note: The source code version will be continuously upgraded. You can obtain the appropriate installation package address in the https://mirrors.aliyun.com/apache/tomcat/tomcat-8/ directory.
wget http://mirrors.linuxeye.com/jdk/jdk-8u141-linux-x64.tar.gz
Note: The source code version will be continuously upgraded. You can obtain the appropriate installation package address in the http://mirrors.linuxeye.com/jdk/ directory.
Install JDK
Follow the following steps to install JDK.
Create a new directory:
mkdir /usr/java
Extract jdk-8u141-linux-x64.tar.gz to /usr/java.
tar xzf jdk-8u141-linux-x64.tar.gz -C /usr/java
Set environment variables:
Edit /etc/profile: vi /etc/profile.
Press the i key to enter edit mode.
Add the following information in the /etc/profile file:
#set java environment
export JAVA_HOME=/usr/java/jdk1.8.0_141
export CLASSPATH=$JAVA_HOME/lib/tools.jar:$JAVA_HOME/lib/dt.jar:$JAVA_HOME/lib
export PATH=$JAVA_HOME/bin:$PATH
Press the Esc key to exit edit mode, enter :wq to save and close the file.
Load environment variables: source /etc/profile.
Check jdk version. When the jdk version information appears, it means that the JDK has been installed successfully.
java -version
java version "1.8.0_141"
Java(TM) SE Runtime Environment (build 1.8.0_141-b15)
Java HotSpot(TM) 64-Bit Server VM (build 25.141-b15, mixed mode)
Installing Tomcat
Follow the following steps to install Tomcat.
Run the following commands in sequence to decompress apache-tomcat-8.5.23.tar.gz, rename the Tomcat directory, and set user permissions.
tar xzf apache-tomcat-8.5.23.tar.gz
mv apache-tomcat-8.5.23 /usr/local/tomcat/
chown -R www.www /usr/local/tomcat/
Description:
In the /usr/local/tomcat/ directory:
bin directory stores some script files of Tomcat, including scripts for starting and shutting down the Tomcat service.
conf: Stores various global configuration files of the Tomcat server, the most important of which are server.xml and web.xml.
webapps: Tomcat’s main Web publishing directory. Web application files are placed in this directory by default.
logs: Stores the log files when Tomcat is executed.
Configure server.xml file:
Switch to the /usr/local/tomcat/conf/ directory: cd /usr/local/tomcat/conf/.
Rename the server.xml file: mv server.xml server.xml_bk.
Create a new server.xml file:
Run the command vi server.xml.
Press the i key to enter edit mode.
Add the following content:
<?xml version="1.0" encoding="UTF-8"?>
 <Server port="8006" shutdown="SHUTDOWN">
<Listener className="org.apache.catalina.core.JreMemoryLeakPreventionListener"/>
<Listener className="org.apache.catalina.mbeans.GlobalResourcesLifecycleListener"/>
<Listener className="org.apache.catalina.core.ThreadLocalLeakPreventionListener"/>
<Listener className="org.apache.catalina.core.AprLifecycleListener"/>
<GlobalNamingResources>
  <Resource name="UserDatabase" auth="Container"
            type="org.apache.catalina.UserDatabase"
            description="User database that can be updated and saved"
            factory="org.apache.catalina.users.MemoryUserDatabaseFactory"
            pathname="conf/tomcat-users.xml"/>
</GlobalNamingResources>
<Service name="Catalina">
  <Connector port="8080"
            protocol="HTTP/1.1"
            connectionTimeout="20000"
            redirectPort="8443"
            maxThreads="1000"
            minSpareThreads="20"
            acceptCount="1000"
            maxHttpHeaderSize="65536"
            debug="0"
            disableUploadTimeout="true"
            useBodyEncodingForURI="true"
            enableLookups="false"
            URIEncoding="UTF-8"/>
  <Engine name="Catalina" defaultHost="localhost">
    <Realm className="org.apache.catalina.realm.LockOutRealm">
      <Realm className="org.apache.catalina.realm.UserDatabaseRealm"
             resourceName="UserDatabase"/>
    </Realm>
    <Host name="localhost" appBase="/data/wwwroot/default" unpackWARs="true" autoDeploy="true">
      <Context path="" docBase="/data/wwwroot/default" debug="0" reloadable="false" crossContext="true"/>
      <Valve className="org.apache.catalina.valves.AccessLogValve" directory="logs"
        prefix="localhost_access_log." suffix=".txt" pattern="%h %l %u %t "%r" %s %b" />
    </Host>
  </Engine>
</Service>
</Server>Set JVM memory parameters:
Run command vi /usr/local/tomcat/bin/setenv.sh, create /usr/local/ tomcat/bin/setenv.sh.
Press the i key to enter edit mode.
Add the following:
JAVA_OPTS='-Djava.security.egd=file:/dev/./urandom -server -Xms256m -Xmx496m -Dfile.encoding=UTF-8'
Press the Esc key to exit edit mode, enter :wq to save and exit the file.
Set Tomcat auto-start script.
Download script: wget https://github.com/lj2007331/oneinstack/raw/master/init.d/Tomcat-init
Rename Tomcat-init: mv Tomcat-init/ etc/init.d/tomcat
Add execution permissions: chmod x /etc/init.d/tomcat
Run the following command to set the startup script JAVA_HOME.
sed -i 's@^export JAVA_HOME=.*@export JAVA_HOME=/usr/java/jdk1.8.0_141@' /etc/init.d/tomcat
Set up auto-start.
chkconfig --add tomcat
chkconfig tomcat on
Start Tomcat.
service tomcat start
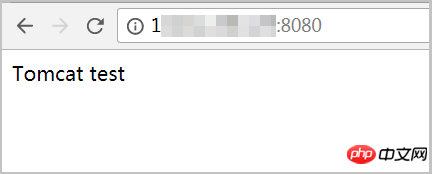
Enter http://ip:8080 in the browser address bar to access. When the page shown in the figure appears, the installation is successful.

The above is the detailed content of How to manually deploy a Java web project using a basic configuration cloud server ECS instance. For more information, please follow other related articles on the PHP Chinese website!