
 Web Front-end
H5 Tutorial
Canvas off-screen technology and magnifying glass implementation code example
Web Front-end
H5 Tutorial
Canvas off-screen technology and magnifying glass implementation code example
Canvas off-screen technology and magnifying glass implementation code example

This article mainly introduces the relevant information about canvas off-screen technology and magnifying glass implementation code examples. It has certain reference value. Friends in need can refer to it. I hope it will be helpful to you.
Using canvas In addition to implementing filters, you can also use off-screen technology magnifying glass function.
For the convenience of explanation, this article is divided into 2 application parts:
Realizing watermark and center scaling
Realizing magnifying glass
1. What is off-screen technology?
canvas learning and filter implementation introduced the drawImage interface. In addition to drawing images, this interface can also: Draw a canvas object to another canvas object . This is off-screen technology.
2. Implement watermark and center scaling
In the code, there are two canvas tags. They are visible and invisible respectively. The Context object on the invisible canvas object is where we place the image watermark.
For more details, please see the code comments:
<!DOCTYPE html>
<html lang="en">
<head>
<meta charset="UTF-8">
<title>Learn Canvas</title>
<style>
canvas {
display: block;
margin: 0 auto;
border: 1px solid #222;
}
input {
display: block;
margin: 20px auto;
width: 800px
}
</style>
</head>
<body>
<p id="app">
<canvas id="my-canvas"></canvas>
<input type="range" value="1.0" min="0.5" max="3.0" step="0.1">
<canvas id="watermark-canvas" style="display: none;"></canvas>
</p>
<script type="text/javascript">
window.onload = function () {
var canvas = document.querySelector("#my-canvas")
var watermarkCanvas = document.querySelector("#watermark-canvas")
var slider = document.querySelector("input")
var scale = slider.value
var ctx = canvas.getContext('2d')
var watermarkCtx = watermarkCanvas.getContext("2d")
/* 给第二个canvas获取的Context对象添加水印 */
watermarkCanvas.width = 300
watermarkCanvas.height = 100
watermarkCtx.font = "bold 20px Arial"
watermarkCtx.lineWidth = "1"
watermarkCtx.fillStyle = "rgba(255 , 255 , 255, 0.5)"
watermarkCtx.fillText("=== yuanxin.me ===", 50, 50)
/****************************************/
var img = new Image()
img.src = "./img/photo.jpg"
/* 加载图片后执行操作 */
img.onload = function () {
canvas.width = img.width;
canvas.height = img.height;
drawImageByScale(canvas, ctx, img, scale, watermarkCanvas);
// 监听input标签的mousemove事件
// 注意:mousemove实时监听值的变化,内存消耗较大
slider.onmousemove = function () {
scale = slider.value
drawImageByScale(canvas, ctx, img, scale, watermarkCanvas);
}
}
/******************/
}
/**
*
* @param {Object} canvas 画布对象
* @param {Object} ctx
* @param {Object} img
* @param {Number} scale 缩放比例
* @param {Object} watermark 水印对象
*/
function drawImageByScale(canvas, ctx, img, scale, watermark) {
// 图像按照比例进行缩放
var width = img.width * scale,
height = img.height * scale
// (dx, dy): 画布上绘制img的起始坐标
var dx = canvas.width / 2 - width / 2,
dy = canvas.height / 2 - height / 2
ctx.clearRect(0, 0, canvas.width, canvas.height) // No1 清空画布
ctx.drawImage(img, dx, dy, width, height) // No2 重新绘制图像
if (watermark) {
// No3 判断是否有水印: 有, 绘制水印
ctx.drawImage(watermark, canvas.width - watermark.width, canvas.height - watermark.height)
}
}
</script>
</body>
</html>The effect is as shown below:
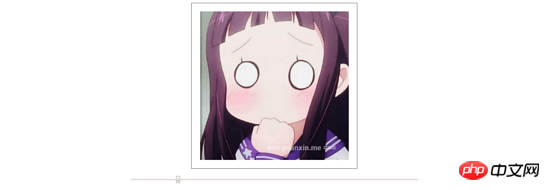
Drag the slider and you can Zoom in and out of images. Then right click to save the image. The saved image will already have a watermark, as shown below:

3. Implement a magnifying glass
Based on the above center zoom, the magnifying glass owner needs to pay attention to the following two parts:
Refined processing of canvas mouse response events: slide in, slide out, click and release
Recalculate the off-screen coordinates (see the code comments for detailed formula calculation ideas)
Recalculate the mouse relative to the canvas label Coordinates (see code comments for detailed formula calculation ideas)
The code is as follows:
<!DOCTYPE html>
<html lang="en">
<head>
  <meta charset="UTF-8">
  <title>Document</title>
  <style>
    canvas {
      display: block;
      margin: 0 auto;
      border: 1px solid #222;
    }
  </style>
</head>
<body>
  <canvas id="my-canvas"></canvas>
  <canvas id="off-canvas" style="display: none;"></canvas>
  <script>
    var isMouseDown = false,
      scale = 1.0
    var canvas = document.querySelector("#my-canvas")
    var offCanvas = document.querySelector("#off-canvas") // 离屏 canvas
    var ctx = canvas.getContext("2d")
    var offCtx = offCanvas.getContext("2d") // 离屏 canvas 的 Context对象
    var img = new Image()

    window.onload = function () {
      img.src = "./img/photo.jpg"

      img.onload = function () {
        canvas.width = img.width
        canvas.height = img.height

        offCanvas.width = img.width
        offCanvas.height = img.height

        // 计算缩放比例
        scale = offCanvas.width / canvas.width

        // 初识状态下, 两个canvas均绘制Image
        ctx.drawImage(img, 0, 0, canvas.width, canvas.height)
        offCtx.drawImage(img, 0, 0, canvas.width, canvas.height)

      }

      // 鼠标按下
      canvas.onmousedown = function (event) {
        event.preventDefault() // 禁用默认事件
        var point = windowToCanvas(event.clientX, event.clientY) // 获取鼠标相对于 canvas 标签的坐标
        isMouseDown = true
        drawCanvasWithMagnifier(true, point) // 绘制在离屏canvas上绘制放大后的图像
      }

      // 鼠标移动
      canvas.onmousemove = function (event) {
        event.preventDefault() // 禁用默认事件
        if (isMouseDown === true) {
          var point = windowToCanvas(event.clientX, event.clientY)
          drawCanvasWithMagnifier(true, point)
        }
      }

      // 鼠标松开
      canvas.onmouseup = function (event) {
        event.preventDefault() // 禁用默认事件
        isMouseDown = false
        drawCanvasWithMagnifier(false) // 不绘制离屏放大镜
      }

      // 鼠标移出canvas标签
      canvas.onmouseout = function (event) {
        event.preventDefault() // 禁用默认事件
        isMouseDown = false
        drawCanvasWithMagnifier(false) // 不绘制离屏放大镜
      }
    }

    /**
    * 返回鼠标相对于canvas左上角的坐标
    * @param {Number} x 鼠标的屏幕坐标x
    * @param {Number} y 鼠标的屏幕坐标y
    */
    function windowToCanvas(x, y) {
      var bbox = canvas.getBoundingClientRect() // bbox中存储的是canvas相对于屏幕的坐标
      return {
        x: x - bbox.x,
        y: y - bbox.y
      }
    }

    function drawCanvasWithMagnifier(isShow, point) {
      ctx.clearRect(0, 0, canvas.width, canvas.height) // 清空画布
      ctx.drawImage(img, 0, 0, canvas.width, canvas.height) // 在画布上绘制图像

      /* 利用离屏,绘制放大镜 */
      if (isShow) {
        var { x, y } = point

        var mr = 50 // 正方形放大镜边长

        // (sx, sy): 待放大图像的开始坐标
        var sx = x - mr / 2,
          sy = y - mr / 2

        // (dx, dy): 已放大图像的开始坐标
        var dx = x - mr,
          dy = y - mr

        // 将offCanvas上的(sx,sy)开始的长宽均为mr的正方形区域
        // 放大到
        // canvas上的(dx,dy)开始的长宽均为 2 * mr 的正方形可视区域
        // 由此实现放大效果
        ctx.drawImage(offCanvas, sx, sy, mr, mr, dx, dy, 2 * mr, 2 * mr)
      }
      /*********************/
    }
  </script>
</body>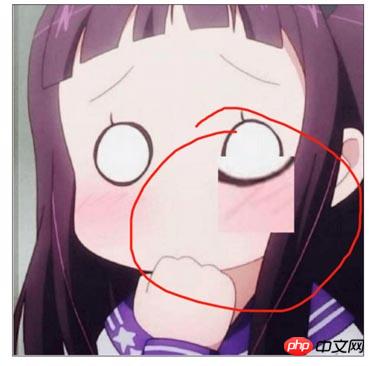
</html>The magnifying glass effect is as shown below (the area marked by the red pen is our Square magnifying glass):
Summary: The above is the entire content of this article, I hope it will be helpful to everyone's study. For more related tutorials, please visit Html5 Video Tutorial!
Related recommendations:
php public welfare training video tutorial
The above is the detailed content of Canvas off-screen technology and magnifying glass implementation code example. For more information, please follow other related articles on the PHP Chinese website!

Hot AI Tools

Undresser.AI Undress
AI-powered app for creating realistic nude photos

AI Clothes Remover
Online AI tool for removing clothes from photos.

Undress AI Tool
Undress images for free

Clothoff.io
AI clothes remover

Video Face Swap
Swap faces in any video effortlessly with our completely free AI face swap tool!

Hot Article
Hot Tools

Notepad++7.3.1
Easy-to-use and free code editor

SublimeText3 Chinese version
Chinese version, very easy to use

Zend Studio 13.0.1
Powerful PHP integrated development environment

Dreamweaver CS6
Visual web development tools

SublimeText3 Mac version
God-level code editing software (SublimeText3)
Hot Topics
 1386
1386
 52
52

 Table Border in HTML
Sep 04, 2024 pm 04:49 PM
Table Border in HTML
Sep 04, 2024 pm 04:49 PM
Guide to Table Border in HTML. Here we discuss multiple ways for defining table-border with examples of the Table Border in HTML.
 HTML margin-left
Sep 04, 2024 pm 04:48 PM
HTML margin-left
Sep 04, 2024 pm 04:48 PM
Guide to HTML margin-left. Here we discuss a brief overview on HTML margin-left and its Examples along with its Code Implementation.
 Nested Table in HTML
Sep 04, 2024 pm 04:49 PM
Nested Table in HTML
Sep 04, 2024 pm 04:49 PM
This is a guide to Nested Table in HTML. Here we discuss how to create a table within the table along with the respective examples.
 HTML Table Layout
Sep 04, 2024 pm 04:54 PM
HTML Table Layout
Sep 04, 2024 pm 04:54 PM
Guide to HTML Table Layout. Here we discuss the Values of HTML Table Layout along with the examples and outputs n detail.
 HTML Input Placeholder
Sep 04, 2024 pm 04:54 PM
HTML Input Placeholder
Sep 04, 2024 pm 04:54 PM
Guide to HTML Input Placeholder. Here we discuss the Examples of HTML Input Placeholder along with the codes and outputs.
 HTML Ordered List
Sep 04, 2024 pm 04:43 PM
HTML Ordered List
Sep 04, 2024 pm 04:43 PM
Guide to the HTML Ordered List. Here we also discuss introduction of HTML Ordered list and types along with their example respectively
 Moving Text in HTML
Sep 04, 2024 pm 04:45 PM
Moving Text in HTML
Sep 04, 2024 pm 04:45 PM
Guide to Moving Text in HTML. Here we discuss an introduction, how marquee tag work with syntax and examples to implement.
 HTML onclick Button
Sep 04, 2024 pm 04:49 PM
HTML onclick Button
Sep 04, 2024 pm 04:49 PM
Guide to HTML onclick Button. Here we discuss their introduction, working, examples and onclick Event in various events respectively.
