This article mainly introduces canvas learning and filter implementation code. Using canvas, front-end personnel can easily perform image processing. It has certain reference value. Friends in need can refer to it. I hope it will be helpful to you. help.
In this era of proliferation of digital products, taking pictures has become an indispensable part of life. Whether at home, outing, or traveling long distances, you will always take some beautiful photos. But the photos taken directly by the camera often have a certain gap between them and our psychological expectations. So how to reduce this gap? The answer is beauty P-pictures, so all kinds of beauty cameras are popping up, and P-pictures have become a portable skill.
In fact, the so-called beauty is just the use of many filters, and filters use certain algorithms to manipulate picture pixels to obtain some special image effects. Friends who have used Photoshop know that there are a lot of filters in PS. Below we will use js canvas technology to achieve several filter effects.
I recently learned the highlight of HTML5 - canvas. Using canvas, front-end personnel can easily perform image processing. There are many APIs. This time I mainly study the commonly used APIs and complete the following two codes:
implementation of decolorization filter
implementation of negative Color (inverse color) filter
1 Do you know canvas?
1.1 What is canvas?
This HTML element is designed for client-side vector graphics. It has no behavior of its own, but exposes a drawing API to client JavaScript so that the script can draw whatever it wants to a canvas.
1.2 What is the difference between canvas, svg and vml?
<canvas> An important difference between markup and SVG and VML is that <canvas> has a JavaScript-based drawing API , while SVG and VML use an XML document to describe the drawing.
2 canvas drawing learning
Most Canvas drawing APIs are not defined on the <canvas> element itself , but defined on a "drawing environment" object obtained through the getContext() method of the canvas. The default width and height of the <canvas> element itself are 300px and 150px respectively.
2.1 canvas draws a rectangle
// 处理canvas元素
var c = document.querySelector("#my-canvas");
c.width = 150;
c.height = 70;

// 获取 指定canvas标签 上的context对象
var ctx = c.getContext("2d");
ctx.fillStyle = "#FF0000"; // 颜色
ctx.fillRect(0, 0, 150, 75); // 形状2.2 canvas draws a path
var c = document.querySelector("#my-canvas");
var ctx = c.getContext("2d");
ctx.moveTo(0, 0); // 开始坐标
ctx.lineTo(200, 100); // 结束坐标
ctx.stroke(); // 立即绘制2.3 canvas draws a circle
For the ctx.arc() interface, the five parameters are: (x,y,r,start,stop). Among them, x and y are the coordinates of the center of the circle, and r is the radius.
The units of start and stop are radians. Not length, not °.
var c = document.querySelector("#my-canvas");
var ctx = c.getContext("2d");
ctx.beginPath();
ctx.arc(95, 50, 40, 0, 2 * Math.PI);
ctx.stroke();2.4 canvas drawing text
var c = document.getElementById("myCanvas");
var ctx = c.getContext("2d");
ctx.font = "30px Arial";
ctx.fillText("Hello World", 10, 50);3 canvas image processing learning
3.1 Commonly used API interfaces
There are four main APIs for image processing:
Drawing images: drawImage(img,x,y,width,height) or drawImage(img,sx,sy,swidth,sheight,x,y,width,height)
Get image data: getImageData(x,y,width,height )
Rewrite image data: putImageData(imgData,x,y[,dirtyX,dirtyY,dirtyWidth,dirtyHeight])
Export image: toDataURL([type, encoderOptions])
For more detailed API and parameter descriptions, please see: canvas image processing API parameter explanation
3.2 Drawing images
Based on these APIs, we can draw our pictures in the canvas element. Suppose our picture is ./img/photo.jpg.
<script>
  window.onload = function () {
    var img = new Image() // 声明新的Image对象
    img.src = "./img/photo.jpg"
    // 图片加载后
    img.onload = function () {
      var canvas = document.querySelector("#my-canvas");
      var ctx = canvas.getContext("2d");

      // 根据image大小,指定canvas大小
      canvas.width = img.width
      canvas.height = img.height

      // 绘制图像
      ctx.drawImage(img, 0, 0, canvas.width, canvas.height)
    }
  }
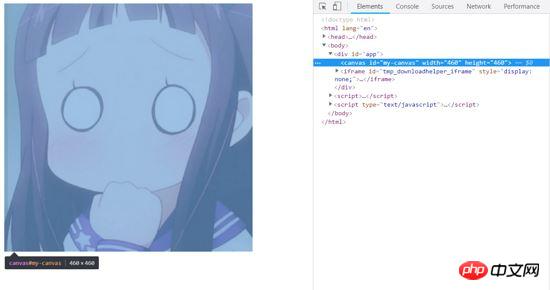
</script>As shown below, the picture is drawn into the canvas:

4 Implement the filter
Here we mainly borrow the getImageData function, which returns the RGBA value of each pixel. With the help of image processing formulas, you can manipulate pixels to perform corresponding mathematical operations.
4.1 Color removal effect
The color removal effect is equivalent to the black and white photos taken by old cameras. Based on the sensitivity of the human eye, people have given the following formula:
gray = red * 0.3 green * 0.59 blue * 0.11
The code is as follows:
<script>
  window.onload = function () {
    var img = new Image()
    img.src = "./img/photo.jpg"
    img.onload = function () {
      var canvas = document.querySelector("#my-canvas");
      var ctx = canvas.getContext("2d");
      canvas.width = img.width
      canvas.height = img.height
      ctx.drawImage(img, 0, 0, canvas.width, canvas.height)

      // 开始滤镜处理
      var imgData = ctx.getImageData(0, 0, canvas.width, canvas.height);
      for (var i = 0; i < imgData.data.length / 4; ++i) {
        var red = imgData.data[i * 4],
          green = imgData.data[i * 4 + 1],
          blue = imgData.data[i * 4 + 2];
        var gray = 0.3 * red + 0.59 * green + 0.11 * blue; // 计算gray
        // 刷新RGB,注意:
        // imgData.data[i * 4 + 3]存放的是alpha,不需要改动
        imgData.data[i * 4] = gray;
        imgData.data[i * 4 + 1] = gray;
        imgData.data[i * 4 + 2] = gray;
      }
      ctx.putImageData(imgData, 0, 0); // 重写图像数据
    }
  }
</script>The effect is as shown below:

4.2 Negative color effect
The negative color effect is to subtract the current value from the maximum value value. The theoretical maximum numerical value in RGB obtained by getImageData is: 255. Therefore, the formula is as follows:
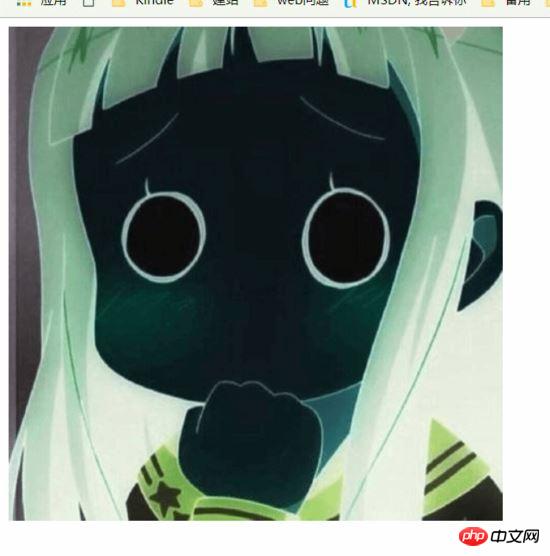
new_val = 255 - val
The code is as follows:
<script>
  window.onload = function () {
    var img = new Image()
    img.src = "./img/photo.jpg"
    img.onload = function () {
      var canvas = document.querySelector("#my-canvas");
      var ctx = canvas.getContext("2d");
      canvas.width = img.width
      canvas.height = img.height
      ctx.drawImage(img, 0, 0, canvas.width, canvas.height)

      // 开始滤镜处理
      var imgData = ctx.getImageData(0, 0, canvas.width, canvas.height);
      for (var i = 0; i < imgData.data.length / 4; ++i) {
        var red = imgData.data[i * 4],
          green = imgData.data[i * 4 + 1],
          blue = imgData.data[i * 4 + 2];
        // 刷新RGB,注意:
        // imgData.data[i * 4 + 3]存放的是alpha,不需要改动
        imgData.data[i * 4] = 255 - imgData.data[i * 4];
        imgData.data[i * 4 + 1] = 255 - imgData.data[i * 4 + 1];
        imgData.data[i * 4 + 2] = 255 - imgData.data[i * 4 + 2];
      }
      ctx.putImageData(imgData, 0, 0); // 重写图像数据
    }
  }
</script>The rendering is as follows:

Summary: The above is the entire content of this article, I hope it will be helpful to everyone's study. For more related tutorials, please visit Html5 Video Tutorial!
Related recommendations:
php public welfare training video tutorial
The above is the detailed content of Canvas learning and filter implementation code. For more information, please follow other related articles on the PHP Chinese website!
 What are the production methods of html5 animation production?
 How to create a new folder in webstorm
 How to configure JDK environment variables
 How to enter BIOS on thinkpad
 Ouyi trading platform app
 What are the python artificial intelligence libraries?
 Solution to java success and javac failure
 How to use the Print() function in Python
 Advantages of downloading the official website of Yiou Exchange App