

CSS3 learning page loading animation (2)

This article will share with you 6 types of CSS3 page loading animations. It has certain reference value. Friends in need can refer to it. I hope it will be helpful to you.
I have shared four CSS3 loading animations in the previous article [CSS3 Learning Page Loading Animation (1)], and we will continue today (the title is continued from the previous time).
Please note: Some of the keyframe animations in the code use linear curves, while others use ease curves. The former is executed at a constant speed, and the entire animation is executed at a fixed speed; the latter has an acceleration and deceleration phase, which accelerates at the beginning of the animation and decelerates when the animation is about to end (for example, if I set an animation at 50%, then when it is about to reach 50% %, the animation begins to slow down, and when it exceeds 50%, the animation begins to accelerate, which will appear as a short stay effect on the page. Effects seven and eight are the most obvious)
5. Effect 5

The effect of the ball climbing stairs, this is the first effect I saw , I thought it would be a bit complicated, but after writing it, I thought it was not that difficult.
First position the stairs to the upper right corner, execute the motion animation from the upper right to the lower left, and set the animation-delay value for each staircase (I used three stairs here, with a total duration of 1.8s, animation- The delay values are 0s, -0.6s, -12s respectively)
{animation: step_mv 1.8s linear infinite;}<br>@keyframes step_mv {<br> 0%{<br> right: 0;<br> top: 0;<br> opacity: 0.6;<br> }<br> 50%{<br> opacity: 1;<br> }<br> 100%{<br> right: 100%;<br> top: 100%;<br> opacity: 0.6;<br> }<br> }<br>Secondly, determine the contact point between the ball and the stairs. The ball will use this contact point as the lowest benchmark. At the same time, change the ball's rising, The width and height during the descent make the ball beat more realistically. The movement time of the ball animation is exactly the delay time of the staircase animation, so as to ensure that the ball can contact each staircase.
{animation: jump .6s 0s ease infinite,jump_S .6s 0s ease infinite;}<br>@keyframes jump {<br> 50%{<br> top: 60%;<br> }<br> }<br> @keyframes jump_S {<br> 5%{<br> height: 25px; //下降过程<br> width: 15px;<br> }<br> 54%{<br> height: 20px;//到达底部<br> width: 20px;<br> }<br> 55%{<br> height: 25px;//上升过程<br> width: 15px;<br> }<br> 98%{<br> height: 20px;//到达顶点<br> width: 20px;<br> }<br> }<br>Six, Effect Six

7. Effect 7

{animation: rotate_bors 2s ease infinite;}//大圆<br>{animation: rotate_bors 1s ease infinite;}//小圆@keyframes rotate_bors {<br> 50%{<br> transform: rotateZ(180deg);<br> }<br> 100%{<br> transform: rotateZ(360deg);<br> }<br> }<br>Eight, effect eight
 ## This effect is also very simple. I won’t go into details on how to make the outer big circle. You only need to change the size of the small circle inside.
{animation: rotate_borw 1s linear infinite;}@keyframes rotate_borw {<br> 50%{<br> width: 15px;<br> height: 15px;<br> }<br> }<br>9. Effect nine
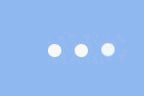
 ## Set all the balls as inline block elements, give the parent element text-align: center to center the balls horizontally, and set the line height to center the balls vertically. Next, use keyframe animation to change the length, width, and left and right margins of the ball.
{animation: margin 1s linear infinite;}<br> @keyframes margin {<br> 50%{<br> margin:0 10px;<br> width: 10px;<br> height: 10px;<br> }<br> }<br>
 # Still set the ball as an inline block, just center it horizontally. You can set the margin to adjust the distance between the balls, and set the translateY value of the ball through key frames. (The delay between each ball does not have to be equally divided, the difference can be reduced)
 {animation: trans 1.2s ease infinite;}@keyframes trans {<br> 50%{<br> opacity: 1;<br> transform: translateY(30px);<br> }<br> 70%{<br> opacity: 1;<br> transform: translateY(30px);<br> }<br> 100%{<br> opacity: 0;<br> transform: translateY(60px);<br> }<br> }<br>
I’ll share it here today, there will be more to come later. I hope it will be helpful to everyone's learning. For more related tutorials, please visit CSS Basics Video Tutorial, CSS3 Video Tutorial, bootstrap Tutorial!
The above is the detailed content of CSS3 learning page loading animation (2). For more information, please follow other related articles on the PHP Chinese website!

Hot AI Tools

Undresser.AI Undress
AI-powered app for creating realistic nude photos

AI Clothes Remover
Online AI tool for removing clothes from photos.

Undress AI Tool
Undress images for free

Clothoff.io
AI clothes remover

AI Hentai Generator
Generate AI Hentai for free.

Hot Article
Hot Tools

Notepad++7.3.1
Easy-to-use and free code editor

SublimeText3 Chinese version
Chinese version, very easy to use

Zend Studio 13.0.1
Powerful PHP integrated development environment

Dreamweaver CS6
Visual web development tools

SublimeText3 Mac version
God-level code editing software (SublimeText3)
Hot Topics
 1378
1378
 52
52

 How to achieve wave effect with pure CSS3? (code example)
Jun 28, 2022 pm 01:39 PM
How to achieve wave effect with pure CSS3? (code example)
Jun 28, 2022 pm 01:39 PM
How to achieve wave effect with pure CSS3? This article will introduce to you how to use SVG and CSS animation to create wave effects. I hope it will be helpful to you!
 How to use Vue to implement loading animation and progress bar effects?
Jun 27, 2023 pm 04:36 PM
How to use Vue to implement loading animation and progress bar effects?
Jun 27, 2023 pm 04:36 PM
Vue is a popular front-end framework that greatly simplifies website or application development. One of the common features is loading animation and progress bar effects to make the interface more attractive and interactive. In this article, we will explore how to achieve these effects using Vue. Loading animation effect Loading animation effect means that while waiting for data to be loaded, an animation effect will appear on the website or application to indicate that the data is loading. This helps convey the concept of wait time to the user, thus preventing them from getting bored or losing interest. The following is the implementation of the loading action
 Use CSS skillfully to realize various strange-shaped buttons (with code)
Jul 19, 2022 am 11:28 AM
Use CSS skillfully to realize various strange-shaped buttons (with code)
Jul 19, 2022 am 11:28 AM
This article will show you how to use CSS to easily realize various weird-shaped buttons that appear frequently. I hope it will be helpful to you!
 How to hide elements in css without taking up space
Jun 01, 2022 pm 07:15 PM
How to hide elements in css without taking up space
Jun 01, 2022 pm 07:15 PM
Two methods: 1. Using the display attribute, just add the "display:none;" style to the element. 2. Use the position and top attributes to set the absolute positioning of the element to hide the element. Just add the "position:absolute;top:-9999px;" style to the element.
 How to implement lace borders in css3
Sep 16, 2022 pm 07:11 PM
How to implement lace borders in css3
Sep 16, 2022 pm 07:11 PM
In CSS, you can use the border-image attribute to achieve a lace border. The border-image attribute can use images to create borders, that is, add a background image to the border. You only need to specify the background image as a lace style; the syntax "border-image: url (image path) offsets the image border width inward. Whether outset is repeated;".
 It turns out that text carousel and image carousel can also be realized using pure CSS!
Jun 10, 2022 pm 01:00 PM
It turns out that text carousel and image carousel can also be realized using pure CSS!
Jun 10, 2022 pm 01:00 PM
How to create text carousel and image carousel? The first thing everyone thinks of is whether to use js. In fact, text carousel and image carousel can also be realized using pure CSS. Let’s take a look at the implementation method. I hope it will be helpful to everyone!
 How to enlarge the image by clicking the mouse in css3
Apr 25, 2022 pm 04:52 PM
How to enlarge the image by clicking the mouse in css3
Apr 25, 2022 pm 04:52 PM
Implementation method: 1. Use the ":active" selector to select the state of the mouse click on the picture; 2. Use the transform attribute and scale() function to achieve the picture magnification effect, the syntax "img:active {transform: scale(x-axis magnification, y Axis magnification);}".
 How to set animation rotation speed in css3
Apr 28, 2022 pm 04:32 PM
How to set animation rotation speed in css3
Apr 28, 2022 pm 04:32 PM
In CSS3, you can use the "animation-timing-function" attribute to set the animation rotation speed. This attribute is used to specify how the animation will complete a cycle and set the speed curve of the animation. The syntax is "element {animation-timing-function: speed attribute value;}".
