This article brings you a small summary of real-time refresh (timely preview) tools, as well as the gulp browser-sync setting method. It has certain reference value. Friends in need can refer to it. Hope it helps.
Let’s get straight to the point. Let’s first explain the positioning of this article:
I wrote this article because I have tried many front-end real-time refresh tools in my daily study. Some are smooth, some are lame, some are simple, and some are troublesome. After installation, I have to fiddle with it, and after I have fiddled with it, I uninstalled it. It really took a lot of time to experience all of these, and I just finished it just yesterday. <span style="font-size: 16px;">gulp</span> <span style="font-size: 16px;">browser-sync</span> method, I guess it can stop me for a while. This article mainly introduces and summarizes the front-end page real-time refresh tools that I have used and seen (which means page refresh after ctrl s. Friends who think that F5 refresh is not troublesome don’t need to read further). I hope it can save you some time, less entanglement, and less gossip when choosing your favorite tools. Let’s start with the introduction below.
<span style="font-size: 16px;">Atom</span> <span style="font-size: 16px;">brackets</span> <span style="font-size: 16px;">webstorm</span>
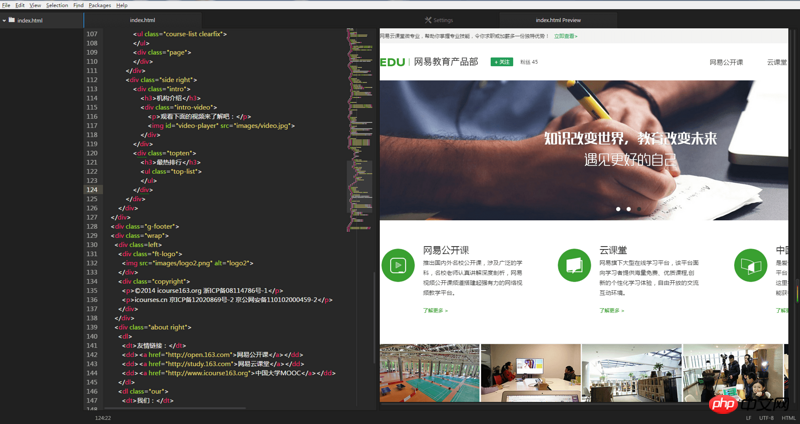
The above three are all famous editors and plug-ins It has many functions and powerful functions. It has made great contributions to the work of front-end developers and is also deeply loved by developers. Therefore, there are many tutorials, so I won’t say more. Just google it and you'll know how to use their instant preview feature. However, the real-time preview of these tools is a little uncomfortable: the preview interface is embedded in the editor interface, which reduces the visual effect of the entire web page. Both Atom and Brackets have this problem (of course this is not a problem, see all Personal preferences). For example, the Atom editor uses atom-preview-html to achieve the effect: 
## while webstorm achieves the preview effect It's great. There will be logo icons of multiple browsers in the upper right corner. You can just click on whichever browser you want to open. It's very convenient. Webstorm itself is considered to be quite powerful in terms of size and function among the editors that are well known to front-end personnel. There is not much to say except that the opening speed is a bit slow.
2.sublime text3
There are reasons why sublime text3 is mentioned separately. First of all, it is the first editor that I have used for a long time. It is inevitable that I will not have a preference among them. What I like most is its super-fast opening response speed. It feels refreshing to just do it. Even if you install a lot of plug-ins, it doesn't feel slow down at all. I like it.
Speaking of plug-ins, we have to say that the sublime editor does not have its own real-time preview function, but it can be achieved through plug-ins: such as sidebarEnhancement, right-click on the html file name and open open in Browser to view the effect. This is actually It is the most traditional ctrl s F5 method to refresh the preview, but it just opens the browser directly in the editor.
You can also use the livereload method, but it is relatively old. If you are interested, you can google it (if you can tolerate all kinds of V1 promotion, V2 promotion and other irrelevant content to occupy you Page, of course you can also use Baidu)
As a novice, I was afraid of command line tools, so when I came into contact with the "F5 refresh-free tool" (click to enter Its official website can be downloaded) I was immediately attracted by its visual interface operation. After using it to open the file in the browser, after editing the code in the editor, ctrl s can automatically refresh. It is very convenient and takes a long time. I thought it was very convenient for a while, but recently I found that it always refreshes automatically when no operation is performed, and the node position I found in the browser suddenly disappears, which makes me very nervous while staring at the screen to read the code. Surprised, I was so excited that my computer screen went black all of a sudden while I was watching a blockbuster movie. I saw that the author of the tool had not updated it for many years, so I had to reluctantly abandon this tool and find another way.
I searched all over the Internet and finally found such a tool: browser-sync
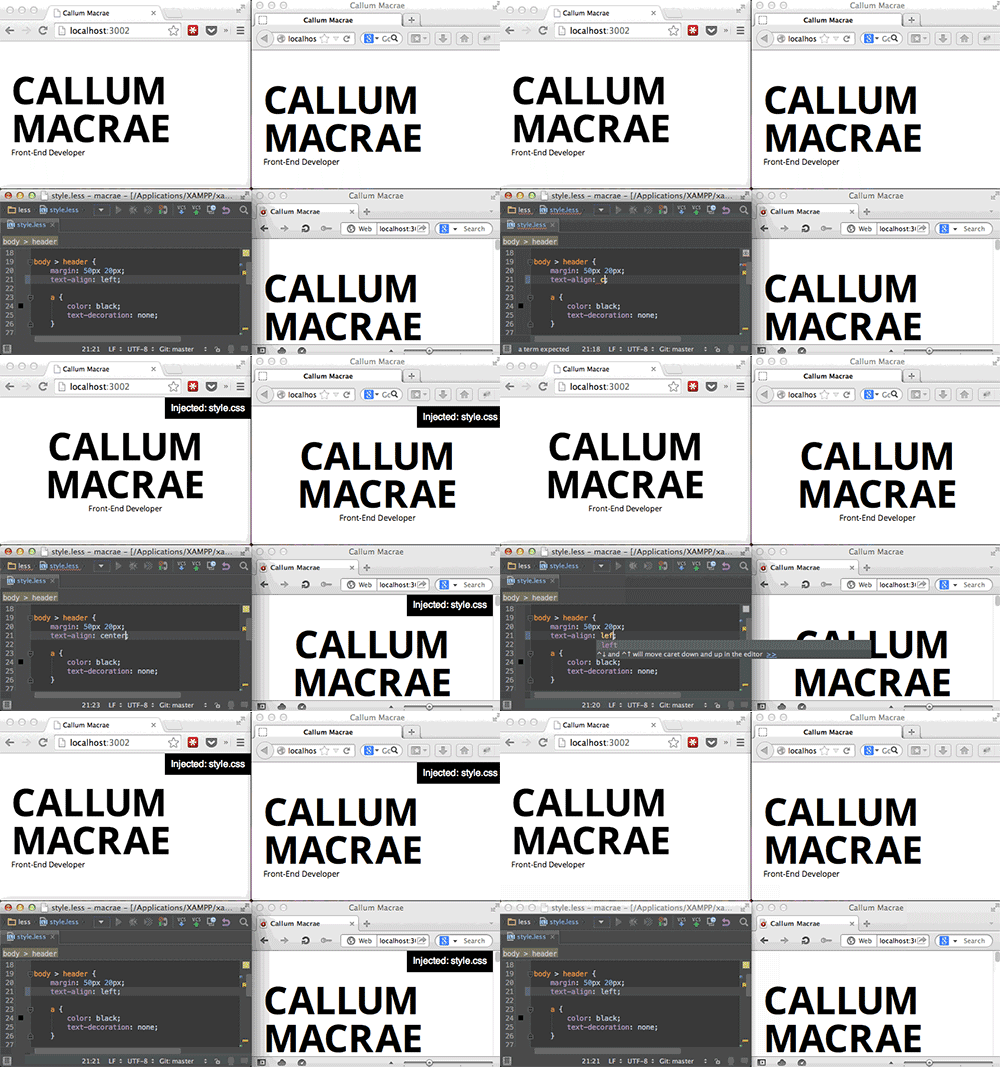
Browsersync allows the browser to respond to you in real time and quickly File changes (html, js, css, sass, less, etc.) and automatically refresh the page. More importantly, Browsersync can be debugged on PC, tablet, mobile phone and other devices at the same time. You can imagine: "Suppose there are PC, iPad, iPhone, Android and other devices on your desk, and the page you need to debug is opened at the same time. When you use browsersync, any time you save the code, the above devices will be displayed at the same time. Your changes". Whether you are a front-end or back-end engineer, using it will increase your work efficiency by 30%.

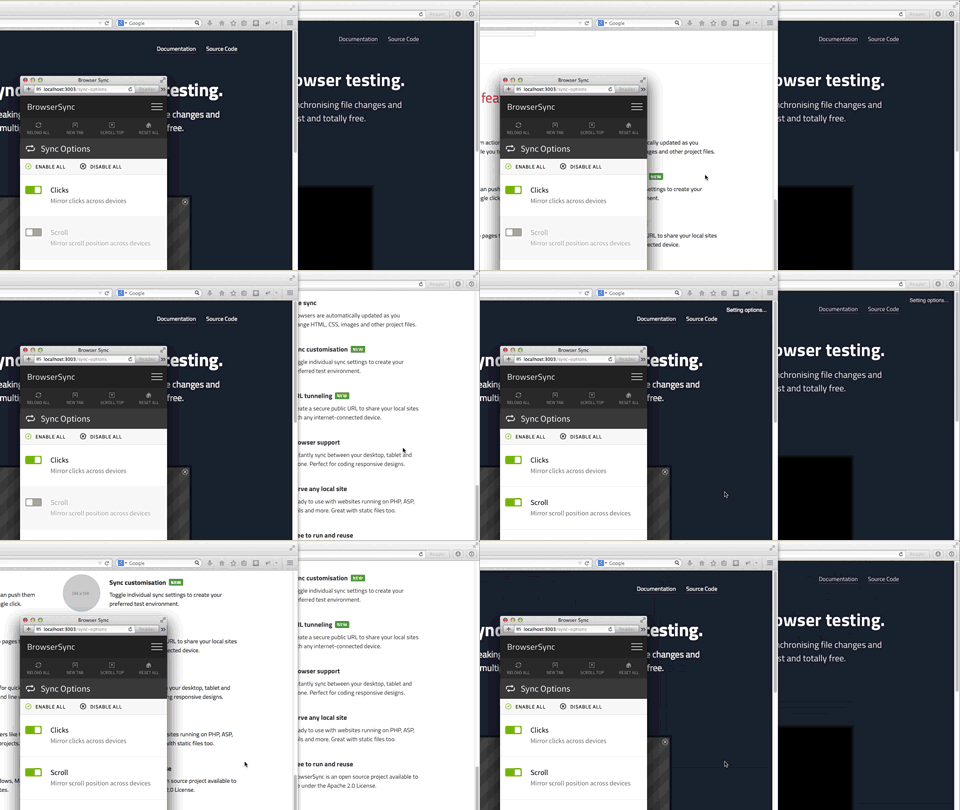
With it, you don’t have to switch back and forth between multiple browsers and multiple devices, and refresh the page frequently. What’s even more amazing is that your scrolling, clicking, and other behaviors in one browser will also be synchronized to other browsers and devices, and all of this can also be controlled through a visual interface. 
The above is the introduction on the Chinese website, which attracted me very much, so I made a decisive decision to use it! (In fact, there is a similar tool puer in China. The functions of the two are similar, but BrowserSync is more powerful. I will mainly introduce it.
1. Download and install node.js
2. Install BrowserSync
You can choose to install BrowserSync from the Node.js Package Management (NPM) repository. Open a terminal window and run the following command:
<span style="font-size: 16px;">npm install -g browser-sync<br/></span>
This command is equivalent to telling the package manager to download the BrowserSync files and install them globally. You can install them in all projects (any directory ) used in.
Of course, you can also use it in combination with gulpjs or gruntjs build tools. Run the following command in the project you need to build:
<span style="font-size: 16px;">npm install --save-dev browser-sync<br/></span>
3. Start BrowserSync
A basic use is if you only want to synchronize to the browser after modifying a certain css file. Then you only need to run the command line tool, enter the project (directory), and run the corresponding command:
If you want to listen to .css files, you need to use server mode. BrowserSync will start a small server and provide a URL to view your website.
<span style="font-size: 16px;">// --files 路径是相对于运行该命令的项目(目录)browser-sync start --server --files "css/*.css"<br/></span>
If you need to monitor multiple types of files, you only need to separate them with commas. For example, we add another .html file
<span style="font-size: 16px;">// --files 路径是相对于运行该命令的项目(目录)browser-sync start --server --files "css/*.css, *.html"// 如果你的文件层级比较深,您可以考虑使用 **(表示任意目录)匹配,任意目录下任意.css 或 .html文件。browser-sync start --server --files "**/*.css, **/*.html"<br/></span>
We have made a static example demonstration. You can download the sample package. You can unzip the file in any directory with any drive letter. It cannot be Chinese path. Open your command line tool, go to the BrowsersyncExample directory, and run one of the following commands. Browsersync will create a local server and automatically open your browser to http://localhost:3000, which will be displayed in the command line tool. If you encounter a prompt like "can not GET/", it means that you do not have an index.html file in the current folder. If you want to view a certain html5.html file under the css folder in the current directory, you need to change the access address to: http://localhost:3000/css/html5.html, so that you can access it normally.
You can also view the Browsersync static example video: This video demonstrates how to use it
<span style="font-size: 16px;">// 监听css文件<br/>browser-sync start --server --files "css/*.css"<br/>// 监听css和html文件<br/>browser-sync start --server --files "css/*.css, *.html"<br/></span>
If you already have another local server environment PHP or similar , you need to use proxy mode. BrowserSync will view your website through the proxy URL (localhost:3000).
<span style="font-size: 16px;">// 主机名可以是ip或域名browser-sync start --proxy "主机名" "css/*.css"<br/></span>
在本地创建了一个PHP服务器环境,并通过绑定Browsersync.cn来访问本地服务器,使用以下命令方式,Browsersync将提供一个新的地址localhost:3000来访问Browsersync.cn,并监听其css目录下的所有css文件。
<span style="font-size: 16px;">browser-sync start --proxy "Browsersync.cn" "css/* .css"<br/></span>
我们建议您结合gulp或grunt来使用,我们这里有详细说明Gulp文档、Grunt文档。如果您还没有使用gulp或grunt,那么可以通过以上方式创建Browsersync
鉴于browser-sync中文网站上给出的教程已经很去那面细致了,我就照搬了部分过来,但是实际使用browser-sync之后,估计你会发现,每次启动都要打开git bash或者其他命令窗工具,输入
<span style="font-size: 16px;">browsersync start --server --file "/.html,/*.css"<br/></span>
命令行的方法太冗长,所以我就研究了下搭配gulp使用的方法,实际证明官方推荐的方法确实蛮省劲儿的,但是他们没有给出具体详细的设置方法,我在这里写点更为详细的方法好了:
肯定有对<span style="font-size: 16px;">gulp</span>工具不是很熟悉的人看这篇文,一次都没接触过也不用怕,他就像个大管家,是来统筹管理前端各类比较杂的工具的大总管,你是主人,有什么需要提前给他吩咐好,他会去让各种工具有序干活儿。所以这里可以理解为把启动browser-sync的命令交由gulp去完成,我们的目标是只要在命令框里输入个gulp就能执行browser-sync。
这里推荐一篇学习gulp的文章,注意学习其中对于命令行参数的解释
在上面的教程中的gulpfile.js文件中写好如下内容:
<span style="font-size: 16px;">var gulp = require('gulp');<br/>var browserSync = require('browser-sync').create();<br/> <br/>// Static server<br/>gulp.task('browser-sync', function() {<br/> var files = [<br/> '**/*.html',<br/> '**/*.css',<br/> '**/*.js'<br/> ];<br/> browserSync.init(files,{<br/> server: {<br/> baseDir: "./"<br/> }<br/> });<br/>});<br/> <br/>// Domain server<br/>//gulp.task('browser-sync', function() {<br/>// browserSync.init({<br/>// proxy: "yourlocal.dev"<br/>// });<br/>//});<br/>gulp.task('default',['browser-sync']); //定义默认任务<br/></span>上面的代码中Domain server部分是针对启用了本地服务器的设置方法,注意proxy: <span style="font-size: 16px;">"yourlocal.dev"</span> 中的<span style="font-size: 16px;">dev</span>有很重要的作用哦!下面引用一段stackoverflow上人们的评论看下
然后重新打开命令行工具,键入“gulp",然后回车,稍等会儿,看看是不是就能打开browser-sync了?
这里其实就是把browser-sync设置为了gulp的默认任务了而已,等你需要用到gulp调用其他工具的时候,可以再作修改。
The above is the detailed content of A small summary of real-time refresh (timely preview) tools, including gulp+browser-sync setting methods. For more information, please follow other related articles on the PHP Chinese website!
 What does independent direct connection mean?
 HTML space setting method
 location.assign
 What are the uses of mysql
 What are the mysql update statements?
 How to solve the problem that Ethernet cannot connect to the internet
 What are the big data storage solutions?
 Three triggering methods of sql trigger
 How to implement instant messaging on the front end