Basic tutorial on operating MySQL database in Node.js
This article brings you a basic tutorial on operating the MySQL database in Node.js. It has certain reference value. Friends in need can refer to it. I hope it will be helpful to you.
This article is a basic tutorial on using the npm module mysql to operate the MySQL database. It does not involve the installation and configuration of MySQL. If MySQL is not installed on the computer, It is recommended to install integrated environments such as WAMP and XAMPP. This article also uses the lightweight Node.js framework Koa to build a web program in order to simulate project scenarios through front-end browser requests. You can easily read this article without mastering the syntax of the Koa framework.
Initialize the project
Create the project directory and use npm initAfter initializing the project, perform the following operations:
Install dependencies
npm install mysql koa koa-router
Create index.js
// index.js

const Koa = require('koa');
const Router = require('koa-router');
const mysql = require('mysql');

const app = new Koa();
const router = new Router();

const connection = mysql.createConnection({
  host: 'localhost', // 填写你的mysql host
  user: 'root', // 填写你的mysql用户名
  password: '123456' // 填写你的mysql密码
})

connection.connect(err => {
  if(err) throw err;
  console.log('mysql connncted success!');
})

router.get('/', ctx => {
  ctx.body = 'Visit index';
})
app.use(router.routes());

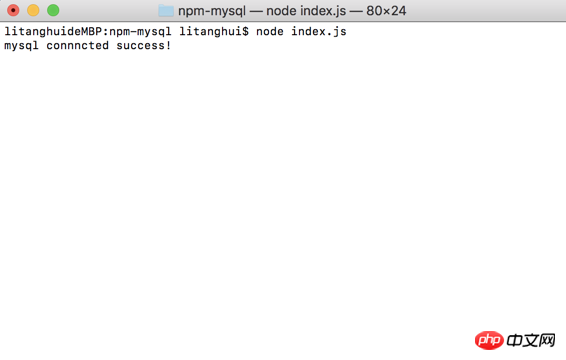
app.listen(3000);Execute node index.js in the shell. When you see mysql connected success! printed in the shell, it indicates that the MySQL database connection is successful.
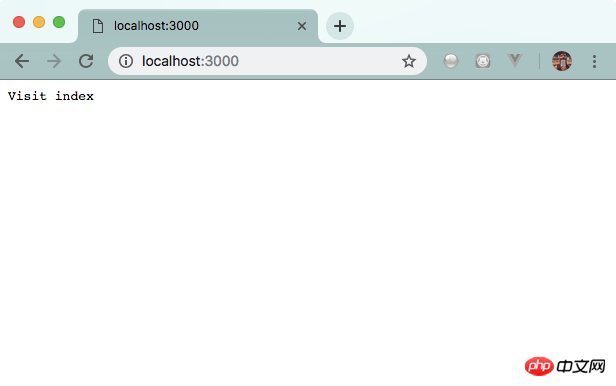
Open the browser and visit localhost:3000. When you see Visit index displayed on the screen, the table name Project initialization was successful.
Database operation
Create database
When accessing /createdb, create a mysqlkoa database, code As follows:
router.get('/createdb', ctx => {
  return new Promise(resolve => {
    const sql = `CREATE DATABASE mysqlkoa`;

    connection.query(sql, (err) => {
      if (err) throw err;
      ctx.body = {
        code: 200,
        msg: `create database mysqlkoa success!`
      }
      resolve();
    });
  })
})Re-execute node index.js, and use the browser to access localhost:3000/createdb
<img src="/static/imghw/default1.png" data-src="https://img.php.cn//upload/image/332/781/973/1540792367149822.png" class="lazy" title="1540792367149822.png" alt="Basic tutorial on operating MySQL database in Node.js">
Create a data table
For convenience, we directly use the database we just created when connecting. We need to add the database:mysqlkoa configuration item in mysql.createConnection.
const connection = mysql.createConnection({
  host: 'localhost',
  user: 'root',
  password: '123456',
  database: 'mysqlkoa' // 添加该列
})When accessing /createtable, we create a data table fe_frame, which is used to save the data of the front-end frame:
router.get('/createtable', ctx => {
  return new Promise(resolve => {
    const sql = `CREATE TABLE fe_frame(
      id INT(11) AUTO_INCREMENT PRIMARY KEY,
      name VARCHAR(255),
      author VARCHAR(255)
    )`;
    connection.query(sql, (err ,results, filelds) => {
      if (err) throw err;
      ctx.body = {
        code: 200,
        msg: `create table of fe_frame success!`
      }
      resolve();
    })
  })
})Re-execute node index.js and use the browser to access localhost :3000/createtable
<img src="/static/imghw/default1.png" data-src="https://img.php.cn//upload/image/332/781/973/1540792367149822.png" class="lazy" title="1540792367149822.png" alt="Basic tutorial on operating MySQL database in Node.js">
Insert data
Insert a single piece of data
When accessing/insert, used to insert a single piece of data:
router.get('/insert', ctx => {
  return new Promise(resolve => {
    const sql = `INSERT INTO fe_frame(name, author)
    VALUES('vue', 'Evan')`;
    connection.query(sql, (err) => {
      if (err) throw err;
      ctx.body = {
        cde: 200,
        msg: `insert data to fe_frame success!`
      }
      resolve();
    })
  })
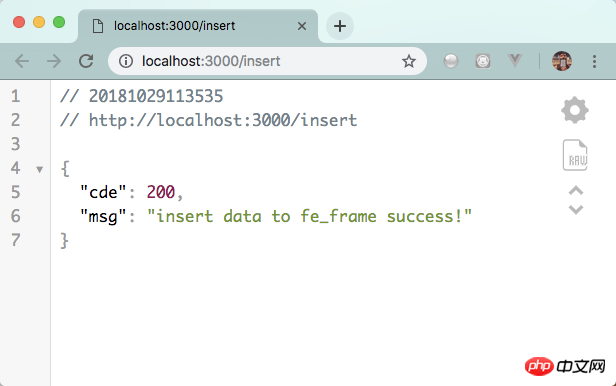
})Re-execute node index.js, and use the browser to access localhost:3000/insert
Insert multiple pieces of data
When accessing /insertmulti, it is used to insert multiple pieces of data:
router.get('/insertmulti', ctx => {
  return new Promise(resolve => {
    const sql = `INSERT INTO fe_frame(name, author)
    VALUES ?`;
    const values = [
      ['React', 'Facebook'],
      ['Angular', 'Google'],
      ['jQuery', 'John Resig']
    ];
    connection.query(sql, [values], (err, result) => {
      if (err) throw err;
      ctx.body = {
        code: 200,
        msg: `insert ${result.affectedRows} data to fe_frame success!`
      }
      resolve();
    })
  })
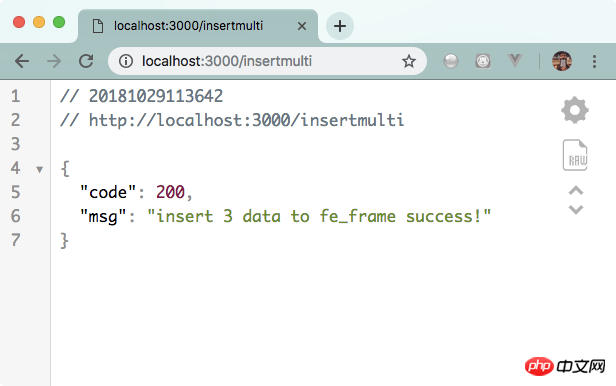
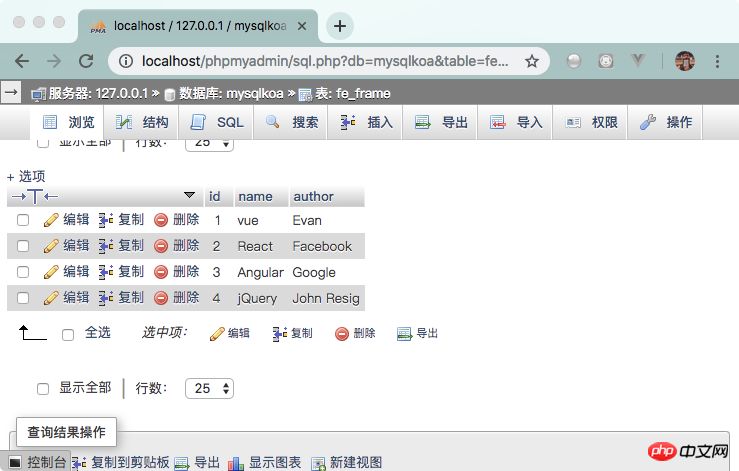
})Re-execute node index.js and use Browser access localhost:3000/insertmulti
Use phpMyAdmin to access, you can see that the mysqlkoa table is as follows
Delete data
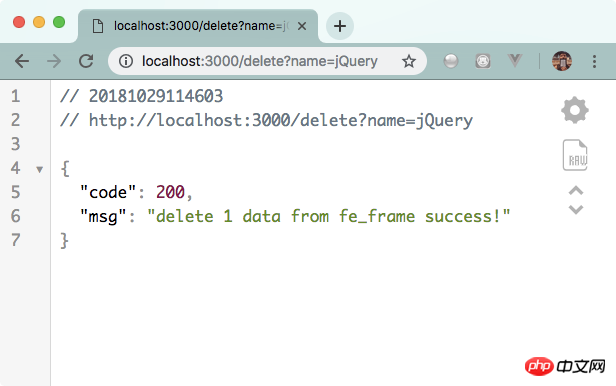
When accessing /delete, delete the corresponding row. We use the request parameter name to specify which frame to delete, and use ctx.query.name to obtain it on the server side. The code is as follows:
router.get('/delete', ctx => {
  return new Promise(resolve => {
    const name = ctx.query.name;
    const sql = `DELETE FROM fe_frame WHERE name = '${name}'`;
    connection.query(sql, (err, result) => {
      if (err) throw err;
      ctx.body = {
        code: 200,
        msg: `delete ${result.affectedRows} data from fe_frame success!`
      };
      resolve();
    })
  })
})Re-execute node index.js, and use the browser to access http://localhost: 3000/delete?name=jQuery
Modify data
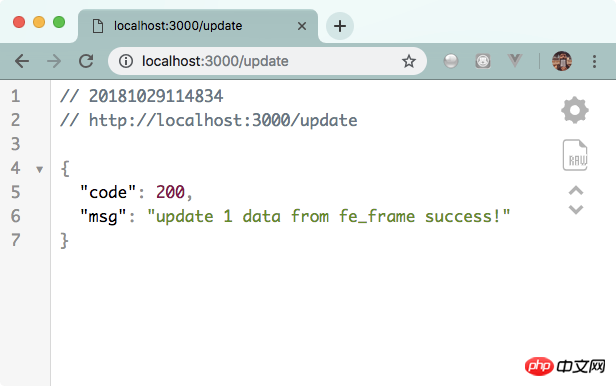
When accessing /update, the author of the updated vue framework is named Evan You, the code is as follows:
router.get('/update', ctx => {
  return new Promise(resolve => {
    const sql =  `UPDATE fe_frame SET author = 'Evan You' WHERE NAME = 'vue'`;
    connection.query(sql, (err, result) => {
      if (err) throw err;
      ctx.body = {
        code: 200,
        msg: `update ${result.affectedRows} data from fe_frame success!`
      };
      resolve();
    })
  })
})Re-execute node index.js, and use the browser to access http://localhost:3000/update
Find data
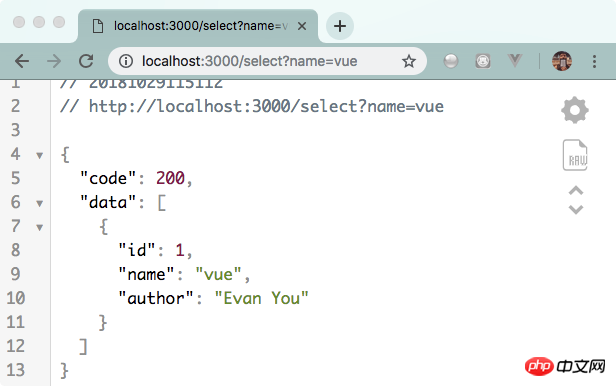
When accessing /select, obtain items that meet the conditions of the frame name in the request parameters. The code is as follows:
router.get('/select', ctx => {
  return new Promise(resolve => {
    let name = ctx.query.name;
    const sql = `SELECT * FROM fe_frame WHERE name = '${name}'`;
    connection.query(sql, (err, result) => {
      if (err) throw err;
      ctx.body = {
        code: 200,
        data: result
      }
      resolve();
    })
  })
})Re-execute node index.js, and Use a browser to access http://localhost:3000/select?name=vue
The above is the detailed content of Basic tutorial on operating MySQL database in Node.js. For more information, please follow other related articles on the PHP Chinese website!

Hot AI Tools

Undresser.AI Undress
AI-powered app for creating realistic nude photos

AI Clothes Remover
Online AI tool for removing clothes from photos.

Undress AI Tool
Undress images for free

Clothoff.io
AI clothes remover

Video Face Swap
Swap faces in any video effortlessly with our completely free AI face swap tool!

Hot Article

Hot Tools

Notepad++7.3.1
Easy-to-use and free code editor

SublimeText3 Chinese version
Chinese version, very easy to use

Zend Studio 13.0.1
Powerful PHP integrated development environment

Dreamweaver CS6
Visual web development tools

SublimeText3 Mac version
God-level code editing software (SublimeText3)

Hot Topics
 1387
1387
 52
52
 PHP and Vue: a perfect pairing of front-end development tools
Mar 16, 2024 pm 12:09 PM
PHP and Vue: a perfect pairing of front-end development tools. In today's era of rapid development of the Internet, front-end development has become increasingly important. As users have higher and higher requirements for the experience of websites and applications, front-end developers need to use more efficient and flexible tools to create responsive and interactive interfaces. As two important technologies in the field of front-end development, PHP and Vue.js can be regarded as perfect tools when paired together. This article will explore the combination of PHP and Vue, as well as detailed code examples to help readers better understand and apply these two
 Questions frequently asked by front-end interviewers
Mar 19, 2024 pm 02:24 PM
In front-end development interviews, common questions cover a wide range of topics, including HTML/CSS basics, JavaScript basics, frameworks and libraries, project experience, algorithms and data structures, performance optimization, cross-domain requests, front-end engineering, design patterns, and new technologies and trends. . Interviewer questions are designed to assess the candidate's technical skills, project experience, and understanding of industry trends. Therefore, candidates should be fully prepared in these areas to demonstrate their abilities and expertise.
 Simple JavaScript Tutorial: How to Get HTTP Status Code
Jan 05, 2024 pm 06:08 PM
JavaScript tutorial: How to get HTTP status code, specific code examples are required. Preface: In web development, data interaction with the server is often involved. When communicating with the server, we often need to obtain the returned HTTP status code to determine whether the operation is successful, and perform corresponding processing based on different status codes. This article will teach you how to use JavaScript to obtain HTTP status codes and provide some practical code examples. Using XMLHttpRequest
 Is Django front-end or back-end? check it out!
Jan 19, 2024 am 08:37 AM
Django is a web application framework written in Python that emphasizes rapid development and clean methods. Although Django is a web framework, to answer the question whether Django is a front-end or a back-end, you need to have a deep understanding of the concepts of front-end and back-end. The front end refers to the interface that users directly interact with, and the back end refers to server-side programs. They interact with data through the HTTP protocol. When the front-end and back-end are separated, the front-end and back-end programs can be developed independently to implement business logic and interactive effects respectively, and data exchange.
 Exploring Go language front-end technology: a new vision for front-end development
Mar 28, 2024 pm 01:06 PM
As a fast and efficient programming language, Go language is widely popular in the field of back-end development. However, few people associate Go language with front-end development. In fact, using Go language for front-end development can not only improve efficiency, but also bring new horizons to developers. This article will explore the possibility of using the Go language for front-end development and provide specific code examples to help readers better understand this area. In traditional front-end development, JavaScript, HTML, and CSS are often used to build user interfaces
 Django: A magical framework that can handle both front-end and back-end development!
Jan 19, 2024 am 08:52 AM
Django: A magical framework that can handle both front-end and back-end development! Django is an efficient and scalable web application framework. It is able to support multiple web development models, including MVC and MTV, and can easily develop high-quality web applications. Django not only supports back-end development, but can also quickly build front-end interfaces and achieve flexible view display through template language. Django combines front-end development and back-end development into a seamless integration, so developers don’t have to specialize in learning
 Combination of Golang and front-end technology: explore how Golang plays a role in the front-end field
Mar 19, 2024 pm 06:15 PM
Combination of Golang and front-end technology: To explore how Golang plays a role in the front-end field, specific code examples are needed. With the rapid development of the Internet and mobile applications, front-end technology has become increasingly important. In this field, Golang, as a powerful back-end programming language, can also play an important role. This article will explore how Golang is combined with front-end technology and demonstrate its potential in the front-end field through specific code examples. The role of Golang in the front-end field is as an efficient, concise and easy-to-learn
 How to get HTTP status code in JavaScript the easy way
Jan 05, 2024 pm 01:37 PM
Introduction to the method of obtaining HTTP status code in JavaScript: In front-end development, we often need to deal with the interaction with the back-end interface, and HTTP status code is a very important part of it. Understanding and obtaining HTTP status codes helps us better handle the data returned by the interface. This article will introduce how to use JavaScript to obtain HTTP status codes and provide specific code examples. 1. What is HTTP status code? HTTP status code means that when the browser initiates a request to the server, the service


