What is PS
PS stands for Adobe Photoshop. It is an image processing software developed and distributed by Adobe Systems. It is mainly responsible for processing digital images composed of pixels. Its functions can be divided into image editing, image synthesis, and proofreading. Color production and other parts.

The operating environment of this article: Windows 7 system, Dell G3 computer, Adobe Photoshop CS6.
PS mainly processes digital images composed of pixels, and uses a variety of drawing tools to edit images to create more beautiful effects
Everyone is familiar with PS. In fact, it The full name is Adobe Photoshop. This is a very powerful design software. It mainly includes a large number of tools, but sometimes it is difficult to use. Today, in this article, I will introduce in detail how to create beautiful and eye-catching images through Photoshop. Patterns, etc. I hope this helps.
In order to help you get started quickly with PS, the following article will introduce to you what PS is and the commonly used tools of PS
The meaning of PS
PS stands for Adobe Photoshop. It is an image processing software developed and distributed by Adobe Systems. It is mainly responsible for processing digital images composed of pixels. Its functions can be divided into image editing, image synthesis, color correction and color production. and other parts. Among them, image editing is the basis of image processing. It can perform various transformations on images, such as enlarging, reducing, and rotating; it can also copy, repair, and modify images, etc.
Photoshop has been continuously launching new versions since its release. Adobe Photoshop CS was launched in 2003, and then the latest version Photoshop CC was launched in 2013, with more and more comprehensive functions. And the application fields are also very broad. It can be said that all walks of life are now inseparable from ps
Adobe supports Windows operating system, Android system and Mac OS, but it does not support Linux system. If you are using Linux system If so, you need to run Photoshop through Wine.
Usage of PS
1. Layer tool
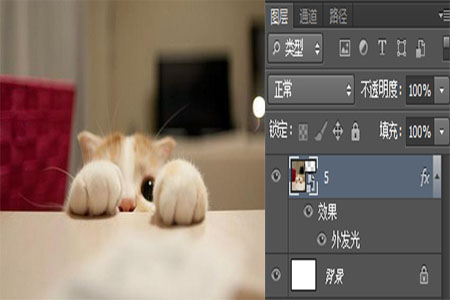
Usage: Layers can be used for images, text , brush strokes, background colors, patterns and filters.
Layers can be thought of as templates that are layered on top of each other. They can be used to create the final drawing and each worksheet can be modified independently without affecting the entire project. This can save a lot of time editing individual aspects of the drawing. Element

It has its own module located in the lower right corner of the Photoshop screen, it can also be accessed by clicking "Layers" in the top menu bar
Add or remove layers: From the top menu bar, select Layers > New > Layers
Select layers: Select specific parts of the image to edit, each Layers have an "eye" symbol next to them: click this symbol to turn the eye on and off, thus toggling the visibility of that layer as you work.
Copy layer: Select the layer and drag it to the "Create New Layer" button; right-click the layer to select "Copy Layer" or "Copy Group"
2. Color and Swatch Tool
Purpose: You can use, modify, copy and save custom colors for content
It is located in the upper right corner of the Photoshop screen. own module.
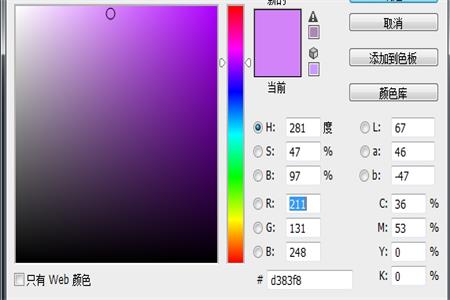
Create your own custom colors: You can adjust it to create your own custom colors by opening the color picker by double-clicking on the top box in the color module or in the menu on the left
If single Click Add to Swatches to add any color you create to the Swatches.

3. Custom brushes and brush tools
Purpose: Using the brush settings, you can change the size of the brush strokes , shapes and transparency to achieve many different visual effects.
It is located on the left toolbar.
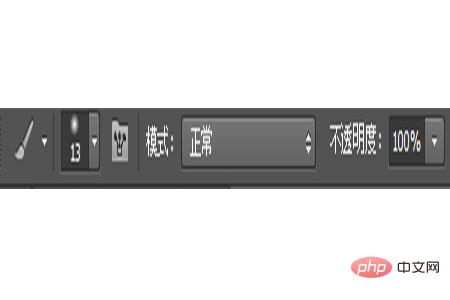
After clicking the "Brush" tool icon, all settings and brush options will pop up at the top of the screen. These settings allow changing brush size, opacity, etc.

4. Selection tool
Select individual elements, the entire graphic, and determine what to copy, cut, and paste into the graphic content.
It is located on the left toolbar.
How to select an image to insert a graphic into:
Open the image you want to use in Photoshop and use the Selection Tool to determine how many images you want to copy. Once an area of the image is selected, simply copy it, then open a tab for the current project and paste it as a new layer, or you can select Free Transform to scale, rotate, move, and flip

5. Eraser
What it does: Change the size and hardness of the eraser tip to achieve various effects, such as blending and fading. Background Eraser uses color differences to help you remove unwanted background areas from your images.
Where it's located: Toolbar on the left.
After clicking the "eraser" icon, all settings will pop up at the top of the screen. These settings can change eraser size, hardness, and other aspects of the tool. It only works on specific selected layers. Before you start erasing, make sure you have the desired layer selected.

6. Cropping tool
Use: Use the "Crop" tool to crop the image, select the area and Just cut it out.
It is located on the left toolbar.
Select the icon indicated in the screenshot from the side menu bar and drag the box over the area you want to crop. To adjust the crop box, simply click and drag the small anchor boxes on the sides and corners of the crop box.

7. Fill Tool
Purpose: Fill any solid area with the selected color "Gradient" in the "Fill" tool Tool allows you to create a beautiful, faded background effect based on a color of your choice.
It's on the top menu bar, select "Layer" > "New Fill Layer"
Fill the solid area with color:
First, select the solid color you want to use Filled layer. Then, select Layers > New Fill Layer > Solid Color from the top menu bar... Then, the New Layer window will pop up and prompt you to name the new color fill layer. Don't worry about picking the color you want at that point - just name the layer and press "OK."

8. Custom fonts and text tools
Purpose: Add custom fonts to the database, you can access advanced Font settings that give your text some serious style.
It is located on the left toolbar, near the bottom.
After clicking the "Text" tool icon, all settings and font options will pop up at the top of the screen. These settings allow you to change characters, font size, and spacing between characters, height, width, color, and style. Please be sure to select the layer of the required text for editing

Summary: The above is the entire content of this article, I hope it will be helpful to everyone learning PS.
【Recommended course: PS Tutorial】
The above is the detailed content of What is PS. For more information, please follow other related articles on the PHP Chinese website!

Hot AI Tools

Undresser.AI Undress
AI-powered app for creating realistic nude photos

AI Clothes Remover
Online AI tool for removing clothes from photos.

Undress AI Tool
Undress images for free

Clothoff.io
AI clothes remover

Video Face Swap
Swap faces in any video effortlessly with our completely free AI face swap tool!

Hot Article

Hot Tools

Notepad++7.3.1
Easy-to-use and free code editor

SublimeText3 Chinese version
Chinese version, very easy to use

Zend Studio 13.0.1
Powerful PHP integrated development environment

Dreamweaver CS6
Visual web development tools

SublimeText3 Mac version
God-level code editing software (SublimeText3)

Hot Topics
 1387
1387
 52
52
 ps serial number cs5 permanently free 2020
Jul 13, 2023 am 10:06 AM
PS serial numbers cs5 permanent free 2020 include: 1. 1330-1384-7388-4265-2355-8589 (Chinese); 2. 1330-1409-7892-5799-0412-7680 (Chinese); 3. 1330-1616-1993 -8375-9492-6951 (Chinese); 4. 1330-1971-2669-5043-0398-7801 (Chinese), etc.
 What to do if ps installation cannot write registry value error 160
Mar 22, 2023 pm 02:33 PM
Solution to error 160 when ps installation cannot write registry value: 1. Check whether there is 2345 software on the computer, and if so, uninstall the software; 2. Press "Win+R" and enter "Regedit" to open the system registry, and then Find "Photoshop.exe" and delete the Photoshop item.
 How to delete selected area in ps
Aug 07, 2023 pm 01:46 PM
Steps to delete the selected area in PS: 1. Open the picture you want to edit; 2. Use the appropriate tool to create a selection; 3. You can use a variety of methods to delete the content in the selection, use the "Delete" key, use the "Healing Brush Tool" , use "Content-Aware Fill", use the "Stamp Tool", etc.; 4. Use tools to repair any obvious traces or defects to make the picture look more natural; 5. After completing editing, click "File" > in the menu bar "Save" to save the editing results.
 Introduction to the process of extracting line drawings in PS
Apr 01, 2024 pm 12:51 PM
1. Open the software and import a piece of material, as shown in the picture below. 2. Then ctrl+shift+u to remove color. 3. Then press ctrl+J to copy the layer. 4. Then reverse ctrl+I, and then set the layer blending mode to Color Dodge. 5. Click Filter--Others--Minimum. 6. In the pop-up dialog box, set the radius to 2 and click OK. 7. Finally, you can see the line draft extracted.
 What should I do if the PS interface font is too small?
Dec 01, 2022 am 11:31 AM
How to fix the PS interface font that is too small: 1. Open PS, click the "Edit" button on the top menu bar of PS to expand the editing menu; 2. Click the "Preferences" button in the expanded editing menu, and then click "Interface. .." button; 3. In the interface settings, set the user interface font size to "Large", set the UI scaling to "200%" and save the settings, then restart PS to take effect.
 How to automate tasks using PowerShell
Feb 20, 2024 pm 01:51 PM
If you are an IT administrator or technology expert, you must be aware of the importance of automation. Especially for Windows users, Microsoft PowerShell is one of the best automation tools. Microsoft offers a variety of tools for your automation needs, without the need to install third-party applications. This guide will detail how to leverage PowerShell to automate tasks. What is a PowerShell script? If you have experience using PowerShell, you may have used commands to configure your operating system. A script is a collection of these commands in a .ps1 file. .ps1 files contain scripts executed by PowerShell, such as basic Get-Help
 Complete list of ps shortcut keys
Mar 11, 2024 pm 04:31 PM
1. Ctrl + N: Create a new document. 2. Ctrl + O: Open a file. 3. Ctrl + S: Save the current file. 4. Ctrl + Shift + S: Save as. 5. Ctrl + W: Close the current document. 6. Ctrl + Q: Exit Photoshop. 7. Ctrl + Z: Undo. 8. Ctrl + Y: Redo. 9. Ctrl + X: Cut the selected content. 10. Ctrl + C: Copy the selected content.
 What is the ps curve shortcut key?
Aug 22, 2023 am 10:44 AM
The ps curve shortcut key is Ctrl+M. Other curve shortcut keys: 1. Convert to point control curve, Alt+Shift+Ctrl+T; 2. Automatically align the curve, Alt+Shift+Ctrl+O; 3. Restore the default curve, Ctrl+Alt+Shift+R; 4. Copy the curve, Ctrl+Alt+Shift+C; 5. Paste the curve, Ctrl+Alt+Shift+V; 6. Adjust the curve slope, Shift+up and down arrows; 7. Adjust the curve brightness, Shift+left and right arrows


