How to draw a rectangle using HTML5 canvas
How to use HTML5 canvas to draw a rectangle: first create the corresponding HTML sample file; then draw a rectangle through the rect method of the Canvas context, with code statements such as "canvas.getContext('2d');".

To draw a rectangle using HTML5 canvas, we need to use the rect() method of the Canvas context. Next let's take a look at the specific code implementation.

Let’s look at a specific example
The code is as follows
<!DOCTYPE html>
<html>
<head>
<meta http-equiv="Content-Type" content="text/html; charset=utf-8" />
<title></title>
<meta charset="utf-8" />
<script type="text/javascript">
function draw() {
var canvas = document.getElementById('SimpleCanvas');
if ( ! canvas || ! canvas.getContext ) {
return false;
}
var cx = 360;
var cy = 400;
var radius = 36;
var context = canvas.getContext('2d');
context.beginPath();
context.rect(240, 80, 160, 80);
context.fillStyle = 'peachpuff';
context.fill();
context.lineWidth = 2;
context.strokeStyle = 'coral';
context.stroke();
}
</script>
</head>
<body onload="draw()" style="background-color:#D0D0D0;">
<canvas id="SimpleCanvas" width="640" height="480" style="background-color:#FFFFFF;"></canvas>
<div>Canvas Demo</div>
</body>
</html>Instructions:
The Canves object is obtained by the document.getElementById() method. The Canves object calls the getContext() method. The process of obtaining the canvas context is processed together with drawing on the canvas.
Call the context's beginPath() method to start the path. Use rect() to draw a rectangle. The first parameter of rect and the second parameter of rect are the X, Y coordinates of the upper left corner of the rectangle. The third parameter is the width of the drawn rectangle, and the fourth parameter is the height of the drawn rectangle.
Use the fill() method to fill the interior and the stroke method to draw the outline.
Run results
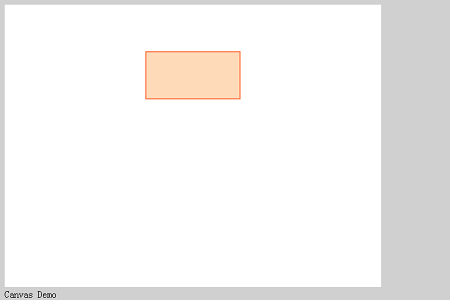
Use a web browser to execute the created HTML file. The effect shown below will be displayed.

The rectangle in the above example is filled inside. Let’s take a look at The rectangle without internal filling
The code is as follows
<!DOCTYPE html>
<html>
<head>
<meta http-equiv="Content-Type" content="text/html; charset=utf-8" />
<title></title>
<meta charset="utf-8" />
<style type="text/css">
<!--
/*背景色和背景图*/
.canvas{
background-color:#FFFFFF;
background-image: url("img/t.jpg");
}
-->
</style>
<script type="text/javascript">
function draw() {
var canvas = document.getElementById('SimpleCanvas');
if ( ! canvas || ! canvas.getContext ) {
return false;
}
var cx = 360;
var cy = 400;
var radius = 36;
var context = canvas.getContext('2d');
context.beginPath();
context.rect(240, 80, 160, 80);
context.lineWidth = 4;
context.strokeStyle = 'coral';
context.stroke();
}
</script>
</head>
<body onload="draw()" style="background-color:#D0D0D0;">
<canvas id="SimpleCanvas" width="640" height="480" class="canvas"></canvas>
<div>Canvas Demo</div>
</body>
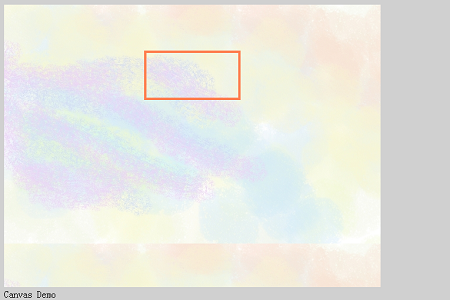
</html>Note: When drawing an image, if you do not call the fill() method and only execute the stroke() method, you can draw a rectangle without filling inside.
Running results
The following effect is displayed on the browser

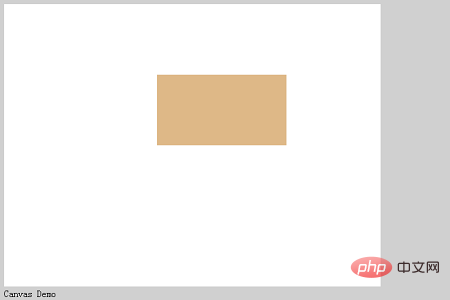
Finally we Let’s look at the drawing of a rectangle that directly fills the interior
<!DOCTYPE html>
<html>
<head>
<meta http-equiv="Content-Type" content="text/html; charset=utf-8" />
<title></title>
<meta charset="utf-8" />
<script type="text/javascript">
function draw() {
var canvas = document.getElementById('SimpleCanvas');
if ( ! canvas || ! canvas.getContext ) {
return false;
}
var cx = 360;
var cy = 400;
var radius = 36;
var context = canvas.getContext('2d');
context.beginPath();
context.rect(260, 120, 220, 120);
context.fillStyle = 'burlywood';
context.fill();
}
</script>
</head>
<body onload="draw()" style="background-color:#D0D0D0;">
<canvas id="SimpleCanvas" width="640" height="480" style="background-color:#FFFFFF;"></canvas>
<div>Canvas Demo</div>
</body>
</html>The running result is as follows

The above is the detailed content of How to draw a rectangle using HTML5 canvas. For more information, please follow other related articles on the PHP Chinese website!

Hot AI Tools

Undresser.AI Undress
AI-powered app for creating realistic nude photos

AI Clothes Remover
Online AI tool for removing clothes from photos.

Undress AI Tool
Undress images for free

Clothoff.io
AI clothes remover

AI Hentai Generator
Generate AI Hentai for free.

Hot Article

Hot Tools

Notepad++7.3.1
Easy-to-use and free code editor

SublimeText3 Chinese version
Chinese version, very easy to use

Zend Studio 13.0.1
Powerful PHP integrated development environment

Dreamweaver CS6
Visual web development tools

SublimeText3 Mac version
God-level code editing software (SublimeText3)

Hot Topics
 1376
1376
 52
52
 How do I use viewport meta tags to control page scaling on mobile devices?
Mar 13, 2025 pm 08:00 PM
The article discusses using viewport meta tags to control page scaling on mobile devices, focusing on settings like width and initial-scale for optimal responsiveness and performance.Character count: 159
 How do I handle user location privacy and permissions with the Geolocation API?
Mar 18, 2025 pm 02:16 PM
The article discusses managing user location privacy and permissions using the Geolocation API, emphasizing best practices for requesting permissions, ensuring data security, and complying with privacy laws.
 How do I use the HTML5 Drag and Drop API for interactive user interfaces?
Mar 18, 2025 pm 02:17 PM
The article explains how to use the HTML5 Drag and Drop API to create interactive user interfaces, detailing steps to make elements draggable, handle key events, and enhance user experience with custom feedback. It also discusses common pitfalls to a
 How do I use the HTML5 Page Visibility API to detect when a page is visible?
Mar 13, 2025 pm 07:51 PM
The article discusses using the HTML5 Page Visibility API to detect page visibility, improve user experience, and optimize resource usage. Key aspects include pausing media, reducing CPU load, and managing analytics based on visibility changes.
 How do I use the HTML5 WebSockets API for bidirectional communication between client and server?
Mar 12, 2025 pm 03:20 PM
This article explains the HTML5 WebSockets API for real-time, bidirectional client-server communication. It details client-side (JavaScript) and server-side (Python/Flask) implementations, addressing challenges like scalability, state management, an
 How to run the h5 project
Apr 06, 2025 pm 12:21 PM
Running the H5 project requires the following steps: installing necessary tools such as web server, Node.js, development tools, etc. Build a development environment, create project folders, initialize projects, and write code. Start the development server and run the command using the command line. Preview the project in your browser and enter the development server URL. Publish projects, optimize code, deploy projects, and set up web server configuration.
 How do I use the HTML5 Notifications API to display desktop notifications?
Mar 13, 2025 pm 07:57 PM
The article explains how to use the HTML5 Notifications API to display desktop notifications, focusing on permission requirements, customization, and browser support.
 Does H5 page production require continuous maintenance?
Apr 05, 2025 pm 11:27 PM
The H5 page needs to be maintained continuously, because of factors such as code vulnerabilities, browser compatibility, performance optimization, security updates and user experience improvements. Effective maintenance methods include establishing a complete testing system, using version control tools, regularly monitoring page performance, collecting user feedback and formulating maintenance plans.


