
When we chat with others through WeChat or QQ, there will be dialog bubbles. So how is this dialog bubble implemented? This article will introduce to you how to use CSS to create dialog bubbles that we often see. Let’s take a look at the specific content.
First let’s take a look at the effect of the dialog box we need to create
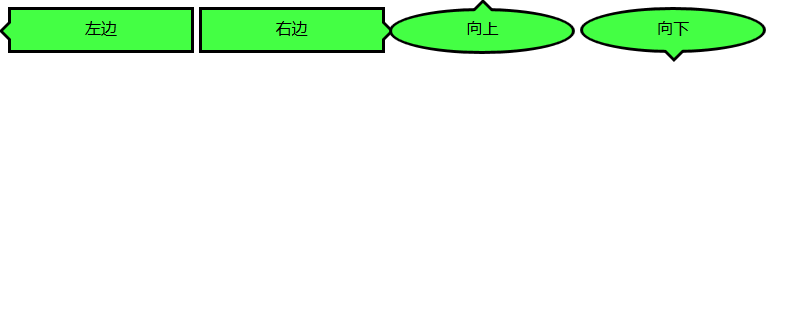
Next let’s take a look at these types of dialogue bubbles Implementation method
Let’s take a lookHow to implement a dialogue bubble with an arrow pointing to the left
We need to make a frame first
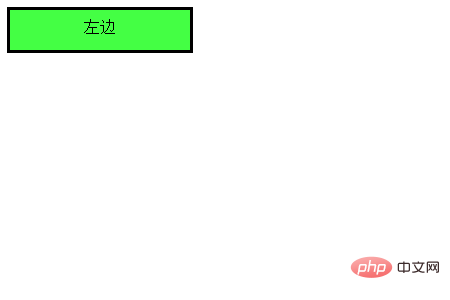
The code is as follows
HTML code
<div class="balloon-left">
左边
</div>
CSS code
 .balloon-left {
  position: relative;
  display: inline-block;
  padding: 0 15px;
  width: auto;
  min-width: 150px;
  height: 40px;
  line-height: 34px;
  text-align: center;
  background: #44FF44;
  border: 3px solid #000000;
  z-index: 0;
}Next, we use :before to make the arrow part and :after to make the arrow The side
CSS code
.balloon-left:before {
  border-style: solid;
  border-width: 10px 10px 10px 0;
  border-color: transparent #44FF44 transparent transparent;
  content: "";
  position: absolute;
  top: 50%; left: -8px;
  margin-top: -9px;
  display: block;
  width: 0px;
  height: 0px;
  z-index: 0;
}
.balloon-left:after {
  border-style: solid;
  border-width: 11px 11px 11px 0;
  border-color: transparent #000000 transparent transparent;
  content: "";
  position: absolute;
  top: 50%; left: -12px;
  margin-top: -10px;
  display: block;
  width: 0px;
  height: 0px;
  z-index: -1;
}runs as shown below
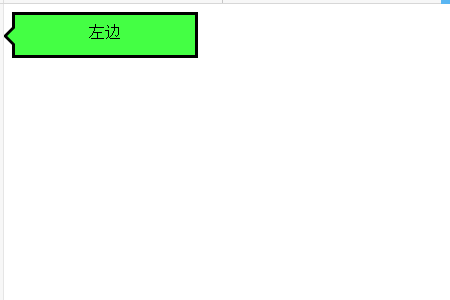
This completes the first A dialogue bubble
Let’s use the above method tomake a dialogue bubble with an arrow pointing to the right
The code is as follows
HTML code
<div class="balloon-right">
  右边
</div>
CSS code
.balloon-right {
  position: relative;
  display: inline-block;
  padding: 0 15px;
  width: auto;
  min-width: 150px;
  height: 40px;
  line-height: 34px;
  text-align: center;
  background: #44FF44;
  border: 3px solid #000000;
  z-index: 0;
}
.balloon-right:before {
  border-style: solid;
  border-width: 10px 0 10px 10px;
  border-color: transparent transparent transparent #44FF44;
  content: "";
  position: absolute;
  top: 50%; right: -8px;
  margin-top: -9px;
  display: block;
  width: 0px;
  height: 0px;
  z-index: 0;
}
.balloon-right:after {
  border-style: solid;
  border-width: 11px 0 11px 11px;
  border-color: transparent transparent transparent #000000;
  content: "";
  position: absolute;
  top: 50%; right: -12px;
  margin-top: -10px;
  display: block;
  width: 0px;
  height: 0px;
  z-index: -1;
}The effect of running the above code is as follows: it is a bubble going to the right
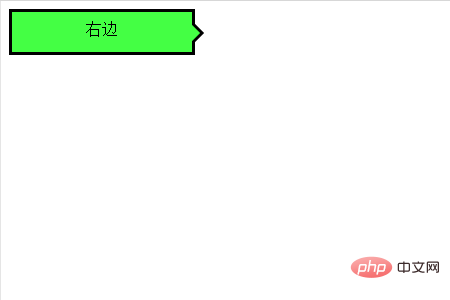
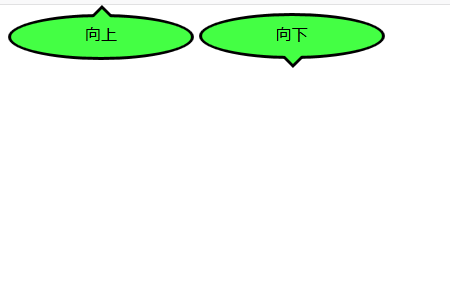
Finally let’s talk about arrows Left and right dialogue bubbles
We need to use the border-radius attribute to make the bubbles smooth
The code is as follows
HTML code
<div class="balloon-top">向上</div>
  <div class="balloon-bottom">向下</div>
CSS code
.balloon-top {
  position: relative;
  display: inline-block;
  padding: 0 15px;
  width: auto;
  min-width: 150px;
  height: 40px;
  line-height: 32px;
  text-align: center;
  background: #44FF44;
  border: 3px solid #000000;
  z-index: 0;
  border-radius: 60%;
}
.balloon-top:before {
  border-style: solid;
  border-width: 0 10px 10px 10px;
  border-color: transparent transparent #44FF44 transparent;
  content: "";
  position: absolute;
  top: -8px; left: 50%;
  margin-left: -9px;
  display: block;
  width: 0px;
  height: 0px;
  z-index: 0;
}
.balloon-top:after {
  border-style: solid;
  border-width: 0 11px 11px 11px;
  border-color: transparent transparent #000000 transparent;
  content: "";
  position: absolute;
  top: -12px; left: 50%;
  margin-left: -10px;
  display: block;
  width: 0px;
  height: 0px;
  z-index: -1;
}
.balloon-bottom {
  position: relative;
  display: inline-block;
  padding: 0 15px;
  width: auto;
  min-width: 150px;
  height: 40px;
  line-height: 34px;
  text-align: center;
  background-color: #44FF44;
  border: 3px solid #000000;
  z-index: 0;
  border-radius: 60%;
}
.balloon-bottom:before {
  content: "";
  position: absolute;
  bottom: -8px; left: 50%;
  margin-left: -9px;
  width: 0px;
  height: 0px;
  border-style: solid;
  border-width: 10px 10px 0 10px;
  border-color: #44FF44 transparent transparent transparent;
  z-index: 0;
}
.balloon-bottom:after {
  border-style: solid;
  border-width: 11px 11px 0 11px;
  border-color: #000000 transparent transparent transparent;
  content: "";
  position: absolute;
  bottom: -12px; left: 50%;
  margin-left: -10px;
  width: 0px;
  height: 0px;
  z-index: -1;
}The effect is as follows
CSS Video Tutorial column on the php Chinese website for further learning! ! !
The above is the detailed content of How to make a dialog bubble using CSS. For more information, please follow other related articles on the PHP Chinese website!