 Web Front-end
 JS Tutorial
 Ultra-detailed complete solution to cross-domain problems (with examples)
Ultra-detailed complete solution to cross-domain problems (with examples)
What this article brings to you is a very detailed and complete solution to cross-domain issues (with examples). It has certain reference value. Friends in need can refer to it. I hope it will be helpful to you.
Cross-domain, a common problem
Brief description
As a front-end rookie, I only know JSONP and CORS in cross-domain. Didn't understand it in depth. But as spring recruitment gets closer, even rookies have to flap their wings. I have carefully studied cross-domain issues in recent days and wrote this article, hoping to be helpful to developers. Before reading this article, I hope you have some knowledge of the following.
Browser Origin Policy
nodejs
iframe
docker, nginx
Why should we study cross-domain issues
Because the browser's same-origin policy stipulates that clients in a certain domain cannot read or write resources in another domain without explicit authorization. In actual development, the front-end and back-end are often separated from each other, and the front-end and back-end project deployments are often not within a server or under different ports of a server. If the front end wants to obtain the data from the back end, it must initiate a request. If it is handled properly, it will be constrained by the browser's same-origin policy. The backend can receive the request and return data, but the frontend cannot receive the data.
Multiple cross-domain methods
Cross-domain can be roughly divided into two purposes
When the front-end and back-end are separated, the front-end uses the Cross-domain
Cross-domain for front-end page communication in different domains
Cross-domain for front-end and back-end separation
Cross Origin Resource Share (CORS )
CORS is a cross-domain resource sharing solution. In order to solve cross-domain problems, by adding a series of request headers and response headers, cross-site data transmission is standardized and secure
Request The header mainly includes
| Request header | Explanation |
|---|---|
| # #Origin | The Origin header indicates the source domain name of the cross-domain request in a cross-domain request or a pre-request.|
| Access-Control-Request-Method | The Access-Control-Request-Method header is used to indicate the actual HTTP method used for cross-domain requests|
| Access-Control-Request-Headers | Access-Control-Request-Headers is used to inform the server to initiate a request in advance. The request header information that will be carried in the cross-domain request
The response header mainly includes
| Explanation | |
|---|---|
| Access-Control- The Allow-Origin header carries the allowed cross-domain request domain name after server-side verification, which can be a specific domain name or an * (indicating any domain name). | |
| The Access-Control-Expose-Headers header is used to allow response headers to be returned to cross-domain requests List, the content of the response header in the list can be accessed by the browser. | |
| Access-Control-Max-Age is used to tell the browser that the result of the pre-check request can be returned Cache time. During the cache validity period, the browser will use the cached pre-check results to determine whether to send a cross-domain request. | |
| Access-Control-Allow-Methods is used to tell the browser that it can actually send cross-domain requests , the supported request methods can be a specific method list or an * (indicating any method). |
| Method | |
|---|---|
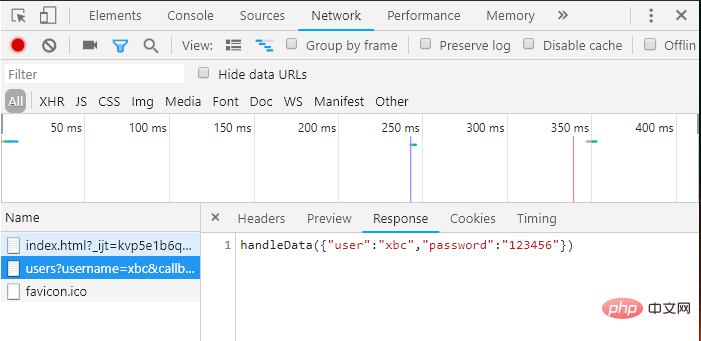
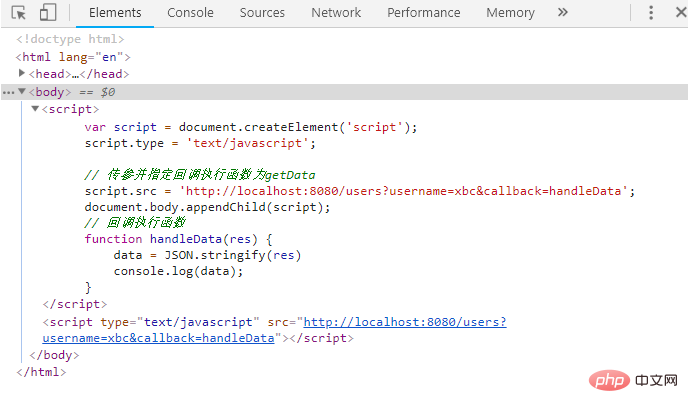
| JSONP | |
| CORS | |
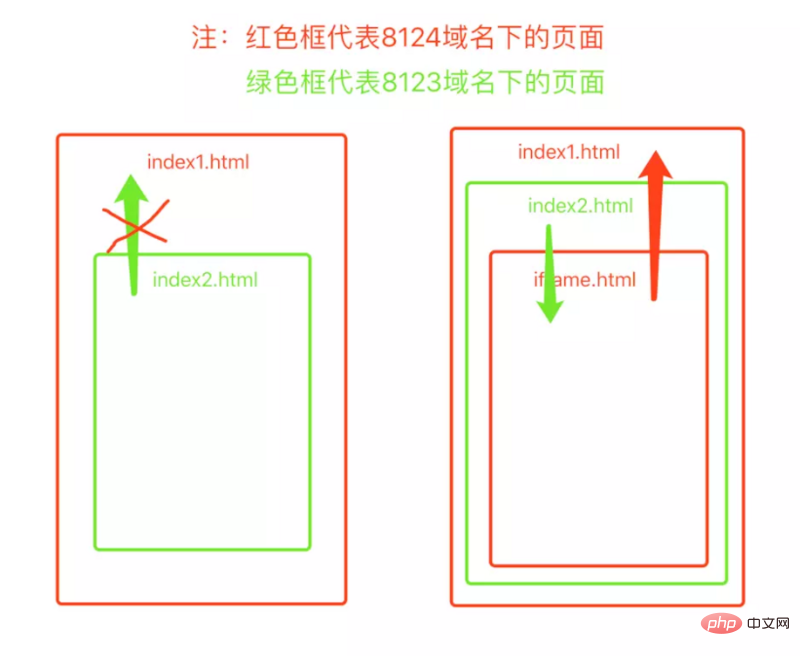
| iframe or server reverse proxy (developed in Linux environment) |
The above is the detailed content of Ultra-detailed complete solution to cross-domain problems (with examples). For more information, please follow other related articles on the PHP Chinese website!

Hot AI Tools

Undresser.AI Undress
AI-powered app for creating realistic nude photos

AI Clothes Remover
Online AI tool for removing clothes from photos.

Undress AI Tool
Undress images for free

Clothoff.io
AI clothes remover

AI Hentai Generator
Generate AI Hentai for free.

Hot Article

Hot Tools

Notepad++7.3.1
Easy-to-use and free code editor

SublimeText3 Chinese version
Chinese version, very easy to use

Zend Studio 13.0.1
Powerful PHP integrated development environment

Dreamweaver CS6
Visual web development tools

SublimeText3 Mac version
God-level code editing software (SublimeText3)

Hot Topics
 1386
1386
 52
52
 How to check whether nginx is started
Apr 14, 2025 pm 01:03 PM
How to confirm whether Nginx is started: 1. Use the command line: systemctl status nginx (Linux/Unix), netstat -ano | findstr 80 (Windows); 2. Check whether port 80 is open; 3. Check the Nginx startup message in the system log; 4. Use third-party tools, such as Nagios, Zabbix, and Icinga.
 How to configure cloud server domain name in nginx
Apr 14, 2025 pm 12:18 PM
How to configure an Nginx domain name on a cloud server: Create an A record pointing to the public IP address of the cloud server. Add virtual host blocks in the Nginx configuration file, specifying the listening port, domain name, and website root directory. Restart Nginx to apply the changes. Access the domain name test configuration. Other notes: Install the SSL certificate to enable HTTPS, ensure that the firewall allows port 80 traffic, and wait for DNS resolution to take effect.
 How to start nginx server
Apr 14, 2025 pm 12:27 PM
Starting an Nginx server requires different steps according to different operating systems: Linux/Unix system: Install the Nginx package (for example, using apt-get or yum). Use systemctl to start an Nginx service (for example, sudo systemctl start nginx). Windows system: Download and install Windows binary files. Start Nginx using the nginx.exe executable (for example, nginx.exe -c conf\nginx.conf). No matter which operating system you use, you can access the server IP
 How to check whether nginx is started?
Apr 14, 2025 pm 12:48 PM
In Linux, use the following command to check whether Nginx is started: systemctl status nginx judges based on the command output: If "Active: active (running)" is displayed, Nginx is started. If "Active: inactive (dead)" is displayed, Nginx is stopped.
 How to start nginx in Linux
Apr 14, 2025 pm 12:51 PM
Steps to start Nginx in Linux: Check whether Nginx is installed. Use systemctl start nginx to start the Nginx service. Use systemctl enable nginx to enable automatic startup of Nginx at system startup. Use systemctl status nginx to verify that the startup is successful. Visit http://localhost in a web browser to view the default welcome page.
 How to check nginx version
Apr 14, 2025 am 11:57 AM
The methods that can query the Nginx version are: use the nginx -v command; view the version directive in the nginx.conf file; open the Nginx error page and view the page title.
 How to create a mirror in docker
Apr 15, 2025 am 11:27 AM
Steps to create a Docker image: Write a Dockerfile that contains the build instructions. Build the image in the terminal, using the docker build command. Tag the image and assign names and tags using the docker tag command.
 How to solve nginx403
Apr 14, 2025 am 10:33 AM
How to fix Nginx 403 Forbidden error? Check file or directory permissions; 2. Check .htaccess file; 3. Check Nginx configuration file; 4. Restart Nginx. Other possible causes include firewall rules, SELinux settings, or application issues.


