Detailed tutorial on java environment configuration (picture and text)
This article brings you a detailed tutorial (pictures and text) on java environment configuration. It has certain reference value. Friends in need can refer to it. I hope it will be helpful to you.
Configuration of JAVA environment variables: Path, JAVA_HOME, CLASSPATH
1. Right-click My Computer, Properties, Advanced System Settings, click Environment Variables
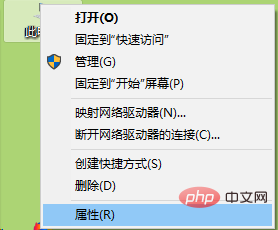

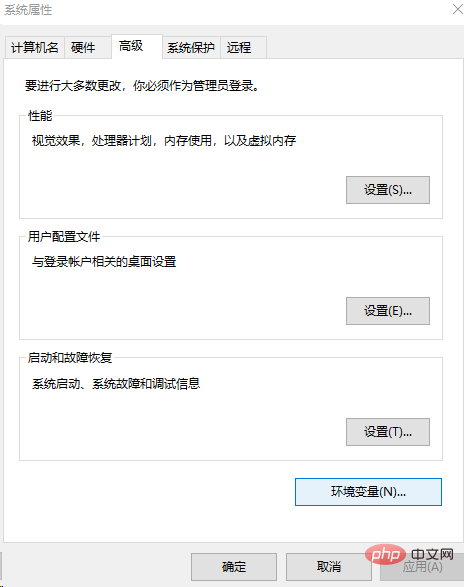
2. Then the environment variables window will pop up. Edit JAVA_HOME in the system variables. If there is not one, create a new one. , add the path of jkd, as shown in the figure

3. Configure CASSPATH, if not, create a new one, and add tool.jar and dt in the jdk lib Add .jar, be sure to add a "." in front, as shown in the figure

4. Configure the Path, and add the bin in jdk, the bin of jre in jdk, and jdk in sequence. Add the lib in and tool.jar in lib

5. Check whether the configuration is successful. Write java, javac and java - version test on the command line. The effect is as follows
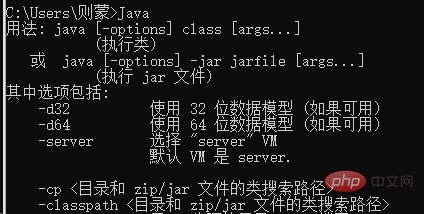
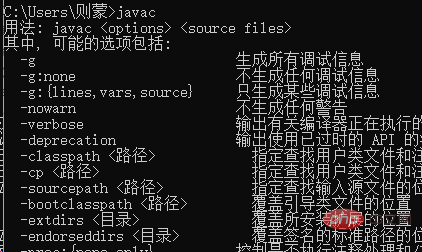

6. Since there is nothing wrong with the test, let’s write a piece of code to see Can you print it out?
First write a hello would code in Notepad. The file name and class name must be consistent. Change the suffix to .java. Note that for convenience, I write hello.java here. The current folder

"javac hello.java" will find this .java file in the current folder, so before compiling we first enter the .java file that needs to be compiled. In the storage directory, a .class file will be generated after javac, and then we can use "java hello" to print out hello would.
The above is the detailed content of Detailed tutorial on java environment configuration (picture and text). For more information, please follow other related articles on the PHP Chinese website!

Hot AI Tools

Undresser.AI Undress
AI-powered app for creating realistic nude photos

AI Clothes Remover
Online AI tool for removing clothes from photos.

Undress AI Tool
Undress images for free

Clothoff.io
AI clothes remover

Video Face Swap
Swap faces in any video effortlessly with our completely free AI face swap tool!

Hot Article

Hot Tools

Notepad++7.3.1
Easy-to-use and free code editor

SublimeText3 Chinese version
Chinese version, very easy to use

Zend Studio 13.0.1
Powerful PHP integrated development environment

Dreamweaver CS6
Visual web development tools

SublimeText3 Mac version
God-level code editing software (SublimeText3)

Hot Topics
 1387
1387
 52
52
 How to simplify field mapping issues in system docking using MapStruct?
Apr 19, 2025 pm 06:21 PM
Field mapping processing in system docking often encounters a difficult problem when performing system docking: how to effectively map the interface fields of system A...
 How to elegantly obtain entity class variable names to build database query conditions?
Apr 19, 2025 pm 11:42 PM
When using MyBatis-Plus or other ORM frameworks for database operations, it is often necessary to construct query conditions based on the attribute name of the entity class. If you manually every time...
 What is the difference between memory leaks in Java programs on ARM and x86 architecture CPUs?
Apr 19, 2025 pm 11:18 PM
Analysis of memory leak phenomenon of Java programs on different architecture CPUs. This article will discuss a case where a Java program exhibits different memory behaviors on ARM and x86 architecture CPUs...
 How does IntelliJ IDEA identify the port number of a Spring Boot project without outputting a log?
Apr 19, 2025 pm 11:45 PM
Start Spring using IntelliJIDEAUltimate version...
 In Java remote debugging, how to correctly obtain constant values on remote servers?
Apr 19, 2025 pm 01:54 PM
Questions and Answers about constant acquisition in Java Remote Debugging When using Java for remote debugging, many developers may encounter some difficult phenomena. It...
 Is the company's security software causing the application to fail to run? How to troubleshoot and solve it?
Apr 19, 2025 pm 04:51 PM
Troubleshooting and solutions to the company's security software that causes some applications to not function properly. Many companies will deploy security software in order to ensure internal network security. ...
 How to correctly divide business logic and non-business logic in hierarchical architecture in back-end development?
Apr 19, 2025 pm 07:15 PM
Discussing the hierarchical architecture problem in back-end development. In back-end development, common hierarchical architectures include controller, service and dao...
 How to convert names to numbers to implement sorting within groups?
Apr 19, 2025 pm 01:57 PM
How to convert names to numbers to implement sorting within groups? When sorting users in groups, it is often necessary to convert the user's name into numbers so that it can be different...


