Anaconda usage tutorial (picture and text)
Anaconda is a data science and machine learning platform for the Python and R programming languages. It is designed to make the process of creating and distributing projects simple, stable, and replicable across systems, and is available on Linux, Windows, and OSX.

Anaconda is a Python-based platform that manages major data science packages, including panda, scikit-learn, SciPy, NumPy, and Google's machine learning platform TensorFlow. It is packaged with conda (a pip-like installation tool), Anaconda navigator (for GUI experience), and spyder (for IDE).
This tutorial will introduce you to some basics of Anaconda, conda, and spyder of the Python programming language and introduce you to the concepts you need to start creating your own projects. (Recommended: Python Tutorial)
Basic knowledge of conda
Conda is an Anaconda package management and environment tool and the core of Anaconda. It's a lot like pip, except it's designed for Python, C, and R package management. Conda also manages virtual environments in a way similar to virtualenv, which I've covered here.
Confirm installation
The first step is to confirm the installation and version on your system. The command below will check if Anaconda is installed and print the version to the terminal.
$ conda --version
You should see results similar to the ones below. I currently have version 4.4.7 installed.
$ conda --version
conda 4.4.7
Update version
Conda can be updated using the update parameter of conda, as shown below.
$ conda update conda
This command will update to the latest version of conda.
Proceed ([y]/n)? y

Downloading and Extracting Packages
conda 4.4.8: ########################################################### | 100%
openssl 1.0.2n: ######################################################## | 100%
certifi 2018.1.18: ##################################################### | 100%
ca-certificates 2017.08.26: ############################################ | 100%
Preparing transaction: done
Verifying transaction: done
Executing transaction: done
By running the version parameter again, we see that my version has been updated to 4.4.8, which is the latest version of the tool.
$ conda --version
conda 4.4.8
Create a new environment
To create a new virtual environment, you can run the following series of commands.
$ conda create -n tutorialConda python=3
$ Proceed ([y]/n)? y
You can see below the packages installed into the new environment.
Downloading and Extracting Packages
certifi 2018.1.18: ##################################################### | 100%
sqlite 3.22.0: ######################################################### | 100%
wheel 0.30.0: ########################################################## | 100%
tk 8.6.7: ############################################################## | 100%
readline 7.0: ########################################################## | 100%
ncurses 6.0: ########################################################### | 100%
libcxxabi 4.0.1: ####################################################### | 100%
python 3.6.4: ########################################################## | 100%
libffi 3.2.1: ########################################################## | 100%
setuptools 38.4.0: ##################################################### | 100%
libedit 3.1: ########################################################### | 100%
xz 5.2.3: ############################################################## | 100%
zlib 1.2.11: ########################################################### | 100%
pip 9.0.1: ############################################################# | 100%
libcxx 4.0.1: ########################################################## | 100%
Preparing transaction: done
Verifying transaction: done
Executing transaction: done
#
# To activate this environment, use:
# > source activate tutorialConda
#
# To deactivate an active environment, use:
# > source deactivate
#
Activation
Very similar to virtualenv, you have to activate the newly created environment. The following command will activate the environment on Linux.
source activate tutorialConda
Bradleys-Mini:~ BradleyPatton$ source activate tutorialConda
(tutorialConda) Bradleys-Mini:~ BradleyPatton$
Installing packages
The conda list command will list the packages currently installed into the project. You can add additional packages and their dependencies using the install command.
$ conda list
# packages in environment at /Users/BradleyPatton/anaconda/envs/tutorialConda:
#
# Name Version Build Channel
ca-certificates 2017.08.26 ha1e5d58_0
certifi 2018.1.18 py36_0
libcxx 4.0.1 h579ed51_0
libcxxabi 4.0.1 hebd6815_0
libedit 3.1 hb4e282d_0
libffi 3.2.1 h475c297_4
ncurses 6.0 hd04f020_2
openssl 1.0.2n hdbc3d79_0
pip 9.0.1 py36h1555ced_4
python 3.6.4 hc167b69_1
readline 7.0 hc1231fa_4
setuptools 38.4.0 py36_0
sqlite 3.22.0 h3efe00b_0
tk 8.6.7 h35a86e2_3
wheel 0.30.0 py36h5eb2c71_1
xz 5.2.3 h0278029_2
zlib 1.2.11 hf3cbc9b_2
To install panda into the current environment, you need to execute the following shell command.
$ conda install pandas
It will download and install relevant packages and dependencies.
The following packages will be downloaded:

package | build
---------------------------|-----------------
libgfortran-3.0.1 | h93005f0_2 495 KB
pandas-0.22.0 | py36h0a44026_0 10.0 MB
numpy-1.14.0 | py36h8a80b8c_1 3.9 MB
python-dateutil-2.6.1 | py36h86d2abb_1 238 KB
mkl-2018.0.1 | hfbd8650_4 155.1 MB
pytz-2017.3 | py36hf0bf824_0 210 KB
six-1.11.0 | py36h0e22d5e_1 21 KB
intel-openmp-2018.0.0 | h8158457_8 493 KB
------------------------------------------------------------
Total: 170.3 MB

The following NEW packages will be INSTALLED:

intel-openmp: 2018.0.0-h8158457_8
libgfortran: 3.0.1-h93005f0_2
mkl: 2018.0.1-hfbd8650_4
numpy: 1.14.0-py36h8a80b8c_1
pandas: 0.22.0-py36h0a44026_0
python-dateutil: 2.6.1-py36h86d2abb_1
pytz: 2017.3-py36hf0bf824_0
six: 1.11.0-py36h0e22d5e_1
By executing the list command again, we can see that the new package is installed in the virtual environment.
$ conda list
# packages in environment at /Users/BradleyPatton/anaconda/envs/tutorialConda:
#
# Name Version Build Channel
ca-certificates 2017.08.26 ha1e5d58_0
certifi 2018.1.18 py36_0
intel-openmp 2018.0.0 h8158457_8
libcxx 4.0.1 h579ed51_0
libcxxabi 4.0.1 hebd6815_0
libedit 3.1 hb4e282d_0
libffi 3.2.1 h475c297_4
libgfortran 3.0.1 h93005f0_2
mkl 2018.0.1 hfbd8650_4
ncurses 6.0 hd04f020_2
numpy 1.14.0 py36h8a80b8c_1
openssl 1.0.2n hdbc3d79_0
pandas 0.22.0 py36h0a44026_0
pip 9.0.1 py36h1555ced_4
python 3.6.4 hc167b69_1
python-dateutil 2.6.1 py36h86d2abb_1
pytz 2017.3 py36hf0bf824_0
readline 7.0 hc1231fa_4
setuptools 38.4.0 py36_0
six 1.11.0 py36h0e22d5e_1
sqlite 3.22.0 h3efe00b_0
tk 8.6.7 h35a86e2_3
wheel 0.30.0 py36h5eb2c71_1
xz 5.2.3 h0278029_2
zlib 1.2.11 hf3cbc9b_2
For packages that are not part of the Anaconda repository, you can use the typical pip command. Since most Python users are familiar with these commands, I won't discuss them here.
Anaconda Navigator (Anaconda Navigator)
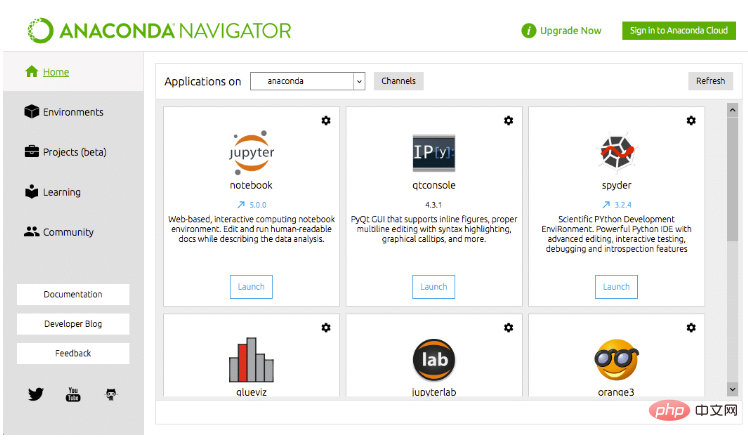
Anaconda includes a GUI-based navigation application that makes development easy. It includes spyder IDE and jupyter notebook as pre-installed projects. This allows you to quickly start a project from the GUI desktop environment.
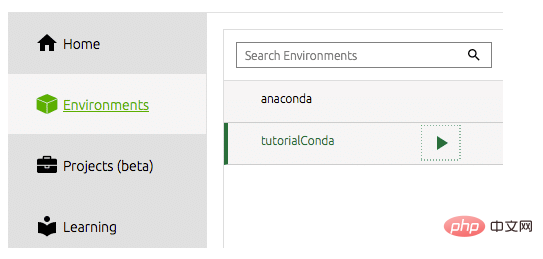
In order to start working from the newly created environment in the Navigator, we must select our environment under the toolbar on the left.
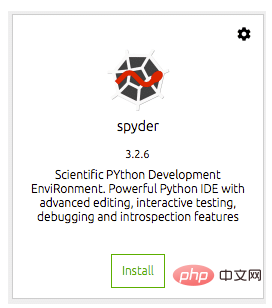
Then we need to install the tools we want to use. For me, this is the spyder IDE. This is where I do most of my data science work, and for me, it's a productive Python IDE. Just click the install button on spyder's dock tile. The navigator will do the rest.
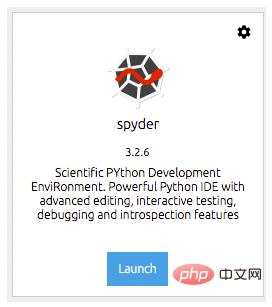
After installation, you can open the IDE from the same dock tile. This will launch spyder from your desktop environment.
spyder
spyder is Anaconda’s default IDE for standard and Data science projects are very powerful. spyder IDE has an integrated IPython notebook, a code editor window and console window.
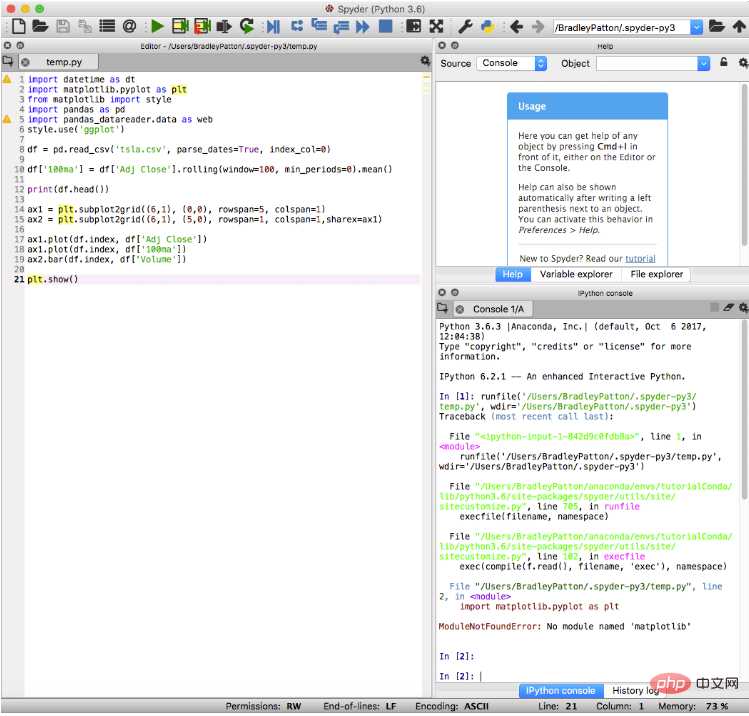
#Spyder also includes standard debugging features and a variable explorer, which can help when things don't go exactly as planned.
in conclusion
anaconda is a great environment for data science and machine learning in Python. It comes with a carefully curated set of software packages designed to work together for a powerful, stable, and replicable data science platform. This allows developers to distribute their content and ensure the same results across different machines and operating systems. It comes with built-in tools to make life easier, like a navigator that allows you to easily create projects and switch environments. It is my first choice for developing algorithms and creating financial analysis projects. I even find myself using it on most Python projects because I'm familiar with the environment. If you want to start learning Python and data science, Anaconda is a great choice.
The above is the detailed content of Anaconda usage tutorial (picture and text). For more information, please follow other related articles on the PHP Chinese website!

Hot AI Tools

Undresser.AI Undress
AI-powered app for creating realistic nude photos

AI Clothes Remover
Online AI tool for removing clothes from photos.

Undress AI Tool
Undress images for free

Clothoff.io
AI clothes remover

AI Hentai Generator
Generate AI Hentai for free.

Hot Article

Hot Tools

Notepad++7.3.1
Easy-to-use and free code editor

SublimeText3 Chinese version
Chinese version, very easy to use

Zend Studio 13.0.1
Powerful PHP integrated development environment

Dreamweaver CS6
Visual web development tools

SublimeText3 Mac version
God-level code editing software (SublimeText3)

Hot Topics
 1385
1385
 52
52
 How to solve the permissions problem encountered when viewing Python version in Linux terminal?
Apr 01, 2025 pm 05:09 PM
Solution to permission issues when viewing Python version in Linux terminal When you try to view Python version in Linux terminal, enter python...
 How to efficiently copy the entire column of one DataFrame into another DataFrame with different structures in Python?
Apr 01, 2025 pm 11:15 PM
When using Python's pandas library, how to copy whole columns between two DataFrames with different structures is a common problem. Suppose we have two Dats...
 How to teach computer novice programming basics in project and problem-driven methods within 10 hours?
Apr 02, 2025 am 07:18 AM
How to teach computer novice programming basics within 10 hours? If you only have 10 hours to teach computer novice some programming knowledge, what would you choose to teach...
 How to avoid being detected by the browser when using Fiddler Everywhere for man-in-the-middle reading?
Apr 02, 2025 am 07:15 AM
How to avoid being detected when using FiddlerEverywhere for man-in-the-middle readings When you use FiddlerEverywhere...
 What are regular expressions?
Mar 20, 2025 pm 06:25 PM
Regular expressions are powerful tools for pattern matching and text manipulation in programming, enhancing efficiency in text processing across various applications.
 How does Uvicorn continuously listen for HTTP requests without serving_forever()?
Apr 01, 2025 pm 10:51 PM
How does Uvicorn continuously listen for HTTP requests? Uvicorn is a lightweight web server based on ASGI. One of its core functions is to listen for HTTP requests and proceed...
 What are some popular Python libraries and their uses?
Mar 21, 2025 pm 06:46 PM
The article discusses popular Python libraries like NumPy, Pandas, Matplotlib, Scikit-learn, TensorFlow, Django, Flask, and Requests, detailing their uses in scientific computing, data analysis, visualization, machine learning, web development, and H
 How to dynamically create an object through a string and call its methods in Python?
Apr 01, 2025 pm 11:18 PM
In Python, how to dynamically create an object through a string and call its methods? This is a common programming requirement, especially if it needs to be configured or run...


