How to configure tomcat in eclipse

How to configure tomcat with eclipse:
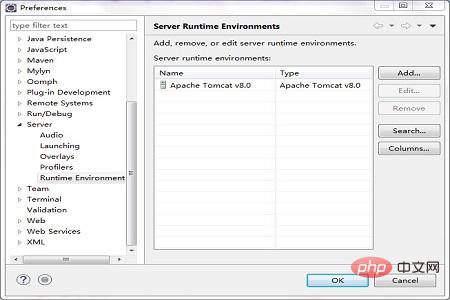
1. Open Eclipse, click the "Window" menu, and select "Preferences".
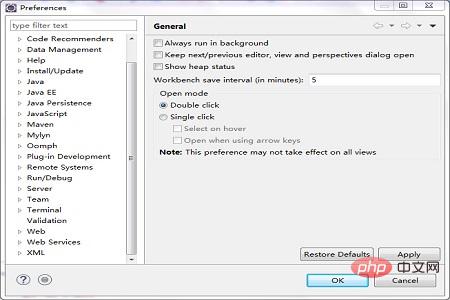
#2. Click the "Server" option and select "Runtime Environments".
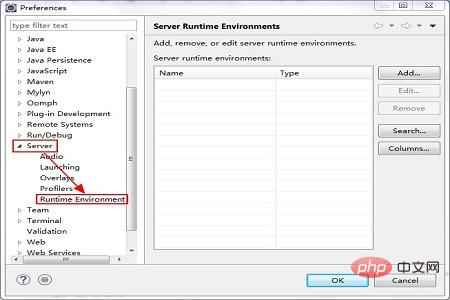
#3. "Add" to add Tomcat.
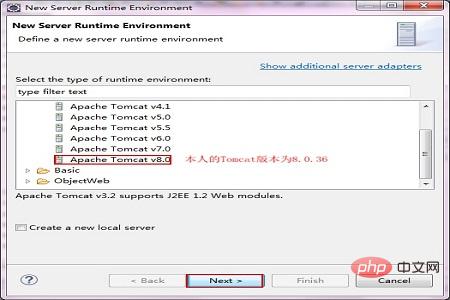
#4. "Next", select the Tomcat path you installed.
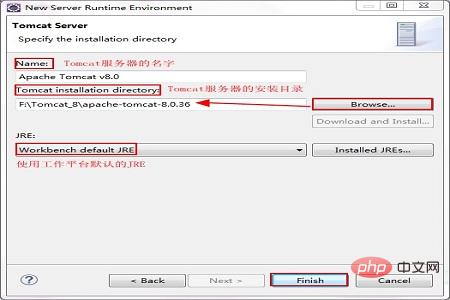
#5. "Finish" is completed.
6. Let the Tomcat server be displayed on the console and deploy the web application to Tomcat
Window → Show View → Servers
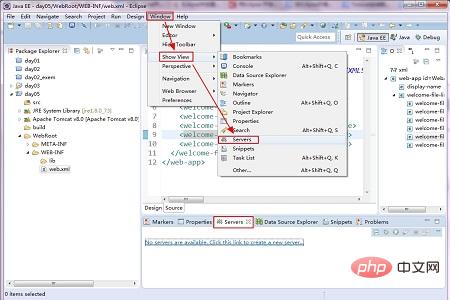
7. Click No servers are available. Click ths link to create a new server. and select the Tomcat version in the pop-up dialog box
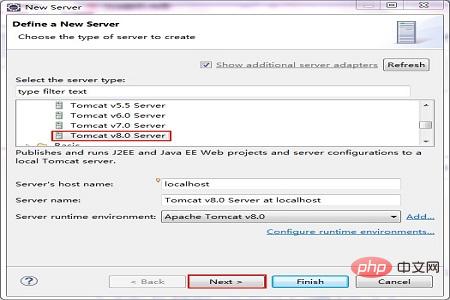
8. "Next", add our project
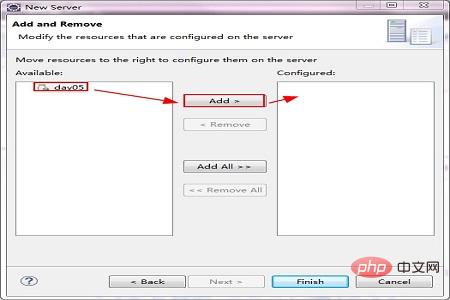
9. Select the project and click Add, or double-click to add it to the right
" Finish"
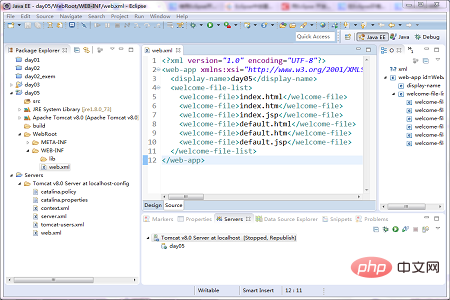
Return to the "Servers" panel below, right-click the "Tomcat v8.0 Server at localhost" node in the panel, and click on the pop-up shortcut menu Click "Start" to start the specified web server. If you directly start accessing http://localhost:8080/TomcatTest at this time, you will find that a 404 error will be reported. This is because we have not added the home page, so add the content of the home page (index.jsp) below.
The above is the detailed content of How to configure tomcat in eclipse. For more information, please follow other related articles on the PHP Chinese website!

Hot AI Tools

Undresser.AI Undress
AI-powered app for creating realistic nude photos

AI Clothes Remover
Online AI tool for removing clothes from photos.

Undress AI Tool
Undress images for free

Clothoff.io
AI clothes remover

AI Hentai Generator
Generate AI Hentai for free.

Hot Article

Hot Tools

Notepad++7.3.1
Easy-to-use and free code editor

SublimeText3 Chinese version
Chinese version, very easy to use

Zend Studio 13.0.1
Powerful PHP integrated development environment

Dreamweaver CS6
Visual web development tools

SublimeText3 Mac version
God-level code editing software (SublimeText3)

Hot Topics
 1376
1376
 52
52
 How to deploy jar project in tomcat
Apr 21, 2024 am 07:27 AM
To deploy a JAR project to Tomcat, follow these steps: Download and unzip Tomcat. Configure the server.xml file, set the port and project deployment path. Copies the JAR file to the specified deployment path. Start Tomcat. Access the deployed project using the provided URL.
 How to allow external network access to tomcat server
Apr 21, 2024 am 07:22 AM
To allow the Tomcat server to access the external network, you need to: modify the Tomcat configuration file to allow external connections. Add a firewall rule to allow access to the Tomcat server port. Create a DNS record pointing the domain name to the Tomcat server public IP. Optional: Use a reverse proxy to improve security and performance. Optional: Set up HTTPS for increased security.
 Where is the tomcat installation directory?
Apr 21, 2024 am 07:48 AM
Tomcat installation directory: Default path: Windows: C:\Program Files\Apache Software Foundation\Tomcat 9.0macOS:/Library/Tomcat/Tomcat 9.0Linux:/opt/tomcat/tomcat9 Custom path: You can specify it during installation. Find the installation directory: use whereis or locate command.
 How to deploy multiple projects in tomcat
Apr 21, 2024 am 09:33 AM
To deploy multiple projects through Tomcat, you need to create a webapp directory for each project and then: Automatic deployment: Place the webapp directory in Tomcat's webapps directory. Manual deployment: Manually deploy the project in Tomcat's manager application. Once the project is deployed, it can be accessed by its deployment name, for example: http://localhost:8080/project1.
 How to check the number of concurrent connections in tomcat
Apr 21, 2024 am 08:12 AM
How to check the number of concurrent Tomcat connections: Visit the Tomcat Manager page (http://localhost:8080/manager/html) and enter your user name and password. Click Status->Sessions in the left navigation bar to see the number of concurrent connections at the top of the page.
 Where is the root directory of the tomcat website?
Apr 21, 2024 am 09:27 AM
The Tomcat website root directory is located in Tomcat's webapps subdirectory and is used to store web application files, static resources, and the WEB-INF directory; it can be found by looking for the docBase attribute in the Tomcat configuration file.
 How to check the port number of tomcat
Apr 21, 2024 am 08:00 AM
The Tomcat port number can be viewed by checking the port attribute of the <Connector> element in the server.xml file. Visit the Tomcat management interface (http://localhost:8080/manager/html) and view the "Status" tab. Run "catalina.sh version" from the command line and look at the "Port:" line.
 How to run two projects with different port numbers in tomcat
Apr 21, 2024 am 09:00 AM
Running projects with different port numbers on the Tomcat server requires the following steps: Modify the server.xml file and add a Connector element to define the port number. Add a Context element to define the application associated with the port number. Create a WAR file and deploy it to the corresponding directory (webapps or webapps/ROOT). Restart Tomcat to apply changes.


