

How to draw stacked charts and pie charts using Matplotlib

Matplotlib is a Python 2D plotting library that can generate publication-quality graphics in a variety of hardcopy formats and interactive environments on a variety of platforms.

In the last Matplotlib data visualization tutorial, we will introducehow to createbar charts, histograms and scatter plots. Today we bring you two other types of charts, stacked charts and pie charts. Because these two diagrams are very similar, they are introduced together.
Stacked Chart
Stacked chart is used to show the relationship of "part to whole" over time. A stacked chart is basically like a pie chart, only it changes over time.
Let's consider a situation where we have 24 hours in a day and we want to see how we spend our time. We divide our activities into: sleeping, eating, working and playing.
We assume we want to track it over a period of 5 days, so our initial data will look like this:
import matplotlib.pyplot as plt
days = [1,2,3,4,5]
sleeping = [7,8,6,11,7]
eating =   [2,3,4,3,2]
working =  [7,8,7,2,2]
playing =  [8,5,7,8,13]
Therefore, our x-axis will include the day variable, which is 1, 2, 3, 4 and 5. The individual components of the date are then kept in their respective activities. Draw them like this:
plt.stackplot(days, sleeping,eating,working,playing, colors=['m','c','r','k'])
plt.xlabel('x')
plt.ylabel('y')
plt.title('Interesting Graph\nCheck it out')
plt.show()
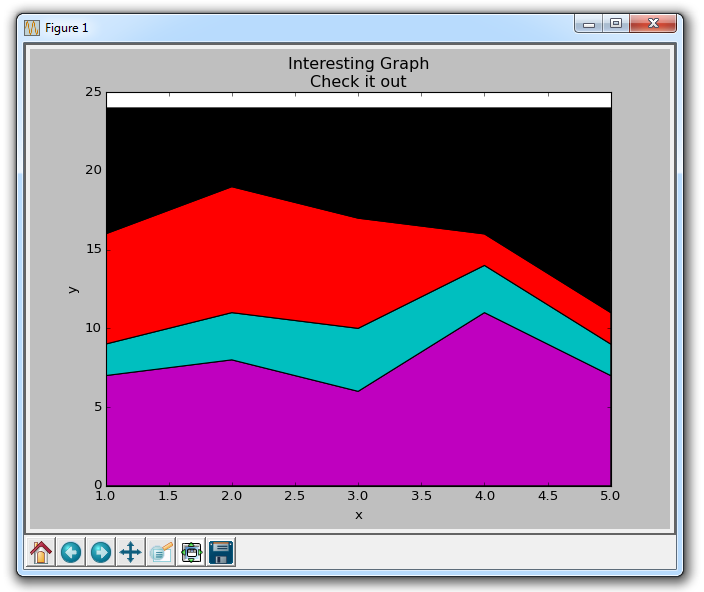
Here we can see, at least in color, how we spend our time. The problem is, without looking back at the code, we don't know what color is what. The next problem is that with polygons we can't actually add "labels" to the data. So anywhere that's more than just lines, with a fill or a stacked diagram like this, we can't inherently mark out specific parts. This shouldn't stop programmers. We can fix this:
import matplotlib.pyplot as plt
days = [1,2,3,4,5]
sleeping = [7,8,6,11,7]
eating =   [2,3,4,3,2]
working =  [7,8,7,2,2]
playing =  [8,5,7,8,13]
plt.plot([],[],color='m', label='Sleeping', linewidth=5)
plt.plot([],[],color='c', label='Eating', linewidth=5)
plt.plot([],[],color='r', label='Working', linewidth=5)
plt.plot([],[],color='k', label='Playing', linewidth=5)
plt.stackplot(days, sleeping,eating,working,playing, colors=['m','c','r','k'])
plt.xlabel('x')
plt.ylabel('y')
plt.title('Interesting Graph\nCheck it out')
plt.legend()
plt.show()
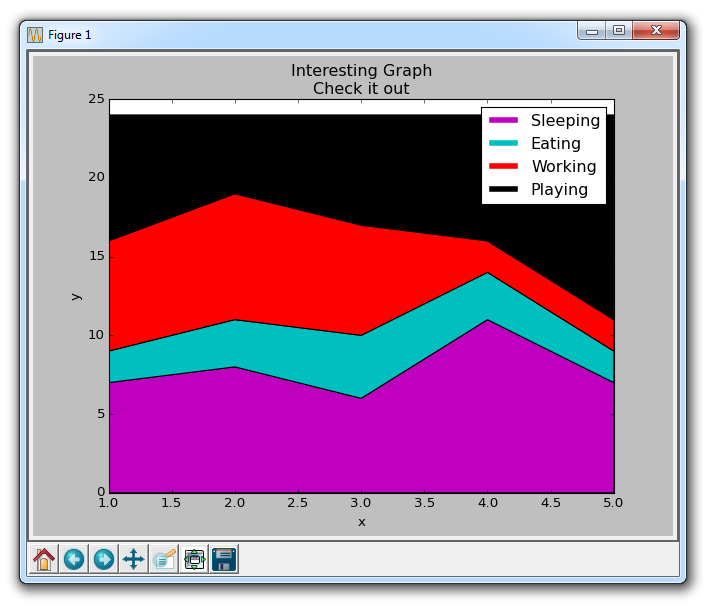
What we do here is draw some empty rows, give them the same color as our stacked plot, and the correct labels. We also give them a line width of 5 to make the lines appear wider in the legend. Now we can easily see how we spend our time.
Pie Chart
Pie charts are much like stacked charts, except they are located at a certain point in time. Typically, pie charts are used to show how a part contributes to a whole, usually in %. Fortunately, Matplotlib takes care of the slice size and everything, we just need to provide the numerical value.
import matplotlib.pyplot as plt
slices = [7,2,2,13]
activities = ['sleeping','eating','working','playing']
cols = ['c','m','r','b']
plt.pie(slices,
        labels=activities,
        colors=cols,
        startangle=90,
        shadow= True,
        explode=(0,0.1,0,0),
        autopct='%1.1f%%')
plt.title('Interesting Graph\nCheck it out')
plt.show()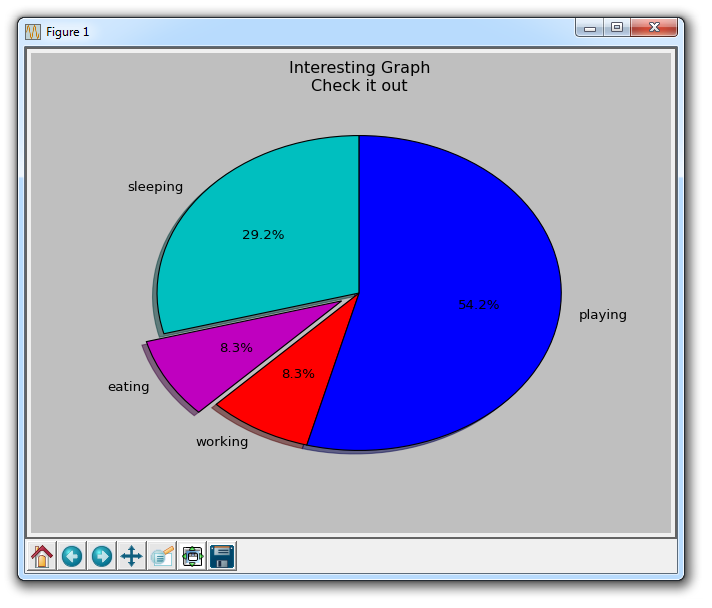
In plt.pie, we need to specify the "slice", which is the relative size of each part. We then specify a list of colors for the corresponding slices. Next, we can choose to specify the "start angle" of the graphic. This allows you to start drawing anywhere. In our example, we chose a 90-degree angle for the pie chart, which means the first segment is a vertical line. Next, we have the option to add a character-sized shadow to the drawing, and then we can even use explode to pull out a slice.
We have a total of four slices, so for explode, if we don't want to pull out any slices, we pass in 0,0,0,0. If we want to pull the first slice, we pass in 0.1,0,0,0.
Finally, we use autopct to choose to place the percentage on the chart.
The above is the detailed content of How to draw stacked charts and pie charts using Matplotlib. For more information, please follow other related articles on the PHP Chinese website!

Hot AI Tools

Undresser.AI Undress
AI-powered app for creating realistic nude photos

AI Clothes Remover
Online AI tool for removing clothes from photos.

Undress AI Tool
Undress images for free

Clothoff.io
AI clothes remover

AI Hentai Generator
Generate AI Hentai for free.

Hot Article
Hot Tools

Notepad++7.3.1
Easy-to-use and free code editor

SublimeText3 Chinese version
Chinese version, very easy to use

Zend Studio 13.0.1
Powerful PHP integrated development environment

Dreamweaver CS6
Visual web development tools

SublimeText3 Mac version
God-level code editing software (SublimeText3)
Hot Topics
 1378
1378
 52
52

 The 2-Hour Python Plan: A Realistic Approach
Apr 11, 2025 am 12:04 AM
The 2-Hour Python Plan: A Realistic Approach
Apr 11, 2025 am 12:04 AM
You can learn basic programming concepts and skills of Python within 2 hours. 1. Learn variables and data types, 2. Master control flow (conditional statements and loops), 3. Understand the definition and use of functions, 4. Quickly get started with Python programming through simple examples and code snippets.
 How to read redis queue
Apr 10, 2025 pm 10:12 PM
How to read redis queue
Apr 10, 2025 pm 10:12 PM
To read a queue from Redis, you need to get the queue name, read the elements using the LPOP command, and process the empty queue. The specific steps are as follows: Get the queue name: name it with the prefix of "queue:" such as "queue:my-queue". Use the LPOP command: Eject the element from the head of the queue and return its value, such as LPOP queue:my-queue. Processing empty queues: If the queue is empty, LPOP returns nil, and you can check whether the queue exists before reading the element.
 How to start the server with redis
Apr 10, 2025 pm 08:12 PM
How to start the server with redis
Apr 10, 2025 pm 08:12 PM
The steps to start a Redis server include: Install Redis according to the operating system. Start the Redis service via redis-server (Linux/macOS) or redis-server.exe (Windows). Use the redis-cli ping (Linux/macOS) or redis-cli.exe ping (Windows) command to check the service status. Use a Redis client, such as redis-cli, Python, or Node.js, to access the server.
 How to read data from redis
Apr 10, 2025 pm 07:30 PM
How to read data from redis
Apr 10, 2025 pm 07:30 PM
To read data from Redis, you can follow these steps: 1. Connect to the Redis server; 2. Use get(key) to get the value of the key; 3. If you need string values, decode the binary value; 4. Use exists(key) to check whether the key exists; 5. Use mget(keys) to get multiple values; 6. Use type(key) to get the data type; 7. Redis has other read commands, such as: getting all keys in a matching pattern, using cursors to iterate the keys, and sorting the key values.
 Python vs. C : Applications and Use Cases Compared
Apr 12, 2025 am 12:01 AM
Python vs. C : Applications and Use Cases Compared
Apr 12, 2025 am 12:01 AM
Python is suitable for data science, web development and automation tasks, while C is suitable for system programming, game development and embedded systems. Python is known for its simplicity and powerful ecosystem, while C is known for its high performance and underlying control capabilities.
 What types of files are composed of oracle databases?
Apr 11, 2025 pm 03:03 PM
What types of files are composed of oracle databases?
Apr 11, 2025 pm 03:03 PM
Oracle database file structure includes: data file: storing actual data. Control file: Record database structure information. Redo log files: record transaction operations to ensure data consistency. Parameter file: Contains database running parameters to optimize performance. Archive log file: Backup redo log file for disaster recovery.
 How to find keys with redis
Apr 10, 2025 pm 05:45 PM
How to find keys with redis
Apr 10, 2025 pm 05:45 PM
There are several ways to find keys in Redis: Use the SCAN command to iterate over all keys by pattern or condition. Use GUI tools such as Redis Explorer to visualize the database and filter keys by name or schema. Write external scripts to query keys using the Redis client library. Subscribe to keyspace notifications to receive alerts when key changes.
 How to obtain redis login permission
Apr 10, 2025 pm 07:18 PM
How to obtain redis login permission
Apr 10, 2025 pm 07:18 PM
To obtain Redis login permission, you need to perform the following steps: 1. Create a username and password; 2. Allow remote connections; 3. Restart the Redis server; 4. Connect using the Redis CLI or programming language.
