How to draw a picture in python? Here we introduce to you two python drawing libraries: turtle and Matplotlib.
Related recommendations: "python视频"

##1 Install turtle
Python2 installation command:
pip install turtule
pip3 install turtle
2 Basic concepts
2.1 CanvasThe canvas is the turtle that expands the drawing area for us, we can set its size and initial position. There are two commonly used canvas methods: screensize() and setup(). (1) turtle.screensize(canvwidth=None, canvheight=None, bg=None)The parameters are the width of the canvas (unit pixel), height, and background colorFor example: turtle.screensize(800, 600, "green")turtle.screensize() #Return to the default size (400, 300)(2 ) turtle.setup(width=0.5, height=0.75, startx=None, starty=None)Parameters:width, height: When the input width and height are integers, they represent pixels; When it is a decimal, it represents the proportion of the computer screen occupied (startx, starty): This coordinate represents the position of the upper left corner of the rectangular window. If it is empty, the window is located in the center of the screenFor example :turtle.setup(width=0.6, height=0.6) turtle.setup(width=800, height=800, startx=100, starty=100)
>>> pencolor('brown')
>>> tup = (0.2, 0.8, 0.55)
>>> pencolor(tup)
>>> pencolor()
'#33cc8c'(2) Drawing commands
There are many commands to control turtle drawing. These commands can be divided into three types: motion commands, brush control commands and global control commands
Brush Motion command:
##Command ‐ ‐ ‐ ‐ ‐ ‐ ‐ ‐ Moved distance pixels long in the direction of the current brush turtle.backward(distance) . Move degree counterclockwise °
Turtle.pendown () Draw a graphic when moving, and the default time is also drawn Turtle.goto (x, y) to move the brush to the position of the coordinates ## Turtle.penup () Do not draw a graphic when moving, lift the pen, and use # TURTLE.Speed (SPEED) paintings when drawing another place. TURTLE.Circle () Draw the circle, and the radius is positive (negative), indicating that the circle is on the left (right) of the brush. #Command#turtle.pencolor() Brush color
Turtle.fillcolor (colorstring) Draw the fill color of the graphics
# Turtle.color (color1, color2). Return Is it currently in the filling state? Hide arrow display;
Turtle.showturtle () and hideturtle () function corresponding to
# overall control commands
:# Section Note
TURTLE.CLEAR () Clear the Turtle window, but the position and status of Turtle will not change Turtle.reset () to clear the window, reset the turtle state state Starting status Turtle.undo () Revisit the previous Turtle action Turtle.isvisible () Return to whether the current TURTLE is visible Stamp () Copy the current graphics #turtle.write(s[,font=("font-name",font_size,"font_type")]) 写文本,s为文本内容,font是字体的参数,里面分别为字体名称,大小和类型;font为可选项, font的参数也是可选项。
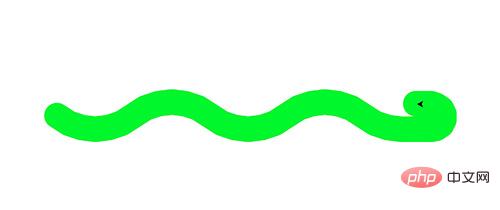
例子:
import turtle
def drawSnake(rad, angle, len, neckrad):
    for _ in range(len):
        turtle.circle(rad, angle)
        turtle.circle(-rad, angle)
    turtle.circle(rad, angle/2)
    turtle.forward(rad/2)  # 直线前进
    turtle.circle(neckrad, 180)
    turtle.forward(rad/4)
if __name__ == "__main__":
   turtle.setup(1500, 1400, 0, 0)
   turtle.pensize(30)  # 画笔尺寸
   turtle.pencolor("green")
   turtle.seth(-40)    # 前进的方向
   drawSnake(70, 80, 2, 15)
Matpliotlib
前提
linux ubuntu 下需安装下面三个包:
Numpy, Scipy,Matplotlib
分别输入下面的代码进行安装:
pip install numpy
pip install scipy
sudo apt-get install python-matplotlib
测试是否安装成功
python
>>> import pylab
如果没有报错则安装成功
开始画图
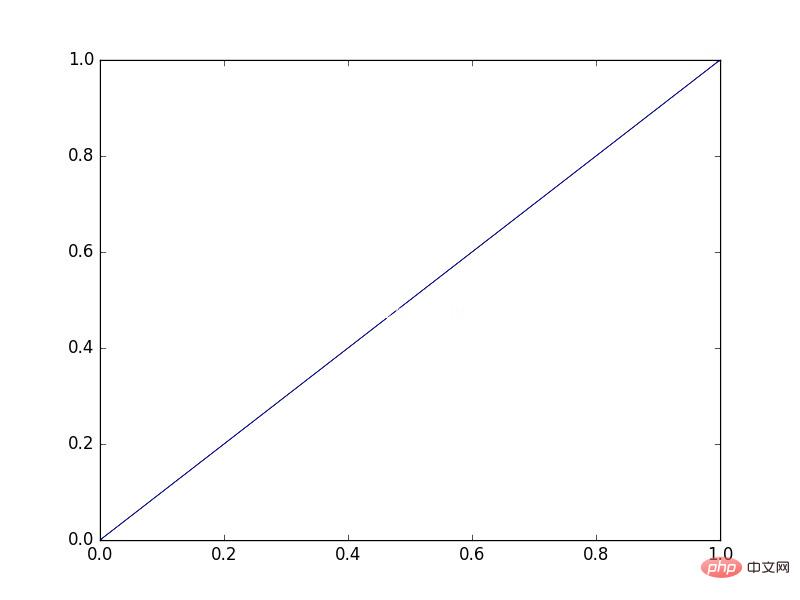
1. 画最简单的直线图
代码如下:
import numpy as np
import matplotlib.pyplot as plt
x=[0,1]
y=[0,1]
plt.figure()
plt.plot(x,y)
plt.savefig("easyplot.jpg")结果如下:

代码解释:
#x轴,y轴
x=[0,1]
y=[0,1]
#创建绘图对象
plt.figure()
#在当前绘图对象进行绘图(两个参数是x,y轴的数据)
plt.plot(x,y)
#保存图象
plt.savefig("easyplot.jpg")The above is the detailed content of Two ways to draw pictures in python. For more information, please follow other related articles on the PHP Chinese website!