

Basic process of app software production

User needs analysis
is the most important part of the entire APP development process. It is equivalent to the status of the decision-maker in the enterprise. The success of an APP is also determined by this. . The user needs analysis here is to sort out the APP functions based on the user's requirements. Note that this is the user, because many companies require that the APP developed be used by their users. Therefore, when sorting out APP development needs, you must not only understand the needs of the development company, but also the needs of its customer groups. Finally, these requirements are sorted out and classified, and the general APP functional framework is sorted out. This process requires close communication with customers and strives to ensure that there are no doubts to avoid developing an impractical APP.
Related recommendations: "pythonvideo"
Product prototype design
在After conducting a round of user needs analysis, the sorted needs are classified, organized, and sorted into functional structure modules. At this time, the existing functional modules can be used to build a simple product prototype. A product prototype is similar to a sketch of an APP product. It shows the basic functional structure to customers. Similar APP products can be simulated with the help of product prototype design software. Confirm this product prototype with the customer. After confirmation, you can enter the next stage of development.

UI visual design
After having the APP product prototype sketch structure, UI designers begin to design the APP interface Beautify, design the layout structure according to the performance content of the APP, then color each area accordingly, draw the icons of each function menu and the design of other page elements, and finally design all APP interface renderings. During this process, we communicate with customers and design with reference to customer suggestions.

Database construction
According to the functional data processing situation analyzed and sorted out according to the needs, establish a reasonable database table structure and optimize the data algorithm , improve data processing efficiency and ensure the security, accuracy, stability and timeliness of data during the use of APP.

Server-side development
The core processing of the APP application is completed by the server-side program, and the client-side APP only Just need to send and receive data. Due to the limited hardware configuration and storage capacity of the user's mobile device, the core data processing process is performed by the server. This method is also called cloud computing. After the server processing is completed, it is fed back to the client APP. Therefore, server-side program development is extremely important, and all functions need to be developed strictly in accordance with the functions compiled during the requirements analysis stage.
iOS/Android client development
At this time, the client is developed according to the APP renderings designed by the designer, mainly to implement the code of the design renderings, and Write an interface for function calls to connect to the server to facilitate interaction with server-side data. Carry out APP development and optimization based on the device software and hardware conditions of Android and iOS, and finally develop an APP client that is consistent with the renderings.

APP program testing
Conduct a comprehensive test on the developed APP client. This test simulates the normal use of the user and In the case of abnormal use, some test data will usually be imported for testing, and the test results will be recorded. If an error occurs, it will be returned to the development stage for repair. If the test passes, it means that the overall APP development process has been completed. The finished APP application is handed over to the user for trial use. Once the user is satisfied, proceed to the next step.

Upload to the App Store
At this stage, the development of an APP has been completed. After completing the signature verification, the developed The client APP program is submitted and published to various application stores. The iOS version of the APP is submitted to Apple's AppStore, and the Android version is submitted to major domestic Android app stores.
Maintenance and update of APP
Maintain the APP after it goes online, collect user feedback information, and promptly fix errors (Bugs) that occur in the APP application. If the customer needs to update the function of the APP, it will return to the required function sorting stage for development. After the development of the new function is completed and the test passes, the update can be released.

The above is the detailed content of Basic process of app software production. For more information, please follow other related articles on the PHP Chinese website!

Hot AI Tools

Undresser.AI Undress
AI-powered app for creating realistic nude photos

AI Clothes Remover
Online AI tool for removing clothes from photos.

Undress AI Tool
Undress images for free

Clothoff.io
AI clothes remover

AI Hentai Generator
Generate AI Hentai for free.

Hot Article
Hot Tools

Notepad++7.3.1
Easy-to-use and free code editor

SublimeText3 Chinese version
Chinese version, very easy to use

Zend Studio 13.0.1
Powerful PHP integrated development environment

Dreamweaver CS6
Visual web development tools

SublimeText3 Mac version
God-level code editing software (SublimeText3)
Hot Topics
 1378
1378
 52
52

 How to perform real-name authentication on Jingdong Mall APP
Mar 19, 2024 pm 02:31 PM
How to perform real-name authentication on Jingdong Mall APP
Mar 19, 2024 pm 02:31 PM
How to get real-name authentication on Jingdong Mall APP? Jingdong Mall is an online shopping platform that many friends often use. Before shopping, it is best for everyone to conduct real-name authentication so that they can enjoy complete services and get a better shopping experience. The following is the real-name authentication method for JD.com, I hope it will be helpful to netizens. 1. Install and open JD.com, and then log in to your personal account; 2. Then click [My] at the bottom of the page to enter the personal center page; 3. Then click the small [Settings] icon in the upper right corner to go to the setting function interface; 4. Select [Account and Security] to go to the account settings page; 5. Finally, click the [Real-name Authentication] option to fill in the real-name information; 6. The installation system requires you to fill in your real personal information and complete the real-name authentication
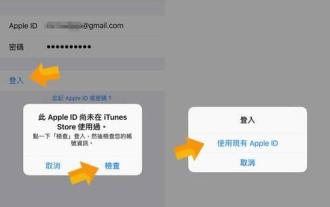 Steps and precautions for registering a Hong Kong Apple ID (enjoy the unique advantages of the Hong Kong Apple Store)
Sep 02, 2024 pm 03:47 PM
Steps and precautions for registering a Hong Kong Apple ID (enjoy the unique advantages of the Hong Kong Apple Store)
Sep 02, 2024 pm 03:47 PM
Apple's products and services have always been loved by users around the world. Registering a Hong Kong Apple ID will bring more convenience and privileges to users. Let’s take a look at the steps to register a Hong Kong Apple ID and what you need to pay attention to. How to register a Hong Kong Apple ID When using Apple devices, many applications and functions require using Apple ID to log in. If you want to download applications from Hong Kong or enjoy the preferential content of the Hong Kong AppStore, it is very necessary to register a Hong Kong Apple ID. This article will detail the steps on how to register a Hong Kong Apple ID and what you need to pay attention to. Steps: Select language and region: Find the "Settings" option on your Apple device and enter
 How to cancel the data package on China Unicom app How to cancel the data package on China Unicom
Mar 18, 2024 pm 10:10 PM
How to cancel the data package on China Unicom app How to cancel the data package on China Unicom
Mar 18, 2024 pm 10:10 PM
The China Unicom app can easily meet everyone's needs. It has various functions to solve your needs. If you want to handle various services, you can easily do it here. If you don't need it, you can unsubscribe in time here. It is effective. To avoid subsequent losses, many people sometimes feel that the data is not enough when using mobile phones, so they buy additional data packages. However, they don’t want it next month and want to unsubscribe immediately. Here, the editor explains We provide a method to unsubscribe, so that friends who need it can come and use it! In the China Unicom app, find the "My" option in the lower right corner and click on it. In the My interface, slide the My Services column and click the "I have ordered" option
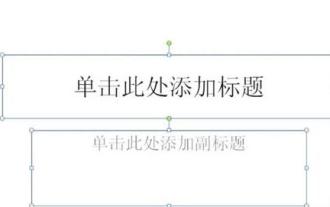 Specific method to create film movement effect in PPT
Mar 26, 2024 pm 04:00 PM
Specific method to create film movement effect in PPT
Mar 26, 2024 pm 04:00 PM
1. Start PPT, create a new blank document, select all text boxes and delete them. 2. Execute the Insert-Shape command, drag a rectangle in the document, and fill the shape with black. 3. Drag the rectangle to elongate it, execute the Insert-Shape command, drag out the small square, and set the fill color to white. 4. Copy and paste the small squares one by one so that the top and bottom are evenly distributed on both sides of the film. After selecting them all with ctrl+a, right-click and select Group. 5. Execute the Insert-Picture command, find the picture to be inserted in the pop-up dialog box, click to open, and adjust the size and position of the picture. 6. Repeat step 5 to insert and set the remaining pictures in order to form a film picture. 7. Select the film, execute animation-add animation command
 How to make a tomato novel cover
Feb 23, 2024 pm 01:55 PM
How to make a tomato novel cover
Feb 23, 2024 pm 01:55 PM
How to make the cover of Tomato novel? You can make exclusive novel cover in Tomato novel, but most friends don’t know how to make the cover of Tomato novel. Next is the picture of how to make the cover of Tomato novel brought by the editor to the players. Tutorial, interested players come and take a look! Tomato Novel usage tutorial How to make a Tomato Novel cover 1. First open the Tomato Novel APP, enter the work management page to create a new book, and select the [Cover Template] as shown by the arrow below; 2. Then enter the cover template page and select your favorite cover Template; 3. After finally selecting the cover, click [Confirm] in the upper right corner.
 Operation guide for creating mobile Excel tables
Feb 18, 2024 pm 02:41 PM
Operation guide for creating mobile Excel tables
Feb 18, 2024 pm 02:41 PM
Mobile Excel table creation tutorial With the popularity of mobile devices and the continuous advancement of technology, mobile phones have become one of the indispensable tools in our daily life and work. Using Excel spreadsheets on your mobile phone can easily record, calculate and analyze data and improve work efficiency. This article will share with you the basic operations and techniques for creating mobile Excel tables. 1. Choose the right application. There are many mobile Excel applications on the market to choose from, such as GoogleSheets, Micro
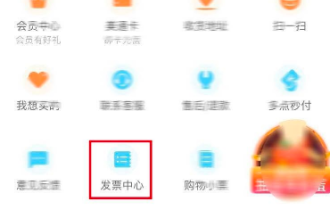 How to issue invoices with multipoint app
Mar 14, 2024 am 10:00 AM
How to issue invoices with multipoint app
Mar 14, 2024 am 10:00 AM
As a shopping voucher, invoices are crucial to our daily lives and work. So when we usually use Duodian app for shopping, how can we easily issue invoices in Duodian app? Below, the editor of this website will bring you a detailed step-by-step guide for opening invoices on multi-point apps. Users who want to know more must not miss it. Come and follow the text to learn more! In the [Invoice Center], click [Multi-Point Supermarket/Free Shopping], select the order that needs to be invoiced on the completed order page, click Next to fill in the [Invoice Information], [Recipient Information], and click Submit after confirming that they are correct. After a few minutes, enter the receiving mailbox, open the email, click on the electronic invoice download address, and finally download and print the electronic invoice.
 Blackmagic\'s pro-level video app lands on Android, but your phone probably can\'t run it
Jun 25, 2024 am 07:06 AM
Blackmagic\'s pro-level video app lands on Android, but your phone probably can\'t run it
Jun 25, 2024 am 07:06 AM
Blackmagic Design has finally brought its well-praised Blackmagic Camera app to Android. The professional video camera app is free to download, and it offers complete manual controls. These controls aim to make it easier for you to take pro-level cin