

What is the shortcut key for merging cells in wps


WPS table shortcut keys
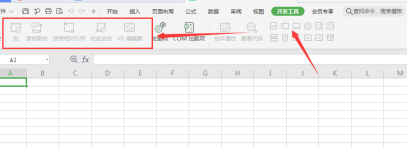
【Ctrl M】Merge cells;
【Ctrl Shift V 】Paste value;
Other shortcut keys are:
Help: F1
Task Pane: Ctrl F1
Create a new blank document: Ctrl N
Switch to the previous worksheet of the active worksheet: Ctrl PageUp
Switch to the next worksheet of the active worksheet: Ctrl PageDown
Edit cell shortcut keys
Move the cursor to the end of the cell content: F2
Type the same data into multiple cells: Ctrl Enter
Line break operation in the cell: Alt Enter
Enter editing and re-edit the cell content: Back Space (backspace key)
Type the current date: Ctrl;
Type the current time: Ctrl Shift;
Position cell shortcut key
Move to the edge of the current data area: Ctrl arrow key
Locate to the beginning of the row in the pane where the active cell is located: Home
Move to the beginning of the worksheet: Ctrl+Home
Move to the last cell position of the worksheet, which is located In the bottom row of the rightmost column occupied by data: Ctrl+End
Change the selection area shortcut key
Change the currently selected cell and cancel the original selection: Arrow keys
Expand the current selection area to adjacent rows and columns: Shift Direction
Expand the selection area to the last non-empty cell in the same column or row as the active cell: Ctrl Shift Arrow keys
Expand the selected area to the beginning of the line: Shift Home
Expand the selected area to the beginning of the worksheet: Ctrl Shift Home
Expand the selected area Expand to the last used cell on the worksheet (lower right corner): Ctrl Shift End
Select the entire worksheet: Ctrl A
Select an area: Mouse selection
Select multiple areas: Ctrl mouse selection
Select the area from the active cell to the clicked cell: Shift mouse click
Move from left to right in the selected area , if cells in a single column are selected, move downward: Tab
moves from right to left in the selected area. If cells in a single column are selected, move up: Shift Tab
moves from top to bottom in the selection. If cells in a single column are selected, move down: Enter
moves from bottom to top in the selection. If a cell in a single column is selected, move up: Shift Enter
Select the cell on the previous screen of the active cell: PageUp
Select the cell on the next screen of the active cell Cell: PageDown
Select the area from the active cell to the corresponding cell on the previous screen: Shift PageUp
Select the area from the active cell to the corresponding cell on the next screen: Shift PageDown
For more technical articles related to Word, please visit Word Tutorial Column for learning!
The above is the detailed content of What is the shortcut key for merging cells in wps. For more information, please follow other related articles on the PHP Chinese website!

Hot AI Tools

Undresser.AI Undress
AI-powered app for creating realistic nude photos

AI Clothes Remover
Online AI tool for removing clothes from photos.

Undress AI Tool
Undress images for free

Clothoff.io
AI clothes remover

AI Hentai Generator
Generate AI Hentai for free.

Hot Article
Hot Tools

Notepad++7.3.1
Easy-to-use and free code editor

SublimeText3 Chinese version
Chinese version, very easy to use

Zend Studio 13.0.1
Powerful PHP integrated development environment

Dreamweaver CS6
Visual web development tools

SublimeText3 Mac version
God-level code editing software (SublimeText3)
Hot Topics
 1386
1386
 52
52

 WPS and Office do not have Chinese fonts, and Chinese font names are displayed in English.
Jun 19, 2024 am 06:56 AM
WPS and Office do not have Chinese fonts, and Chinese font names are displayed in English.
Jun 19, 2024 am 06:56 AM
My friend's computer, all Chinese fonts such as imitation Song, Kai style, Xing Kai, Microsoft Yahei, etc. cannot be found in WPS and OFFICE. The editor below will tell you how to solve this problem. The fonts in the system are normal, but all fonts in the WPS font options are not available, only cloud fonts. OFFICE only has English fonts, not any Chinese fonts. After installing different versions of WPS, English fonts are available, but there is also no Chinese font. Solution: Control Panel → Categories → Clock, Language, and Region → Change Display Language → (Region and Language) Management → (Language for Non-Unicode Programs) Change System Regional Settings → Chinese (Simplified, China) → Restart. Control Panel, change the view mode in the upper right corner to "Category", Clock, Language and Region, change
 How to use wps translation function_How to use wps translation function
Mar 27, 2024 pm 04:46 PM
How to use wps translation function_How to use wps translation function
Mar 27, 2024 pm 04:46 PM
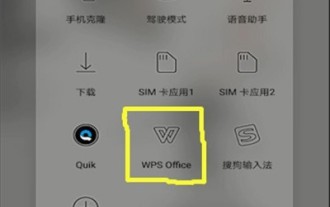
1. First, we open wpsoffice on the mobile phone. 2. Then click Apply. 3. Click the image to translate. Method 2 1. First, we open wpsoffice on the mobile phone. 2. Open the document that needs to be translated and click the tool in the lower left corner. 3. Click Review and Translate.
 How to center the WPS Word table
Mar 21, 2024 pm 02:21 PM
How to center the WPS Word table
Mar 21, 2024 pm 02:21 PM
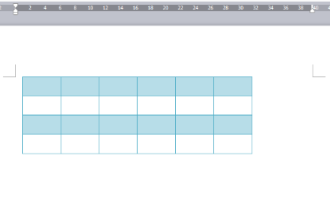
When using word in WPS, you often need to insert pictures, tables, etc., but if the inserted table is not centered, it will affect the beauty of the entire document. So how to set the centering of the WPS table? Today I will teach you how to make adjustments. The specific steps are as follows. Come and take a look! 1. The table in the picture is not in the middle of the page, which is not very beautiful. I want it to be centered. 2. First, right-click the mouse in the table (as shown in the picture). 3. Then click [Select All Tables] in the right-click menu (as shown by the red arrow in the figure). 4. After clicking, the table will be fully selected (as shown in the figure below). 5. At this time, click to open the [Start] tab of wps text (as shown by the red arrow in the figure). 6 o'clock
 How to create a QR code using wps
Mar 28, 2024 am 09:41 AM
How to create a QR code using wps
Mar 28, 2024 am 09:41 AM
1. Open the software and enter the wps text operation interface. 2. Find the insert option in this interface. 3. Click the Insert option and find the QR code option in its editing tool area. 4. Click the QR code option to pop up the QR code dialog box. 5. Select the text option on the left and enter our information in the text box. 6. On the right side, you can set the shape of the QR code and the color of the QR code.
 Why macros still cannot be enabled after wps installs vba
Mar 21, 2024 am 08:30 AM
Why macros still cannot be enabled after wps installs vba
Mar 21, 2024 am 08:30 AM
wpsOffice is an office software suite independently developed by Kingsoft Software Co., Ltd., which can realize multiple functions such as text, forms, presentations, and PDF reading. It has the advantages of low memory usage, fast running speed, multiple cloud functions, powerful plug-in platform support, free massive online storage space and document templates. What the editor will introduce to you today is the "macro" function. In the past few days, friends have always asked me why I still can't enable macros after installing VBA. The "macro" function is still gray and cannot be opened, as shown below. What's going on? The editor will find out the reasons for you. There are three main reasons for this situation: 1. Does your wps support vba? Some versions do not support it. 2. Confirm that you have enabled macros and whether the operation
 Introduction to the method of editing watermark with WPS
Mar 27, 2024 pm 02:06 PM
Introduction to the method of editing watermark with WPS
Mar 27, 2024 pm 02:06 PM
1. We use WPS to open a document. There is a watermark in it. It looks messy. How to remove it? Look down. 2. Find the Insert tab in the menu bar, select the header and footer icons under this tab, and click on them with the left mouse button. 3. At this time, the text on the page becomes gray and cannot be edited, but the watermark on the back of the text can be edited at this time. 4. Click on the watermark, you can see that this is a picture watermark, because there are several small squares around the picture, and the picture can be edited at this time. 5. Use the delete key on the keyboard to delete the picture, and you can see that the watermark is gone. 6. Double-click the mouse on the page to exit the header and footer editing mode. The text on the page returns to normal color and can be edited, but at this time the watermark on the page has disappeared. 7.
 How to set WPS value to automatically change color according to conditions_Steps to set WPS table value to automatically change color according to condition
Mar 27, 2024 pm 07:30 PM
How to set WPS value to automatically change color according to conditions_Steps to set WPS table value to automatically change color according to condition
Mar 27, 2024 pm 07:30 PM
1. Open the worksheet and find the [Start]-[Conditional Formatting] button. 2. Click Column Selection and select the column to which conditional formatting will be added. 3. Click the [Conditional Formatting] button to bring up the option menu. 4. Select [Highlight conditional rules]-[Between]. 5. Fill in the rules: 20, 24, dark green text with dark fill color. 6. After confirmation, the data in the selected column will be colored with corresponding numbers, text, and cell boxes according to the settings. 7. Conditional rules without conflicts can be added repeatedly, but for conflicting rules WPS will replace the previously established conditional rules with the last added rule. 8. Repeatedly add the cell columns after [Between] rules 20-24 and [Less than] 20. 9. If you need to change the rules, you can just clear the rules and then reset the rules.
 How to use shortcut keys to take screenshots in Win8?
Mar 28, 2024 am 08:33 AM
How to use shortcut keys to take screenshots in Win8?
Mar 28, 2024 am 08:33 AM
How to use shortcut keys to take screenshots in Win8? In our daily use of computers, we often need to take screenshots of the content on the screen. For users of Windows 8 system, taking screenshots through shortcut keys is a convenient and efficient operation method. In this article, we will introduce several commonly used shortcut keys to take screenshots in Windows 8 system to help you take screenshots more quickly. The first method is to use the "Win key + PrintScreen key" key combination to perform full
