

How to add flowers, plants and trees in CAD


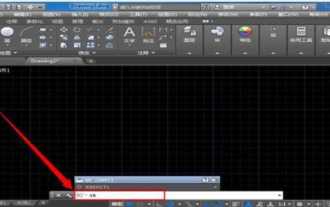
First of all, let’s open the CAD software we are using. The version I use is version 07, as shown in the picture:

The operation interface after opening CAD will often be different, but it will not affect our operation. My CAD operation interface is as shown below:

We can use the menu above Bar to find the tool palette window, open the tool palette and then the operation interface, as shown in the figure:

Related recommendations:《FAQ》
There is a vertical row of options for us to choose from on the left side of the tool palette operation interface. We can find the building options from these options. Open the building options and you will see the tree. .


Click to select the tree, then select the insertion point in the blank space and click the left mouse button to display the tree graphic, as shown in the figure :

If we want to modify the tree type and view direction, we can click on the graphic. After the small triangle appears, click on the small triangle to make modifications.


#If you want the trees to look more realistic, it would be better to switch the graphics to the vertical view for observation, as shown in the figure:

The above is the detailed content of How to add flowers, plants and trees in CAD. For more information, please follow other related articles on the PHP Chinese website!

Hot AI Tools

Undresser.AI Undress
AI-powered app for creating realistic nude photos

AI Clothes Remover
Online AI tool for removing clothes from photos.

Undress AI Tool
Undress images for free

Clothoff.io
AI clothes remover

Video Face Swap
Swap faces in any video effortlessly with our completely free AI face swap tool!

Hot Article
Hot Tools

Notepad++7.3.1
Easy-to-use and free code editor

SublimeText3 Chinese version
Chinese version, very easy to use

Zend Studio 13.0.1
Powerful PHP integrated development environment

Dreamweaver CS6
Visual web development tools

SublimeText3 Mac version
God-level code editing software (SublimeText3)
Hot Topics
 1387
1387
 52
52

 How to add a TV to Mijia
Mar 25, 2024 pm 05:00 PM
How to add a TV to Mijia
Mar 25, 2024 pm 05:00 PM
Many users are increasingly favoring the electronic ecosystem of Xiaomi smart home interconnection in modern life. After connecting to the Mijia APP, you can easily control the connected devices with your mobile phone. However, many users still don’t know how to add Mijia to their homes. app, then this tutorial guide will bring you the specific connection methods and steps, hoping to help everyone in need. 1. After downloading Mijia APP, create or log in to Xiaomi account. 2. Adding method: After the new device is powered on, bring the phone close to the device and turn on the Xiaomi TV. Under normal circumstances, a connection prompt will pop up. Select "OK" to enter the device connection process. If no prompt pops up, you can also add the device manually. The method is: after entering the smart home APP, click the 1st button on the lower left
 How to add a new script in Tampermonkey-How to delete a script in Tampermonkey
Mar 18, 2024 pm 12:10 PM
How to add a new script in Tampermonkey-How to delete a script in Tampermonkey
Mar 18, 2024 pm 12:10 PM
Tampermonkey Chrome extension is a user script management plug-in that improves user efficiency and browsing experience through scripts. So how does Tampermonkey add new scripts? How to delete the script? Let the editor give you the answer below! How to add a new script to Tampermonkey: 1. Take GreasyFork as an example. Open the GreasyFork web page and enter the script you want to follow. The editor here chooses one-click offline download. 2. Select a script. , after entering the script page, you can see the button to install this script. 3. Click to install this script to come to the installation interface. Just click here to install. 4. We can see the installed one-click in the installation script.
 binance official website URL Binance official website entrance latest genuine entrance
Dec 16, 2024 pm 06:15 PM
binance official website URL Binance official website entrance latest genuine entrance
Dec 16, 2024 pm 06:15 PM
This article focuses on the latest genuine entrances to Binance’s official website, including Binance Global’s official website, the US official website and the Academy’s official website. In addition, the article also provides detailed access steps, including using a trusted device, entering the correct URL, double-checking the website interface, verifying the website certificate, contacting customer support, etc., to ensure safe and reliable access to the Binance platform.
![Outlook stuck on adding account [Fixed]](https://img.php.cn/upload/article/000/887/227/171116770937641.jpg?x-oss-process=image/resize,m_fill,h_207,w_330) Outlook stuck on adding account [Fixed]
Mar 23, 2024 pm 12:21 PM
Outlook stuck on adding account [Fixed]
Mar 23, 2024 pm 12:21 PM
When you encounter problems adding accounts in Outlook, you can try the following solutions to resolve it. Typically this can be caused by a faulty network connection, corrupted user profiles, or other temporary issues. Through the methods provided in this article, you can easily solve these problems and ensure that your Outlook can run normally. Outlook stuck on adding account If your Outlook is stuck on adding account, then use these fixes mentioned below: Disconnect and reconnect the internet Temporarily disable antivirus software Create a new Outlook profile Try adding account in safe mode Disable IPv6 Run Microsoft Support and Recovery Assistant Repair Office Application Outlook Add Account Required
 How to use CAD external reference? CAD external reference usage tutorial
Mar 04, 2024 pm 07:10 PM
How to use CAD external reference? CAD external reference usage tutorial
Mar 04, 2024 pm 07:10 PM
Do you know how to use cad external reference? Below, the editor brings how to use cad external reference. I hope it can be helpful to everyone. Let’s learn with the editor! How to use cad external reference? How to use cad external reference The first step of the tutorial: first open CAD and enter the XR command, as shown in the figure. Step 2: A prompt box will pop up. Click the icon to adhere the DWG above, as shown in the picture. Step 3: The selected file is a reference file, and the content in this file is used as a reference block and inserted into the current file, as shown in the figure. Step 4: Select the desired effect and the insertion is complete, as shown in the picture. The above is all the content on how to use cad external reference brought by the editor. I hope it can be helpful to everyone.
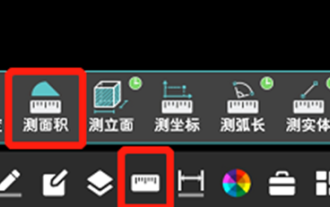 How to measure the area of graphics in CAD Viewer. How to measure the area of graphics in CAD Viewer.
Mar 13, 2024 pm 01:43 PM
How to measure the area of graphics in CAD Viewer. How to measure the area of graphics in CAD Viewer.
Mar 13, 2024 pm 01:43 PM
How to measure the area of graphics in CAD Viewer? CAD Viewer is a very easy-to-use software for viewing engineering drawings. This software has many functions, and drawings in various formats can be opened and viewed. If when we look at the drawings, we find that the area measurement of some graphics is wrong or that some graphics forget to measure the area, we can use this software to measure the area of the graphics. So how to measure the area of graphics? Below, the editor of this site has compiled a CAD drawing king's steps to measure the area of graphics for your reference. Steps for measuring the graphic area in CAD Viewer 1. First, open the drawing file in CAD Viewer APP, take the drawing with arc graphics as an example, and measure the area of the graphic. 2. After opening the drawing, go to the bottom of the software interface
 How to use the cad stretch command-how to use the cad stretch command
Mar 06, 2024 pm 02:31 PM
How to use the cad stretch command-how to use the cad stretch command
Mar 06, 2024 pm 02:31 PM
Many novice friends still don’t know how to use the cad stretch command, so the editor below will bring you how to use the cad stretch command. Friends in need can quickly take a look. Step 1: Open the CAD software. For example, you want to stretch the triangle below, as shown in the picture below. Step 2: Enter the s shortcut key command in the command bar below and press Enter, as shown in the figure below. Step 3: Then select the object from right to left and press Enter (Note: It can neither be lower than the lower boundary nor exceed the upper vertex, and must be between the parts that need to be stretched.), as shown in the figure below. Step 4: Then specify the base point according to the prompts, as shown in the figure below. Step 5: Stretch to the specified position according to the drawing requirements and click to complete the stretching, as shown in the figure below. The above is the cad stretching instructions that the editor brings to you.
 What music can be added to the must-cut list?
Mar 07, 2024 pm 09:19 PM
What music can be added to the must-cut list?
Mar 07, 2024 pm 09:19 PM
This software provides our users with a wealth of functions when editing videos. Just upload the video to the software and you can edit the content in all aspects at any time. You can easily add your favorite stickers, create personalized backgrounds, and have numerous filters and music to choose from to make your videos even better. So how to add music in the BiJi APP? Users who want to know can come and follow this article to find out! How to add music to a must-cut? 1. First, click to enter the must-cut software on your mobile phone, and click the button to start creating. 2. Then we select the video above and click the next option. 3. Click the audio function option below. 4. Then we click on the music library option below. 5. Then select the music above. 6