

What tools are used to fill the borders of graphics in the flash toolbox?


First draw a shape in the canvas, now draw an ellipse.

Select the "Arrow Tool" in the toolbar.

When the mouse pointer changes to the shape as shown in the picture, hold down the left mouse button and drag to select the entire elliptical frame.


Related recommendations: "FAQ"
Click on the toolbar with the mouse Fill color button.

Move the mouse pointer in the color palette to the desired color and click the mouse.

As you can see, the fill color of the ellipse has also changed.

Keep the ellipse selected and click the "Draw Color" (Outline Color) button in the toolbar.

Choose a color from the pop-up color palette.

The outline color of the ellipse has also changed.


The above is the detailed content of What tools are used to fill the borders of graphics in the flash toolbox?. For more information, please follow other related articles on the PHP Chinese website!

Hot AI Tools

Undresser.AI Undress
AI-powered app for creating realistic nude photos

AI Clothes Remover
Online AI tool for removing clothes from photos.

Undress AI Tool
Undress images for free

Clothoff.io
AI clothes remover

AI Hentai Generator
Generate AI Hentai for free.

Hot Article
Hot Tools

Notepad++7.3.1
Easy-to-use and free code editor

SublimeText3 Chinese version
Chinese version, very easy to use

Zend Studio 13.0.1
Powerful PHP integrated development environment

Dreamweaver CS6
Visual web development tools

SublimeText3 Mac version
God-level code editing software (SublimeText3)
Hot Topics


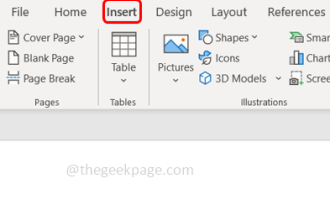 How to make an image look transparent in Microsoft Word
May 29, 2023 pm 02:01 PM
How to make an image look transparent in Microsoft Word
May 29, 2023 pm 02:01 PM
Changing the transparency of an image or fading an image into the background can also be done using Microsoft Word. It lets you adjust color and transparency, apply background effects, and more. In this article, we will see how easy and simple it is to make an image transparent in Word. How to make an image look transparent Step 1: Open Microsoft Word and click on the Insert option at the top Step 2: Click on the Shape drop-down menu and select the shape of your choice. Here I'm going to select the rectangle. Step 3: Draw a rectangle to select an area on the word page, then right-click on it. Step 4: Click the "Fill" drop-down menu from the options that appear and select "Picture" to add an image. Step 5: Click Stock
 Cannot use PS shortcut keys to fill
Feb 19, 2024 am 09:18 AM
Cannot use PS shortcut keys to fill
Feb 19, 2024 am 09:18 AM
With the development of the digital age, image processing software has become an indispensable part of our life and work. Among them, Photoshop (PS for short) developed by Adobe is one of the most famous image processing software. It has powerful functions and flexible operation, and is deeply loved by users. However, when using PS, some users reported that the shortcut key "Fill" cannot be used normally, which brings troubles to the user experience. Shortcut keys are a quick operation method provided in the software to avoid tedious mouse click operations.
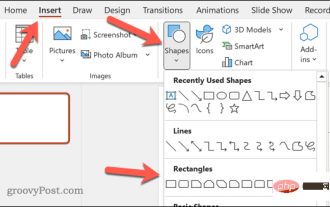 How to insert an image into a shape in PowerPoint
Apr 17, 2023 pm 02:28 PM
How to insert an image into a shape in PowerPoint
Apr 17, 2023 pm 02:28 PM
How to Insert an Image into a Shape in PowerPoint Inserting an image into a shape is useful for creating visual elements that stand out in your presentation. It could be an arrow, a heart, or a cross, but each of these shapes provides a purpose or emotion that can help your image pack a punch. If you're not sure how to insert an image into a shape in PowerPoint, follow these steps: Open your PowerPoint presentation. Click the Insert tab in the ribbon. Click the shape. Select the desired shape and draw it on the slide. Next, select the shape you drew and select the Format Shape tab on the ribbon bar. Click the shape fill. Fill dropdown menu from shape
 what is flash
Aug 10, 2023 am 10:16 AM
what is flash
Aug 10, 2023 am 10:16 AM
Flash is a software used to create multimedia and interactive content, with features such as vector graphics, timeline animation, interactivity, and multimedia processing capabilities. Although once very popular, Flash was gradually phased out with the rise of new technologies, and official support ceased in 2020.
 How to color alternating rows or columns in MS Excel
May 22, 2023 pm 05:56 PM
How to color alternating rows or columns in MS Excel
May 22, 2023 pm 05:56 PM
To make your Excel documents stand out, it's a good idea to paint them with some color. It's very easy to select all the cells you want to add color to and then choose the color you like. But wouldn't it be fun if you could color the odd rows/columns with one color and the even rows/columns with another color? Of course, it will make your Excel document stand out. So, what is the fastest solution to automatically color alternating rows or columns in MSExcel? Well, that’s exactly why we’re here to help you today. Read on to master this cool Excel trick in the easiest steps possible. Hope you enjoyed reading this article. Part 1: How to use MSExcel
 Best practices and algorithm choices for how to handle and fill missing data in Python
Oct 19, 2023 am 08:38 AM
Best practices and algorithm choices for how to handle and fill missing data in Python
Oct 19, 2023 am 08:38 AM
Best practices and algorithm selection for how to handle and fill missing data in Python Introduction Missing values are often encountered in data analysis. The presence of missing values may seriously affect the results of data analysis and model training. Therefore, the processing and filling of missing values has become an important part of data analysis. This article will introduce best practices and algorithm choices for handling and filling missing data in Python, and provide specific code examples. Common methods for processing missing values in data Delete missing values The simplest way to handle missing values
 Installing Flash on Debian: Detailed Guide and Sharing Linux Tips
Feb 15, 2024 pm 01:00 PM
Installing Flash on Debian: Detailed Guide and Sharing Linux Tips
Feb 15, 2024 pm 01:00 PM
Flash used to be the king of online multimedia. Although its use has been greatly reduced now, in some old websites or specific applications, we still need Flash plug-ins. We will introduce in detail how to install Flash in Debian systems. What we need to be clear about is that Adobe has officially stopped supporting Flash Player on December 31, 2020. Therefore, the Flash version we recommend is the open source PepperFlash. PepperFlash is a Flash version developed by Google and specially used by the Chrome browser. Installation steps: 1. Open the terminal and update your package list: ````sqlsudoapt-getupdat
 Detailed explanation of Oracle LPAD function: practical tips for quickly filling strings
Mar 08, 2024 pm 05:39 PM
Detailed explanation of Oracle LPAD function: practical tips for quickly filling strings
Mar 08, 2024 pm 05:39 PM
Oracle database provides many commonly used functions, among which the LPAD function is a very practical function, used to fill the left side of a string with specified characters. The basic syntax of the LPAD function is as follows: LPAD (string, length, fill_string) where string is the string to be filled, length is the total length expected after filling, and fill_string is the character used for filling. LP will be explained in detail below through specific code examples.