How to create a new link in navicat

1. Double-click the Navicat icon on the desktop to start Navicat.

2. The picture below is the main page of Navicat. You can see Navicat’s navigation bar and various tabs.

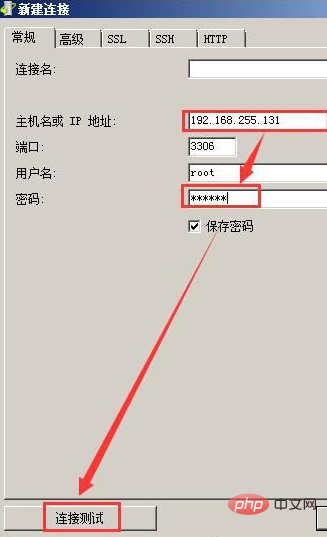
3. Click the connection in the upper left corner, and the "New Connection" window shown below will pop up. Here you need to enter the host name or IP address you want to connect to, and the port will be directly defaulted. That's it, then enter your username and password.
Related recommendations: "Navicat for mysql graphic tutorial"
4. After the input is completed, click " Connection Test". If the test fails, an error message will appear, as shown in the figure below.
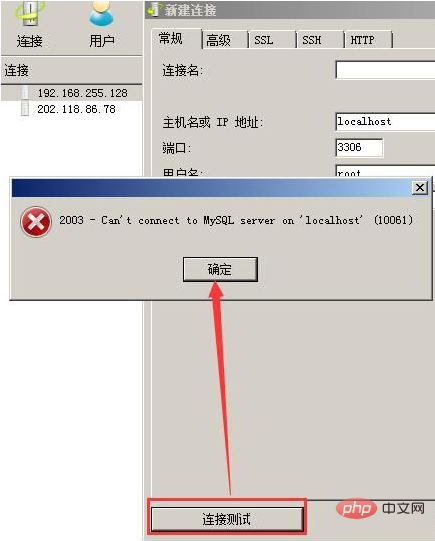
Or the following error may appear:
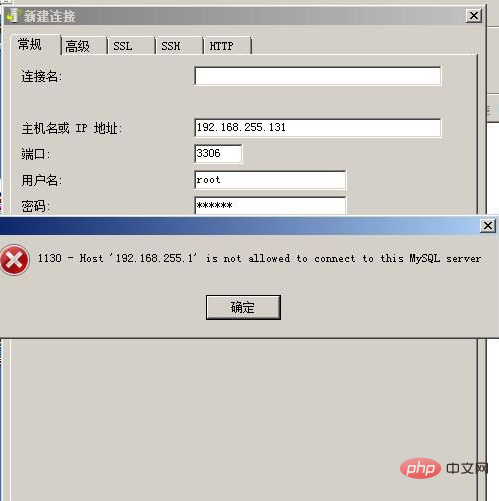
This problem occurs, indicating that the database has not authorized the root user , you only need to authorize it in the database, and then you can achieve remote connection.
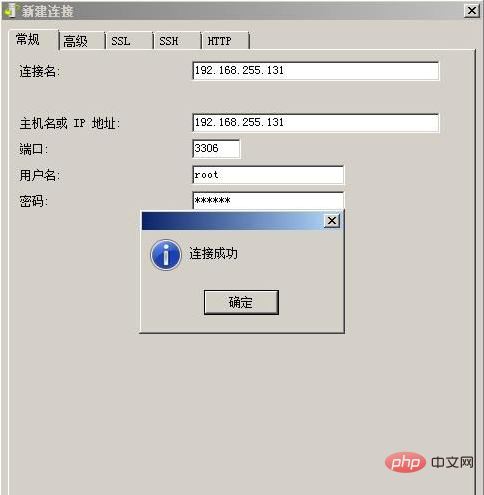
5. If the test connection is successful, the connection will be successful and no error will be reported, as shown in the figure below.
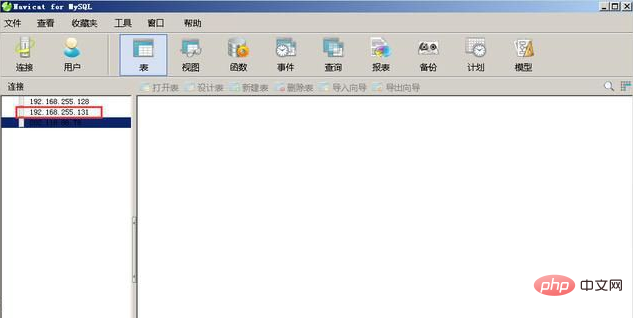
6. Click OK, and then you can see on the Navicat main page that the database with the IP address 192.168.255.131 is already in Navicat.
7. Double-click the 192.168.255.131 database on the left to see the database information. After that, you can remotely operate the database in Navicat, which is synchronized with the database in Ubuntu.
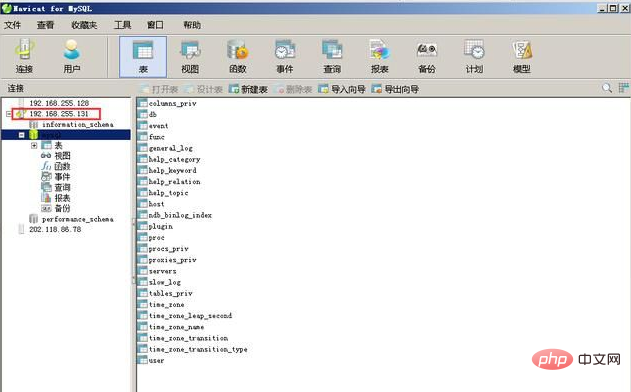
At this point, Navicat’s new connection database has been completed.
The above is the detailed content of How to create a new link in navicat. For more information, please follow other related articles on the PHP Chinese website!

Hot AI Tools

Undresser.AI Undress
AI-powered app for creating realistic nude photos

AI Clothes Remover
Online AI tool for removing clothes from photos.

Undress AI Tool
Undress images for free

Clothoff.io
AI clothes remover

AI Hentai Generator
Generate AI Hentai for free.

Hot Article

Hot Tools

Notepad++7.3.1
Easy-to-use and free code editor

SublimeText3 Chinese version
Chinese version, very easy to use

Zend Studio 13.0.1
Powerful PHP integrated development environment

Dreamweaver CS6
Visual web development tools

SublimeText3 Mac version
God-level code editing software (SublimeText3)

Hot Topics
 How to adjust the interface font size in navicat
Apr 24, 2024 pm 04:24 PM
Steps to adjust interface font size in Navicat: Enter the required database connection. Click the Tools menu. Select "Options". Select the Environment tab. Under User Interface Settings, find the Font Size setting. Select the desired font size and click OK.
 How to export the er diagram of navicat
Apr 24, 2024 pm 04:21 PM
The steps to export an ER diagram in Navicat are: 1. Open the ER diagram pane; 2. Connect to the database; 3. Export the ER diagram. The exported ER diagram is saved as an image file, showing the entities, relationships, and properties of the database.
 Where is the navicat cache file?
Apr 24, 2024 pm 06:06 PM
Navicat cache file storage location: Windows: %APPDATA%\PremiumSoft\Navicat\Cache; Mac: /Users/[username]/Library/Application Support/PremiumSoft/Navicat/Cache. Cache file types: .ncache, .ncache2, .ncache3. Purpose: Store recently opened connections, query history and DBMS metadata. Clear cache files: After closing Navicat, delete the corresponding files in the above location, and then restart Navicat.
 How to copy database to another database in navicat
Apr 24, 2024 pm 07:24 PM
Steps to copy a database using Navicat: Connect the source and target databases. Select the database objects (tables, views, stored procedures) to be copied. Right-click the object and select Copy Database Object. Select the target database and customize replication options (data copy, rename tables, discard constraints). Click "Start" to perform the copy. Check the replication results in the target database to verify the correctness of data and constraints.
 How to recover accidentally deleted table in navicat
Apr 24, 2024 pm 06:21 PM
Navicat accidentally deleted table recovery method: Check whether there is an accidentally deleted table in the recycle bin and restore it. Use binary log recovery: open the binary log, find the start and stop positions, recover the table from the binary log file and import it back to the database. Use a third-party backup tool to back up your database regularly, allowing recovery in the event of accidental deletion.
 How to export table structure to word using navicat
Apr 24, 2024 pm 07:57 PM
To export a table structure to Word in Navicat: Select the table to export. Select the Export Wizard and select Word format. Custom export options (including table headers, single table export, and merged files). Select the output file location and name. Export and open the file to view the table structure including table names, column names, data types, constraints, and more.
 How to undo the previous step in navicat
Apr 24, 2024 pm 05:48 PM
Navicat can undo the previous operation. The specific steps are as follows: Open Navicat and connect to the database. Perform the action you want to undo. Click the Undo button under the Edit menu in the menu bar (or use the shortcut Ctrl+Z/Cmd+Z). Confirm the undo operation.
 Can Navicat not install the database?
Apr 24, 2024 pm 04:39 PM
Navicat is a database management tool that requires a database connection to function. Specifically, it is compatible with database systems such as MySQL, MariaDB, and PostgreSQL, and allows users to perform operations such as querying, creating tables, and modifying data by establishing sessions. Therefore, the database must be installed first, otherwise Navicat cannot be used.


