

PS简单制作一个动态的字体动画

这篇教程是向PHP中文网的朋友分享PS简单制作一个动态的字体动画方法,教程制作出来的字体动画非常漂亮,难度不是很大,来看看吧
动态的文字比静态的文字更加吸引人的目光。如果在平时的海报中,在平时的促销活动中,我们也可以做文字动图,把我们的信息以动态的信息传输给我们的小伙伴们,下面小编就为大家详细介绍一下,来看看吧!

步骤
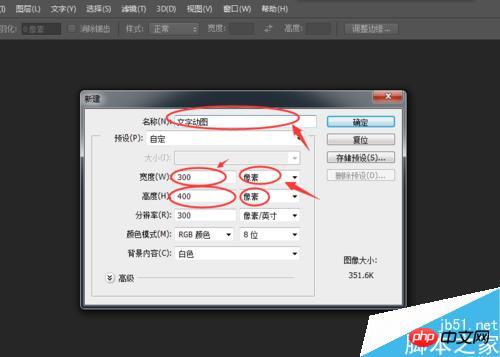
打开ps软件,点击菜单栏:文件-新建,新建一个画布,(也可以用快捷键ctrl+n新建)画布大小根据大家的需要,,我这里是拿300*400px做例子。参数设置好了之后点击确定
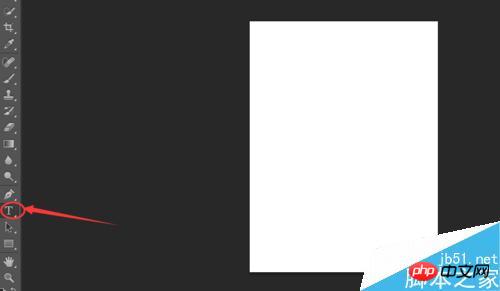
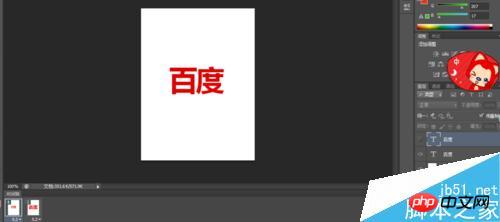
进入画布工作台后,我们鼠标选择工具栏的文字工具(也可以用快捷键“t”),选择好文字工具之后,在我们的画布上点一下,然后打上我们需要做动图的文字,在ps的属性栏可以设置字体,调节字体大小等等。当我们设置完毕,可以点击属性栏右边的小勾勾确定我们编辑的文字内容


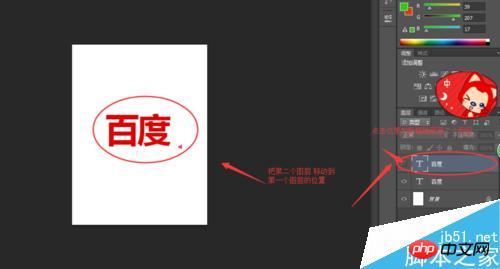
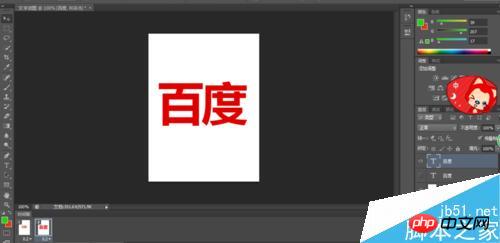
刚才已经成功新建了一个文字图层了,接下来我们要再用文字工具增加一个同样文字但是字体比刚才大的图层,这样子才能凸显我们动图中文字的变化嘛。
新建好了之后,我们鼠标左键按住第二个新建的文字图层,然后把它拉到跟第一个图层一样的位置后,隐藏第二个图层(也是刚才我们设置字体大小比较大的那个图层)

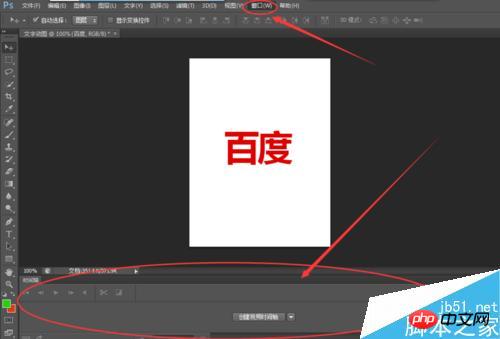
文字图层做好了,我们点击一下菜单栏里的“窗口”—“时间轴”点击时间轴时候会在我们ps工作界面的下方出现一个模块,我们点击中间的三角形,选择”创建帧动画“

创建好了之后,我们会发现在页面上出现一个帧,我们先来调整这个帧的属性,调整好了之后再点击时间轴模块的垃圾桶图标的旁边有一个新建帧的按钮,点击一下之后会出现一个新的帧,我们把鼠标选择第二个帧,接着把第一个文字图层(字体比较小的图层)隐藏了,把第二个文字图层(也是字体比较大的图层)打开


我们按一下我们键盘的空格键,这时候我们会发现我们刚才设置的文字动画已经按照我们的要求开始动起来了。再按一下空格键,动画就停止演示
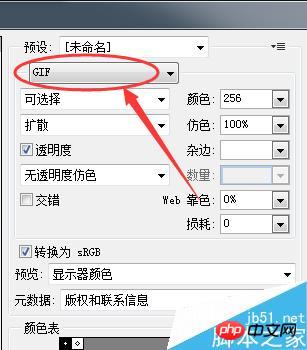
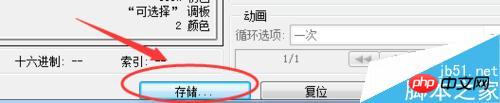
做好的文字动画需要导出来,选择菜单栏里的文件—保存为web所用格式,选择图片保存为gif格式,点击存储,选择你要保存到电脑的哪里,选择好之后按保存,搞定了
注意事项
帧的时间设置根据自己的需要,需要查看效果之后微调,这样才能确保动图的效果更佳
以上就是PS简单制作一个动态的字体动画教程,大家学会了吗?希望这篇文章能对大家有所帮助!

Hot AI Tools

Undresser.AI Undress
AI-powered app for creating realistic nude photos

AI Clothes Remover
Online AI tool for removing clothes from photos.

Undress AI Tool
Undress images for free

Clothoff.io
AI clothes remover

AI Hentai Generator
Generate AI Hentai for free.

Hot Article
Hot Tools

Notepad++7.3.1
Easy-to-use and free code editor

SublimeText3 Chinese version
Chinese version, very easy to use

Zend Studio 13.0.1
Powerful PHP integrated development environment

Dreamweaver CS6
Visual web development tools

SublimeText3 Mac version
God-level code editing software (SublimeText3)
Hot Topics


 win10 font folder path details
Jan 03, 2024 pm 08:37 PM
win10 font folder path details
Jan 03, 2024 pm 08:37 PM
When inputting text, many friends like to add their favorite personalized fonts, but they do not know where the font folder path of the win10 system is and cannot add fonts. The following will introduce the specific folder path to you. Win10 font folder path: 1. Click "This PC" on the desktop. 2. Enter the system disk C drive. 3. Click the “windows” folder. 4. Pull down to find the "Fonts" folder. 5. You can enter the font library. Friends who have other questions can take a look to learn more about common problems with win10 fonts~
 How to change the font in Outlook on Apple mobile phone
Mar 08, 2024 pm 04:46 PM
How to change the font in Outlook on Apple mobile phone
Mar 08, 2024 pm 04:46 PM
How to change the font in Outlook on Apple mobile phone? First open the Outlook software and click on the file in the upper left corner of the interface. You can set the font according to your own preferences. After the settings are completed, click the OK button. Let’s take a look! How to change the font in Outlook on Apple mobile phone 1. Open the Outlook software and click the "File" option in the upper left corner of the interface. 2. In the list that appears, find "Options" and click to enter. 3. On the left side of the option list, click "Mail". 4. Next, select “Letter and Fonts”. 5. If you want to set the font for new emails, reply emails, or composing, click the corresponding option to enter the settings. 6. Set the font according to personal preference. After the setting is completed, click OK
 How to make vivo mobile phone font larger and where to set it
Feb 24, 2024 pm 06:16 PM
How to make vivo mobile phone font larger and where to set it
Feb 24, 2024 pm 06:16 PM
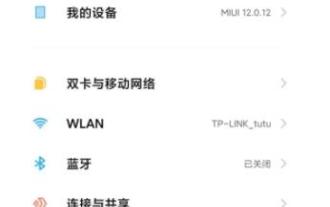
How to make the font size of vivo mobile phone larger? Where can I set it? In vivo mobile phone, you can make the font size larger, but most users don’t know how to set the font size of vivo mobile phone. Next, the editor brings you the settings of how to make the font size of vivo mobile phone larger. Method graphic tutorials, interested users come and take a look! Vivo mobile phone usage tutorial How to make the font size of vivo mobile phone larger Where to set it 1. First open the [Settings] function in the vivo mobile phone and click on it; 2. Then jump to the settings interface and find the [Display and Brightness] function; 3. Then Reach the page in the picture below and click the [Font Size and Thickness] service; 4. Finally, slide the horizontal line in the picture below to adjust the font size.
 How to solve win11 font blur problem
Jan 13, 2024 pm 09:00 PM
How to solve win11 font blur problem
Jan 13, 2024 pm 09:00 PM
After updating the win11 system, some friends found that their win11 fonts were blurred and very uncomfortable to use. This may be due to a bug in the system version, or it may be that we have turned on special effects. Let’s follow the editor. Let’s see how to solve it. Win11 fonts are blurred: Method 1: 1. First, right-click this computer and open "Properties" 2. Then enter "Advanced System Settings" in the related link 3. Then click "Settings" in Performance to open it. 4. Under "Visual Effects" check "Adjust for Best Performance" and click "OK" to save. Method 2: 1. Right-click a blank space on the desktop and open "Display Settings" 2. Click "Zoom" under Zoom and Layout 3. Then click "Text Size" under relevant settings
 Detailed explanation of Win11 font installation method
Dec 27, 2023 pm 05:16 PM
Detailed explanation of Win11 font installation method
Dec 27, 2023 pm 05:16 PM
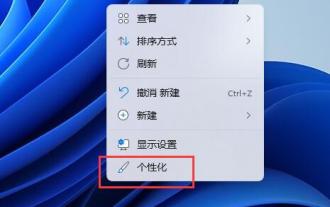
Some friends cannot find where their fonts are installed after installing win11 fonts, so they raise the issue of the installation location of win11 fonts. In fact, we can enter the font management in personalization to find the location where the fonts are installed. Let’s take a look below. Win11 font installation location: 1. First, right-click a blank space on the desktop and open "Personalization" settings. 2. Then enter the "Font" installation management settings. 3. Find the font you want and enter it. 4. If you can’t find it, you can also search directly above. 5. After entering the font, you can see the installation location of the win11 font in "Font File" under metadata. 6. If we want to uninstall the font, click Uninstall here.
 How to change the font of Xiaomi 11_How to change the font of Xiaomi 11
Mar 25, 2024 pm 07:26 PM
How to change the font of Xiaomi 11_How to change the font of Xiaomi 11
Mar 25, 2024 pm 07:26 PM
1. Open the phone settings and click [Display]. 2. Click [Font]. 3. Select the font you like or click [More Fonts] to download the application.
 An effective way to solve the Linux font blur problem
Jan 08, 2024 pm 11:25 PM
An effective way to solve the Linux font blur problem
Jan 08, 2024 pm 11:25 PM
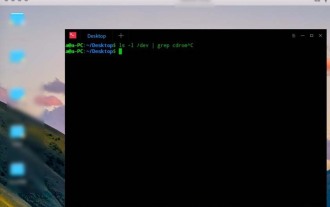
Linux fonts are blurry. How can I make the fonts appear clearly? Let’s take a look at the detailed tutorial below. 1. Install font files 1. Download the file provided by the tool above, then drag the file to the desktop and unzip it. As shown in the picture below, because the file has been decompressed, it is in the form of a folder. 2. Then, without clicking anything on the desktop, right-click and select Open in Terminal. Enter the command in the terminal: sudodpkg-i and press space. Open the decompressed font file on the desktop, and drag the deb package into it one after the -i of this command. After pressing Enter, an error will appear, indicating that the dependency is not installed. If the dependency error is prompted, the command input is normal, otherwise it is an incorrect command. Newbies must pay attention to spaces and capitalization.
 How to automate tasks using PowerShell
Feb 20, 2024 pm 01:51 PM
How to automate tasks using PowerShell
Feb 20, 2024 pm 01:51 PM
If you are an IT administrator or technology expert, you must be aware of the importance of automation. Especially for Windows users, Microsoft PowerShell is one of the best automation tools. Microsoft offers a variety of tools for your automation needs, without the need to install third-party applications. This guide will detail how to leverage PowerShell to automate tasks. What is a PowerShell script? If you have experience using PowerShell, you may have used commands to configure your operating system. A script is a collection of these commands in a .ps1 file. .ps1 files contain scripts executed by PowerShell, such as basic Get-Help
