

phpstrom is a very powerful development tool. Below we will introduce to you how phpstrom deploys projects to the server.
Recommended tutorial: phpstrom installation and usage tutorial
1. Connection settings
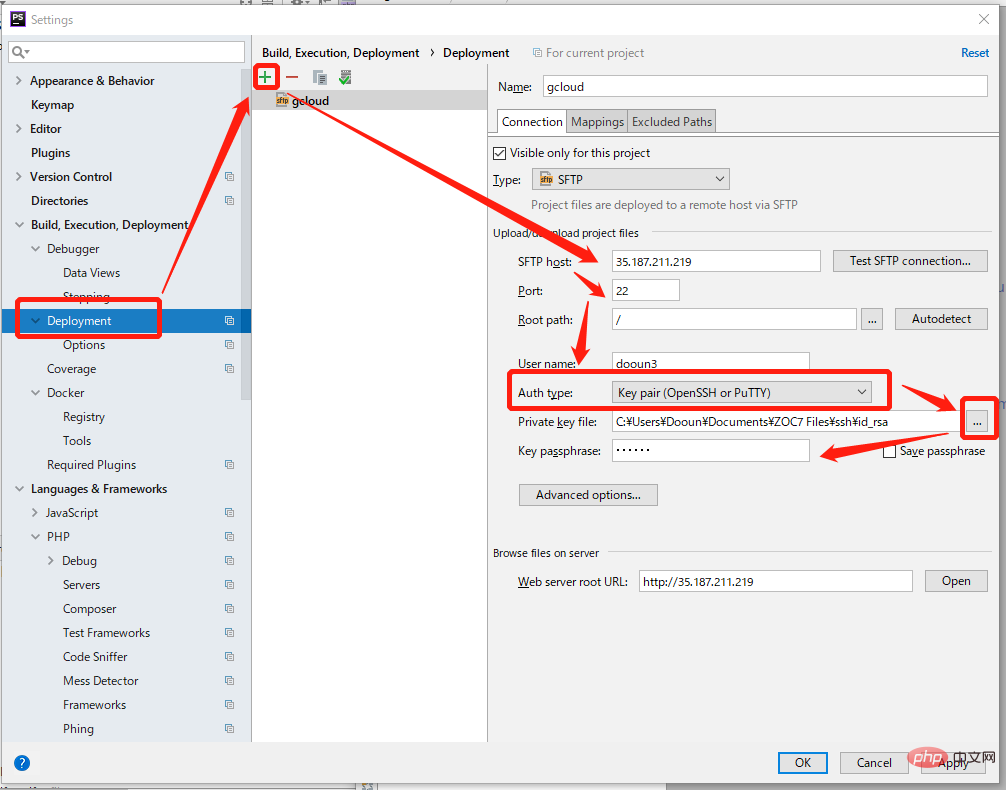
Find Deployment in the settings
Click the plus sign to add an SFTP type connection
Fill in the server’s external network address in the host column
Fill in the default port 22 in the Port column
Change AuthType (authentication type) to Key pair (certificate)
Click in the file selector on the right and select the private key,
Enter the password of the private key.
2, mapping
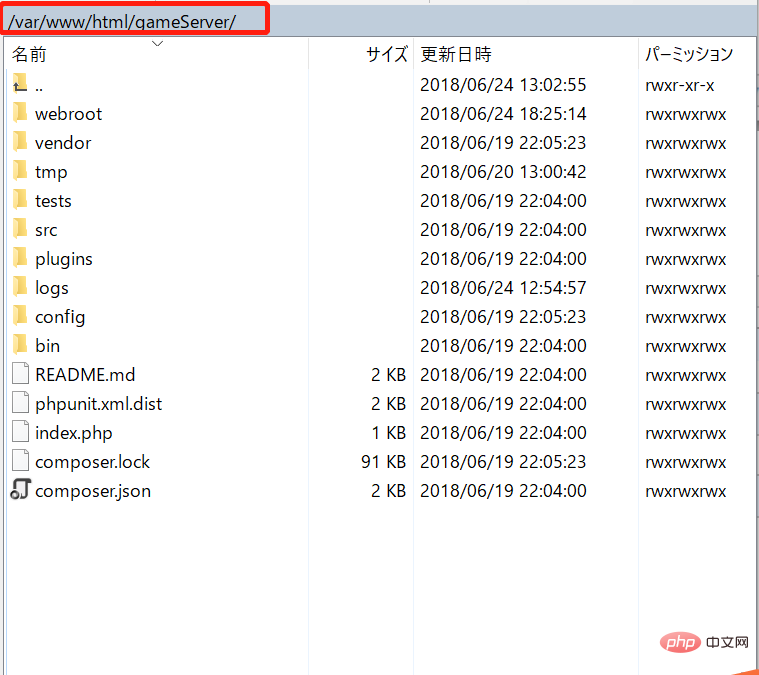
The following is the location of the project on the server.
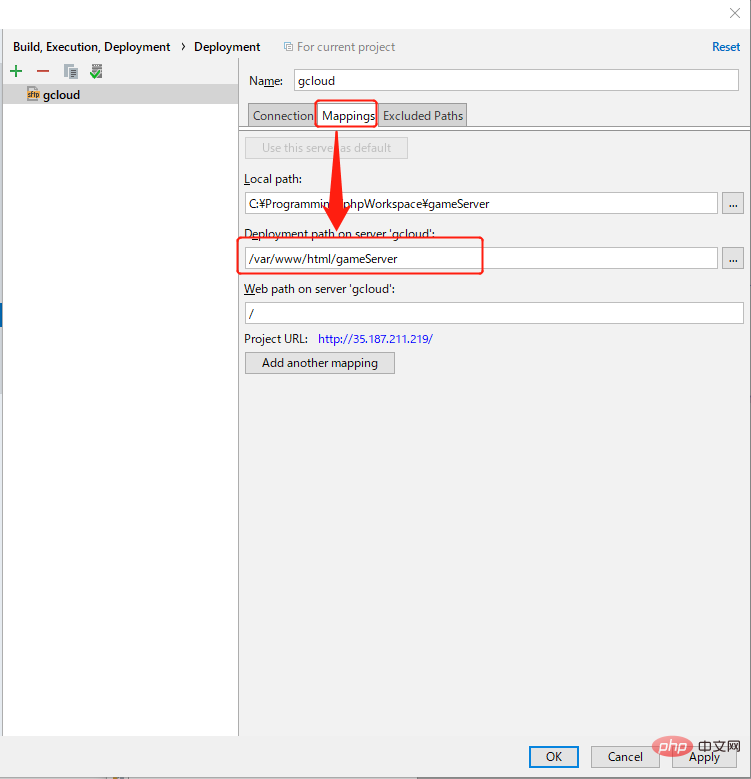
The following are the corresponding mapping settings in phpStorm
Select the "mapping" tab
In " Deployment path on server xxx" List the corresponding location of the code on the server.
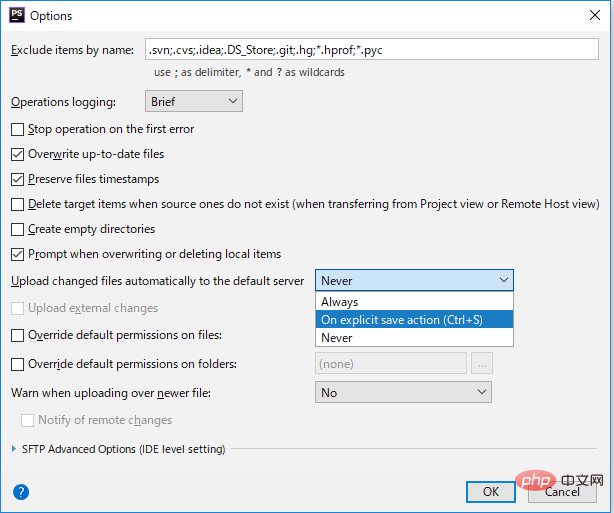
3. Set up automatic upload
Follow the picture below to open the setting interface for automatic upload.
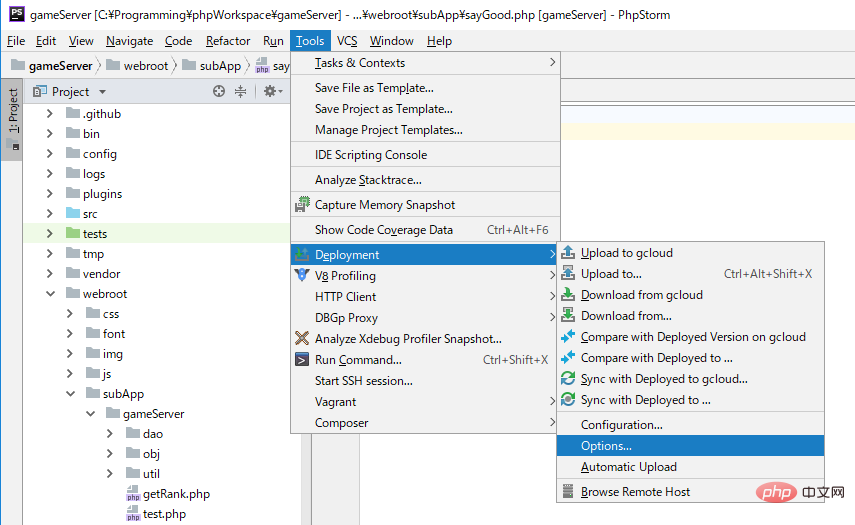
Change the automatic upload option from "Never" to upload when saving or always sync (here I changed it to the second one, upload after saving).
Modify any file and press Ctrl S to save.
The following prompt will pop up for the first time

Click Yes, the file will start to be uploaded, but the following text may appear in the upload log.

This is because the current user does not have permission to write files. Use the ssh client to execute the following command
sudo chown -R testuser:testuser /var/www/test/public_html
Method 1 Change the owner directly to this user (which may result in the app server not having write permissions.)
sudo chown -R dooun3:dooun3 /var/www/html/gameServer
Method 2 Modify the file permissions so that everyone can read
sudo chmod -R 777 /var/www/html/gameServer
Modify it and save it again. If text similar to the following appears, it means the automatic upload is successful.

The above is the detailed content of How to deploy phpstorm project to server. For more information, please follow other related articles on the PHP Chinese website!