
Foreword: In the development of PHP, the first step we have to do is to install the PHP operating environment, but if we use a separate installation method, that is php, Mysql and apache are installed separately, which is not friendly to beginners who are just getting started or preparing to get started. Fortunately, there is an integrated development environment that saves worry, effort and time in the development process of PHP. For example: wampserver, phpstudy. So, today I will introduce to you the installation steps of phpstudy. Currently, phpchinese.com launched the phpstudy V8 version in 2019, which is more convenient and easy to use!
First of all, let’s briefly introduce the phpstudy V8 version
php Chinese website launched the phpstudy V8 version in 2019, which is a new upgrade to the old phpstudy version.
phpStudy v8 is a PHP development environment integration package that can be used on a local computer or server. This package integrates the latest PHP/MySql/Apache/Nginx/Redis/FTP and can be installed in one go without configuration. It is a very convenient and easy-to-use PHP debugging environment.
phpStudy V8 version installation steps (including Win32 and 64-bit)
First step: Download phpStudy V8 version
Download address: https://www.xp.cn/wenda/401.html
Click download to enter the download page, select the version corresponding to the corresponding operating system of your computer to download, this example The choice is WIN64 bit.
Second step: Extract to the root directory of drive C (you can customize the decompression path), find phpstudy_64, open it and click phpStudy_x64_8.0.7.exe to run the installation. The installation path can also be customized.
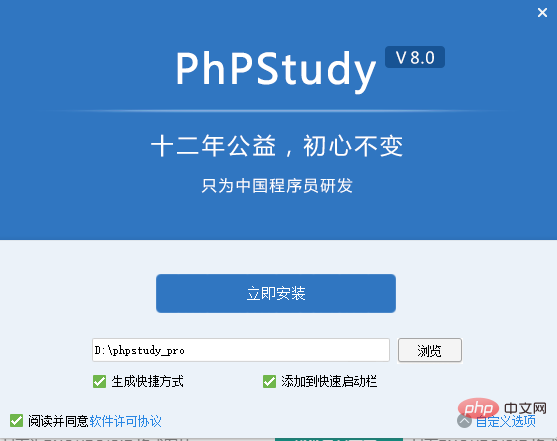
Here we choose to add a quick launch bar, which will facilitate our operation. Wait for the installation to complete.
After the installation of phpStudy V8 version is completed, we can see the following interface:
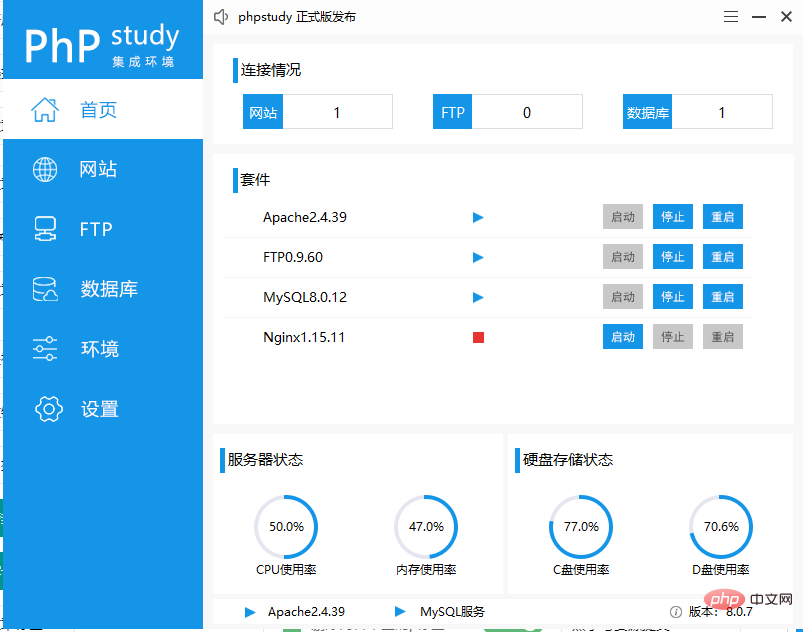
The third step: At this time, All configurations are red, indicating that the service is not enabled. We click Start to enable the corresponding configuration.

What we need to pay attention to here is:
01. If we have already turned on Apache, there is no need to turn on Nginx.
02. For FTP settings, you need to go to [FTP] on the left side of the menu to enter a separate account and password
Step 4: We click Settings, here we can modify apache related configurations , no modification is required unless there are special circumstances.
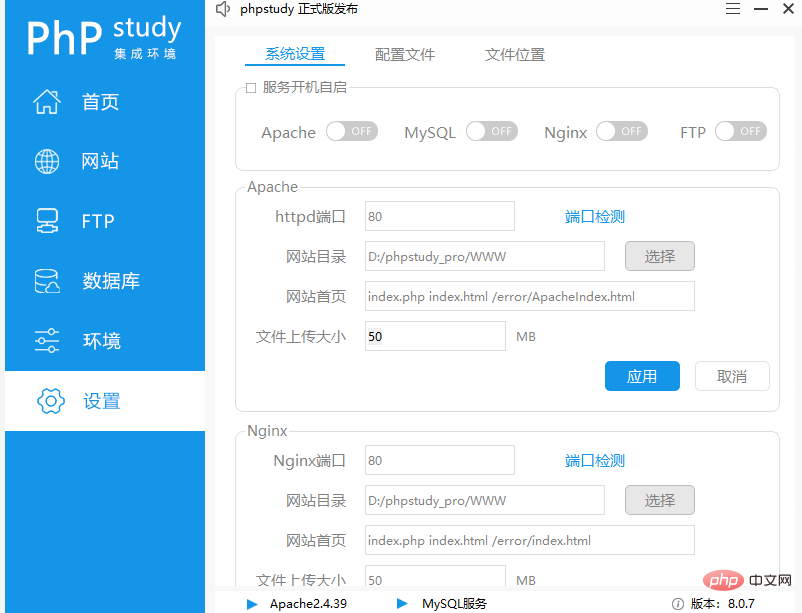
Here you can see that the root directory of the website is D:/phpstudy_pro/WWW Our files are saved in this directory.
Step 5:Next, test whether the environment is configured successfully.
01. We first use the editor to write the test file.
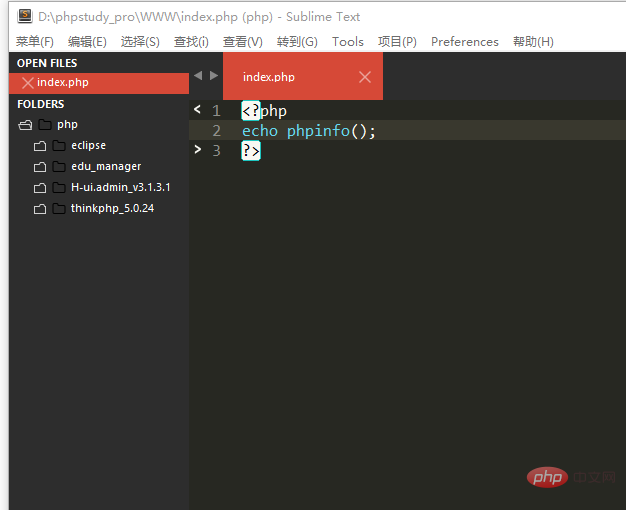
02. Save this file in the root directory of the website, i.e. D:/phpstudy_pro/WWW, and name it index.php.
03. Then, open the browser, enter localhost/index.php in the URL bar, and run. The following results indicate that the operation is successful.
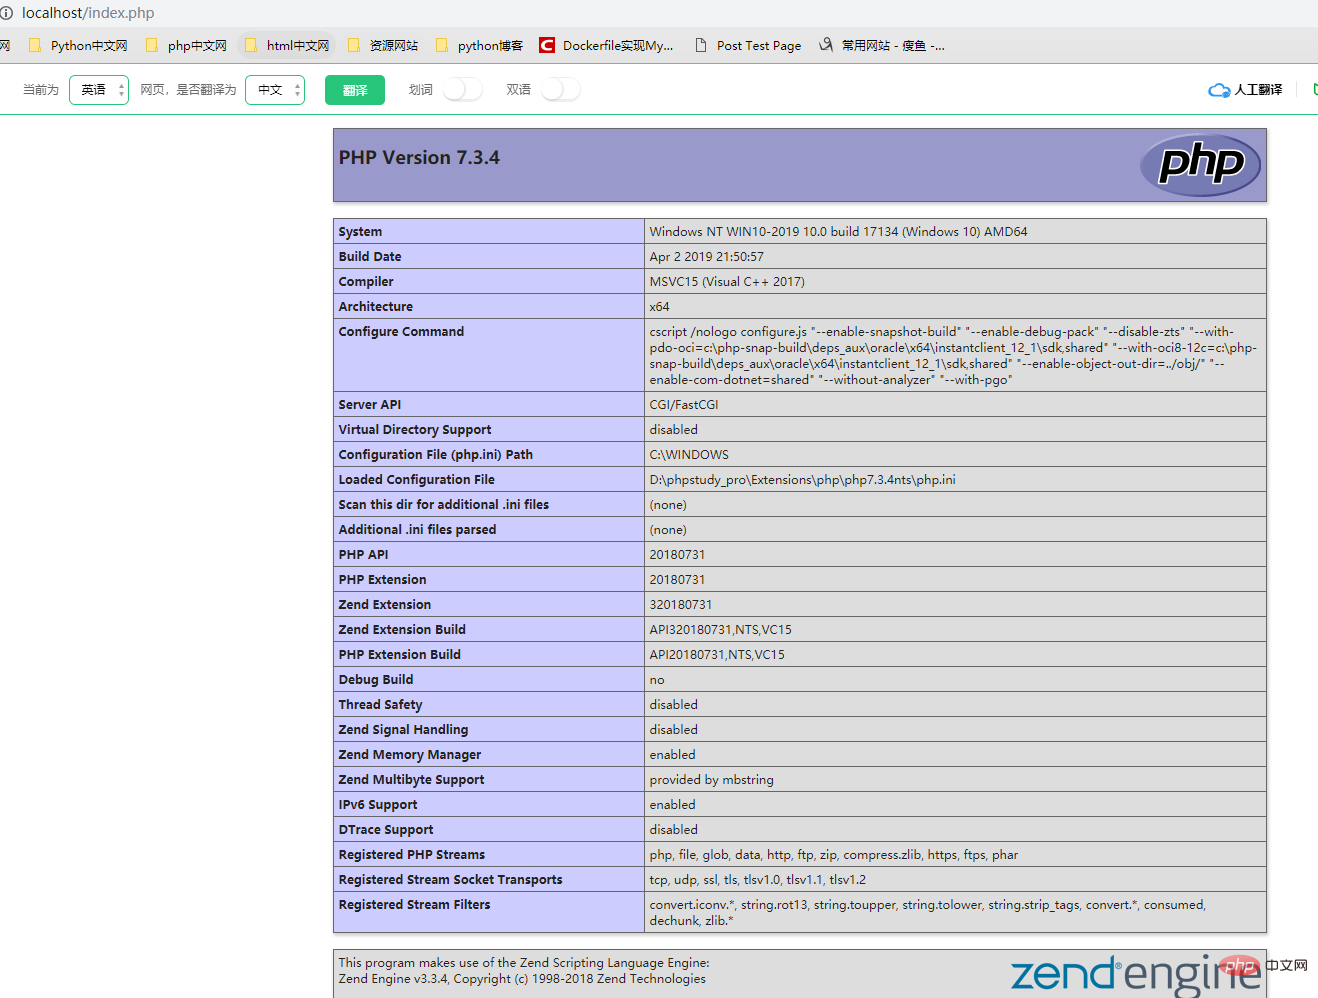
#Finally, everyone can enjoy it. Thanks!
Note: If the apache service cannot be opened, it is likely that the port is occupied. Please refer to the articlephpstudy port is occupied solution,
The above is the detailed content of The latest version of phpstudy v8 installation and use tutorial (picture and text steps). For more information, please follow other related articles on the PHP Chinese website!
 vcruntime140.dll cannot be found and code execution cannot continue
 pr shortcut key
 How to dress up Douyin Xiaohuoren
 What does data intelligence mean?
 parentnode usage
 How to read data from excel file in python
 What to do if the computer fakes death
 What to do if css cannot be loaded
 What is the difference between JD International self-operated and JD self-operated


