Home > Web Front-end > PS Tutorial > How to take out pictures after cutting them out in PS

How to take out pictures after cutting them out in PS

藏色散人
Release: 2019-08-19 09:49:16
Original
29184 people have browsed it

How to take out pictures after cutting them out in PS

#ps How to take out the picture after cutting it out?

1 Open ps and click "Open" in "File".
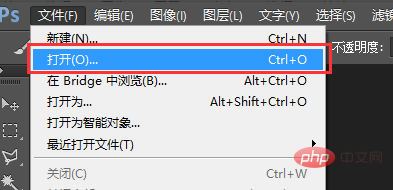
How to take out pictures after cutting them out in PS

#2 Find the image you want to open and click "Open".
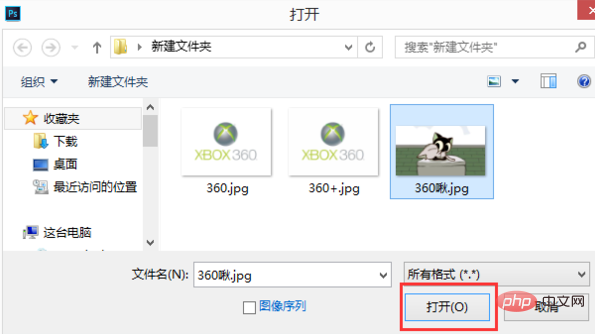
How to take out pictures after cutting them out in PS

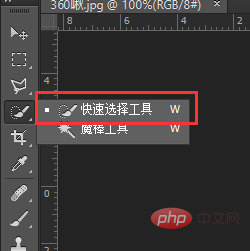
#3 Find the "Quick Selection Tool" on the toolbar (you can also choose other tools) to cut out the image.
How to take out pictures after cutting them out in PS

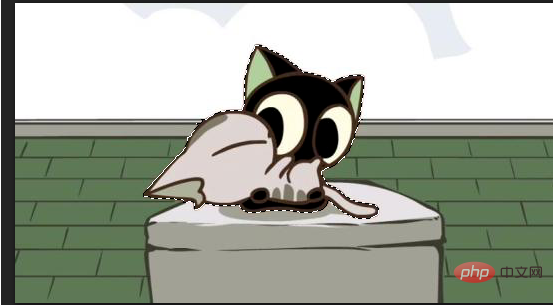
#4 Select the cutout area.

How to take out pictures after cutting them out in PS

#5 Click "Invert Selection" in "Select" on the upper toolbar.

How to take out pictures after cutting them out in PS

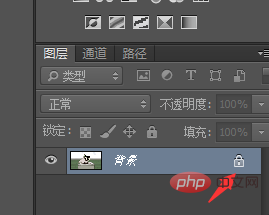
#6 Then remember to open the small lock in the lower right corner, because if it is a background, you cannot delete the cutout part and make it transparent.
How to take out pictures after cutting them out in PS

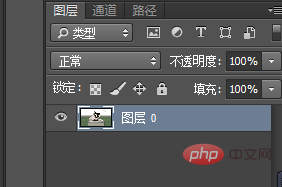
#7 Click the small lock to turn it into a layer, so you can delete the inverted part.
How to take out pictures after cutting them out in PS

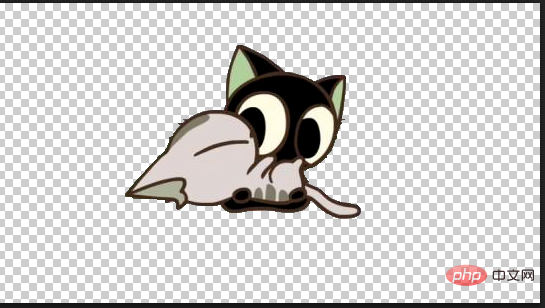
#8 Press the "Delete" key to delete, and the deleted part becomes transparent.
How to take out pictures after cutting them out in PS

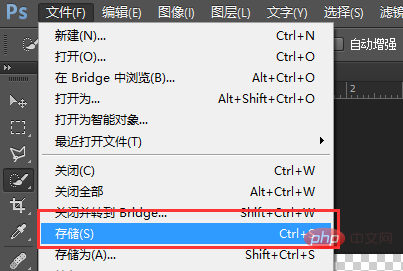
#9 Then click "Save" in "File".

How to take out pictures after cutting them out in PS

#10 Select the location where you want to store it, and remember to select PNG as the format.
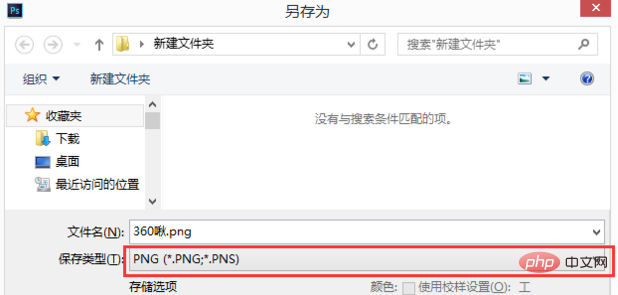
How to take out pictures after cutting them out in PS

#11 Then the PNG option will pop up, just click OK.
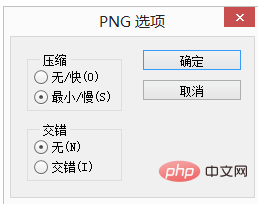
How to take out pictures after cutting them out in PS

#12 The cutout picture will be saved separately.

How to take out pictures after cutting them out in PS

The above is the detailed content of How to take out pictures after cutting them out in PS. For more information, please follow other related articles on the PHP Chinese website!

Related labels:
ps
source:php.cn
Statement of this Website
The content of this article is voluntarily contributed by netizens, and the copyright belongs to the original author. This site does not assume corresponding legal responsibility. If you find any content suspected of plagiarism or infringement, please contact admin@php.cn
Popular Tutorials
More>
Latest Downloads
More>
Web Effects
Website Source Code
Website Materials
Front End Template