Navicat Premium is a relatively good visual database management tool. It is short and concise. One tool solves the connection problems of three databases, and truly achieves integrated management, for MySQL and SQLServer. Generally speaking, the connection is relatively simple, so I won’t go into details. The steps to connect to Oracle are summarized as follows:
1. Description
This tutorial is to connect the Oracle database It is installed into a Vmvare virtual machine. For simple debugging, it is a headache to install it into a physical machine. The performance of the physical machine will be greatly reduced, and the database is not easy to uninstall.
2. Preparations before installation
The first is Navicat
1. Install the Oracle database and select the type during installation Share a server, do not choose a dedicated server.
2. Determine the number of digits of Oracle, Navicat, and OracleClient. Make sure that the number of digits of your oracle database is consistent with the number of navicat, that is: 32v32, 64v64
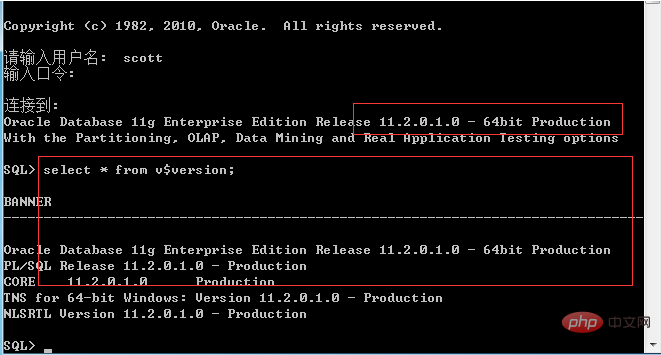
3.http ://www.oracle.com/technetwork/database/features/instant-client/index-097480.html, download the instantclient that is consistent with your database version on this page. It must be consistent with your database version. You don’t know your own database. For the version number, please enter select * from v$version in sql. The data will be as follows:

Related recommendations: "Navicat User Tutorial"
Then the matching client version is as follows:

When downloading, choose to download the BASIC version, remember that the download time and version number must be certain Be consistent! I said it three times. After downloading, it is usually placed in navicat, whichever you like. Because it also has an instantclient directory in it, but please remember that the one that comes with it cannot be used at all. Please delete it, and then put the one you downloaded into this directory. Most online information says that you only need to replace the oci.dll file. That’s it, this is wrong, the entire folder must be placed in it!
4. Open navicat->tools->oci, select the instantclient you just downloaded, find oci.dll, and set it as the path. Navicat is now configured!
The next step is the virtual machine.
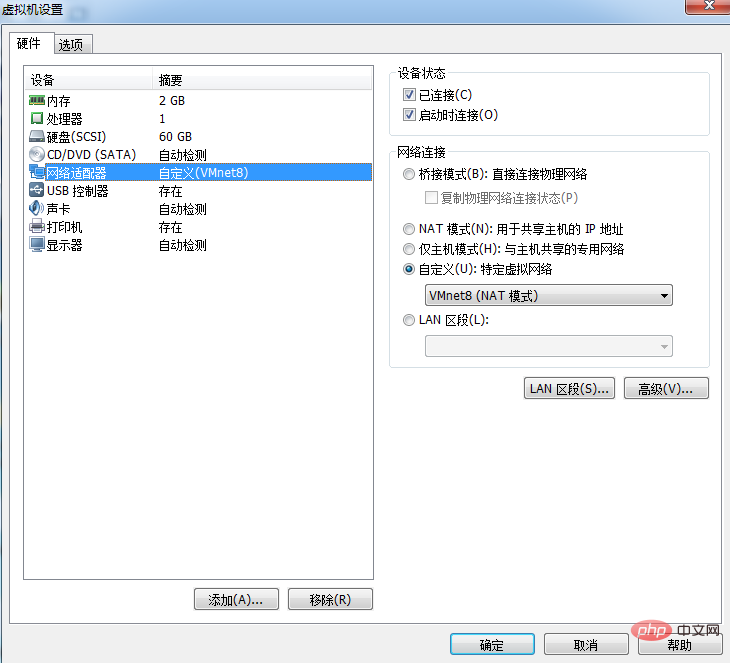
5. For virtual machine installation and system installation, please Google and Du Niang. Note that the network adapter should be selected VMNET8, as shown in the figure:

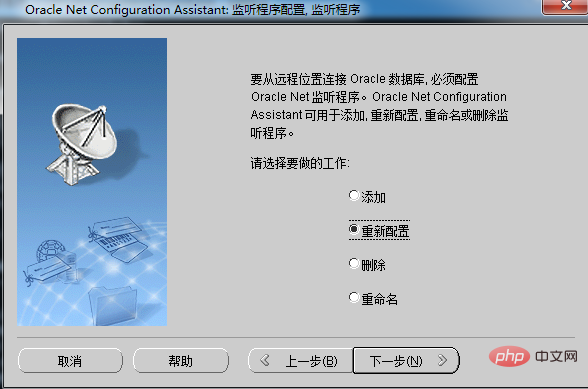
6. To install Oracle, please Google and DuNiang. Note that you should select the shared mode during installation. After installation, open the Net Configuration Assistant and reconfigure the listening program, as shown in the figure:

7. Because it is in a virtual machine, just turn off the firewall. If you don't want to turn it off, just let Oracle in the network firewall. This step of the firewall may not be considered generally. requires attention.
8. Have you noticed that we do not have any steps to configure the tnsname and listener files. This method does not require configuration, because the previous step of reconfiguring the listener has already configured the listening for us. program.
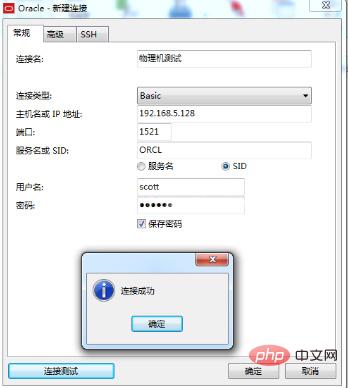
9. Test the connection and connect in the virtual machine.

10. Test the connection. Physical machine connection.

The above is the detailed content of How to connect to remote oracle using navicat. For more information, please follow other related articles on the PHP Chinese website!


