


android studio usage tutorial
Android Studio is an Android integrated development tool launched by Google, based on IntelliJ IDEA. Similar to Eclipse ADT, Android Studio Integrated Android development tools are provided for development and debugging. The following is an introduction to the basic usage.
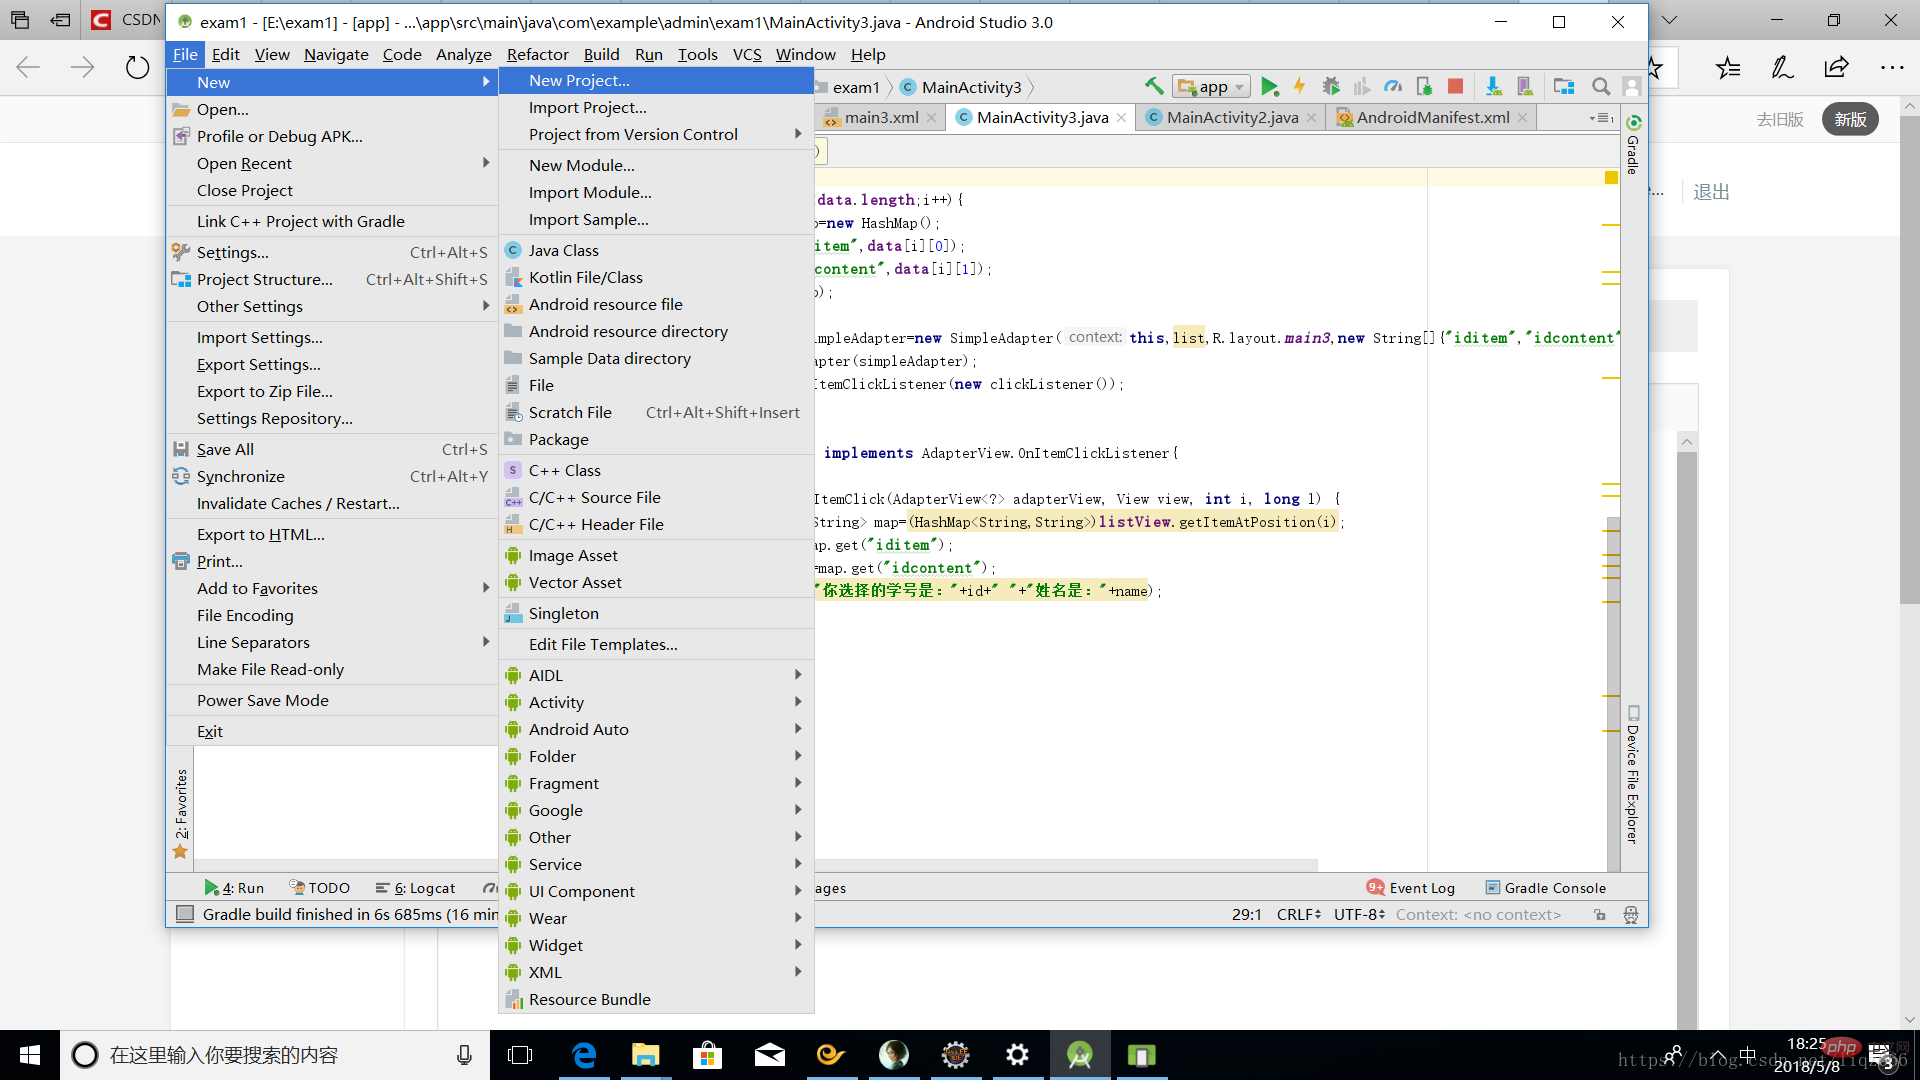
1. Create an Android project, click File ->New->New Project,
where open is to open an Android project
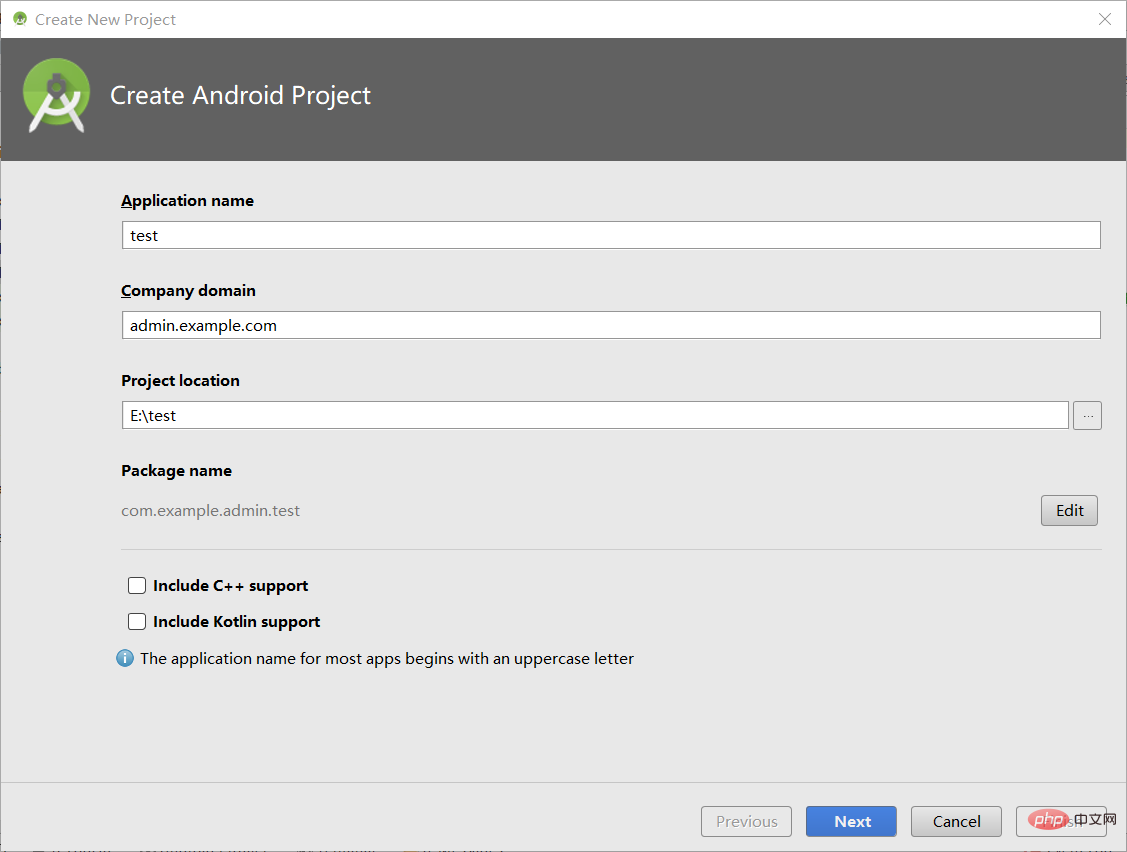
2. Enter the name of the project test, put this project under the E drive, and then click Finish
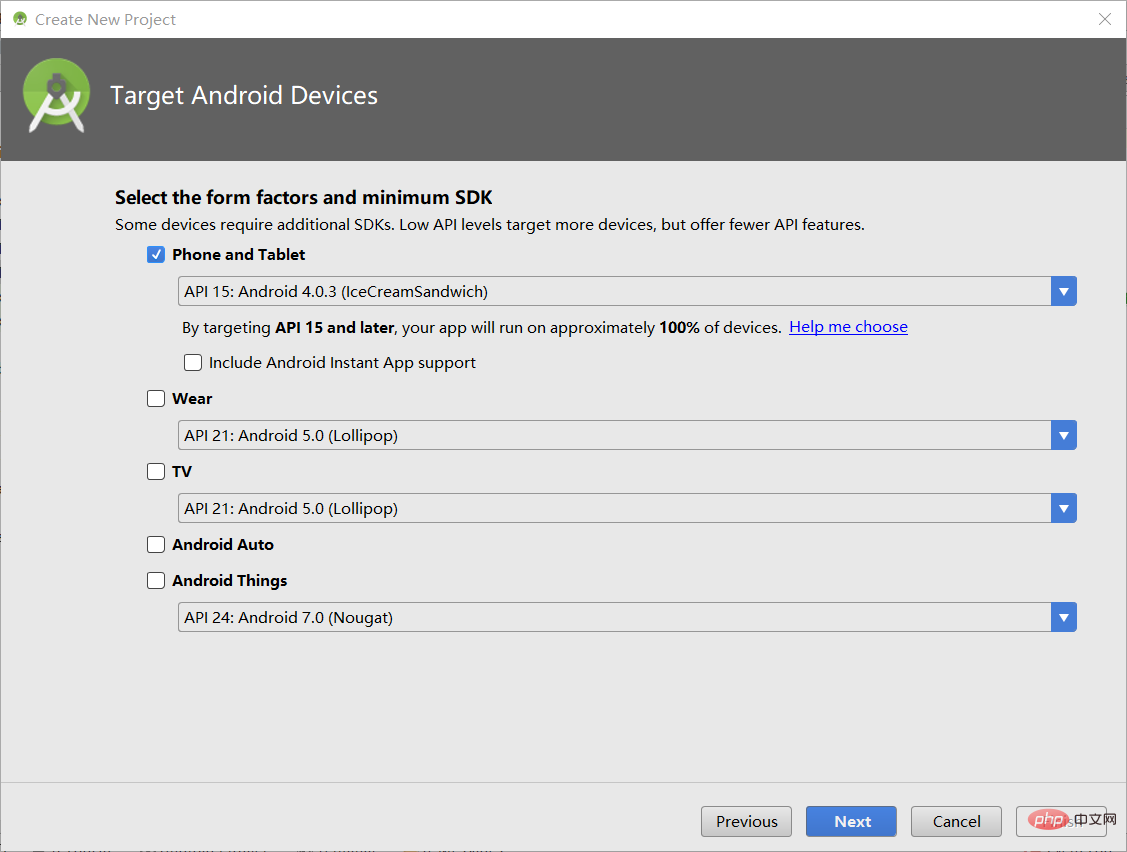
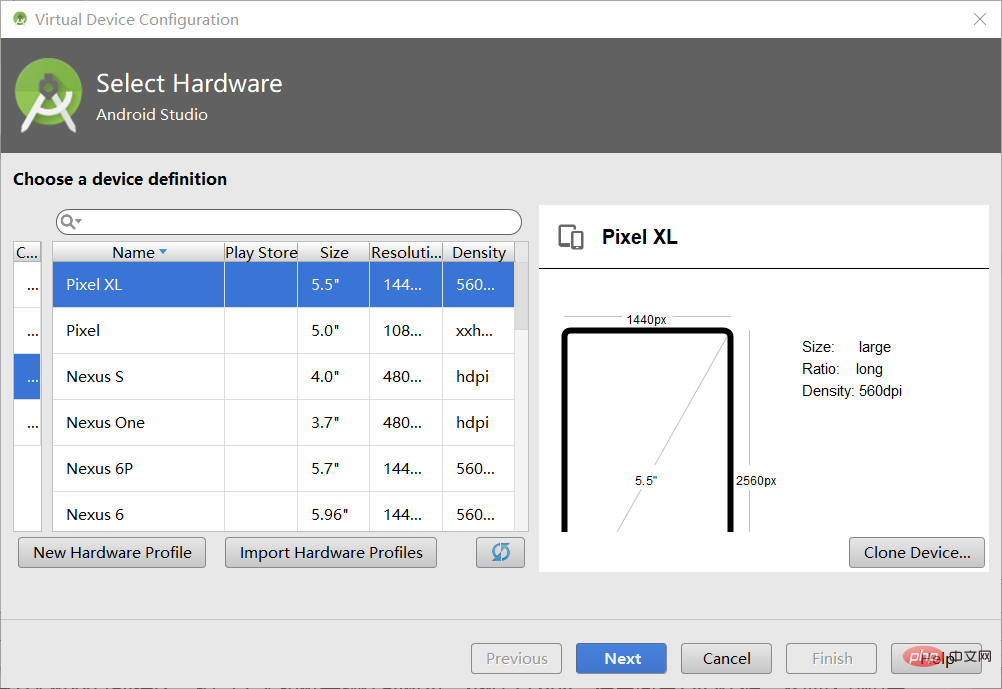
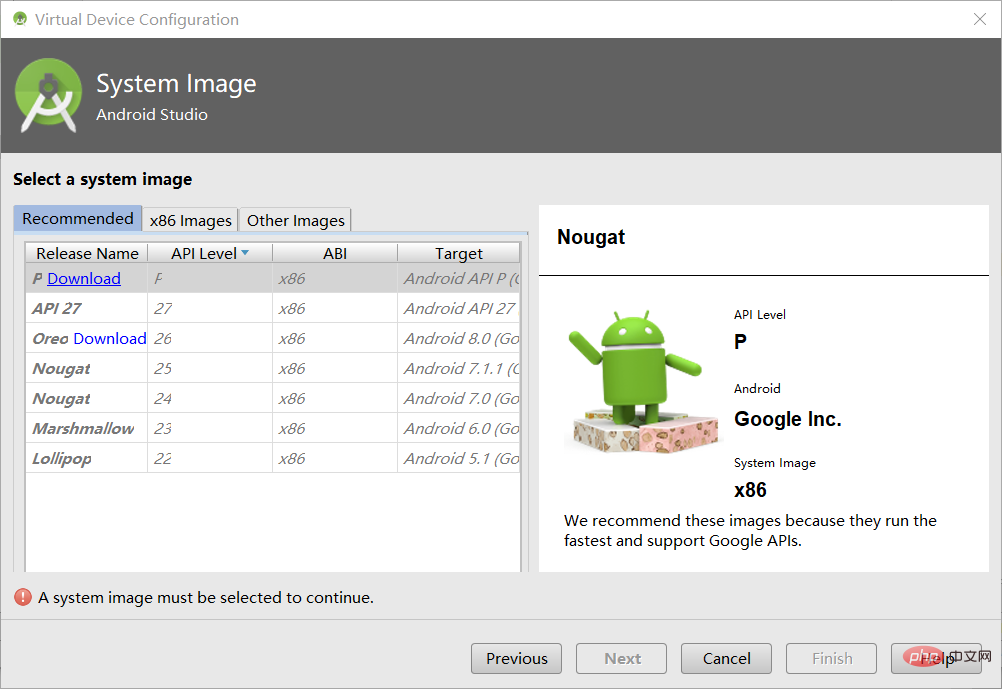
3. Select the version of the Android virtual machine. The lower the version, the faster it will run. There is no need to check other options.
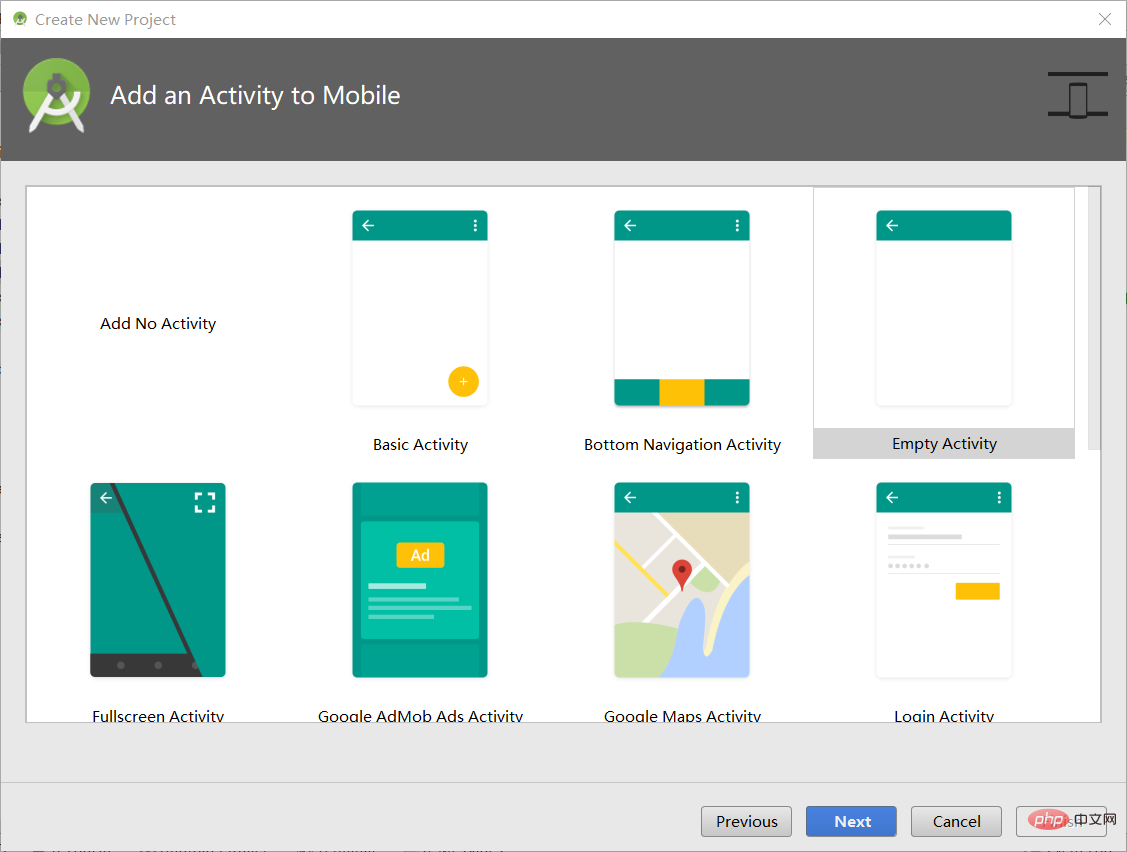
4. Select the Android template, select the empty template Empty Activity of the basic class android, and click Next
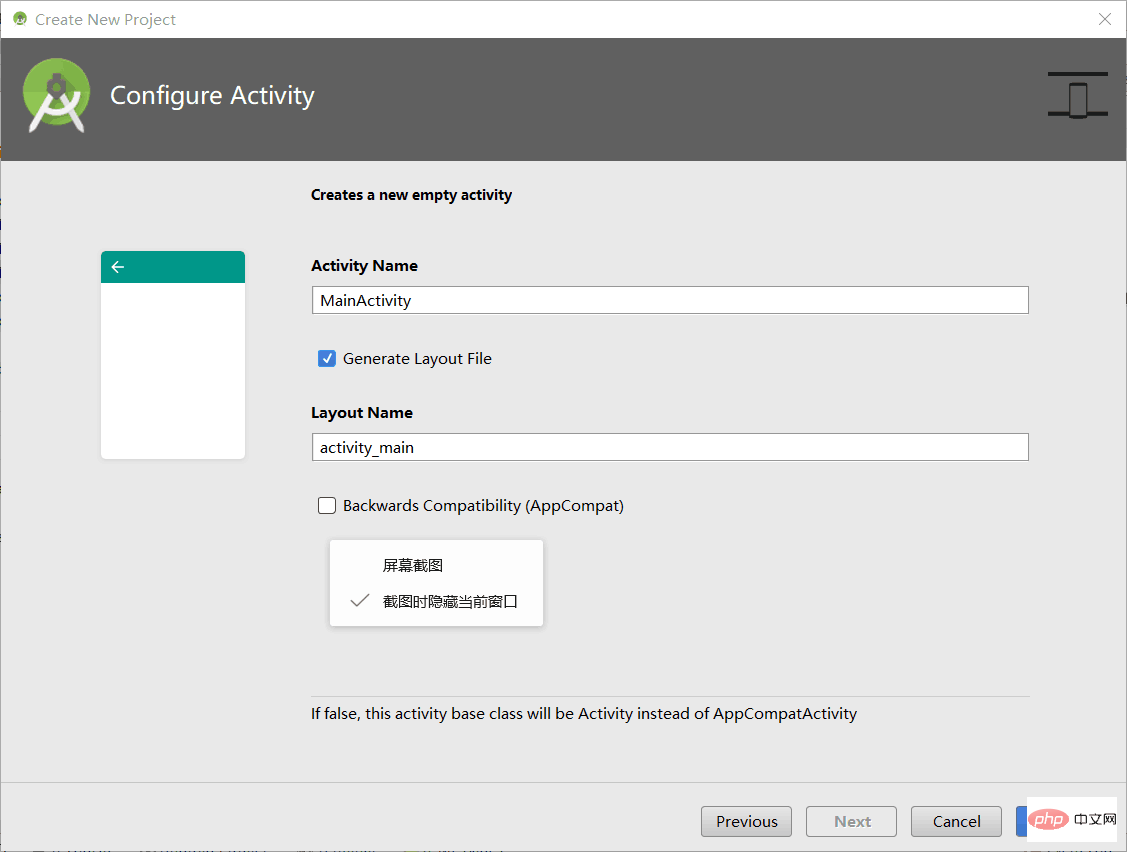
5. Set the name of Activity and Layout, which are usually automatically generated. If necessary, you can change them here,
The last box cannot be checked, Otherwise it may cause project exception, then click Finish.
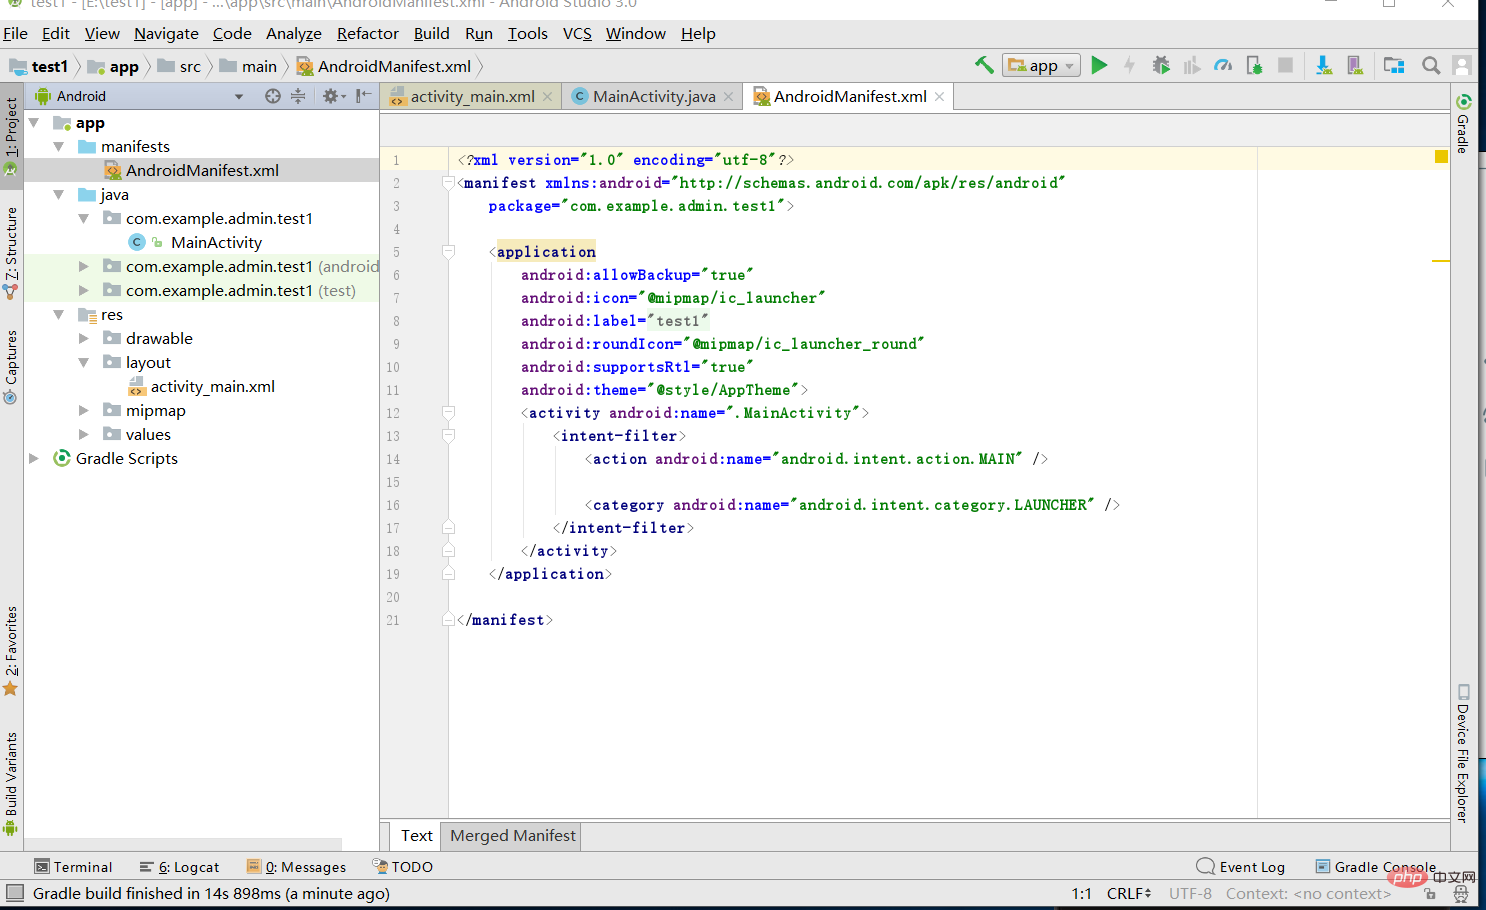
6. This is what the Android project will look like after it is built. There are three main files: main configuration file: AndroidManifest.xml,
Human-computer interaction MainActivity, as well as layout LayLout: activity_main.xml
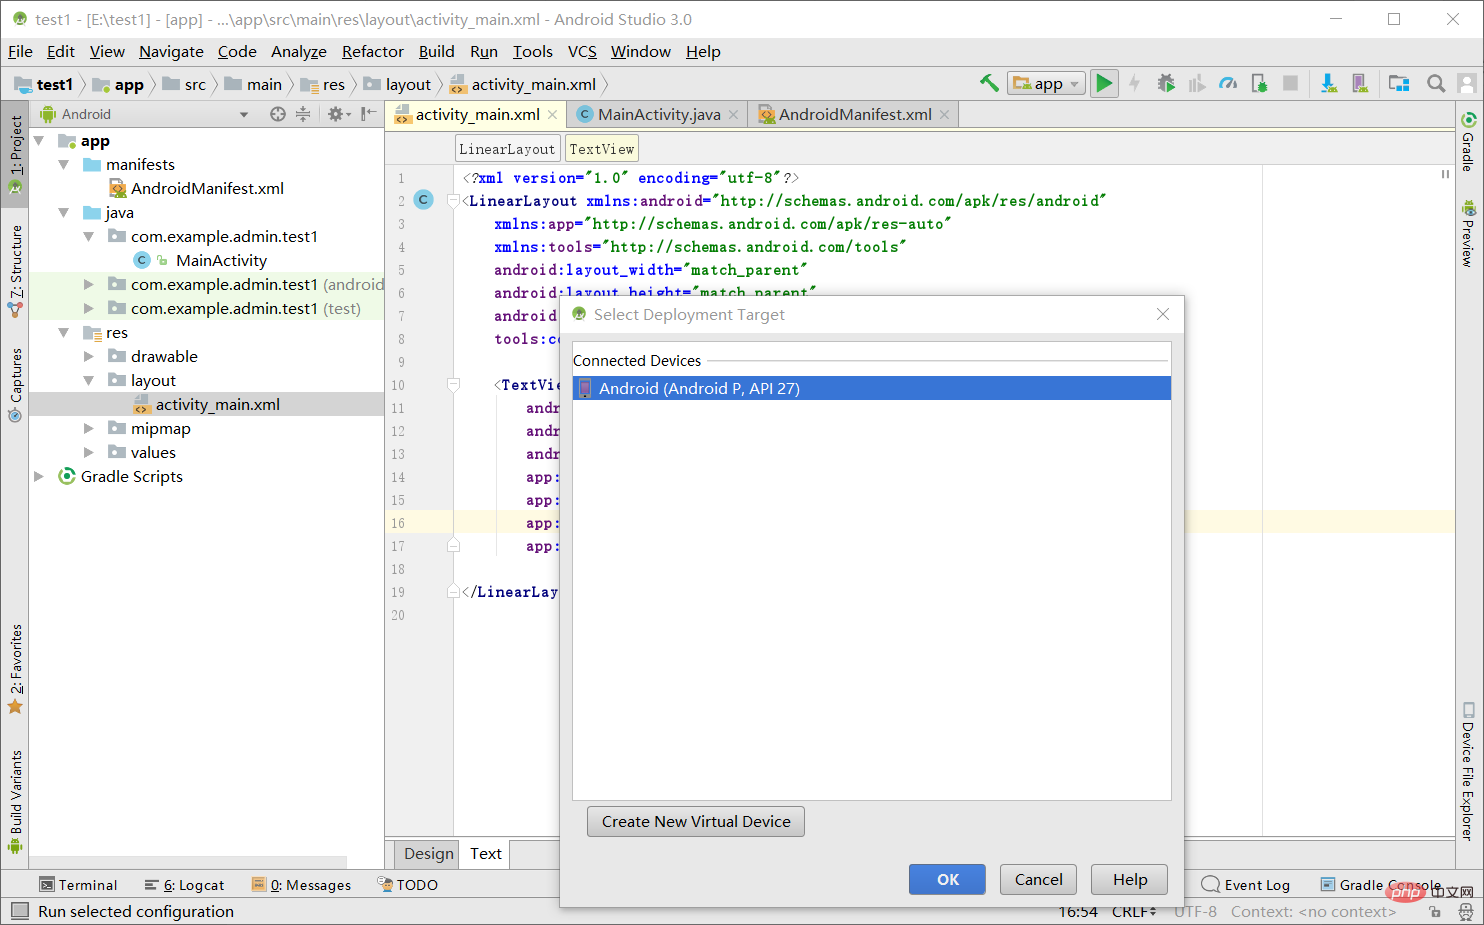
##7. Virtual Machine display: Click the triangle icon run to run the virtual machine, directly select the default virtual machine, click ok
 ##8
##8
Activity
: It is a human-computer interaction program, which is equivalent to a bridge between human and machine operations. It is similar to a shell. Java code is written in it to achieve what you want. Business processing implemented.
activity_main.xml: It is the view displayed on the Android interface. All configuration controls and various controls can be designed here.
AndroidManifest.xml: Main configuration file, used to configure the access permissions of each component.
R.java: Simply put, it is the ID number of the control in android_main.xml. It is convenient to find the ID in MainActivity to determine the control, so as to perform business processing.
app: Usually the various components of Android are placed in this directory, where res stores some resource files, such as pictures, layouts, values and other resources. 9. A simple entry-level Activity program
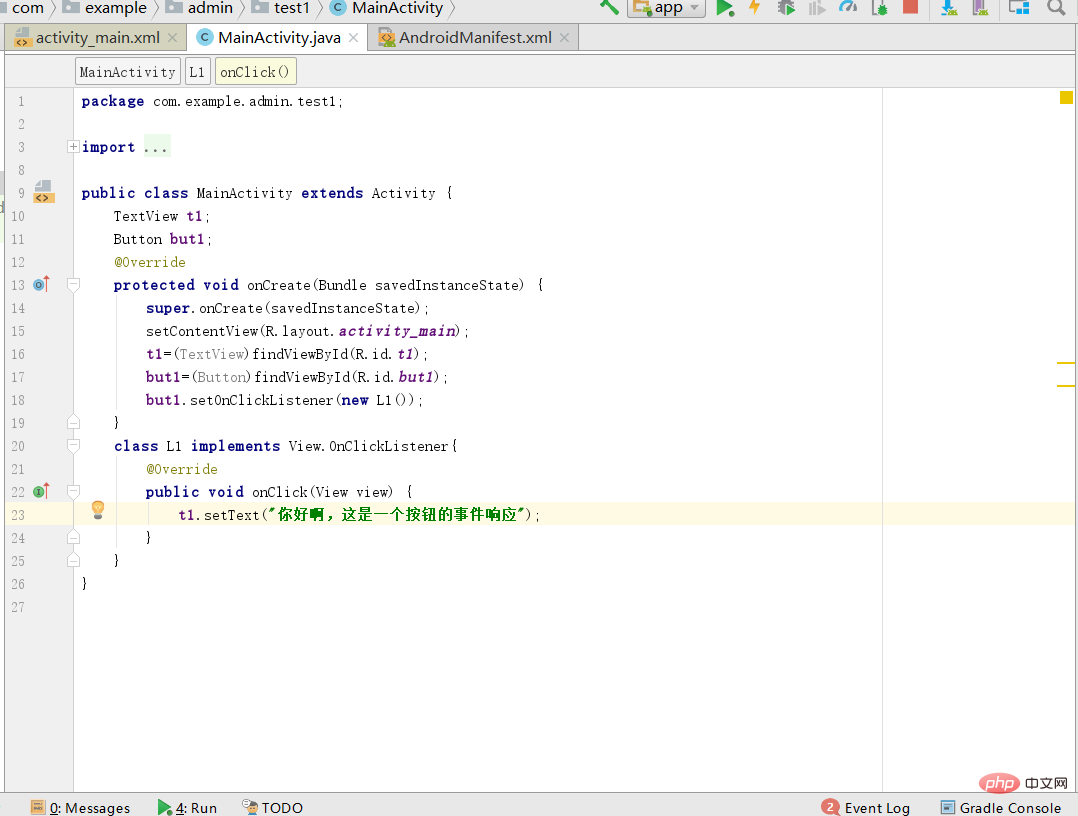
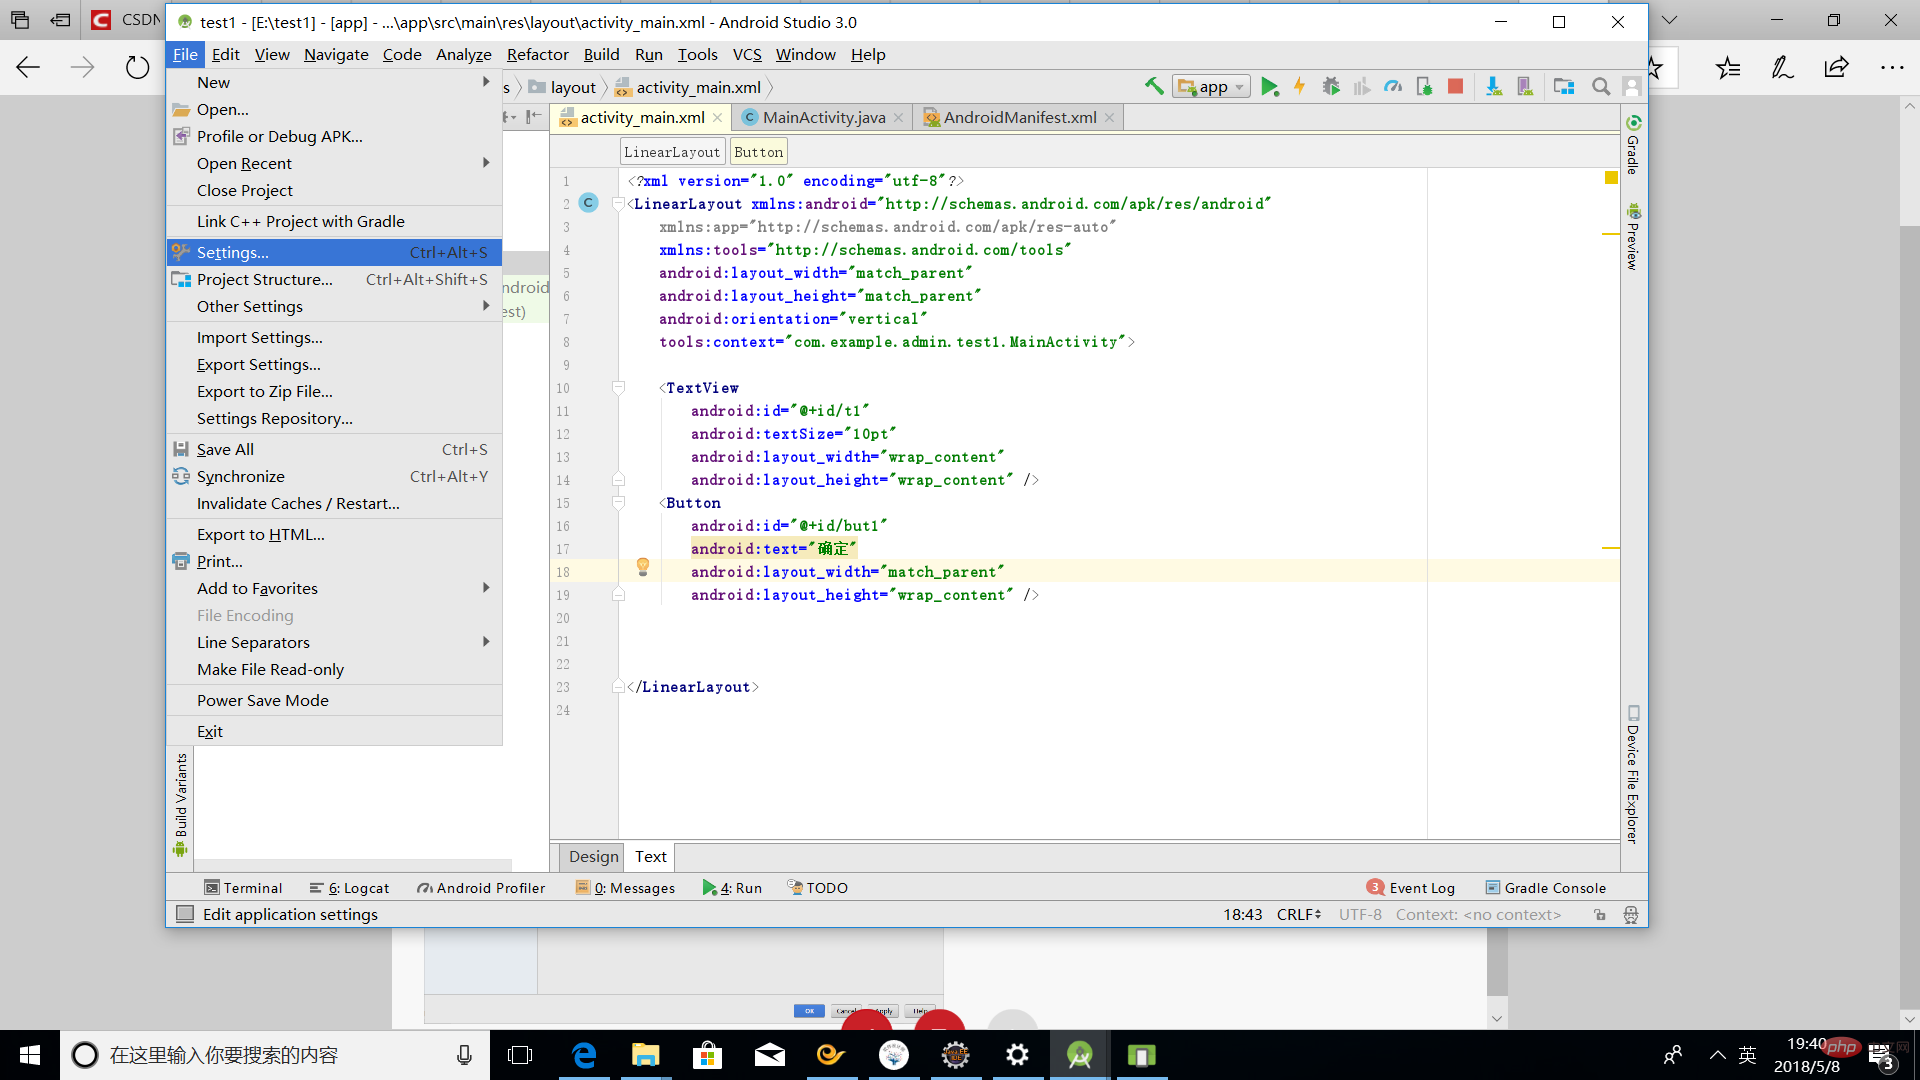
(1) First configure the control in Activity_main.xml.
First change android.support.constraint.ConstraintLayout to LinerLayout linear , meaning a horizontal structure
And add ndroid:orientation="vertical" to place all components vertically and add a text display component TextView and a button component Button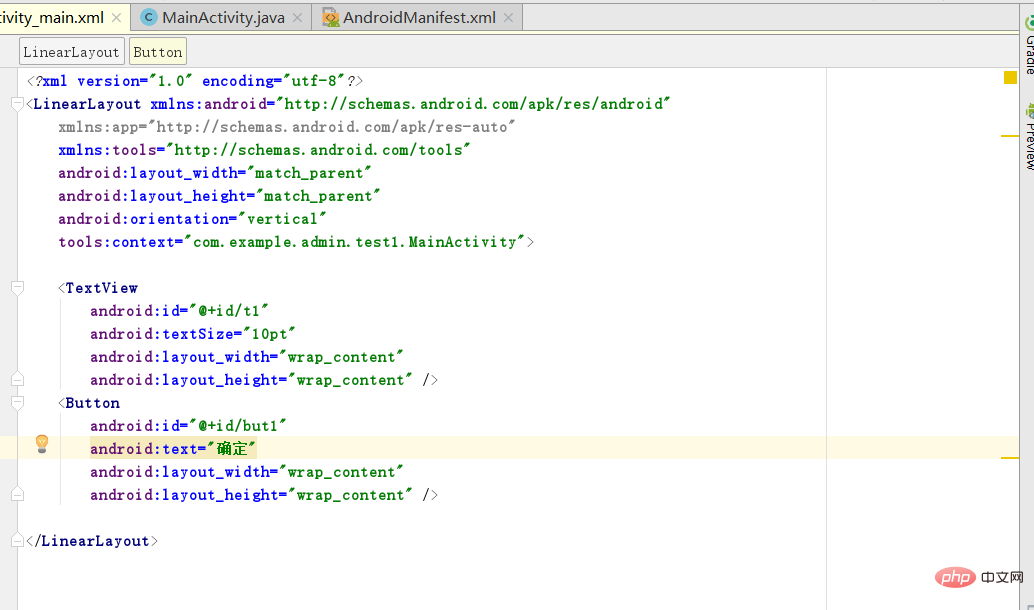
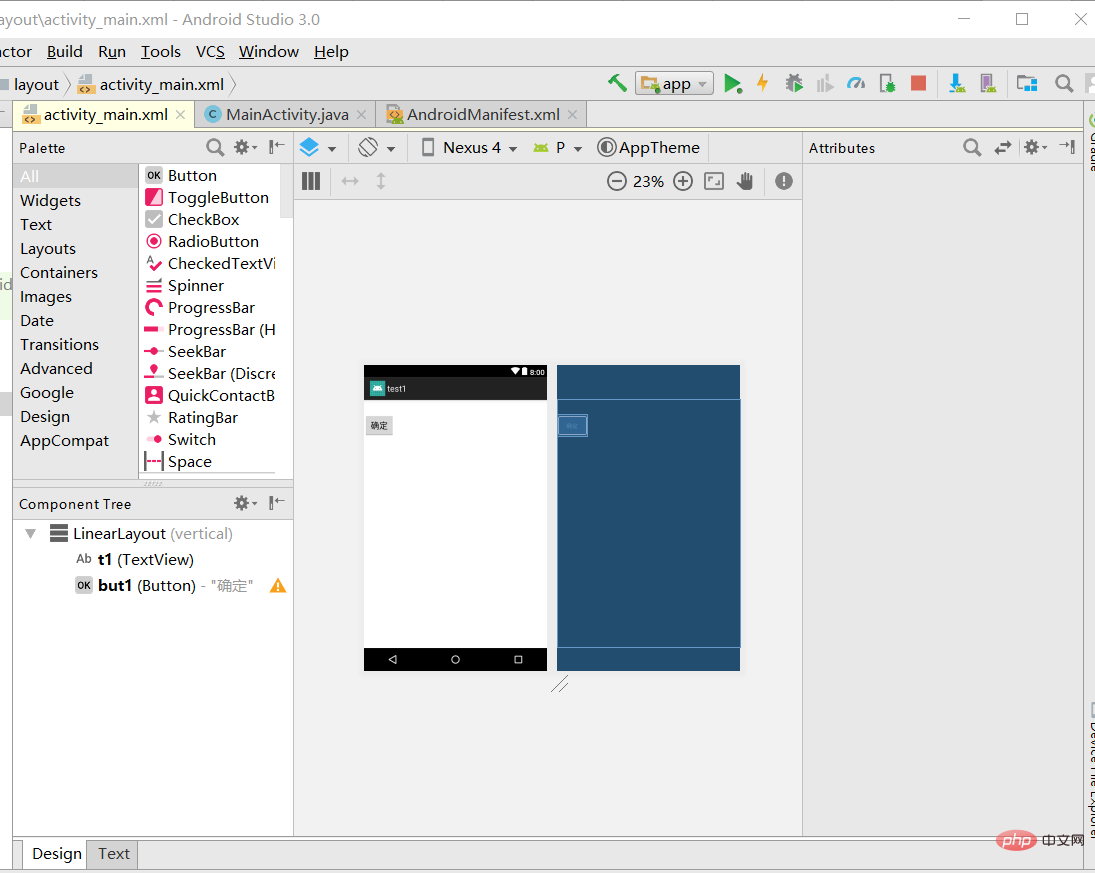
You can design through design and you can see the effect. We set up two components and set an id for each component. The id of the text box is t1 and the id of the button is But1, this id can be named arbitrarily for the convenience of MainActivity calling.
(2) Perform business logic processing in MainActivity: define the global variables of the two components, and then obtain the ID numbers of the two components of the R file through find ViewById, and proceed For business processing, set an event response for Button. By implementing the OnClickListener interface of the View class, and
public void onClick(View v){
t1.setText();//设置文本显示信息。
}
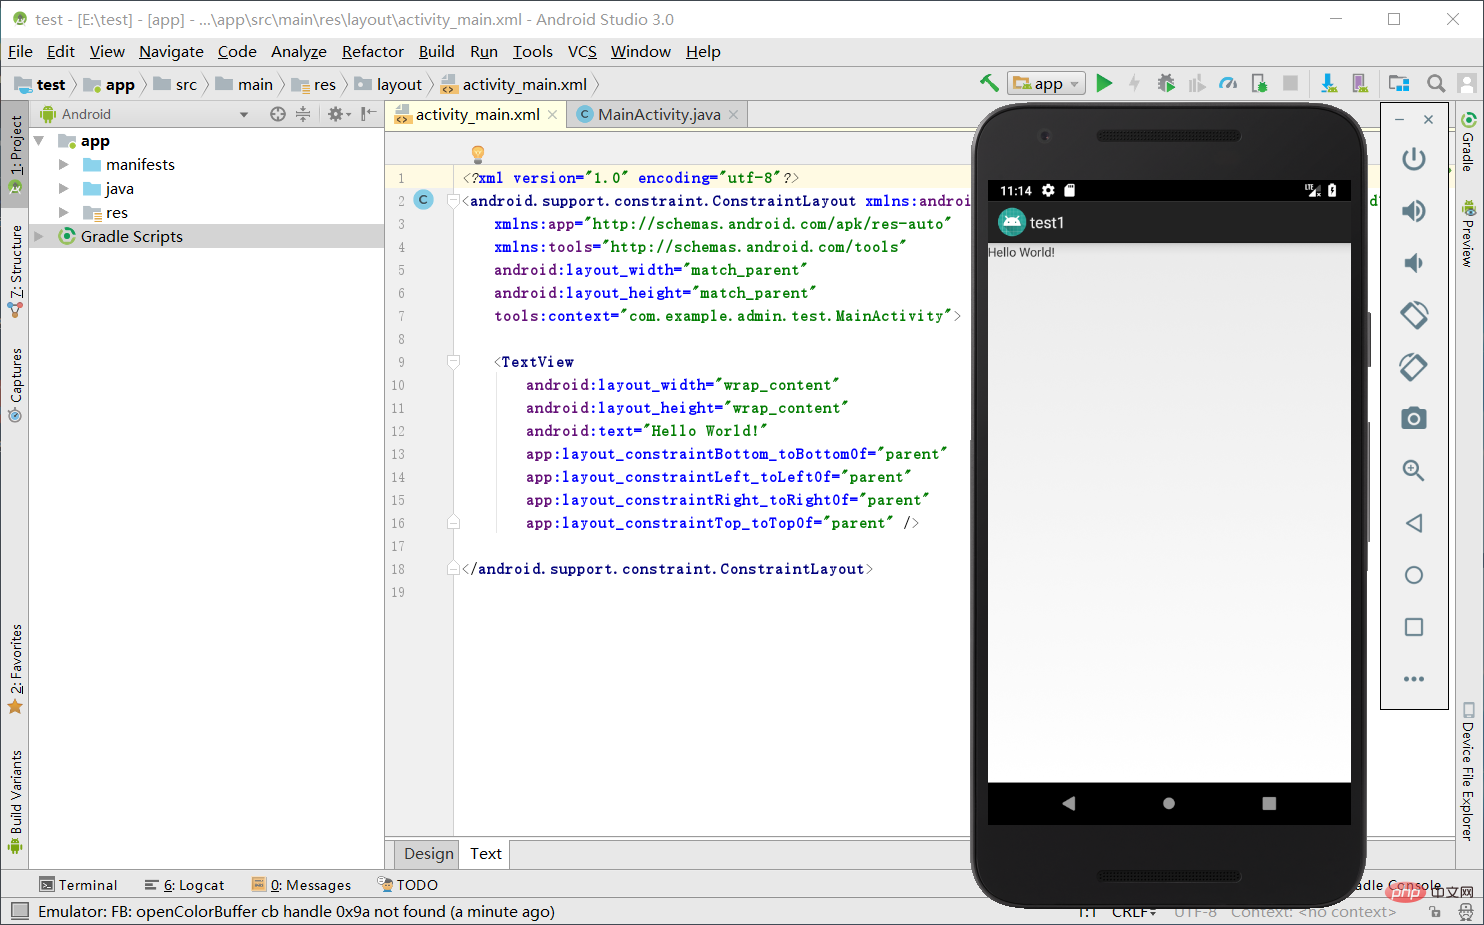
(3) Confirm whether the event response is successful: click OK: text display content appears.

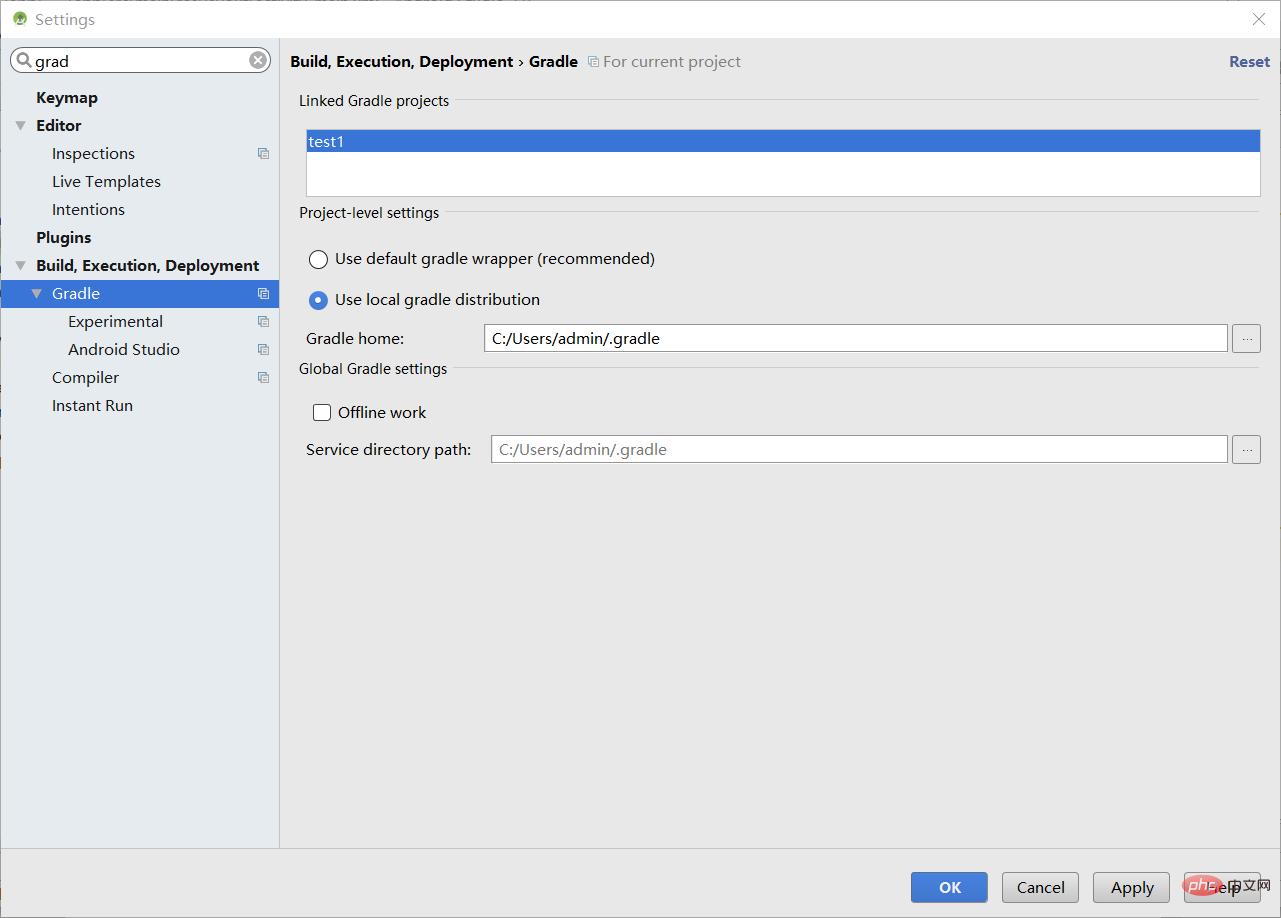
10.setting configuration: android studio If you are not running local gradle, it may be slower or abnormal, it is recommended to use local
gradle.
Process: Click FIle->Setting... and then click ok
.
The above is the detailed content of android studio tutorial. For more information, please follow other related articles on the PHP Chinese website!


![[Web front-end] Node.js quick start](https://img.php.cn/upload/course/000/000/067/662b5d34ba7c0227.png)


