How to install php plug-in in eclipse

How to install php plug-in in eclipse?
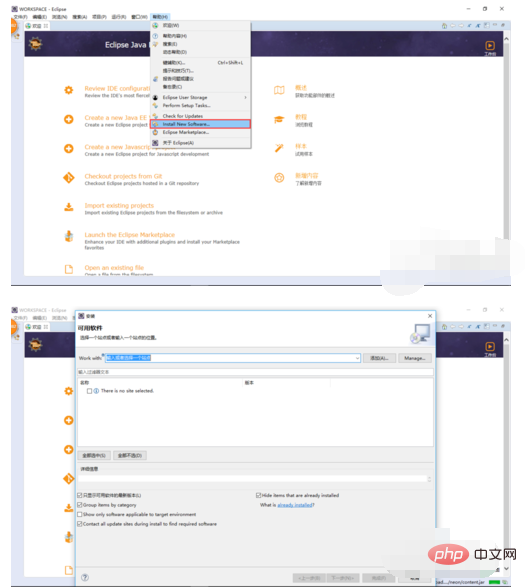
Execute the [Help>Install New Software] command to open the [Installation] interface, as shown in the figure below.
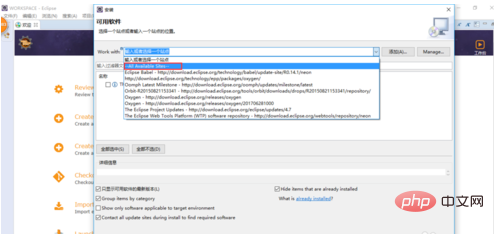
In the pop-up [Installation] interface, click Enter or select a site's drop-down list, select All Available Plug-in Sites (All Available Sites), as shown in the figure below .
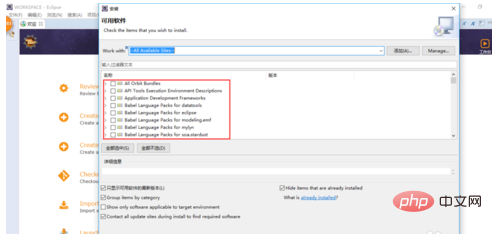
#After the selection is completed, it will take a few minutes to display all available plug-in sites, as shown in the image below.
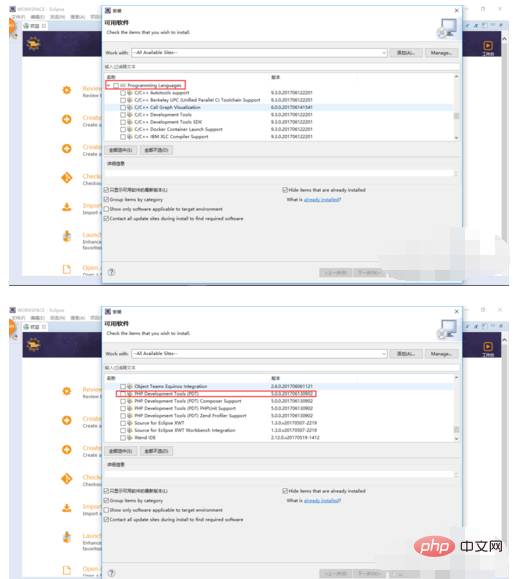
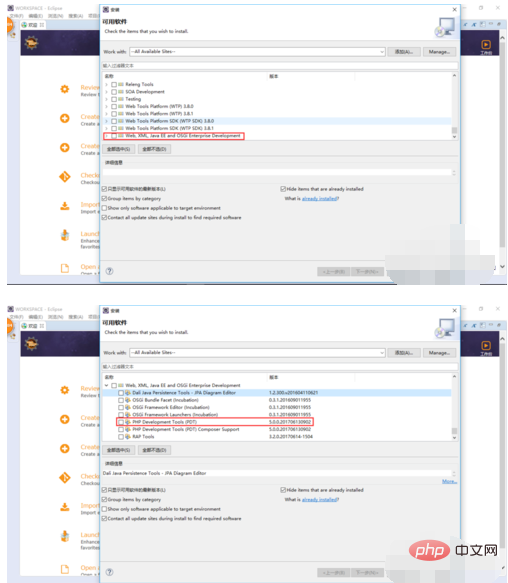
There are two ways to check PHP Development Tools (PHP Development Tools, the English abbreviation of PDT): programming languages (grogramming Languages) or web development-related software, and then Click the [next] button, as shown in the figure below.
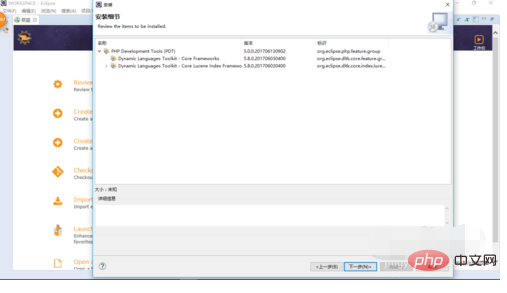
In the [Installation Details] that pops up, describe the component information to be installed in detail, and then click [Next] button as shown below.
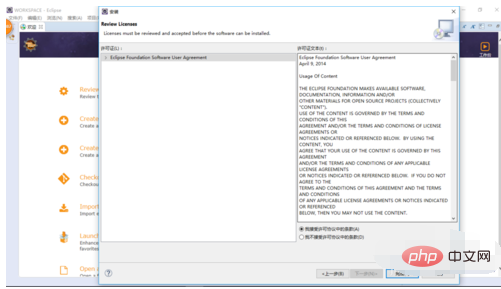
In the [Review Licenses] interface that pops up, select [I accept the terms of the license agreement], and then click the [Finish] button, as follows As shown in the figure.
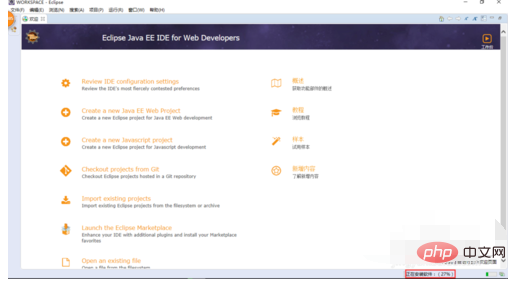
# Return to the original place and see the progress status of the software being installed in the lower right corner, as shown in the figure below.
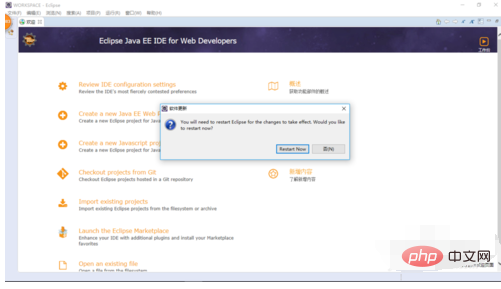
After the installation is completed, click the [Restart Now] button in the [Software Update] dialog box that pops up, as shown in the figure below.
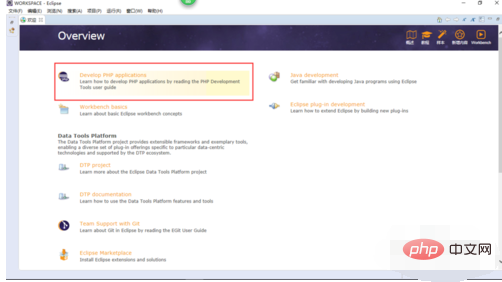
After restarting, you can see the developed PHP application, as shown in the figure below.
The above is the detailed content of How to install php plug-in in eclipse. For more information, please follow other related articles on the PHP Chinese website!

Hot AI Tools

Undresser.AI Undress
AI-powered app for creating realistic nude photos

AI Clothes Remover
Online AI tool for removing clothes from photos.

Undress AI Tool
Undress images for free

Clothoff.io
AI clothes remover

AI Hentai Generator
Generate AI Hentai for free.

Hot Article

Hot Tools

Notepad++7.3.1
Easy-to-use and free code editor

SublimeText3 Chinese version
Chinese version, very easy to use

Zend Studio 13.0.1
Powerful PHP integrated development environment

Dreamweaver CS6
Visual web development tools

SublimeText3 Mac version
God-level code editing software (SublimeText3)

Hot Topics
 Why can't eclipse import the project?
Jan 05, 2024 am 11:50 AM
Reasons why eclipse cannot import the project: 1. Check whether the project folder exists; 2. Check whether the project folder path is correct; 3. Create the project manually; 4. Clear the Eclipse cache; 5. Check the file structure of the project; 6. Check the project configuration file; 7. Clean up the Eclipse workspace; 8. Check the build path of Eclipse; 9. Re-import the project; 10. Update Eclipse. Detailed introduction: 1. Check whether the project folder exists, etc. before Eclipse imports the project.
 How to adjust background color settings in Eclipse
Jan 28, 2024 am 09:08 AM
How to set background color in Eclipse? Eclipse is a popular integrated development environment (IDE) among developers and can be used for development in a variety of programming languages. It is very powerful and flexible, and you can customize the appearance of the interface and editor through settings. This article will introduce how to set the background color in Eclipse and provide specific code examples. 1. Change the editor background color. Open Eclipse and enter the "Windows" menu. Select "Preferences". Navigate on the left
 Pro Guidance: Expert advice and steps on how to successfully install the Eclipse Lombok plug-in
Jan 28, 2024 am 09:15 AM
Professional guidance: Expert advice and steps for installing the Lombok plug-in in Eclipse, specific code examples are required Summary: Lombok is a Java library that simplifies the writing of Java code through annotations and provides some powerful tools. This article will introduce readers to the steps of how to install and configure the Lombok plug-in in Eclipse, and provide some specific code examples so that readers can better understand and use the Lombok plug-in. Download the Lombok plug-in first, we need
 What are the eclipse decompilation plug-ins?
Jan 04, 2024 pm 02:21 PM
eclipse decompilation plug-in: 1. JadClipse; 2. JD-Eclipse; 3. Eclipse JD-Eclipse; 4. JDeclipse; 5. ClassMate; 6. Eclipse Class Decompiler; 7. JByteCode. Detailed introduction: 1. JadClipse is an Eclipse plug-in based on Jad, which can decompile Java bytecode into readable source code and so on.
 Revealing solutions to Eclipse code running problems: helping you troubleshoot various running errors
Jan 28, 2024 am 09:22 AM
The solution to Eclipse code running problems is revealed: it helps you eliminate various code running errors and requires specific code examples. Introduction: Eclipse is a commonly used integrated development environment (IDE) and is widely used in Java development. Although Eclipse has powerful functions and a friendly user interface, it is inevitable to encounter various running problems when writing and debugging code. This article will reveal some common Eclipse code running problems and provide solutions. Please note that in order to better help readers understand, this
 Secret method and quick solution to solve Eclipse failure to start
Jan 03, 2024 pm 01:01 PM
What should I do if Eclipse cannot be opened? Quick solution revealed, specific code examples required Eclipse is a very popular development tool, but sometimes you may encounter problems that cannot be opened. This can be due to a number of reasons, including configuration issues, plugin conflicts, software corruption, etc. Don’t worry, here are some common solutions to help you solve this problem quickly. Clear the workspace Sometimes, Eclipse cannot be opened because a file in the workspace is damaged. solve this problem
 How to customize shortcut key settings in Eclipse
Jan 28, 2024 am 10:01 AM
How to customize shortcut key settings in Eclipse? As a developer, mastering shortcut keys is one of the keys to improving efficiency when coding in Eclipse. As a powerful integrated development environment, Eclipse not only provides many default shortcut keys, but also allows users to customize them according to their own preferences. This article will introduce how to customize shortcut key settings in Eclipse and give specific code examples. Open Eclipse First, open Eclipse and enter
 Step-by-step guide to changing background color with Eclipse
Jan 28, 2024 am 08:28 AM
Teach you step by step how to change the background color in Eclipse, specific code examples are required Eclipse is a very popular integrated development environment (IDE) that is often used to write and debug Java projects. By default, the background color of Eclipse is white, but some users may wish to change the background color to suit their preference or to reduce eye strain. This article will teach you step by step how to change the background color in Eclipse and provide specific code examples. Step 1: Open Eclipse First


