
 Web Front-end
Layui Tutorial
The table tool button can also trigger table events when more columns are displayed.
Web Front-end
Layui Tutorial
The table tool button can also trigger table events when more columns are displayed.
The table tool button can also trigger table events when more columns are displayed.


Let’s first look at the renderings of a problem that everyone may have encountered:
 That is, if the width of the toolbar is not set, it will sometimes be squeezed by the content. If the pressure is small, or the width setting is not enough, it will appear like the content... Then when you click the display drop-down icon, more content will be displayed, but unlike ordinary td, the button will be displayed.
But clicking cannot trigger the originally added tool monitoring, which is embarrassing. You can only manually drag the column width to display other buttons and then click, or you should set a sufficient one at the beginning. The width, but the problem also arises, if the number of buttons inside is uncertain, the length is uncertain, or there are many, many.
So it is actually impossible to let the user mainly look at the button instead of the content, so is there any way to make it realistic...and then click to display more and trigger the original event when clicked? ?
The method is just an idea. I guess there are many ways to do it. Here I will share my method: use two event delegates to achieve it.
The basic code is as follows:
 Idea analysis:
First add a mousedown event to this drop-down icon to record the current display of more data. Which table's which tr and which td. Then record it under table._tableTrCurr.
Some students may have questions about why they don’t use click directly. This is because an event delegation is also made inside the table, but it is not delegated to the document but to the body of the table and then stops. In other words, you actually write the delegate to the document outside.
When you click on the monitor, it will stop after reaching the table logic. It will not go into your monitor, so you use a mousedown to avoid it. Will there be any problems if it is on the mobile side? You can try this yourself, mainly on the web side.
Then there is another monitor, which is to monitor the click of the "button" in the opened tips, and then find the _tableTrCurr information just recorded, and find the tr, td of the table we want. Button is easy to handle once you find it. Just click it to trigger the content of table.on('tool') written.
Effect:

Note: This modification is based on the latest version (v2.4.5). One of the key points is to obtain the form. id, this id is not simply the id of the table node, but the id of the instance after rendering.
If it is not set, the default is the ID of the node of the table. If not, an index or the like will be generated inside the table as the ID of the table. There is one in the 2.4.4 update that may not be easy for everyone to notice, but A really significant modification is to add a lay-id attribute to the table's view to save the ID of the current table instance.
This is a very, very, very easy-to-use change, and it is of great significance. If you want to reload a certain table later, as long as you know which node you are reloading, you will naturally be able to find the tableId you want to reload. . Therefore, it is strongly recommended that if you are still using 2.4.0~2.4.3, you should upgrade to 2.4.4.
 Of course, if you use my tablePlug plug-in, you actually don’t have to worry about this problem, because I have done the processing inside the tablePlug. If there is no lay-id after rendering, it will be added. Achieve the same effect as 2.4.4.
 Test page: https://sun_zoro.gitee.io/layuitableplug/testTableReload.html
gitee project: https://gitee.com/sun_zoro/layuiTablePlug
The implementation code is as follows:
  //缓存当前操作的是哪个表格的哪个tr的哪个td
    $(document).off('mousedown','.layui-table-grid-down').on('mousedown','.layui-table-grid-down',function (event) {
        //直接记录td的jquery对象
        table._tableTrCurrr = $(this).closest('td');
    });

    //给弹出的详情里面的按钮添加监听级联的触发原始table的按钮的点击事件
    $(document).off('click','.layui-table-tips-main [lay-event]').on('click','.layui-table-tips-main [lay-event]',function (event) {
        var elem = $(this);
        var tableTrCurrr =  table._tableTrCurrr;
        if(!tableTrCurrr){
            return;
        }
        var layerIndex = elem.closest('.layui-table-tips').attr('times');
        layer.close(layerIndex);
        table._tableTrCurrr.find('[lay-event="' + elem.attr('lay-event') + '"]').first().click();
}); Recommended: layui tutorial
The above is the detailed content of The table tool button can also trigger table events when more columns are displayed.. For more information, please follow other related articles on the PHP Chinese website!

Hot AI Tools

Undresser.AI Undress
AI-powered app for creating realistic nude photos

AI Clothes Remover
Online AI tool for removing clothes from photos.

Undress AI Tool
Undress images for free

Clothoff.io
AI clothes remover

AI Hentai Generator
Generate AI Hentai for free.

Hot Article
Hot Tools

Notepad++7.3.1
Easy-to-use and free code editor

SublimeText3 Chinese version
Chinese version, very easy to use

Zend Studio 13.0.1
Powerful PHP integrated development environment

Dreamweaver CS6
Visual web development tools

SublimeText3 Mac version
God-level code editing software (SublimeText3)
Hot Topics
 1378
1378
 52
52

 Steps to adjust the format of pictures inserted in PPT tables
Mar 26, 2024 pm 04:16 PM
Steps to adjust the format of pictures inserted in PPT tables
Mar 26, 2024 pm 04:16 PM
1. Create a new PPT file and name it [PPT Tips] as an example. 2. Double-click [PPT Tips] to open the PPT file. 3. Insert a table with two rows and two columns as an example. 4. Double-click on the border of the table, and the [Design] option will appear on the upper toolbar. 5. Click the [Shading] option and click [Picture]. 6. Click [Picture] to pop up the fill options dialog box with the picture as the background. 7. Find the tray you want to insert in the directory and click OK to insert the picture. 8. Right-click on the table box to bring up the settings dialog box. 9. Click [Format Cells] and check [Tile images as shading]. 10. Set [Center], [Mirror] and other functions you need, and click OK. Note: The default is for pictures to be filled in the table
 How to set WPS value to automatically change color according to conditions_Steps to set WPS table value to automatically change color according to condition
Mar 27, 2024 pm 07:30 PM
How to set WPS value to automatically change color according to conditions_Steps to set WPS table value to automatically change color according to condition
Mar 27, 2024 pm 07:30 PM
1. Open the worksheet and find the [Start]-[Conditional Formatting] button. 2. Click Column Selection and select the column to which conditional formatting will be added. 3. Click the [Conditional Formatting] button to bring up the option menu. 4. Select [Highlight conditional rules]-[Between]. 5. Fill in the rules: 20, 24, dark green text with dark fill color. 6. After confirmation, the data in the selected column will be colored with corresponding numbers, text, and cell boxes according to the settings. 7. Conditional rules without conflicts can be added repeatedly, but for conflicting rules WPS will replace the previously established conditional rules with the last added rule. 8. Repeatedly add the cell columns after [Between] rules 20-24 and [Less than] 20. 9. If you need to change the rules, you can just clear the rules and then reset the rules.
 How to set up jump on layui login page
Apr 04, 2024 am 03:12 AM
How to set up jump on layui login page
Apr 04, 2024 am 03:12 AM
Layui login page jump setting steps: Add jump code: Add judgment in the login form submit button click event, and jump to the specified page through window.location.href after successful login. Modify the form configuration: add a hidden input field to the form element of lay-filter="login", with the name "redirect" and the value being the target page address.
 How to get form data in layui
Apr 04, 2024 am 03:39 AM
How to get form data in layui
Apr 04, 2024 am 03:39 AM
layui provides a variety of methods for obtaining form data, including directly obtaining all field data of the form, obtaining the value of a single form element, using the formAPI.getVal() method to obtain the specified field value, serializing the form data and using it as an AJAX request parameter, and listening Form submission event gets data.
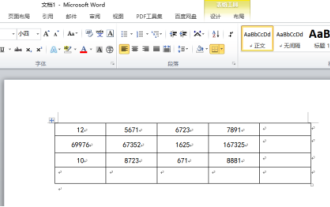 Do you know how to sum a Word table?
Mar 21, 2024 pm 01:10 PM
Do you know how to sum a Word table?
Mar 21, 2024 pm 01:10 PM
Sometimes, we often encounter counting problems in Word tables. Generally, when encountering such problems, most students will copy the Word table to Excel for calculation; some students will silently pick up the calculator. Calculate. Is there a quick way to calculate it? Of course there is, in fact the sum can also be calculated in Word. So, do you know how to do it? Today, let’s take a look together! Without further ado, friends in need should quickly collect it! Step details: 1. First, we open the Word software on the computer and open the document that needs to be processed. (As shown in the picture) 2. Next, we position the cursor on the cell where the summed value is located (as shown in the picture); then, we click [Menu Bar
 What are the tips for novices to create forms?
Mar 21, 2024 am 09:11 AM
What are the tips for novices to create forms?
Mar 21, 2024 am 09:11 AM
We often create and edit tables in excel, but as a novice who has just come into contact with the software, how to use excel to create tables is not as easy as it is for us. Below, we will conduct some drills on some steps of table creation that novices, that is, beginners, need to master. We hope it will be helpful to those in need. A sample form for beginners is shown below: Let’s see how to complete it! 1. There are two methods to create a new excel document. You can right-click the mouse on a blank location on the [Desktop] - [New] - [xls] file. You can also [Start]-[All Programs]-[Microsoft Office]-[Microsoft Excel 20**] 2. Double-click our new ex
 How layui implements self-adaptation
Apr 26, 2024 am 03:00 AM
How layui implements self-adaptation
Apr 26, 2024 am 03:00 AM
Adaptive layout can be achieved by using the responsive layout function of the layui framework. The steps include: referencing the layui framework. Define an adaptive layout container and set the layui-container class. Use responsive breakpoints (xs/sm/md/lg) to hide elements under specific breakpoints. Specify element width using the grid system (layui-col-). Create spacing via offset (layui-offset-). Use responsive utilities (layui-invisible/show/block/inline) to control the visibility of elements and how they appear.
 How to transfer data in layui
Apr 26, 2024 am 03:39 AM
How to transfer data in layui
Apr 26, 2024 am 03:39 AM
The method of using layui to transmit data is as follows: Use Ajax: Create the request object, set the request parameters (URL, method, data), and process the response. Use built-in methods: Simplify data transfer using built-in methods such as $.post, $.get, $.postJSON, or $.getJSON.
