Detailed explanation of uploading images in layui (with code)

layui upload is similar to bootstrap upload, except that you don’t need to download a plug-in.
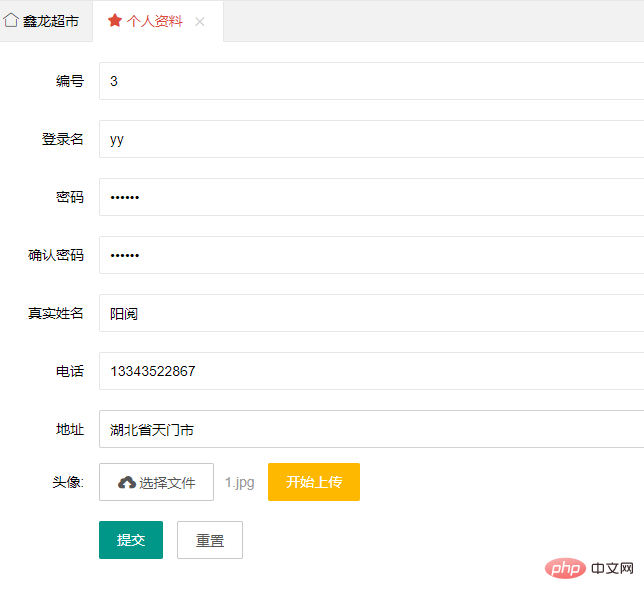
layui’s own one is enough. Let’s take a look at the front interface first. Here is the upload used. Avatar

Click first to start uploading. The avatar is uploaded to the server.
Return json and add it to the form, and submit it together with other data
Let’s take a look at the jsp interface first
<%@ page language="java" contentType="text/html; charset=UTF-8"
pageEncoding="UTF-8"%>
<!DOCTYPE html PUBLIC "-//W3C//DTD HTML 4.01 Transitional//EN" "http://www.w3.org/TR/html4/loose.dtd">
<html>
<head>
<meta http-equiv="Content-Type" content="text/html; charset=UTF-8">
<title>个人资料</title>
<link href="${pageContext.request.contextPath }/js/layui/css/layui.css"
rel="stylesheet" />
<script src="${pageContext.request.contextPath }/js/layui/layui.js"
charset="utf-8"></script>
<script src="${pageContext.request.contextPath }/js/jquery-1.8.3.js"></script>
<script type="text/javascript">
layui.use('upload',function(){
var upload = layui.upload;
upload.render({
elem: '#fileBtn'
,url: '../updatePersonalById.do'
,accept: 'file'
,auto: false
,bindAction: '#uploadBtn'
,done: function(res){
alert(res.data.src);
$("[name=userImage]").val(res.data.src);
}
});
});
</script>
</head>
<body>
<form class="layui-form" action="../updatePersonalByIdSuccess.do" method="post" charset="utf-8" target="_parent">
<div class="layui-form-item" style="margin-top: 20px;">
<label class="layui-form-label">编号</label>
<div class="layui-input-block">
<input type="text" name="userId" required lay-verify="required" value="${ui.userId }" autocomplete="off" readonly="readonly" class="layui-input">
</div>
</div>
<div class="layui-form-item" style="margin-top: 20px;">
<label class="layui-form-label">登录名</label>
<div class="layui-input-block">
<input type="text" name="userName" required lay-verify="required" value="${ui.userName }" autocomplete="off" readonly="readonly" class="layui-input">
</div>
</div>
<div class="layui-form-item" style="margin-top: 20px;">
<label class="layui-form-label">密码</label>
<div class="layui-input-block">
<input type="password" name="userPwd" required lay-verify="required" value="${ui.userPwd }" autocomplete="off" class="layui-input">
</div>
</div>
<div class="layui-form-item" style="margin-top: 20px;">
<label class="layui-form-label">确认密码</label>
<div class="layui-input-block">
<input type="password" name="reuserPwd" required lay-verify="required" value="${ui.userPwd }" autocomplete="off" class="layui-input">
</div>
</div>
<div class="layui-form-item" style="margin-top: 20px;">
<label class="layui-form-label">真实姓名</label>
<div class="layui-input-block">
<input type="text" name="userrealName" required lay-verify="required" value="${ui.userrealName }" autocomplete="off" class="layui-input">
</div>
</div>
<div class="layui-form-item" style="margin-top: 20px;">
<label class="layui-form-label">电话</label>
<div class="layui-input-block">
<input type="text" name="userPhone" required lay-verify="required" value="${ui.userPhone }" autocomplete="off" class="layui-input">
</div>
</div>
<div class="layui-form-item" style="margin-top: 20px;">
<label class="layui-form-label">地址</label>
<div class="layui-input-block">
<input type="text" name="userAds" required lay-verify="required" value="${ui.userAds }" autocomplete="off" class="layui-input">
</div>
</div>
<div class="layui-upload">
<label class="layui-form-label">头像:</label>
<div class="layui-upload layui-input-block">
<input type="hidden" name="userImage" value="${ui.userImage }" required lay-verify="required" />
<button type="button" class="layui-btn layui-btn-primary" id="fileBtn"><i class="layui-icon"></i>选择文件</button>
<button type="button" class="layui-btn layui-btn-warm" id="uploadBtn">开始上传</button>
</div>
</div>
<div class="layui-form-item" style="margin-top: 20px;">
<div class="layui-input-block">
<button class="layui-btn" id="btn1" lay-submit lay-filter="formDemo">提交</button>
<button type="reset" class="layui-btn layui-btn-primary">重置</button>
</div>
</div>
</form>
</body>
</html>Interaction with Controller.do
package com.supermanager.controller;

import java.io.File;
import java.io.IOException;
import java.util.Date;
import java.util.List;
import java.util.Random;

import javax.annotation.Resource;
import javax.servlet.http.HttpServletRequest;
import javax.servlet.http.HttpSession;

import org.springframework.context.annotation.Scope;
import org.springframework.stereotype.Controller;
import org.springframework.web.bind.annotation.ModelAttribute;
import org.springframework.web.bind.annotation.RequestMapping;
import org.springframework.web.bind.annotation.RequestParam;
import org.springframework.web.bind.annotation.ResponseBody;
import org.springframework.web.multipart.MultipartFile;

import com.supermanager.entity.LogsInfo;
import com.supermanager.entity.RoleInfo;
import com.supermanager.entity.StoragesInfo;
import com.supermanager.entity.UserInfo;
import com.supermanager.service.LogsService;
import com.supermanager.service.RoleInfoService;
import com.supermanager.service.StoragesService;
import com.supermanager.service.UserInfoService;

import net.sf.json.JSONArray;

@Controller
@Scope("prototype")
public class UserInfoController {

    @Resource
    private UserInfoService userInfoService;
    @Resource
    private LogsService logService;
    @Resource
    private RoleInfoService roleInfoService;
    @Resource
    private StoragesService storagesService;


    /**
     * 修改个人资料
     * @param session
     * @param file
     * @param ui
     * @return
     * @throws IOException
     * @throws IllegalStateException
     */
    @RequestMapping(value="updatePersonalById")
    public @ResponseBody String updatePersonal(@RequestParam("file") MultipartFile file,@ModelAttribute UserInfo ui,HttpServletRequest request) throws IllegalStateException, IOException{
        String oldName = file.getOriginalFilename();
        String path = request.getServletContext().getRealPath("/upload/");
        String fileName = changeName(oldName);
        String rappendix = "upload/" + fileName;
        fileName = path + "/" + fileName;
        File file1 = new File(fileName);
        file.transferTo(file1);
        String str = "{\"code\": 0,\"msg\": \"\",\"data\": {\"src\":\"" + rappendix + "\"}}";
        return str;
    }
    public static String changeName(String oldName){
        Random r = new Random();
        Date d = new Date();
        String newName = oldName.substring(oldName.indexOf('.'));
        newName = r.nextInt(99999999) + d.getTime() + newName;
        return newName;
    }
    @RequestMapping(value="updatePersonalByIdSuccess")
    public  String updatePersonalByIdSuccess(@ModelAttribute UserInfo ui){
        UserInfo uif = userInfoService.FindUserByUserId(ui.getUserId());
        ui.setRoleId(uif.getRoleId());
        ui.setUserSex(uif.getUserSex());
        ui.setUserAge(uif.getUserAge());
        int a = userInfoService.Update(ui);
        if(a!=0){
            return "redirect:exitSystem.do";
        }
        return "error";
    }


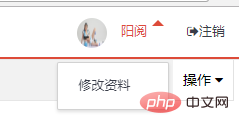
}The effect after successful upload is as shown in the figure

For more layui related articles, please pay attention to the layui usage tutorial column.
The above is the detailed content of Detailed explanation of uploading images in layui (with code). For more information, please follow other related articles on the PHP Chinese website!

Hot AI Tools

Undresser.AI Undress
AI-powered app for creating realistic nude photos

AI Clothes Remover
Online AI tool for removing clothes from photos.

Undress AI Tool
Undress images for free

Clothoff.io
AI clothes remover

AI Hentai Generator
Generate AI Hentai for free.

Hot Article

Hot Tools

Notepad++7.3.1
Easy-to-use and free code editor

SublimeText3 Chinese version
Chinese version, very easy to use

Zend Studio 13.0.1
Powerful PHP integrated development environment

Dreamweaver CS6
Visual web development tools

SublimeText3 Mac version
God-level code editing software (SublimeText3)

Hot Topics
 How to get form data in layui
Apr 04, 2024 am 03:39 AM
layui provides a variety of methods for obtaining form data, including directly obtaining all field data of the form, obtaining the value of a single form element, using the formAPI.getVal() method to obtain the specified field value, serializing the form data and using it as an AJAX request parameter, and listening Form submission event gets data.
 How to set up jump on layui login page
Apr 04, 2024 am 03:12 AM
Layui login page jump setting steps: Add jump code: Add judgment in the login form submit button click event, and jump to the specified page through window.location.href after successful login. Modify the form configuration: add a hidden input field to the form element of lay-filter="login", with the name "redirect" and the value being the target page address.
 How layui implements self-adaptation
Apr 26, 2024 am 03:00 AM
Adaptive layout can be achieved by using the responsive layout function of the layui framework. The steps include: referencing the layui framework. Define an adaptive layout container and set the layui-container class. Use responsive breakpoints (xs/sm/md/lg) to hide elements under specific breakpoints. Specify element width using the grid system (layui-col-). Create spacing via offset (layui-offset-). Use responsive utilities (layui-invisible/show/block/inline) to control the visibility of elements and how they appear.
 What is the difference between layui and vue?
Apr 04, 2024 am 03:54 AM
The difference between layui and Vue is mainly reflected in functions and concerns. Layui focuses on rapid development of UI elements and provides prefabricated components to simplify page construction; Vue is a full-stack framework that focuses on data binding, component development and state management, and is more suitable for building complex applications. Layui is easy to learn and suitable for quickly building pages; Vue has a steep learning curve but helps build scalable and easy-to-maintain applications. Depending on the project needs and developer skill level, the appropriate framework can be selected.
 How to run layui
Apr 04, 2024 am 03:42 AM
To run layui, perform the following steps: 1. Import layui script; 2. Initialize layui; 3. Use layui components; 4. Import layui styles (optional); 5. Ensure script compatibility and pay attention to other considerations. With these steps, you can build web applications using the power of layui.
 What language is layui framework?
Apr 04, 2024 am 04:39 AM
The layui framework is a JavaScript-based front-end framework that provides a set of easy-to-use UI components and tools to help developers quickly build responsive web applications. Its features include: modular, lightweight, responsive, and has complete documentation and community support. layui is widely used in the development of management backend systems, e-commerce websites, and mobile applications. The advantages are quick start-up, improved efficiency, and easy maintenance. The disadvantages are poor customization and slow technology updates.
 Which one is better, layui or elementui?
Apr 04, 2024 am 04:15 AM
Question: Which one is better, layui or ElementUI? Answer: It depends on the project requirements. Layui is more comprehensive, customizable and suitable for large projects, while ElementUI is more lightweight, beautiful and easy to use. The specific reasons for selection are as follows: Choose layui: Provides a wider range of functions and modules that allow a high degree of customization of component appearance and behavior. Suitable for large projects that require a wide range of functions and scalability. Choose ElementUI: Smaller size and faster loading speed. Components follow Material Design principles. , high aesthetics, providing a large number of ready-made components, reducing development complexity and time
 The difference between layui framework and vue framework
Apr 26, 2024 am 01:27 AM
layui and vue are front-end frameworks. layui is a lightweight library that provides UI components and tools; vue is a comprehensive framework that provides UI components, state management, data binding, routing and other functions. layui is based on a modular architecture, and vue is based on a componentized architecture. layui has a smaller ecosystem, vue has a large and active ecosystem. The learning curve of layui is low, and the learning curve of vue is steep. Layui is suitable for small projects and rapid development of UI components, while vue is suitable for large projects and scenarios that require rich functions.


