

I have used date controls in recent projects, and I feel good about it. I will write it down and share it with everyone. I limit the start time and end time span to no more than three days, and configure it with functions such as clearing time and reselecting time. Share it with Everyone:
Let me show you two renderings first
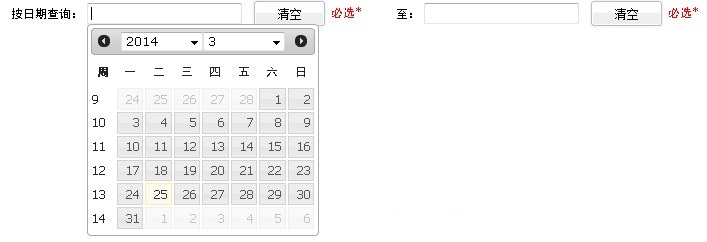
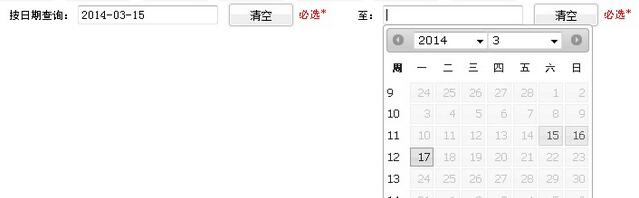
In the example, the start time and end time I control are three days, that is, the span between the start time and the end time cannot exceed three days.
How to implement it specifically? There will be a detailed explanation in the code. Please continue reading:
The first step is to introduce the control js. There are two here, one is jquery.js, one is jquery-ui-datepicker.js, and of course, introduce the style file:
<script type="text/javascript" src="js/jquery.js"></script>
<script type="text/javascript" src="js/jquery-ui-datepicker.js"></script>
<link rel="stylesheet" type="text/css" href="css/jquery-ui.css" />
Step 2: Create a text input box, a text type input. My demo also includes the setting of the clearing time, which is a button response event
<td width="35%">
    <label>开始时间:</label>
    <input type="text" name="start" id="start" value="${params.start}" readonly="true" title="日期范围不能大于3天"/>
    <input type="button" class="formButton" value="清空" onclick="cleaPrevInput(this);"/>
    <font color="red">必选*</font>
   </td>
   <td width="35%">
    <label>结束时间:</label>
    <input type="text" name="end" id="end" value="${params.end}" readonly="true" title="日期范围不能大于3天"/>
    <input type="button" class="formButton" value="清空" onclick="cleaPrevInput(this);"/>
    <font color="red">必选*</font>
</td>Don’t worry about the value inside. This is the code I wrote in the project. The value is written like this so that when the page is refreshed after querying, there can still be a selected time value in the time box.
The following code is to call the date control. The code is as follows:
$(function(){
 // 获取调用控件的对象
 var dates = $("#start,#end");
 var option;
 //设置目标时间,因为例子中的开始时间和结束时间是有时间限制的
 var targetDate;
 var optionEnd;
 var targetDateEnd;
 dates.datepicker({
  showButtonPanel:false,
  //当选择时间的时候触发此事件
  onSelect: function(selectedDate){
   if(this.id == "start"){
   // 如果是选择了开始时间
   option = "minDate";
   //getTimeByDateStr 这个方法的代码下面会贴出来的,就是处理时间的代码
   var selectedTime = getTimeByDateStr(selectedDate);
   var minTime = selectedTime;
   targetDate = new Date(minTime);
   //设置结束时间
   optionEnd = "maxDate";
   targetDateEnd = new Date(minTime+2*24*60*60*1000);
   }else{
   // 如果是选择了结束时间
   option = "maxDate";
   var selectedTime = getTimeByDateStr(selectedDate);
   var maxTime = selectedTime;
   targetDate = new Date(maxTime);
   //设置开始时间
   optionEnd = "minDate";
   targetDateEnd = new Date(maxTime-2*24*60*60*1000);

   }
   //设置时间框中时间,比如根据选择的开始时间,限制结束时间的不可选项,dates.not(this)是js选择器使用,
   //datepicker("option", option, targetDate),这个就是日期控件封装的api了
   dates.not(this).datepicker("option", option, targetDate);
   dates.not(this).datepicker("option", optionEnd, targetDateEnd);
  }
 });
});
Now let’s post the code of the getTimeByDateStr(XXX) method in the above code for everyone’s convenience. This code is very simple and I believe everyone can understand it at a glance:
//根据日期字符串取得其时间
function getTimeByDateStr(dateStr){
 var year = parseInt(dateStr.substring(0,4));
 var month = parseInt(dateStr.substring(5,7),10)-1;
 var day = parseInt(dateStr.substring(8,10),10);
 return new Date(year, month, day).getTime();
}
The code can now implement the use of date controls, and the start time and end time are limited to within three days. For example, if you choose the start time as 2014-03-27, then the end time is only 27, 28, and 29. Optional, the remaining dates are not clickable. If you choose the end time as 28, then now the start time can only be 28, 27, 26, that's it.
Step 3: Look at the clear button. The clear button is to clear the value in the time selection box . This is very simple to implement:
//清空日历控件
function cleaPrevInput(objs){
 //清空输入框中的值,但是仅仅是清空了值而已,时间控件的选值限制还在的
 $(objs).prev().val("");
 //如果开始时间和结束时间都清空了,这时应该是你选择的那个框中是没有时间限制的,也就是说可以随便选择日期
 if($('#start').val()=="" && $('#end').val()==""){
 var dates = $("#start,#end");
 //调用datepicker封装的api,使刚刚设置的开始时间和结束时间为空,这样就可以选择任意日期了
 dates.datepicker("option", "minDate", null);
 dates.datepicker("option", "maxDate", null);
 }
}It can be used now. If you just use the control, it is very simple without setting a time limit. The above code can be used for most date selection needs, but if there is something special, you still need to check the API yourself. At that time, I checked the API for a long time just to clear the value in the date control, which is this code: dates.datepicker("option", "maxDate", null). I still need everyone to have enough patience.
The above is the entire introduction to the jquery UI Datepicker time control. It has come to an end for the time being. If there are related articles in the future, I will share them with you as soon as possible.


![[Web front-end] Node.js quick start](https://img.php.cn/upload/course/000/000/067/662b5d34ba7c0227.png)


