How to modify arm thickness in PS

The method of modifying the arm thickness in PS is:
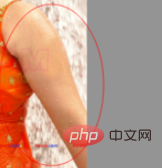
1. Open the material picture in PS. The areas circled in the picture need to be adjusted. , as shown in the picture below:
#2. Use the [Lasso Tool] to circle the arm and the surrounding environment. As shown below.
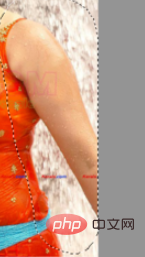
#3. Right-click, select [Feather], and set [Feather Radius] to 20 pixels.

Recommended related online video tutorials: ps video tutorial
4. Press Ctrl J to copy the layer to get layer 1. Press Ctrl T to free transform.
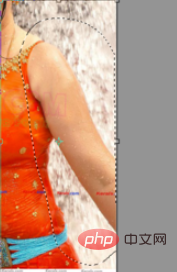
#5. Right-click and select [Transform], hold down the left mouse button and push forward gently.
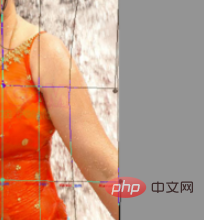
#6. Press the Enter key to complete the overall adjustment of the arm.

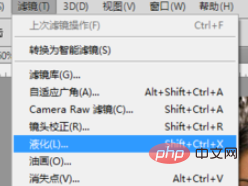
7. Merge the layers, execute Filter-Liquify, use the [Forward Transform Tool] on the muscles of the upper arm, and push it to the left.


8. The finished effect.

Recommended related articles and tutorials: ps tutorial
The above is the detailed content of How to modify arm thickness in PS. For more information, please follow other related articles on the PHP Chinese website!

Hot AI Tools

Undresser.AI Undress
AI-powered app for creating realistic nude photos

AI Clothes Remover
Online AI tool for removing clothes from photos.

Undress AI Tool
Undress images for free

Clothoff.io
AI clothes remover

AI Hentai Generator
Generate AI Hentai for free.

Hot Article

Hot Tools

Notepad++7.3.1
Easy-to-use and free code editor

SublimeText3 Chinese version
Chinese version, very easy to use

Zend Studio 13.0.1
Powerful PHP integrated development environment

Dreamweaver CS6
Visual web development tools

SublimeText3 Mac version
God-level code editing software (SublimeText3)

Hot Topics
 How to change the personal name in the group on DingTalk_How to modify the personal name in the group on DingTalk
Mar 29, 2024 pm 08:41 PM
1. First open DingTalk. 2. Open the group chat and click the three dots in the upper right corner. 3. Find my nickname in this group. 4. Click to enter to modify and save.
 Can Douyin Blue V change its name? What are the steps to change the name of corporate Douyin Blue V account?
Mar 22, 2024 pm 12:51 PM
Douyin Blue V certification is the official certification of a company or brand on the Douyin platform, which helps enhance brand image and credibility. With the adjustment of corporate development strategy or the update of brand image, the company may want to change the name of Douyin Blue V certification. So, can Douyin Blue V change its name? The answer is yes. This article will introduce in detail the steps to modify the name of the enterprise Douyin Blue V account. 1. Can Douyin Blue V change its name? You can change the name of Douyin Blue V account. According to Douyin’s official regulations, corporate Blue V certified accounts can apply to change their account names after meeting certain conditions. Generally speaking, enterprises need to provide relevant supporting materials, such as business licenses, organization code certificates, etc., to prove the legality and necessity of changing the name. 2. What are the steps to modify the name of corporate Douyin Blue V account?
 Win10 sleep time modification tips revealed
Mar 08, 2024 pm 06:39 PM
Win10 Sleep Time Modification Tips Revealed As one of the currently widely used operating systems, Windows 10 has a sleep function to help users save power and protect the screen when not using the computer. However, sometimes the default sleep time does not meet the needs of users, so it is particularly important to know how to modify the Win10 sleep time. This article will reveal the tips for modifying the sleep time of Win10, allowing you to easily customize the system’s sleep settings. 1. Modify Win10 sleep time through “Settings” First, the simplest fix
 Introduction to the process of extracting line drawings in PS
Apr 01, 2024 pm 12:51 PM
1. Open the software and import a piece of material, as shown in the picture below. 2. Then ctrl+shift+u to remove color. 3. Then press ctrl+J to copy the layer. 4. Then reverse ctrl+I, and then set the layer blending mode to Color Dodge. 5. Click Filter--Others--Minimum. 6. In the pop-up dialog box, set the radius to 2 and click OK. 7. Finally, you can see the line draft extracted.
 How to modify the address location of published products on Xianyu
Mar 28, 2024 pm 03:36 PM
When publishing products on the Xianyu platform, users can customize the geographical location information of the product according to the actual situation, so that potential buyers can more accurately grasp the specific location of the product. Once the product is successfully put on the shelves, there is no need to worry if the seller's location changes. The Xianyu platform provides a flexible and convenient modification function. So when we want to modify the address of a published product, how do we modify it? This tutorial guide will provide you with a detailed step-by-step guide. I hope it can help. Everyone! How to modify the release product address in Xianyu? 1. Open Xianyu, click on what I published, select the product, and click Edit. 2. Click the positioning icon and select the address you want to set.
 Complete list of ps shortcut keys
Mar 11, 2024 pm 04:31 PM
1. Ctrl + N: Create a new document. 2. Ctrl + O: Open a file. 3. Ctrl + S: Save the current file. 4. Ctrl + Shift + S: Save as. 5. Ctrl + W: Close the current document. 6. Ctrl + Q: Exit Photoshop. 7. Ctrl + Z: Undo. 8. Ctrl + Y: Redo. 9. Ctrl + X: Cut the selected content. 10. Ctrl + C: Copy the selected content.
 How to use ps vanishing point - how to use ps vanishing point
Mar 05, 2024 am 09:00 AM
Recently, many friends have asked the editor how to use PS vanishing point. Next, let us learn how to use PS vanishing point. I hope it can help everyone. Step one: First open the ps software and import a picture with a three-dimensional perspective effect (as shown in the picture). Step 2: Then import a material picture, any picture can be used (as shown in the picture). Step 3: Then select the material picture, then ctrl+c to copy the material picture, hide the eyes in front, select the stereoscopic perspective effect picture, and then click the vanishing point option in the filter options (as shown in the picture). Step 4: Enter the editing window of the vanishing point filter and select the Create Plane tool on the left (as shown in the picture). Step 5: Click on the four corners of the object in the three-dimensional perspective rendering to form a closed circle
 How to modify the greeting content for boss direct recruitment
Mar 01, 2024 pm 03:40 PM
In the job recruitment software called Boss Direct Jobs, users can personalize their greetings to better demonstrate their personality and job search intentions. However, sometimes the default greeting terms are rather mechanical and rigid. Many users want to make their own changes but don’t know where to set them. So this tutorial guide will introduce the detailed modification steps for players who want to know more. Come and follow this article to find out! How to change the answer when a boss directly hires someone to say hello: [Boss directly hires]-[My]-[Settings Icon]-[Greeting Language]. Specific steps: 1. First, we click on the boss direct recruitment software. After entering the homepage, we click [My] in the lower right corner; 2. Then when we come to the My page, we can see the relevant data.


