How to automatically fill in the surrounding background in ps

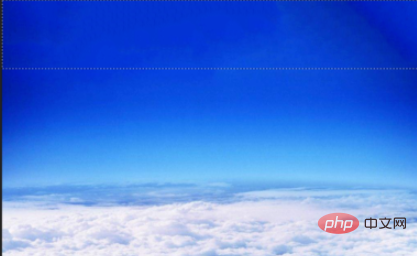
First open a picture, and then you can see that our picture is a little smaller than the canvas. We can leave the sky to fill it, as shown below:
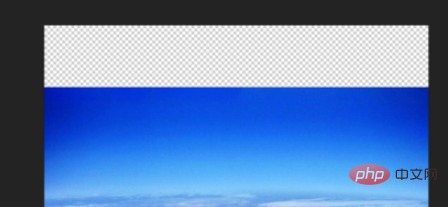
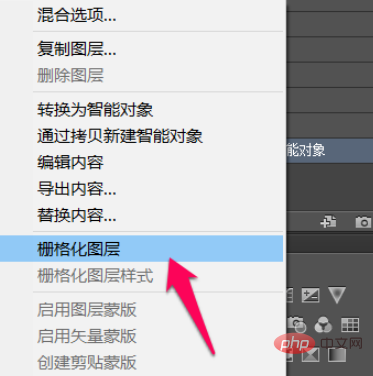
First rasterize the picture. The so-called rasterization is to convert the picture into a bitmap form, so that we can proceed to the next step. If the picture is already in bitmap form, you can jump Go through this step, as shown below: (Free learning video tutorial recommendation: ps video tutorial)
Then use the rectangular selection tool to select the blank area above the picture Select and select all the boxes, as shown below:

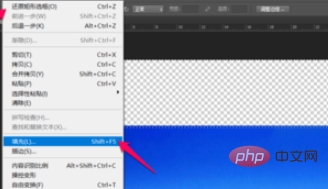
#Then click Edit -> Fill according to the position indicated by the red arrow in the picture below. Of course, you can also use the shortcut key shift F5 , as shown below:
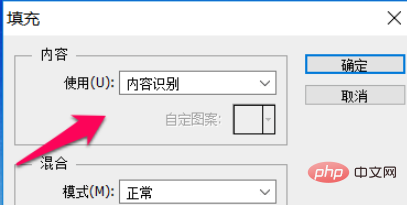
In the pop-up pop-up dialog box, we select content recognition under the use of content, and then other default selections are sufficient, and then click OK, as follows Picture:
After confirmation, go back to the previous picture and you will see that the blank part in the upper part of the picture has been automatically filled with the color of the sky, and the filling is seamless, as shown below:
Recommended related articles and tutorials: ps tutorial
The above is the detailed content of How to automatically fill in the surrounding background in ps. For more information, please follow other related articles on the PHP Chinese website!

Hot AI Tools

Undresser.AI Undress
AI-powered app for creating realistic nude photos

AI Clothes Remover
Online AI tool for removing clothes from photos.

Undress AI Tool
Undress images for free

Clothoff.io
AI clothes remover

AI Hentai Generator
Generate AI Hentai for free.

Hot Article

Hot Tools

Notepad++7.3.1
Easy-to-use and free code editor

SublimeText3 Chinese version
Chinese version, very easy to use

Zend Studio 13.0.1
Powerful PHP integrated development environment

Dreamweaver CS6
Visual web development tools

SublimeText3 Mac version
God-level code editing software (SublimeText3)

Hot Topics
 How to automate tasks using PowerShell
Feb 20, 2024 pm 01:51 PM
If you are an IT administrator or technology expert, you must be aware of the importance of automation. Especially for Windows users, Microsoft PowerShell is one of the best automation tools. Microsoft offers a variety of tools for your automation needs, without the need to install third-party applications. This guide will detail how to leverage PowerShell to automate tasks. What is a PowerShell script? If you have experience using PowerShell, you may have used commands to configure your operating system. A script is a collection of these commands in a .ps1 file. .ps1 files contain scripts executed by PowerShell, such as basic Get-Help
 Introduction to the process of extracting line drawings in PS
Apr 01, 2024 pm 12:51 PM
1. Open the software and import a piece of material, as shown in the picture below. 2. Then ctrl+shift+u to remove color. 3. Then press ctrl+J to copy the layer. 4. Then reverse ctrl+I, and then set the layer blending mode to Color Dodge. 5. Click Filter--Others--Minimum. 6. In the pop-up dialog box, set the radius to 2 and click OK. 7. Finally, you can see the line draft extracted.
 Automount drives on Linux
Mar 20, 2024 am 11:30 AM
If you are using a Linux operating system and want the system to automatically mount the drive on boot, you can do this by adding the device's unique identifier (UID) and mount point path to the fstab configuration file. fstab is a file system table file located in the /etc directory. It contains information about the file systems that need to be mounted when the system starts. By editing the fstab file, you can ensure that the required drives are loaded correctly every time the system starts, thus ensuring stable system operation. Automatically mounting drivers can be conveniently used in a variety of situations. For example, I plan to back up my system to an external storage device. To achieve automation, ensure that the device remains connected to the system, even at startup. Likewise, many applications will directly
 Win11 new version of drawing: remove background with one click to realize cutout function
Sep 15, 2023 pm 10:53 PM
Microsoft invites WindowsInsider project members in the Canary and Dev channels to test and experience the new Paint application. The latest version number is 11.2306.30.0. The most noteworthy new feature of this version update is the one-click cutout function. Users only need to click once to automatically eliminate the background and highlight the main body of the picture, making it easier for users to perform subsequent operations. The whole step is very simple. The user imports the picture in the new layout application, and then clicks the "removebackground" button on the toolbar to delete the background in the picture. The user can also use a rectangle to select the area to remove the background.
 Complete list of ps shortcut keys
Mar 11, 2024 pm 04:31 PM
1. Ctrl + N: Create a new document. 2. Ctrl + O: Open a file. 3. Ctrl + S: Save the current file. 4. Ctrl + Shift + S: Save as. 5. Ctrl + W: Close the current document. 6. Ctrl + Q: Exit Photoshop. 7. Ctrl + Z: Undo. 8. Ctrl + Y: Redo. 9. Ctrl + X: Cut the selected content. 10. Ctrl + C: Copy the selected content.
 What is the ps curve shortcut key?
Aug 22, 2023 am 10:44 AM
The ps curve shortcut key is Ctrl+M. Other curve shortcut keys: 1. Convert to point control curve, Alt+Shift+Ctrl+T; 2. Automatically align the curve, Alt+Shift+Ctrl+O; 3. Restore the default curve, Ctrl+Alt+Shift+R; 4. Copy the curve, Ctrl+Alt+Shift+C; 5. Paste the curve, Ctrl+Alt+Shift+V; 6. Adjust the curve slope, Shift+up and down arrows; 7. Adjust the curve brightness, Shift+left and right arrows
 Cannot use PS shortcut keys to fill
Feb 19, 2024 am 09:18 AM
With the development of the digital age, image processing software has become an indispensable part of our life and work. Among them, Photoshop (PS for short) developed by Adobe is one of the most famous image processing software. It has powerful functions and flexible operation, and is deeply loved by users. However, when using PS, some users reported that the shortcut key "Fill" cannot be used normally, which brings troubles to the user experience. Shortcut keys are a quick operation method provided in the software to avoid tedious mouse click operations.
 How to use ps vanishing point - how to use ps vanishing point
Mar 05, 2024 am 09:00 AM
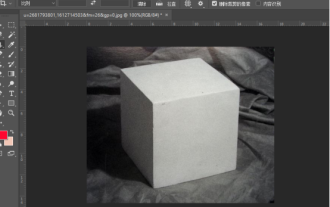
Recently, many friends have asked the editor how to use PS vanishing point. Next, let us learn how to use PS vanishing point. I hope it can help everyone. Step one: First open the ps software and import a picture with a three-dimensional perspective effect (as shown in the picture). Step 2: Then import a material picture, any picture can be used (as shown in the picture). Step 3: Then select the material picture, then ctrl+c to copy the material picture, hide the eyes in front, select the stereoscopic perspective effect picture, and then click the vanishing point option in the filter options (as shown in the picture). Step 4: Enter the editing window of the vanishing point filter and select the Create Plane tool on the left (as shown in the picture). Step 5: Click on the four corners of the object in the three-dimensional perspective rendering to form a closed circle


