Encapsulating ThinkPHP6.0 universal file upload
本文实例讲述了封装ThinkPHP6通用文件上传方法,上传功能使用的是LayUI的upload组件。
封装ThinkPHP6.0通用文件上传教程
一、打开项目在config文件夹下创建upload.php配置文件用来管理文件上传的后缀和大小
<?php
return [
//定义允许上传文件后缀的数组
'suffix_arr' => [
//允许图片上传的后缀
'image' => 'jpg,jpeg,png,gif',
//允许上传文件的后缀
'file' => 'zip,gz,doc,txt,pdf,xls',
//...
],
//定义允许上传文件大小的数组
'size_arr' => [
//允许图片上传的大小
'image' => 10,
//允许文件上传的大小
'file' => 50
],
];二、修改config\filesystem.php配置文件配置上传根目录及上传规则
<?php
return [
// 默认磁盘
'default' => env('filesystem.driver', 'local'),
// 磁盘列表
'disks' => [
'local' => [
'type' => 'local',
'root' => app()->getRuntimePath() . 'storage',
],
'public' => [
// 磁盘类型
'type' => 'local',
// 磁盘路径
'root' => app()->getRootPath() . 'public/uploads',
// 磁盘路径对应的外部URL路径
'url' => '/uploads',
// 可见性
'visibility' => 'public',
],
// 更多的磁盘配置信息
],
];三、 在app\controller目录下创建Upload.php类并编写upload()文件上传方法
<?php
namespace app\controller;
use think\exception\ValidateException;
class Upload
{
//上传
public function upload()
{
//判断是否是POST请求,如果是处理上传逻辑
if (request()->isPost()){
//接收文件上传类型
$type = request()->param('type','','trim');
$name = request()->param('name','','trim');
//获取表单上传文件
$file = request()->file('file');
//组装文件保存目录
$upload_dir = '/'.$type.'/'.$name;
try {
//从config/upload.php配置文件中读取允许上传的文件后缀和大小
$suffix_config = config('upload.suffix_arr');
$size_config = config('upload.size_arr');
if (empty($size_config[$type]) || empty($size_config[$type])){
return false;
}else{
$suffix = $suffix_config[$type];
$size = $size_config[$type];
}
//验证器验证上传的文件
validate(['file'=>[
//限制文件大小
'fileSize' => $size * 1024 * 1024,
//限制文件后缀
'fileExt' => $suffix
]],[
'file.fileSize' => '上传的文件大小不能超过'.$size.'M',
'file.fileExt' => '请上传后缀为:'.$suffix.'的文件'
])->check(['file'=>$file]);
//上传文件到本地服务器
$filename = \think\facade\Filesystem::disk('public')->putFile($upload_dir, $file);
if ($filename){
$src = '/uploads/'.$filename;
return json(['code'=>1,'result'=>$src]);
}else{
return json(['code'=>0,'msg'=>'上传失败']);
}
}catch (ValidateException $e){
return json(['code'=>0,'msg'=>$e->getMessage()]);
}
}else{
return json(['code'=>0,'msg'=>'非法请求']);
}
}
}四、 打开app\controller\Index.php类并修改index方法
<?php

namespace app\controller;

use app\BaseController;

class Index extends BaseController
{
    public function index()
    {
        //渲染前端页面
        return view();
    }
}五、在app\view\index目录下创建index.html文件
<!DOCTYPE html>
<html lang="en">
<head>
<meta charset="UTF-8">
<title>文件上传</title>
<!-- layui.css 推荐使用本地文件 -->
<link rel="stylesheet" href="https://heerey525.github.io/layui-v2.4.3/layui-v2.4.4/css/layui.css" media="all">
<style>
#avatar_thumb {
position: absolute;
left: 50%;top: 50%;
width: 168px;
height: 168px;
margin: -50px 0 0 -84px;
border-radius: 100%;
}
</style>
</head>
<body>
<div class="layui-card-body" style="text-align: center;">
<div class="layui-form-item">
<div style="position: relative;width: 373px;height: 373px;background-color: #F2F2F5;margin: auto;">
<button type="button" class="layui-btn" id="avatar">
<i class="layui-icon"></i>上传头像
</button>
<img src="/static/imghw/default1.png" data-src="" id=" class="lazy" id="avatar_thumb" alt="Encapsulating ThinkPHP6.0 universal file upload" >
<input type="hidden" name="avatar" value="">
</div>
</div>
</div>
<!-- layui.js 和jquery.js 推荐使用本地文件 -->
<script src="https://heerey525.github.io/layui-v2.4.3/layui-v2.4.4/layui.js" charset="utf-8"></script>
<script src="http://libs.baidu.com/jquery/2.1.4/jquery.min.js"></script>
<script src="/static/lib/js/common.js"></script>
<script>
layui.use(['form', 'upload'], function() {
var upload = layui.upload;
//图片上传
common_upload('avatar');
//文件上传
//common_upload('avatar','file');
});
</script>
</body>
</html>六、在public\static\lib\js目录下创建common.js
/**
 * @desc 通用文件上传
 * @param name  文件存储文件夹
 * @param type 文件类型:默认为图片类型(image)
 */
function common_upload(name,type='image') {

    layui.use(['form', 'upload'], function() {
        var upload = layui.upload;

        //选完文件后自动上传
        upload.render({
            elem: '#'+name,
            url: "/upload/upload",
            auto: true,
            accept: 'file', //普通文件
            data:{name:name,type:type},

            done: function(data) {
                console.log(data);
                //上传完毕回调
                if (data.code == 0) {
                    return layer.msg(data.msg,{icon:2});
                } else {
                    $("#"+name+"_thumb").attr('src',data.result).show();
                    $('input[name='+name+']').val(data.result);
                }
            }
        });
    });
}七、测试图片上传
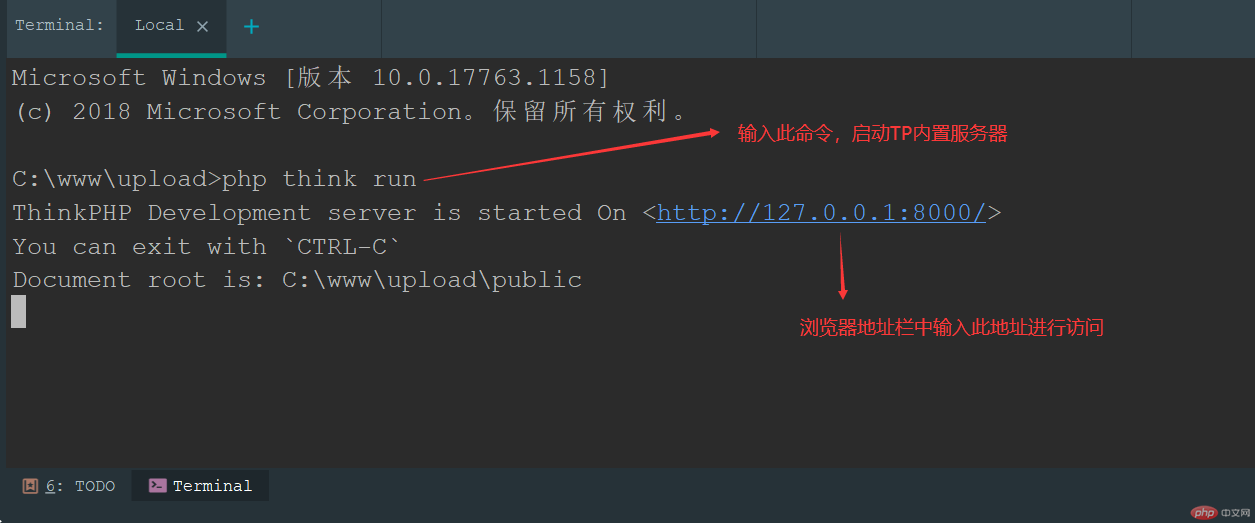
7.1、为了方便,本文就不在本地部署项目了,采用ThinkPHP内置的服务器
进到项目根目录,执行以下命令:
php think run
7.2、在浏览器地址栏中输入访问地址,发现报错?

7.3、遇到错误不要慌,我们打开ThinkPHP的调试功能,看看具体错误信息
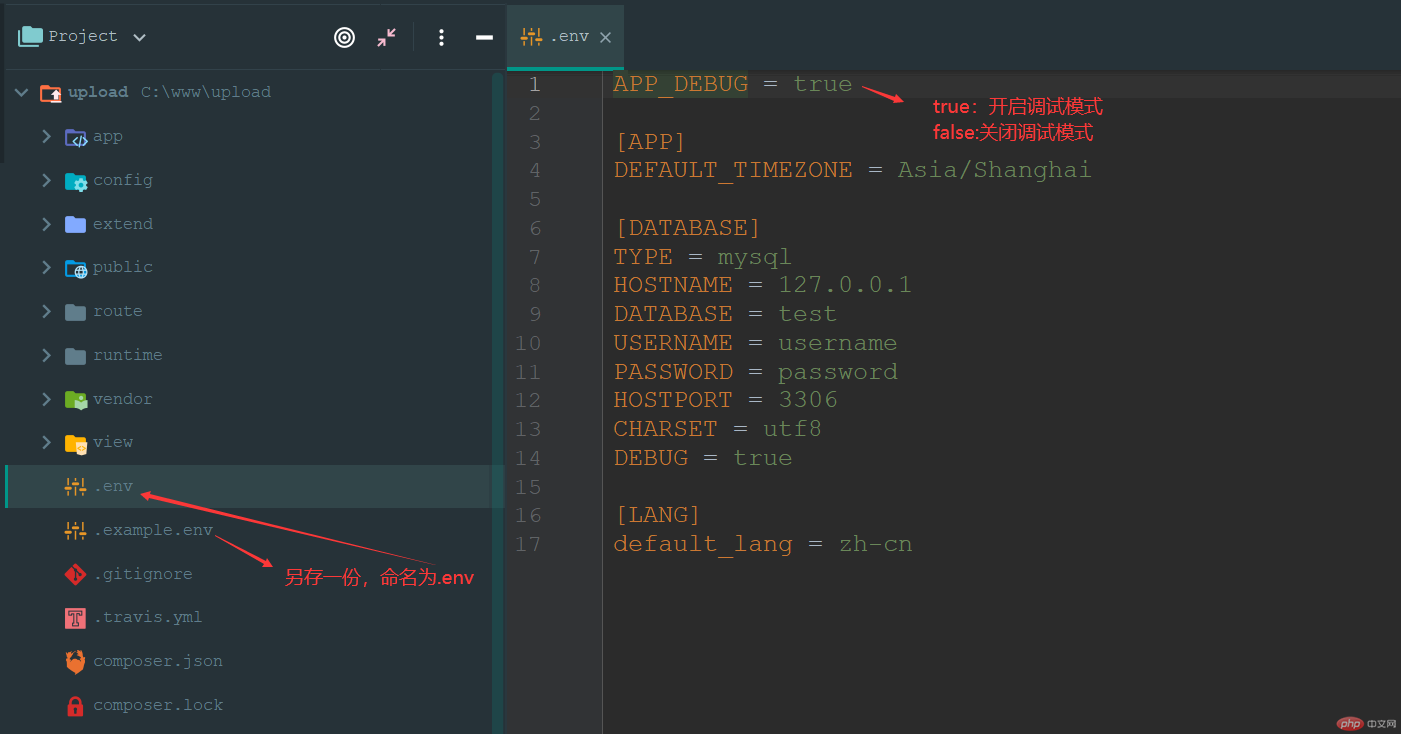
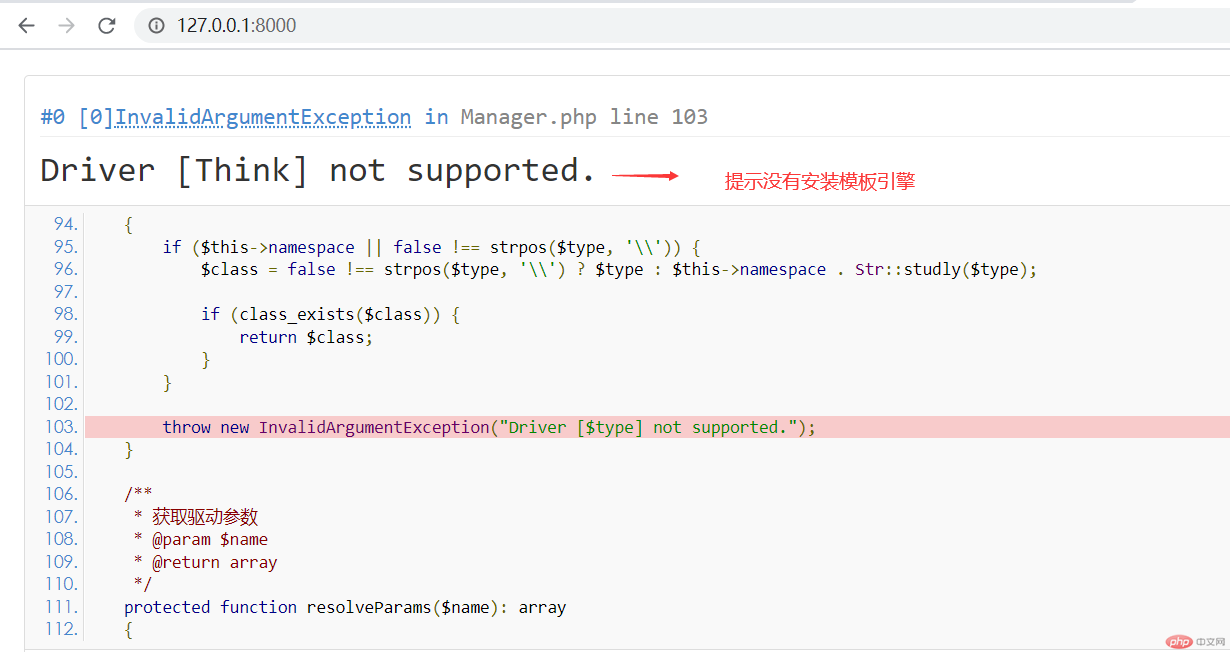
7.4、通过开启调试模式,发现报错原因是我们没有安装模板引擎,在ThinkPHP6.0中默认只能支持PHP原生模板,如果需要使用thinkTemplate模板引擎,需要安装think-view扩展
7.5、进到项目根目录下,输入以下命令进行安装think-view模板
composer require topthink/think-view
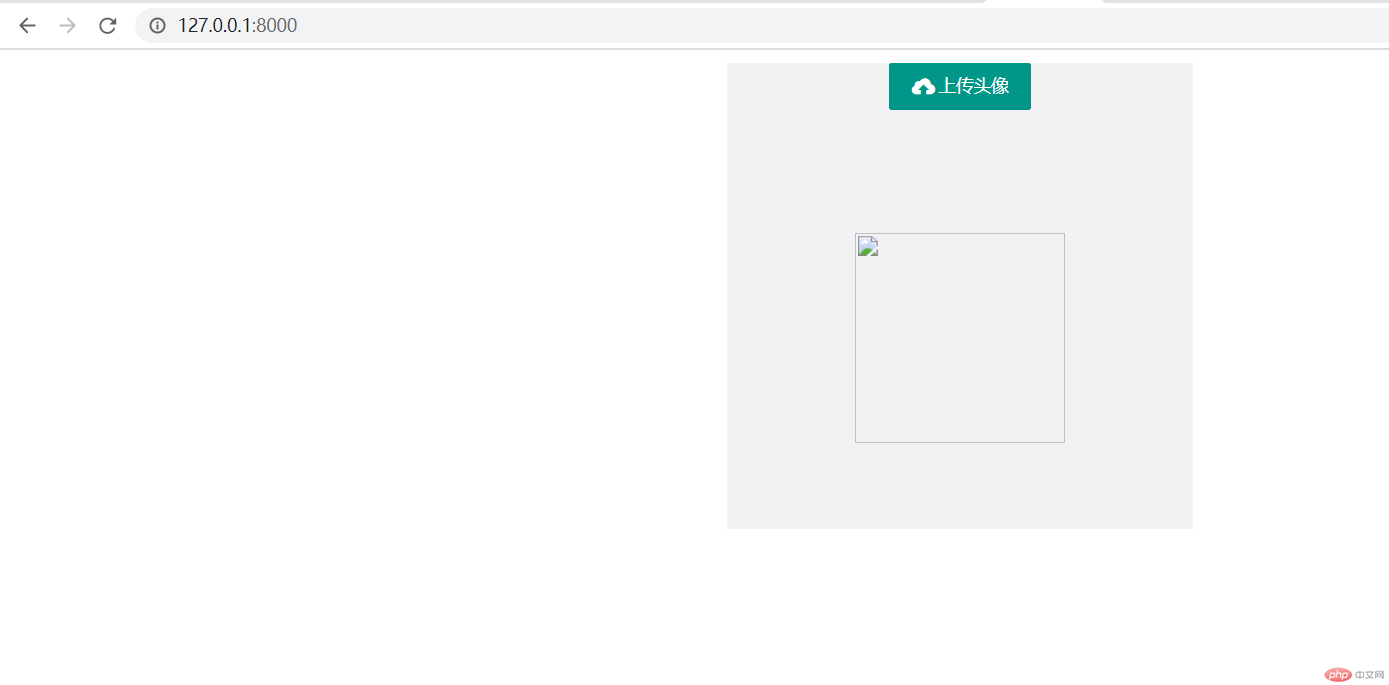
7.6、再次访问,访问成功。不过图片显示的是破裂的,如果觉得不好看,小伙伴们可以自行设置一个默认图片。
7.7、测试图片上传。从GIF图中可以看出上传图片大小和后缀不符合配置文件中设置的值,会给出相应的提示信息,只有上传符合配置文件中设置的值的图片才会在页面中显示并存储到本地。

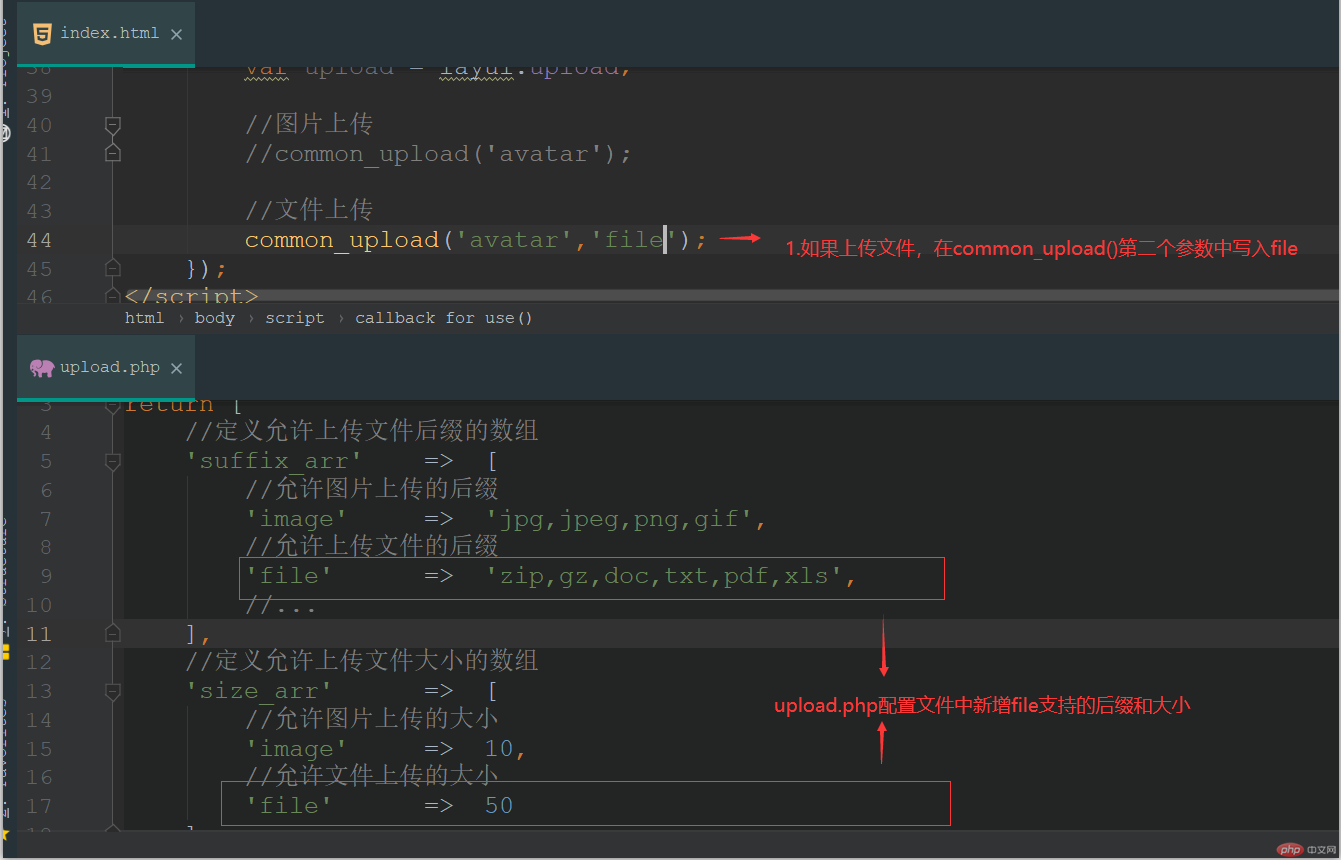
7.8、如果需要上传文件,视频或音频,只需要修改以下两个地方,这里就不演示了,小伙伴们下去自己试下。
八、新图片上传成功后自动删除原图,有效地减少垃圾信息的累积
8.1、在app\controller\Upload.php中添加delImg() 方法
<?php
namespace app\controller;
use think\exception\ValidateException;
class Upload
{
//上传
public function upload()
{
//判断是否是POST请求,如果是处理上传逻辑
if (request()->isPost()){
//接收文件上传类型
$type = request()->param('type','','trim');
$name = request()->param('name','','trim');
//获取表单上传文件
$file = request()->file('file');
//组装文件保存目录
$upload_dir = '/'.$type.'/'.$name;
try {
//从config/upload.php配置文件中读取允许上传的文件后缀和大小
$suffix_config = config('upload.suffix_arr');
$size_config = config('upload.size_arr');
if (empty($size_config[$type]) || empty($size_config[$type])){
return false;
}else{
$suffix = $suffix_config[$type];
$size = $size_config[$type];
}
//验证器验证上传的文件
validate(['file'=>[
//限制文件大小
'fileSize' => $size * 1024 * 1024,
//限制文件后缀
'fileExt' => $suffix
]],[
'file.fileSize' => '上传的文件大小不能超过'.$size.'M',
'file.fileExt' => '请上传后缀为:'.$suffix.'的文件'
])->check(['file'=>$file]);
//上传文件到本地服务器
$filename = \think\facade\Filesystem::disk('public')->putFile($upload_dir, $file);
if ($filename){
$src = '/uploads/'.$filename;
return json(['code'=>1,'result'=>$src]);
}else{
return json(['code'=>0,'msg'=>'上传失败']);
}
}catch (ValidateException $e){
return json(['code'=>0,'msg'=>$e->getMessage()]);
}
}else{
return json(['code'=>0,'msg'=>'非法请求']);
}
}
//删除旧图片
public function delImg()
{
if (request()->isPost() && request()->isAjax()){
//获取旧图片地址
$img_url = input('img_url','','trim');
//如果旧图片地址为系统默认图片地址直接返回true; 这里的系统默认地址小伙伴可以自行设置
if($img_url == '/uploads/image/avatar/default/user_avatar.jpg'){
return true;
}
//ROOT_PATH常量建议定义在入口文件index.php或中间件中,这里为了演示方便就先定义在这里。
define('ROOT_PATH',dirname(str_replace("\\",'/',$_SERVER['SCRIPT_FILENAME']))."/");
//如果接收的图片地址不为空,循环删除
if (!empty($img_url)){
$old_image = array(ROOT_PATH.$img_url);
foreach ($old_image as $img){
if (file_exists($img)){
@unlink($img);
}
}
}
return json(['code'=>1,'msg'=>'图片删除成功']);
}else{
return json(['code'=>0,'msg'=>'图片删除失败']);
}
}
}8.2、在common.js中的common_upload()方法中定义before()
/**
 * @desc 通用文件上传
 * @param name  文件存储文件夹
 * @param type 文件类型:默认为图片类型(image)
 */
function common_upload(name,type='image') {

    layui.use(['form', 'upload'], function() {
        var upload = layui.upload;

        //选完文件后自动上传
        upload.render({
            elem: '#'+name,
            url: "/upload/upload",
            auto: true,
            accept: 'file', //普通文件
            data:{name:name,type:type},

            before: function(obj) {
                var img_url = $('input[name='+name+']').val();
                // 删除老数据
                if (img_url != '') {
                    $.ajax({
                        url: "/upload/delImg",
                        type: 'POST',
                        data: {
                            img_url: img_url
                        },
                    });
                }
            },

            done: function(data) {
                console.log(data);
                //上传完毕回调
                if (data.code == 0) {
                    return layer.msg(data.msg,{icon:2});
                } else {
                    $("#"+name+"_thumb").attr('src',data.result).show();
                    $('input[name='+name+']').val(data.result);
                }
            }
        });
    });
}相关推荐:
1. thinkphp技术专题
2. thinkphp视频教程
The above is the detailed content of Encapsulating ThinkPHP6.0 universal file upload. For more information, please follow other related articles on the PHP Chinese website!

Hot AI Tools

Undresser.AI Undress
AI-powered app for creating realistic nude photos

AI Clothes Remover
Online AI tool for removing clothes from photos.

Undress AI Tool
Undress images for free

Clothoff.io
AI clothes remover

AI Hentai Generator
Generate AI Hentai for free.

Hot Article

Hot Tools

Notepad++7.3.1
Easy-to-use and free code editor

SublimeText3 Chinese version
Chinese version, very easy to use

Zend Studio 13.0.1
Powerful PHP integrated development environment

Dreamweaver CS6
Visual web development tools

SublimeText3 Mac version
God-level code editing software (SublimeText3)

Hot Topics
 1378
1378
 52
52
 Can Tmp format files be deleted?
Feb 24, 2024 pm 04:33 PM
Tmp format files are a temporary file format usually generated by a computer system or program during execution. The purpose of these files is to store temporary data to help the program run properly or improve performance. Once the program execution is completed or the computer is restarted, these tmp files are often no longer necessary. Therefore, for Tmp format files, they are essentially deletable. Moreover, deleting these tmp files can free up hard disk space and ensure the normal operation of the computer. However, before deleting Tmp format files, we need to
 What to do if the 0x80004005 error code appears. The editor will teach you how to solve the 0x80004005 error code.
Mar 21, 2024 pm 09:17 PM
When deleting or decompressing a folder on your computer, sometimes a prompt dialog box "Error 0x80004005: Unspecified Error" will pop up. How should you solve this situation? There are actually many reasons why the error code 0x80004005 is prompted, but most of them are caused by viruses. We can re-register the dll to solve the problem. Below, the editor will explain to you the experience of handling the 0x80004005 error code. Some users are prompted with error code 0X80004005 when using their computers. The 0x80004005 error is mainly caused by the computer not correctly registering certain dynamic link library files, or by a firewall that does not allow HTTPS connections between the computer and the Internet. So how about
 How to transfer files from Quark Cloud Disk to Baidu Cloud Disk?
Mar 14, 2024 pm 02:07 PM
Quark Netdisk and Baidu Netdisk are currently the most commonly used Netdisk software for storing files. If you want to save the files in Quark Netdisk to Baidu Netdisk, how do you do it? In this issue, the editor has compiled the tutorial steps for transferring files from Quark Network Disk computer to Baidu Network Disk. Let’s take a look at how to operate it. How to save Quark network disk files to Baidu network disk? To transfer files from Quark Network Disk to Baidu Network Disk, you first need to download the required files from Quark Network Disk, then select the target folder in the Baidu Network Disk client and open it. Then, drag and drop the files downloaded from Quark Cloud Disk into the folder opened by the Baidu Cloud Disk client, or use the upload function to add the files to Baidu Cloud Disk. Make sure to check whether the file was successfully transferred in Baidu Cloud Disk after the upload is completed. That's it
 How to run thinkphp project
Apr 09, 2024 pm 05:33 PM
To run the ThinkPHP project, you need to: install Composer; use Composer to create the project; enter the project directory and execute php bin/console serve; visit http://localhost:8000 to view the welcome page.
 What is hiberfil.sys file? Can hiberfil.sys be deleted?
Mar 15, 2024 am 09:49 AM
Recently, many netizens have asked the editor, what is the file hiberfil.sys? Can hiberfil.sys take up a lot of C drive space and be deleted? The editor can tell you that the hiberfil.sys file can be deleted. Let’s take a look at the details below. hiberfil.sys is a hidden file in the Windows system and also a system hibernation file. It is usually stored in the root directory of the C drive, and its size is equivalent to the size of the system's installed memory. This file is used when the computer is hibernated and contains the memory data of the current system so that it can be quickly restored to the previous state during recovery. Since its size is equal to the memory capacity, it may take up a larger amount of hard drive space. hiber
 Different uses of slashes and backslashes in file paths
Feb 26, 2024 pm 04:36 PM
A file path is a string used by the operating system to identify and locate a file or folder. In file paths, there are two common symbols separating paths, namely forward slash (/) and backslash (). These two symbols have different uses and meanings in different operating systems. The forward slash (/) is a commonly used path separator in Unix and Linux systems. On these systems, file paths start from the root directory (/) and are separated by forward slashes between each directory. For example, the path /home/user/Docume
 There are several versions of thinkphp
Apr 09, 2024 pm 06:09 PM
ThinkPHP has multiple versions designed for different PHP versions. Major versions include 3.2, 5.0, 5.1, and 6.0, while minor versions are used to fix bugs and provide new features. The latest stable version is ThinkPHP 6.0.16. When choosing a version, consider the PHP version, feature requirements, and community support. It is recommended to use the latest stable version for best performance and support.
 How to run thinkphp
Apr 09, 2024 pm 05:39 PM
Steps to run ThinkPHP Framework locally: Download and unzip ThinkPHP Framework to a local directory. Create a virtual host (optional) pointing to the ThinkPHP root directory. Configure database connection parameters. Start the web server. Initialize the ThinkPHP application. Access the ThinkPHP application URL and run it.


