

Integrate Vue in Flask


This tutorial answers the question, "How do I integrate Vue.js into Flask?" Because you are reading this tutorial, so I assume you know that Flask is a Python microframework built for rapid web development. If you're new to Flask, or you think I might be talking about a thermos, I recommend you read this before continuing with this tutorial.
Vue.js is a progressive framework for building user interfaces. If you're not familiar with it, you can read about it here.
Now that you are familiar with Flask and Vue.js, we can get started.
Flask settings
Let’s install a few dependencies first:
pip install --user cookiecutter
Cookiecutter is a great command line tool for quickly bootstrapping projects template. We are using cookiecutter so we don't need to spend too much time configuring the project. Keep in mind that Flask does not include a battery like Django does, so a lot of work must be put into the initial setup of your project. Now that you have Cookiecutter installed, we need to grab a project template. For this tutorial, we only need a simple Flask API. Run the following command:
cookiecutter gh:mobidevke/cookiecutter-flask-api-starter
You should get the following output:
repo_name [api-starter]: flask-vuejs-tutorial
api_name [Api]: api
version [1.0.0]: 1.0.0
A folder named
flask-vuejs-tutorial should be created. Navigate to the folder and you should see the following structure: ├── app
│ ├── config.py
│ ├── factory.py
│ ├── __init__.py
│ ├── models
│ │ ├── base.py
│ │ ├── database.py
│ │ ├── datastore.py
│ │ └── __init__.py
│ ├── resources
│ │ ├── example.py
│ │ └── __init__.py
│ └── utils.py
├── pytest.ini
├── README.md
├── requirements.txt
├── settings.py
├── tests
│ ├── conftest.py
│ ├── __init__.py
│ ├── test_app.py
│ ├── test_models.py
│ ├── test_resources.py
│ └── utils.py
├── unit-tests.sh
└── wsgi.py
Before we continue, we need to set up a virtual environment. Execute:
python -m venv venv
Now you can open the project folder using your favorite IDE/text editor. Before proceeding to the next step, remember to activate the virtual environment.
Now we can install dependencies. Execution:pip install -r requirements.txt
After completion, open app/config.py
. You'll notice that this API template uses a postgres database connection. If you don't mind, you can setup postgres db with necessary credentials. Otherwise, replace the contents of that folder with the following lines of code: <div class="code" style="position:relative; padding:0px; margin:0px;"><pre class="brush:php;toolbar:false">import os
class Config:
ERROR_404_HELP = False
SECRET_KEY = os.getenv('APP_SECRET', 'secret key')
SQLALCHEMY_DATABASE_URI = 'sqlite:///tutorial.db'
SQLALCHEMY_TRACK_MODIFICATIONS = False
DOC_USERNAME = 'api'
DOC_PASSWORD = 'password'
class DevConfig(Config):
DEBUG = True
class TestConfig(Config):
SQLALCHEMY_DATABASE_URI = 'sqlite://'
TESTING = True
DEBUG = True
class ProdConfig(Config):
DEBUG = False
config = {
'development': DevConfig,
'testing': TestConfig,
'production': ProdConfig
}</pre><div class="contentsignin">Copy after login</div></div> We have removed all postgres configuration in favor of sqlite's configuration. If you are using postgres, leave the
file unchanged. Now we need to export the Flask application. Execute:
export FLASK_APP=wsgi:app
Now that we have completed the settings of Flask’s API, execute:
flask run
and open http://127.0.0.1:5000/example on the browser. You should see the following:
{"message": "Success"}Now that our API is ready, we can move on to bootstrapping the vue application.
The first thing we need to do is install vue cli. Execute:npm install -g @vue/cli # OR yarn global add @vue/cli
Once the installation is complete, you can check if the version is correct (3.x) using the following command:
vue --version
In the root of the project folder run:
vue create web
I chose
default (babel, eslint) as the default and yarn as my package manager. If you are familiar with node projects, you can go ahead and choose your preferred option. If not, follow the default settings for this tutorial. Now navigate to the newly created web
folder and run: yarn serve
# OR
npm run serve
text. Now we are ready to start integration.
In the Web folder, create a file called
vue.config.js and paste the following content: <div class="code" style="position:relative; padding:0px; margin:0px;"><pre class="brush:php;toolbar:false">const path = require('path');
module.exports = {
assetsDir: '../static',
baseUrl: '',
publicPath: undefined,
outputDir: path.resolve(__dirname, '../app/templates'),
runtimeCompiler: undefined,
productionSourceMap: undefined,
parallel: undefined,
css: undefined
};</pre><div class="contentsignin">Copy after login</div></div>Here, define for Vue cl i some configuration. We are only interested in three fields:
. Let's start with outputDir. This folder holds the location of the built Vue files, which is the folder that will hold the
index.html
that will load the Vue application. If you observe the path provided, you will notice that the folder is located inside the app module of the flask application. assetsDir
Save the folder used to store static files (css, js, etc.). Note It is relative to the value provided in the outputDir field. Finally, the baseUrl
field will save the path prefix of the static file in index.html. You can check this to learn more about other configuration options. Run now:
yarn build
# OR
npm run build
如果打开 app 文件夹, 您会注意到已经创建了两个新文件夹, 即templates 和 static。 它们包含内置的vue文件。
现在在app 文件夹中创建一个 views.py 文件并粘贴以下内容:
from flask import Blueprint, render_template, abort
from jinja2 import TemplateNotFound

sample_page = Blueprint('sample_page', 'sample_page', template_folder='templates')

@sample_page.route('/sample')
def get_sample():
    try:
        return render_template('index.html')
    except TemplateNotFound:
abort(404)现在,这是怎么回事呢?
好吧,现在我们创建一个名为 sample_page 的 Flask 蓝图(blueprint),并添加路由。这条路由将渲染我们的 Vue 应用。
打开 __init__.py 文件并在 app = f.flask 下添加以下几行:
.....
app = f.flask
from .views import sample_page

app.register_blueprint(sample_page, url_prefix='/views')
在这里, 我们正在注册之前创建的蓝图(blueprint)。
我们为蓝图(blueprint)指定了url前缀,以便于可以从 /views/sample访问我们的vue应用程序。
真相时刻到啦。
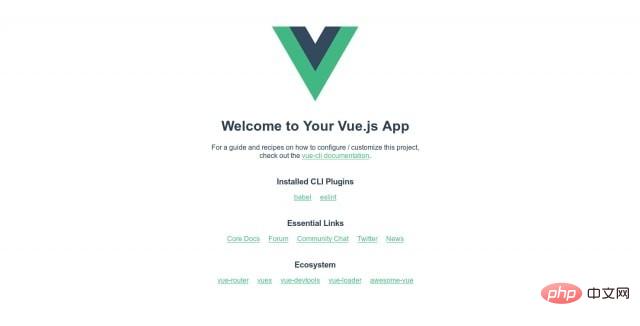
打开 http://127.0.0.1:5000/views/sample, 您应该能看到以下内容:
如果您检查日志, 将看到正确加载了内置资源:
 * Serving Flask app "wsgi:app"
 * Environment: production
   WARNING: Do not use the development server in a production environment.
   Use a production WSGI server instead.
 * Debug mode: off
 * Running on http://127.0.0.1:5000/ (Press CTRL+C to quit)
127.0.0.1 - - [24/May/2019 20:45:02] "GET /views/sample HTTP/1.1" 200 -
127.0.0.1 - - [24/May/2019 20:45:02] "GET /static/css/app.e2713bb0.css HTTP/1.1" 200 -
127.0.0.1 - - [24/May/2019 20:45:02] "GET /static/js/chunk-vendors.b10d6c99.js HTTP/1.1" 200 -
127.0.0.1 - - [24/May/2019 20:45:02] "GET /static/js/app.c249faaa.js HTTP/1.1" 200 -
127.0.0.1 - - [24/May/2019 20:45:02] "GET /static/img/logo.82b9c7a5.png HTTP/1.1" 200 -
127.0.0.1 - - [24/May/2019 20:45:02] "GET /views/favicon.ico HTTP/1.1" 404 -
您已经成功将Flask与Vuejs集成
推荐教程:《Python教程》
The above is the detailed content of Integrate Vue in Flask. For more information, please follow other related articles on the PHP Chinese website!

Hot AI Tools

Undresser.AI Undress
AI-powered app for creating realistic nude photos

AI Clothes Remover
Online AI tool for removing clothes from photos.

Undress AI Tool
Undress images for free

Clothoff.io
AI clothes remover

Video Face Swap
Swap faces in any video effortlessly with our completely free AI face swap tool!

Hot Article
Hot Tools

Notepad++7.3.1
Easy-to-use and free code editor

SublimeText3 Chinese version
Chinese version, very easy to use

Zend Studio 13.0.1
Powerful PHP integrated development environment

Dreamweaver CS6
Visual web development tools

SublimeText3 Mac version
God-level code editing software (SublimeText3)
Hot Topics


 PHP and Python: Different Paradigms Explained
Apr 18, 2025 am 12:26 AM
PHP and Python: Different Paradigms Explained
Apr 18, 2025 am 12:26 AM
PHP is mainly procedural programming, but also supports object-oriented programming (OOP); Python supports a variety of paradigms, including OOP, functional and procedural programming. PHP is suitable for web development, and Python is suitable for a variety of applications such as data analysis and machine learning.
 Python vs. JavaScript: The Learning Curve and Ease of Use
Apr 16, 2025 am 12:12 AM
Python vs. JavaScript: The Learning Curve and Ease of Use
Apr 16, 2025 am 12:12 AM
Python is more suitable for beginners, with a smooth learning curve and concise syntax; JavaScript is suitable for front-end development, with a steep learning curve and flexible syntax. 1. Python syntax is intuitive and suitable for data science and back-end development. 2. JavaScript is flexible and widely used in front-end and server-side programming.
 Choosing Between PHP and Python: A Guide
Apr 18, 2025 am 12:24 AM
Choosing Between PHP and Python: A Guide
Apr 18, 2025 am 12:24 AM
PHP is suitable for web development and rapid prototyping, and Python is suitable for data science and machine learning. 1.PHP is used for dynamic web development, with simple syntax and suitable for rapid development. 2. Python has concise syntax, is suitable for multiple fields, and has a strong library ecosystem.
 Netflix's Frontend: Examples and Applications of React (or Vue)
Apr 16, 2025 am 12:08 AM
Netflix's Frontend: Examples and Applications of React (or Vue)
Apr 16, 2025 am 12:08 AM
Netflix uses React as its front-end framework. 1) React's componentized development model and strong ecosystem are the main reasons why Netflix chose it. 2) Through componentization, Netflix splits complex interfaces into manageable chunks such as video players, recommendation lists and user comments. 3) React's virtual DOM and component life cycle optimizes rendering efficiency and user interaction management.
 Can visual studio code be used in python
Apr 15, 2025 pm 08:18 PM
Can visual studio code be used in python
Apr 15, 2025 pm 08:18 PM
VS Code can be used to write Python and provides many features that make it an ideal tool for developing Python applications. It allows users to: install Python extensions to get functions such as code completion, syntax highlighting, and debugging. Use the debugger to track code step by step, find and fix errors. Integrate Git for version control. Use code formatting tools to maintain code consistency. Use the Linting tool to spot potential problems ahead of time.
 PHP and Python: A Deep Dive into Their History
Apr 18, 2025 am 12:25 AM
PHP and Python: A Deep Dive into Their History
Apr 18, 2025 am 12:25 AM
PHP originated in 1994 and was developed by RasmusLerdorf. It was originally used to track website visitors and gradually evolved into a server-side scripting language and was widely used in web development. Python was developed by Guidovan Rossum in the late 1980s and was first released in 1991. It emphasizes code readability and simplicity, and is suitable for scientific computing, data analysis and other fields.
 Is the vscode extension malicious?
Apr 15, 2025 pm 07:57 PM
Is the vscode extension malicious?
Apr 15, 2025 pm 07:57 PM
VS Code extensions pose malicious risks, such as hiding malicious code, exploiting vulnerabilities, and masturbating as legitimate extensions. Methods to identify malicious extensions include: checking publishers, reading comments, checking code, and installing with caution. Security measures also include: security awareness, good habits, regular updates and antivirus software.
 How to run python with notepad
Apr 16, 2025 pm 07:33 PM
How to run python with notepad
Apr 16, 2025 pm 07:33 PM
Running Python code in Notepad requires the Python executable and NppExec plug-in to be installed. After installing Python and adding PATH to it, configure the command "python" and the parameter "{CURRENT_DIRECTORY}{FILE_NAME}" in the NppExec plug-in to run Python code in Notepad through the shortcut key "F6".
