 Operation and Maintenance
 CentOS
 Detailed graphic and text explanation of the steps to install CentOS6.x (6.8) on ESXI6.5
Detailed graphic and text explanation of the steps to install CentOS6.x (6.8) on ESXI6.5
The following column centos system tutorial will introduce to you the method to solve the Initial setup of CentOS Linux 7 prompt when booting Centos7 for the first time. I hope it will be helpful to friends in need!
Preface
Three versions of VMware
workstation: stand-alone level, used in personal desktop systems, requires operating system support
servier: workgroup level , used for servers, requires operating system support
esxi: enterprise-level, used for servers, does not require operating system support
Exsi is a virtualization system, different from VMware, VirtualBox, it It does not need to be installed on other operating systems and runs directly on bare metal; it takes up very little system resources and is easy to manage, so it is used by most small and medium-sized companies;
About the client vshpere client

Because ESXi no longer supports the client, our image can only be uploaded to the server first (you can use workstation to connect to the server, which will not be explained here)
Vmware Workstation installation It's basically the same as this, you can refer to my installation steps for installation. Only the way to create the virtual machine is different at the beginning
Installation diagram:
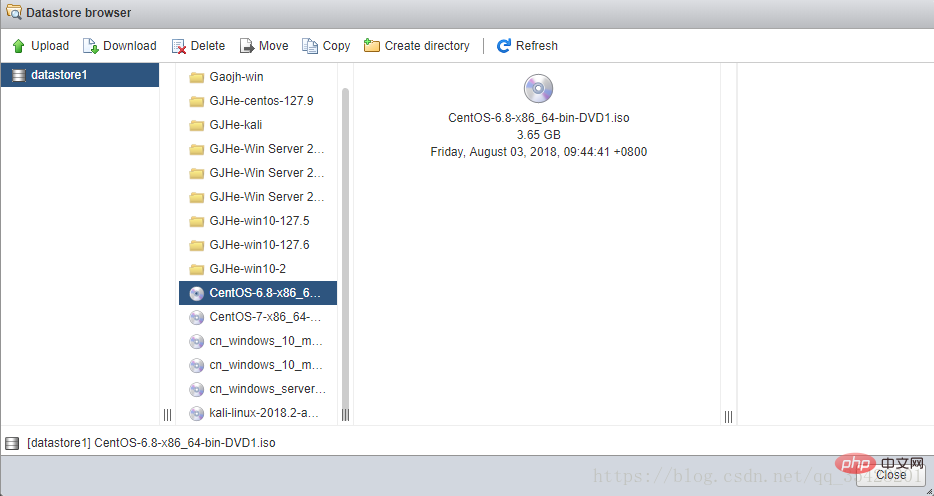
The image has been uploaded to the server, CentOS-6.8-x86_64-bin-DVD1.iso
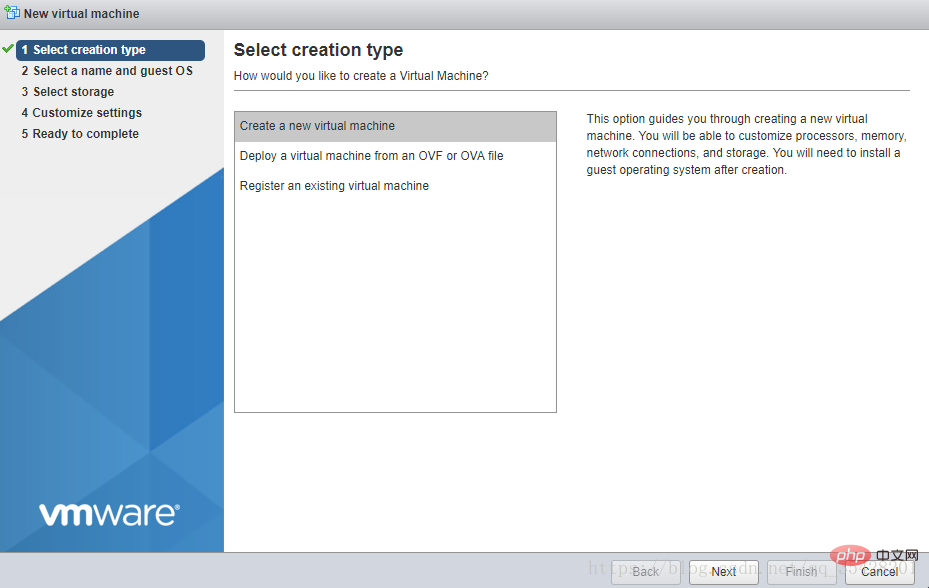
Create a new virtual machine
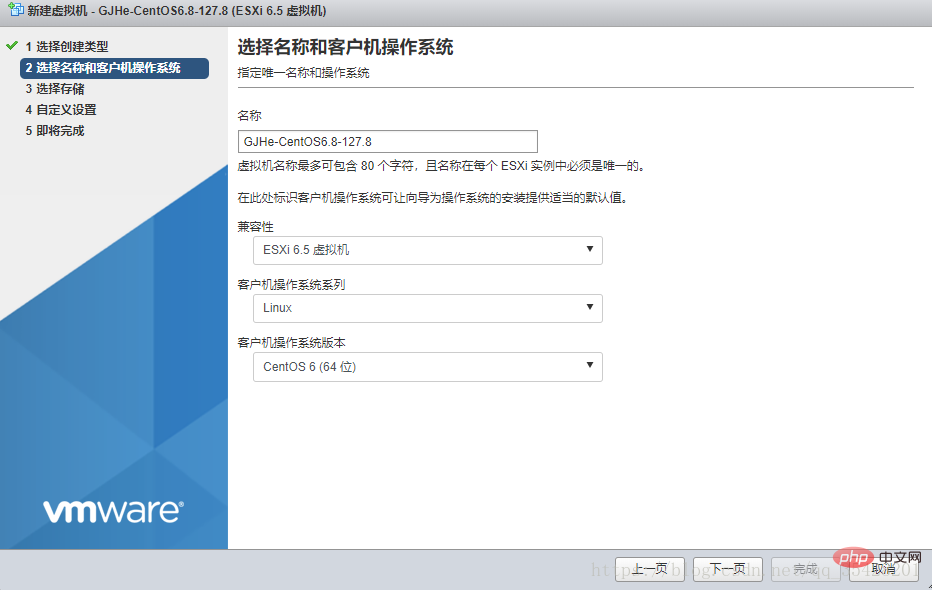
Select a name and guest operating system
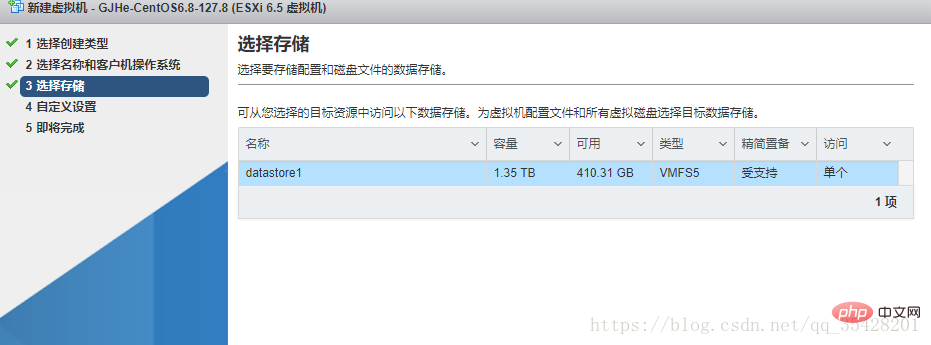
Select storage
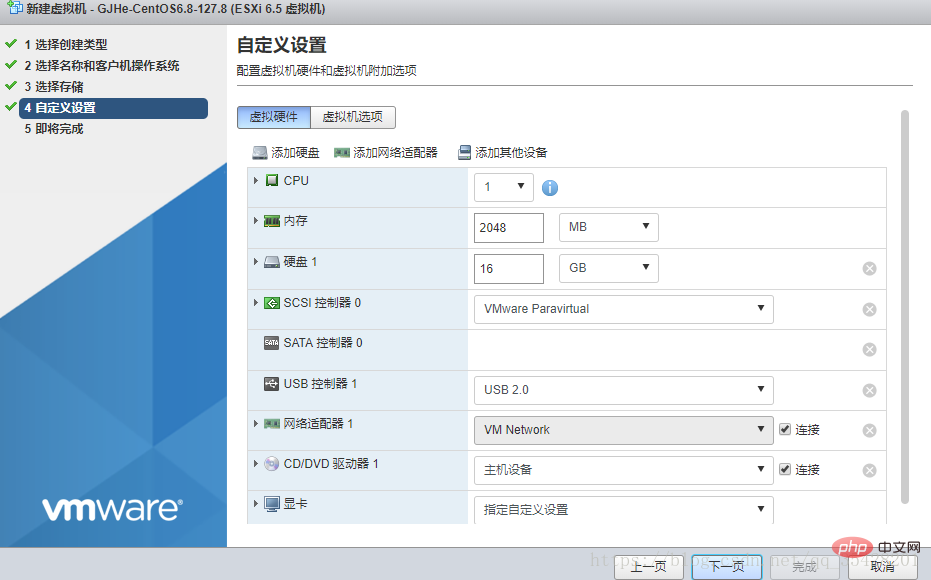
Custom settings
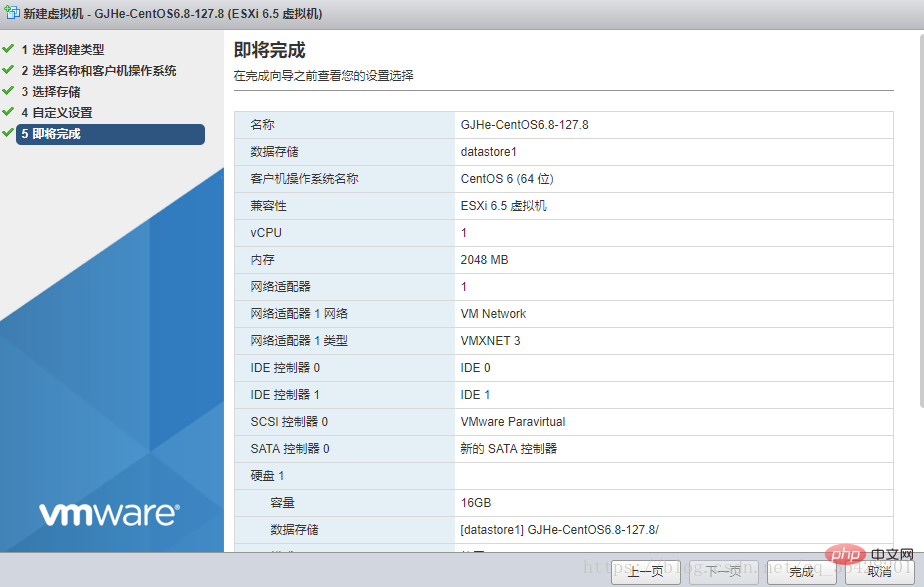
is about to be completed and your virtual machine configuration will be displayed
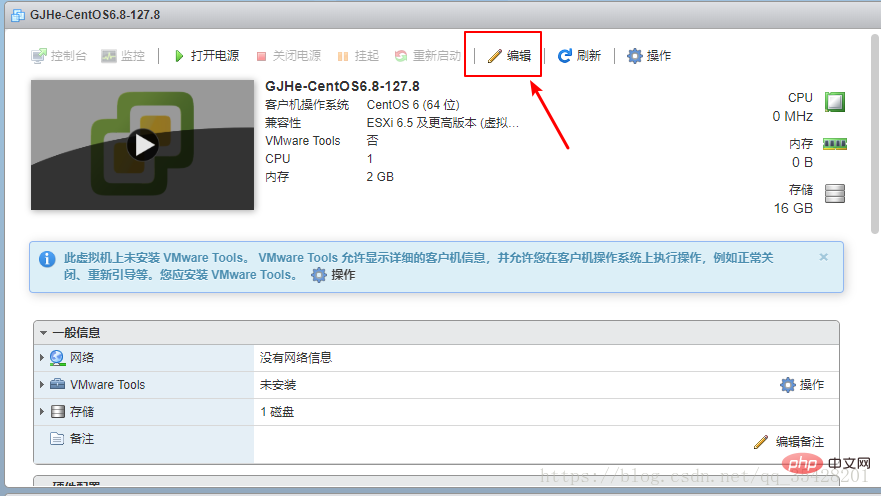
If the configuration is not enough, you can modify it
Load the image into the newly created virtual machine, and select the data storage ISO file for the CD/DVD drive
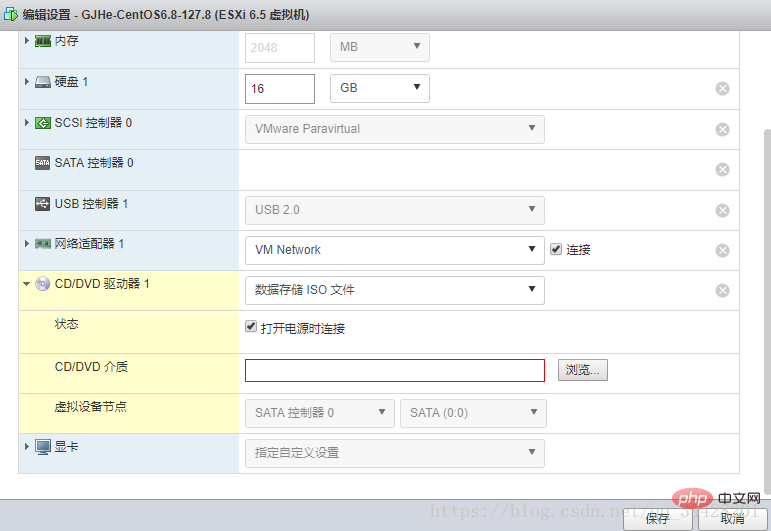
Browse and select the required iso
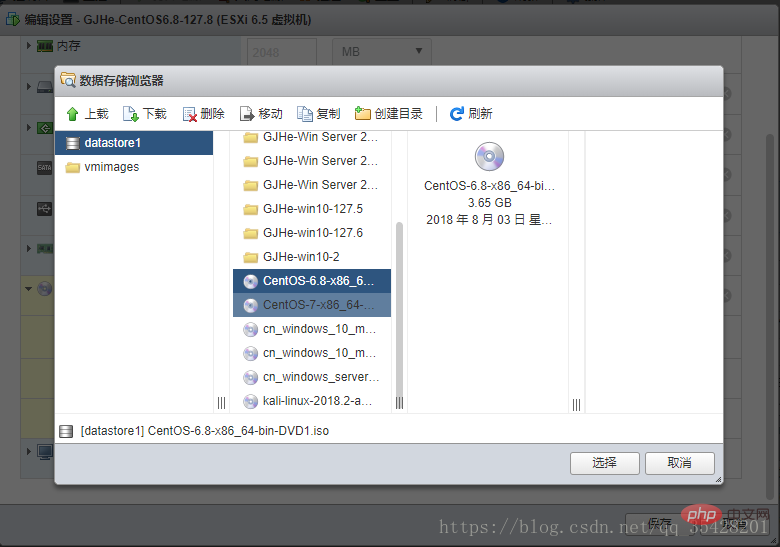
Now start running, first turn on the power and open the console
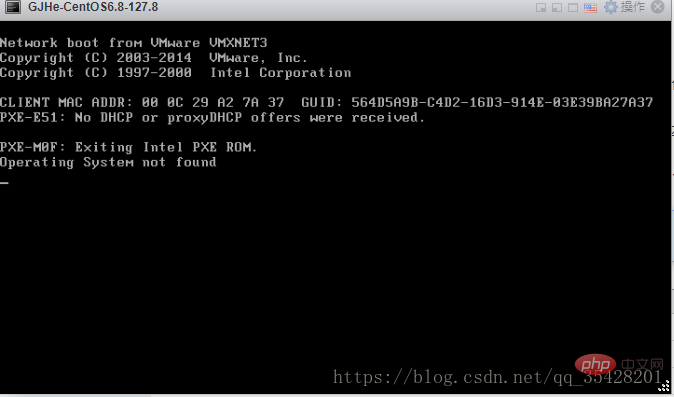
Restart, or press Enter
The following interface will appear
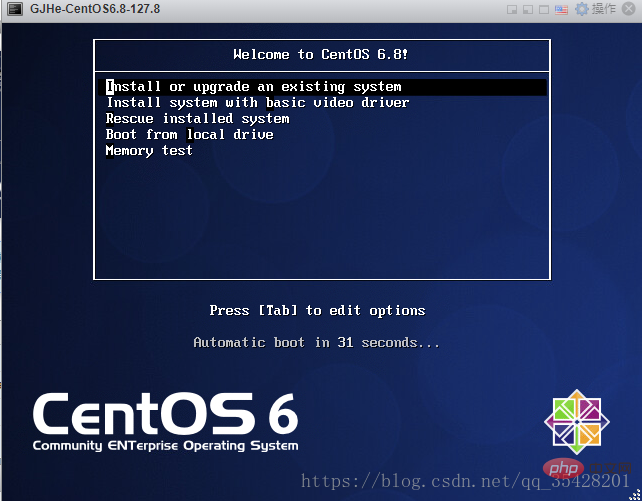
Interface description
Install or upgrade an existing system 安装或升级现有的系统

install system with basic video driver 安装过程中采用 基本的显卡驱动

Rescue installed system 进入系统修复模式

Boot from local drive 退出安装从硬盘启动

Memory test 内存检测
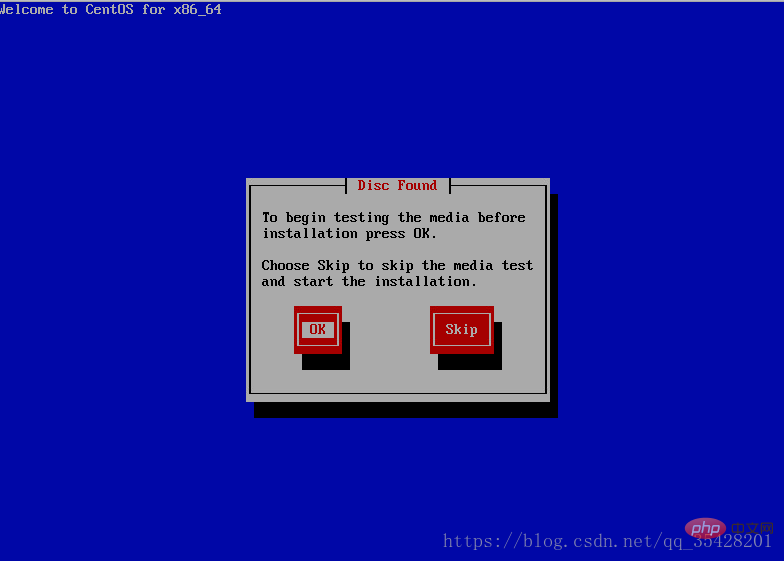
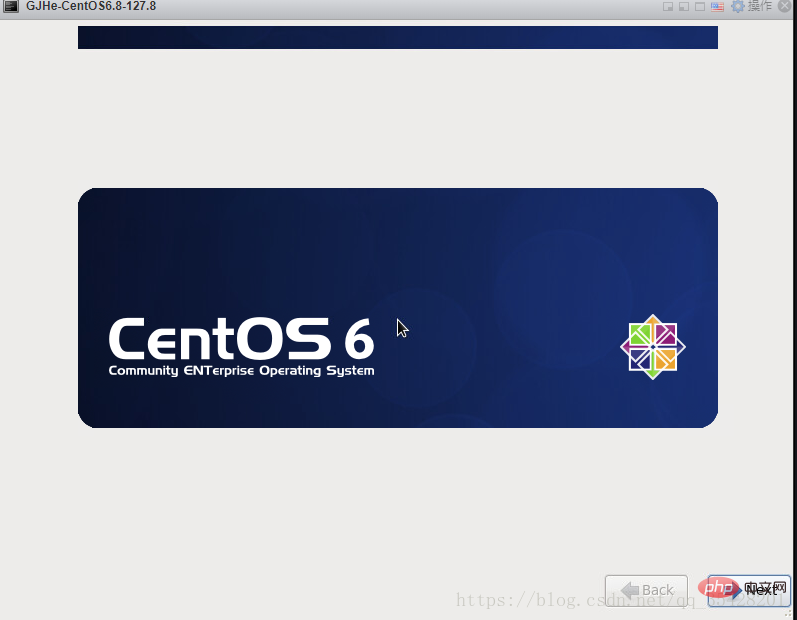
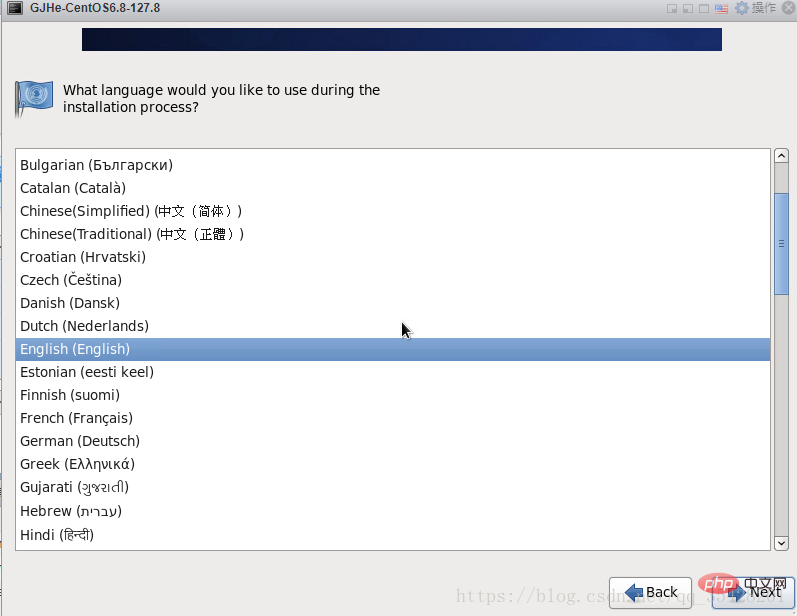
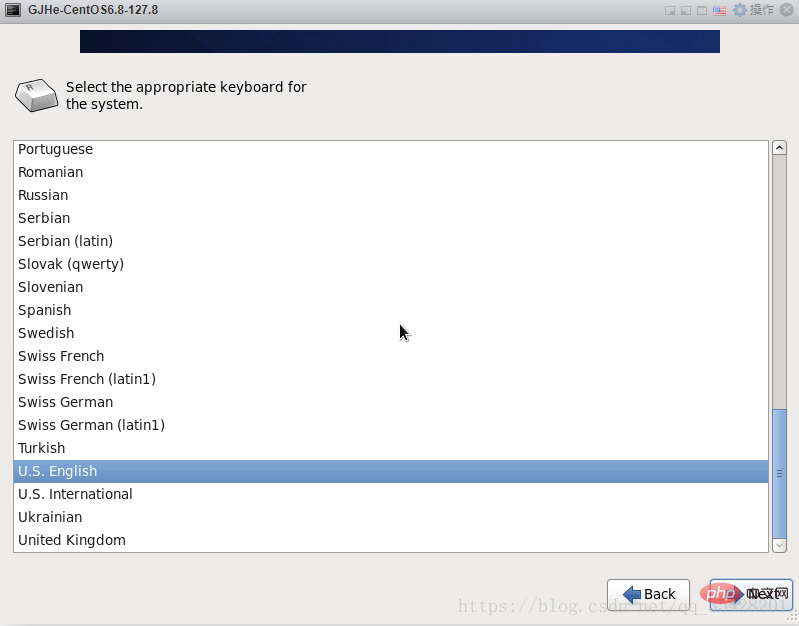
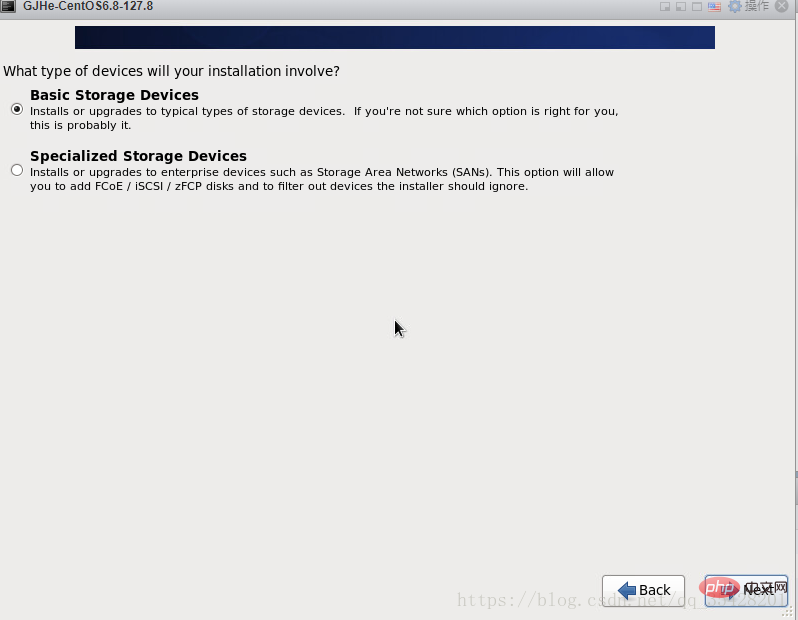
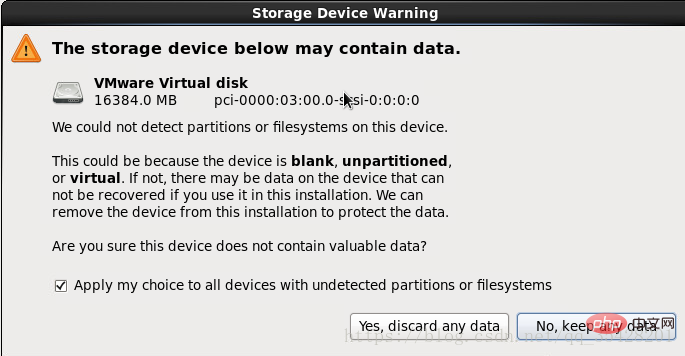
Storage device warning, select the first item, ignore all data, create a new one, there is nothing
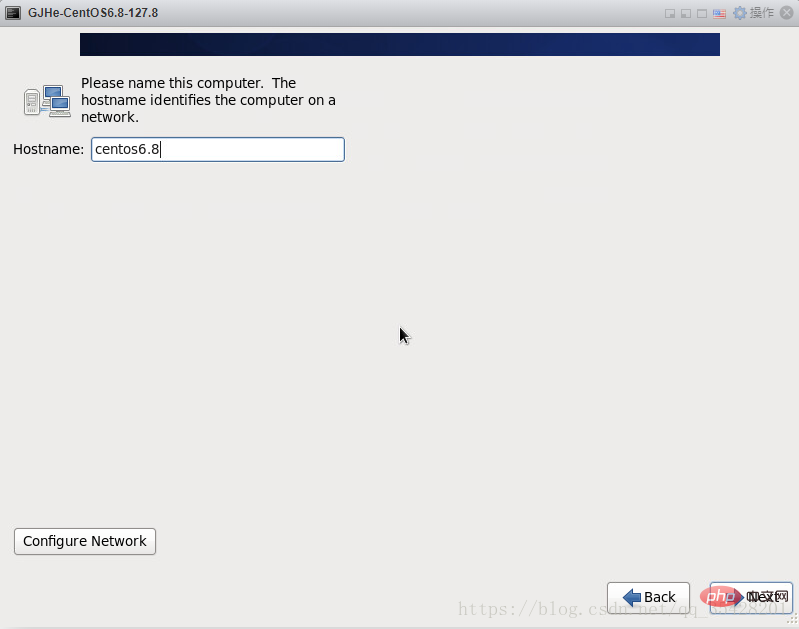
Set the host The name
can be changed according to your own needs. You can use the default host name
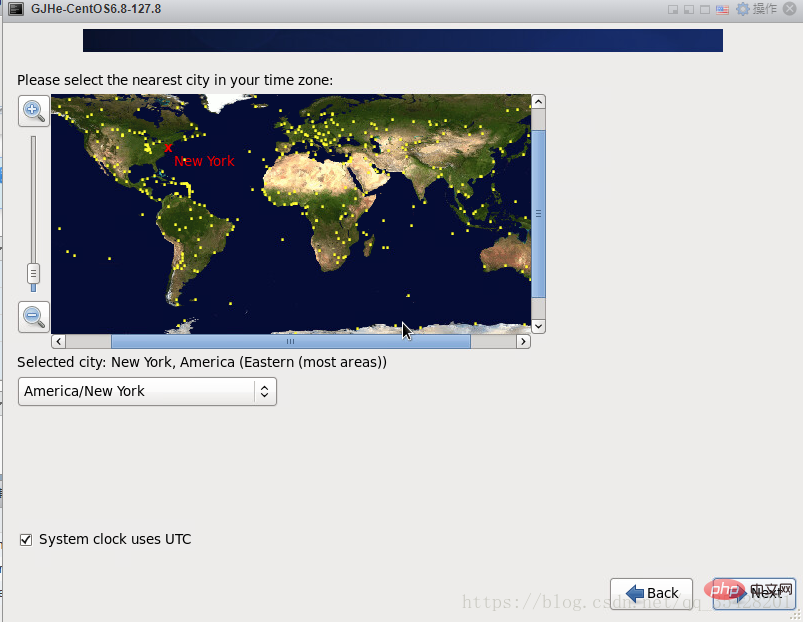
Select the time zone and uncheck System clock users UTC (set daylight saving time)
Set root password
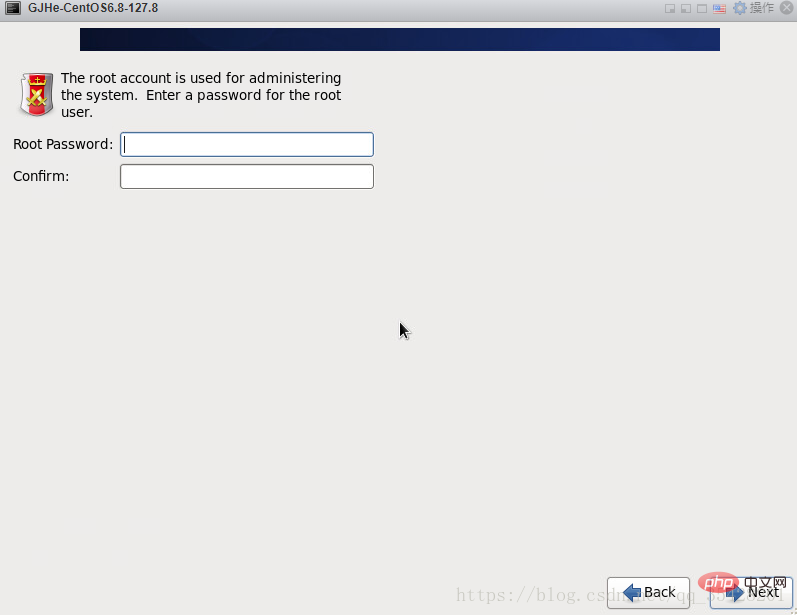
If your password is too simple, the system will automatically prompt you to choose to use it no matter what
Select Create Custom Layout for disk layout
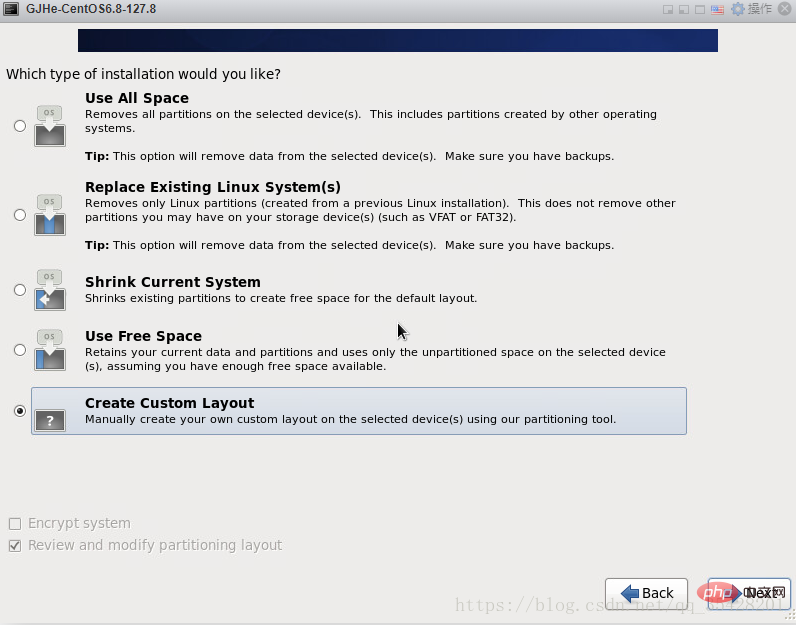
#You can see the capacity of the hard drive. What I show here is 16G. Now customize the partition. Note: Before partitioning, you must first plan how to partition
Basic requirements for Linux system partitions
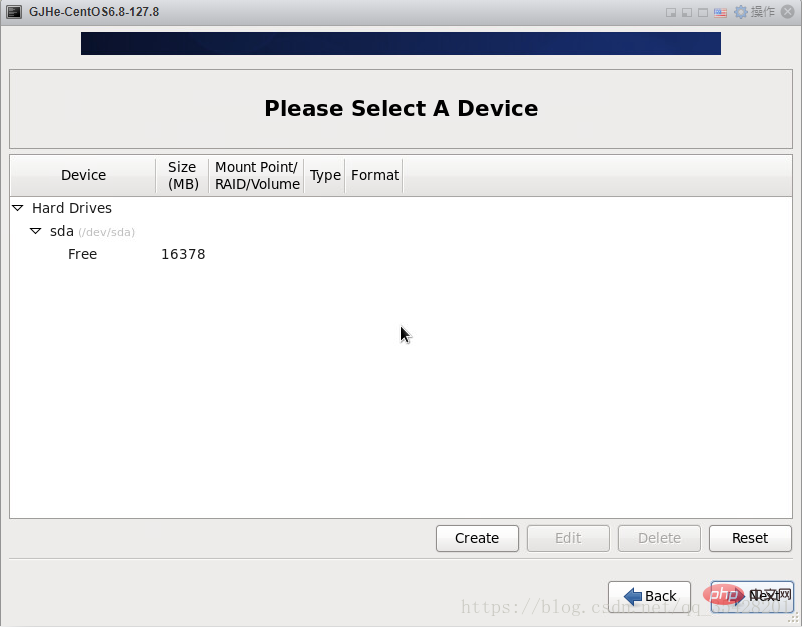
Now start creating disk partitions and select Standard Partition Create
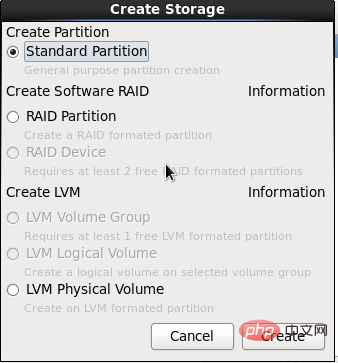
Follow the settings in my picture step by step

Then create and select Free ->Create
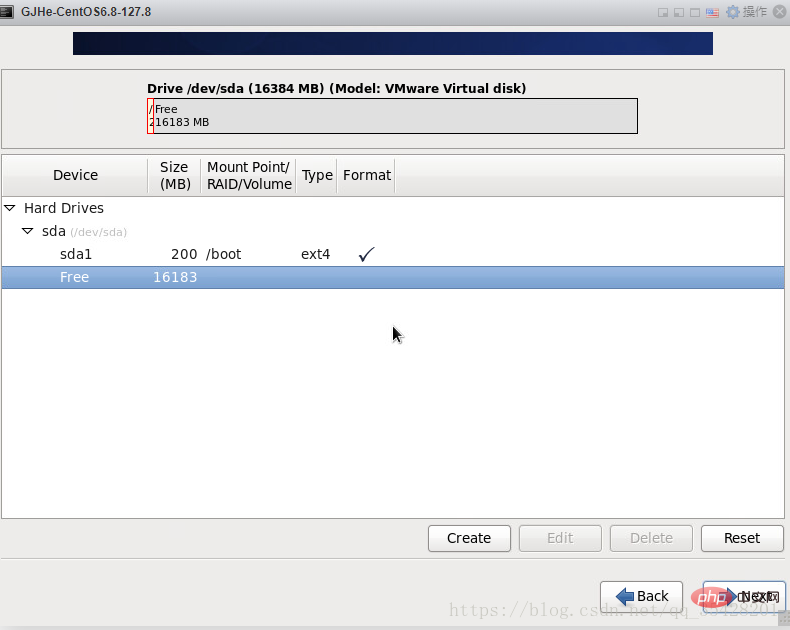
Still ->Create
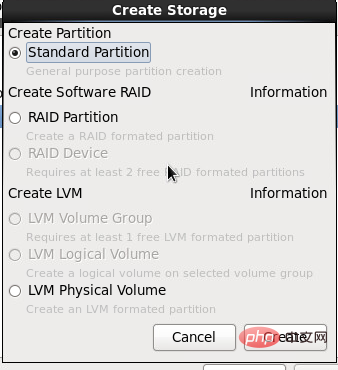
Then->swap
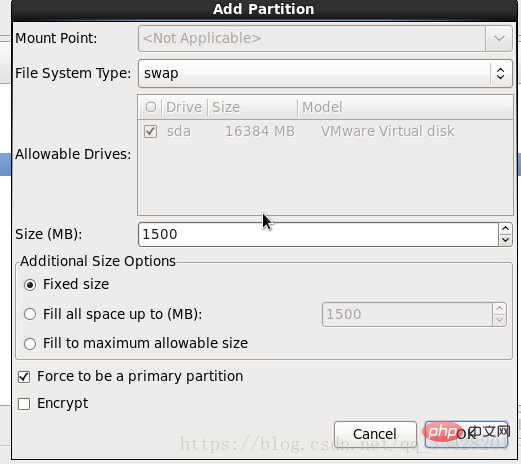
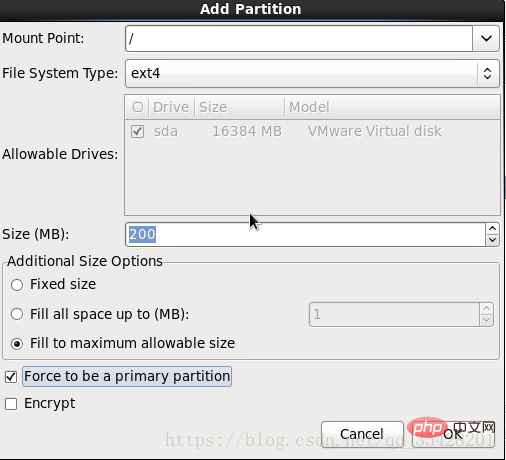
Repeat Following the above steps to create a partition, the rest is allocated to / Note: Select Fill to maximum allowable size here
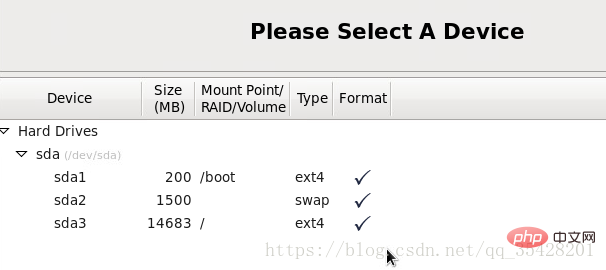
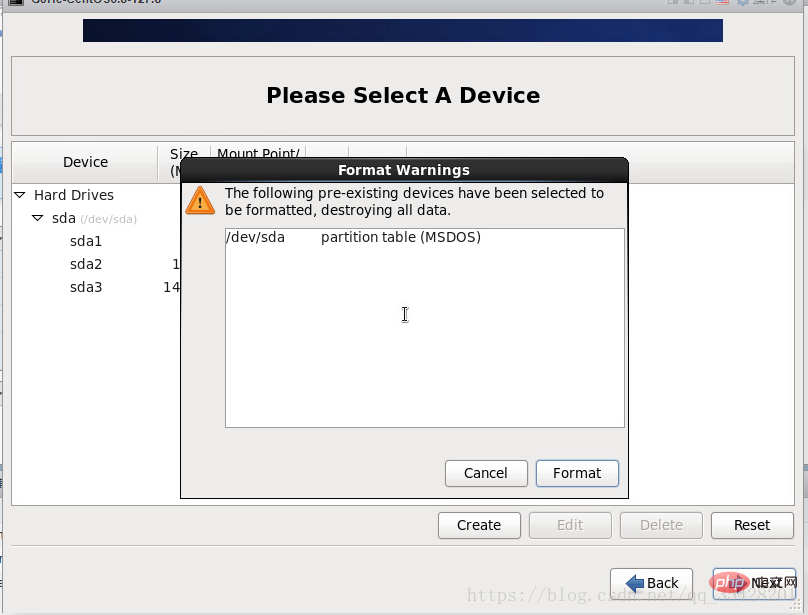
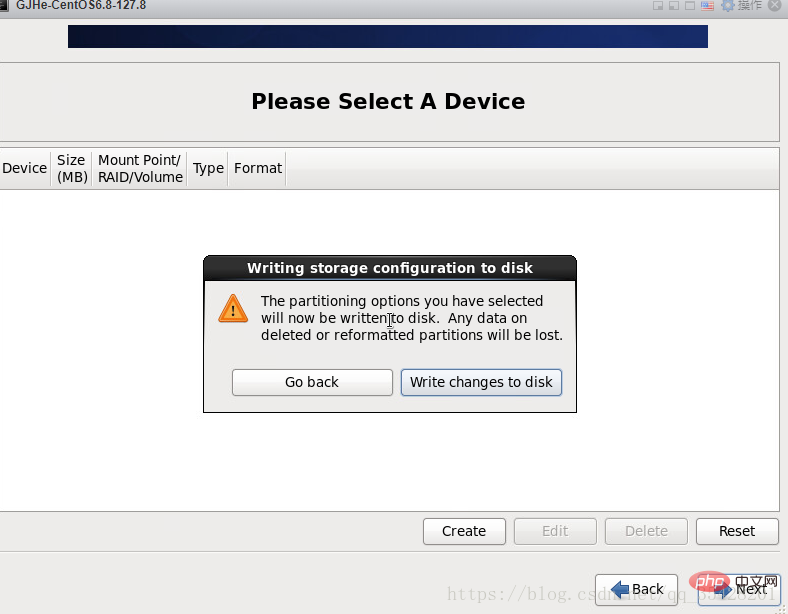
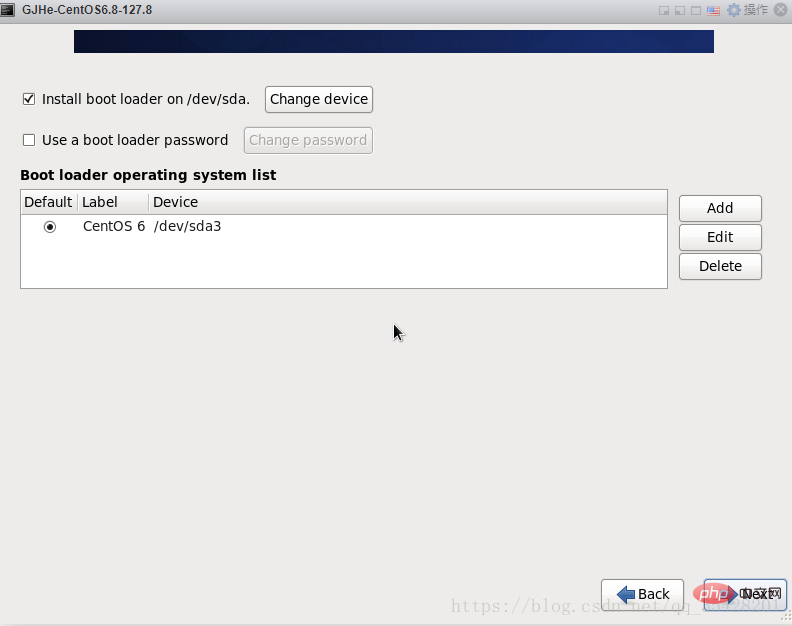
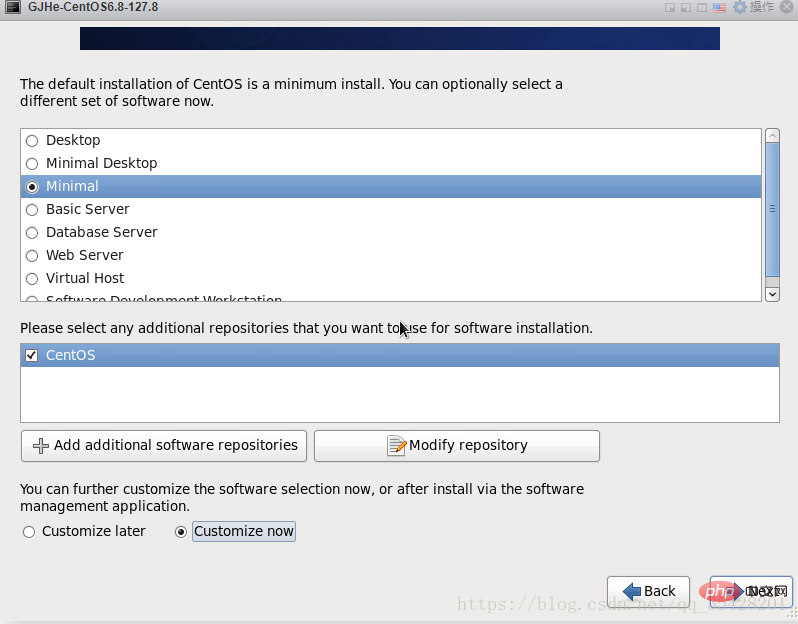
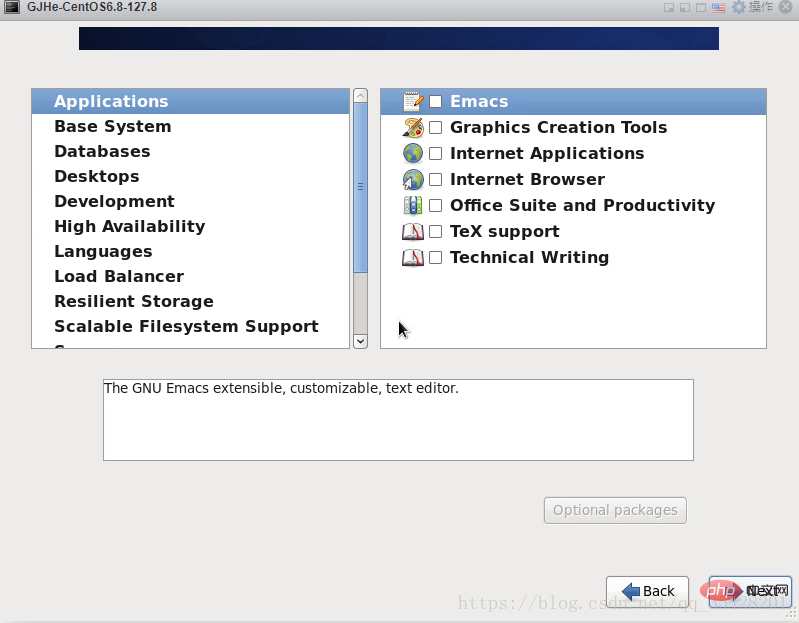 ##Base System
##Development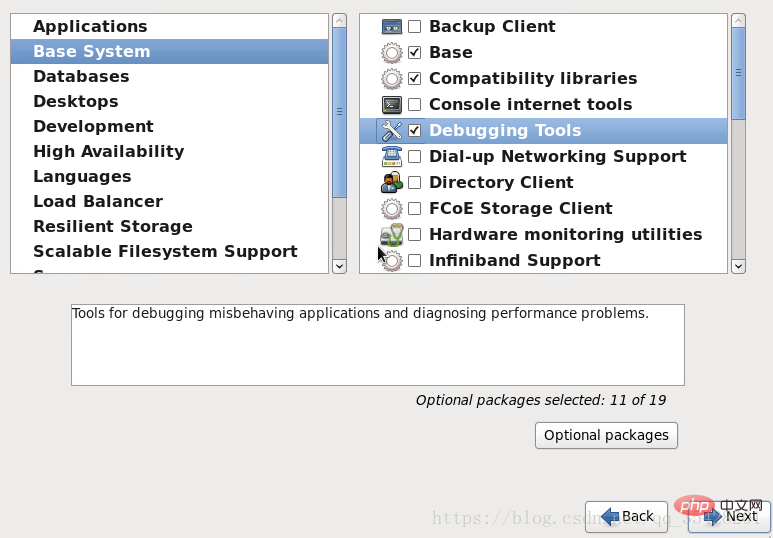
After checking, then->Next
Start the installation
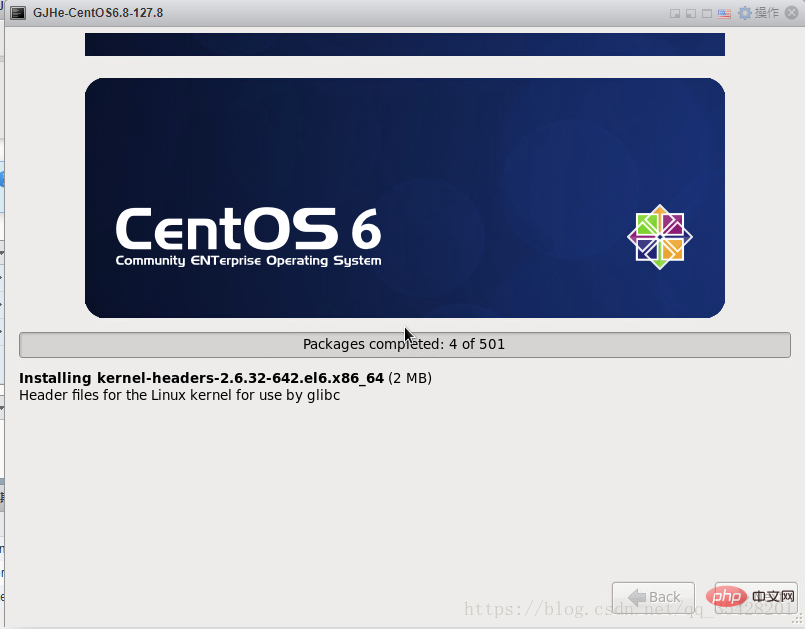
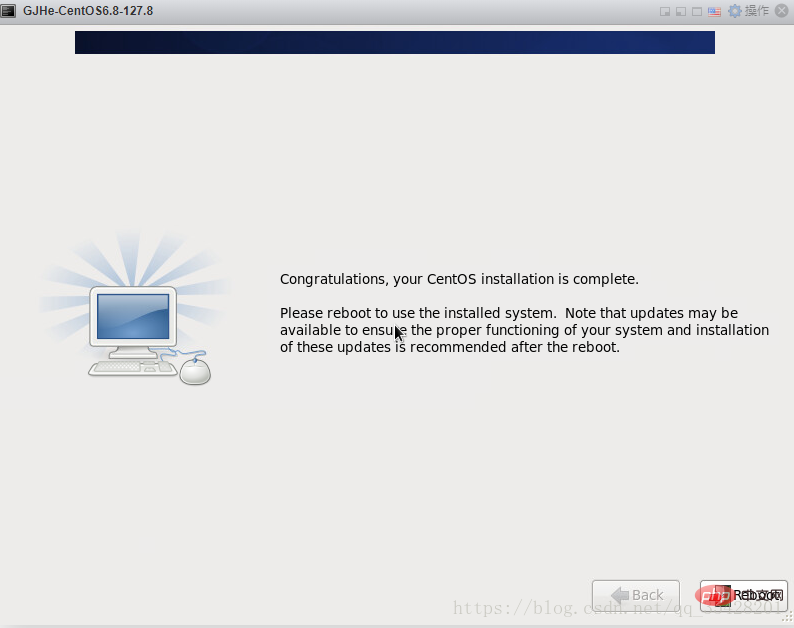
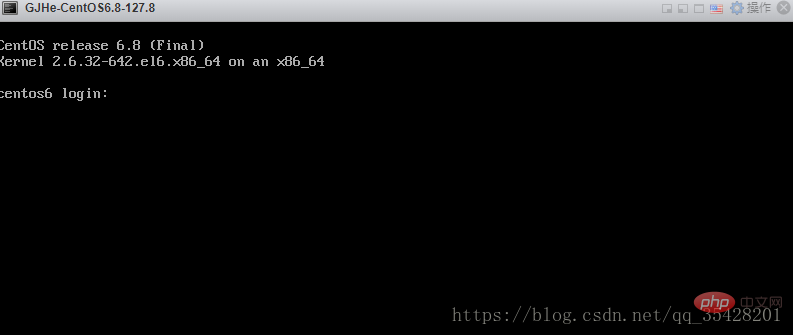
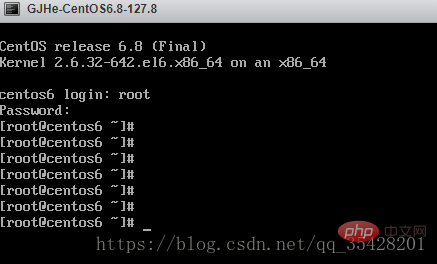
If you write this in detail, please give it a like and leave For more centos related technical articles, please visit
The above is the detailed content of Detailed graphic and text explanation of the steps to install CentOS6.x (6.8) on ESXI6.5. For more information, please follow other related articles on the PHP Chinese website!

Hot AI Tools

Undresser.AI Undress
AI-powered app for creating realistic nude photos

AI Clothes Remover
Online AI tool for removing clothes from photos.

Undress AI Tool
Undress images for free

Clothoff.io
AI clothes remover

AI Hentai Generator
Generate AI Hentai for free.

Hot Article

Hot Tools

Notepad++7.3.1
Easy-to-use and free code editor

SublimeText3 Chinese version
Chinese version, very easy to use

Zend Studio 13.0.1
Powerful PHP integrated development environment

Dreamweaver CS6
Visual web development tools

SublimeText3 Mac version
God-level code editing software (SublimeText3)

Hot Topics
 How to input Chinese in centos
Apr 07, 2024 pm 08:21 PM
Methods for using Chinese input in CentOS include: using the fcitx input method: install and enable fcitx, set shortcut keys, press the shortcut keys to switch input methods, and input pinyin to generate candidate words. Use iBus input method: Install and enable iBus, set shortcut keys, press the shortcut keys to switch input methods, and input pinyin to generate candidate words.
 How to read USB disk files in centos7
Apr 07, 2024 pm 08:18 PM
To read U disk files in CentOS 7, you need to first connect the U disk and confirm its device name. Then, use the following steps to read the file: Mount the USB flash drive: mount /dev/sdb1 /media/sdb1 (replace "/dev/sdb1" with the actual device name) Browse the USB flash drive file: ls /media/sdb1; cd /media /sdb1/directory; cat file name
 How to enter root permissions in centos7
Apr 02, 2024 pm 08:57 PM
There are two ways to enter the root authority of CentOS 7: use the sudo command: enter sudo su - in the terminal and enter the current user password. Log in directly as the root user: Select "Other" on the login screen, enter "root" and the root password. Note: Operate carefully with root privileges, perform tasks with sudo privileges, and change the root password regularly.
 What to do if you forget your password to log in to centos
Apr 07, 2024 pm 07:33 PM
Solutions for forgotten CentOS passwords include: Single-user mode: Enter single-user mode and reset the password using passwd root. Rescue Mode: Boot from CentOS Live CD/USB, mount root partition and reset password. Remote access: Use SSH to connect remotely and reset the password with sudo passwd root.
 SCP usage tips-recursively exclude files
Apr 22, 2024 am 09:04 AM
One can use the scp command to securely copy files between network hosts. It uses ssh for data transfer and authentication. Typical syntax is: scpfile1user@host:/path/to/dest/scp -r/path/to/source/user@host:/path/to/dest/scp exclude files I don't think you can when using scp command Filter or exclude files. However, there is a good workaround to exclude the file and copy it securely using ssh. This page explains how to filter or exclude files when copying directories recursively using scp. How to use rsync command to exclude files The syntax is: rsyncav-essh-
 What should I do if I forget my centos username and password?
Apr 02, 2024 pm 08:54 PM
After forgetting your CentOS username and password, there are two ways to restore access: Reset the root password: Restart the server, edit the kernel command line in the GRUB menu, add "rw init=/sysroot/bin/sh" and press Ctrl+x ;Mount the root file system and reset the password in single-user mode. Use rescue mode: Start the server from the CentOS installation ISO image, select rescue mode; mount the root file system, copy the chroot environment from the ISO image, reset the password, exit the chroot environment and restart the server.
 How to enable root permissions in centos7
Apr 07, 2024 pm 08:03 PM
CentOS 7 disables root permissions by default. You can enable it by following the following steps: Temporarily enable it: Enter "su root" on the terminal and enter the root password. Permanently enabled: Edit "/etc/ssh/sshd_config", change "PermitRootLogin no" to "yes", and restart the SSH service.
 What should I do if I forget my centos7 password?
Apr 02, 2024 pm 08:51 PM
Three solutions for forgotten passwords in CentOS 7: Single-user mode: Restart the system, edit the kernel options, change ro to rw init=/sysroot/bin/sh, and use the passwd command to reset the root password. Rescue mode: Boot from the installation media, select rescue mode, mount the root file system, chroot to the root file system, and use the passwd command to reset the root password. Grub2 command line: Restart the system, press c to enter the command line, load the kernel, mount the root file system, chroot to the root file system, and use the passwd command to reset the root password.


