
 Operation and Maintenance
Windows Operation and Maintenance
How to cancel the offline work prompt in win7?
Operation and Maintenance
Windows Operation and Maintenance
How to cancel the offline work prompt in win7?
How to cancel the offline work prompt in win7?

How to cancel the offline work prompt in win7: First click the [Menu Bar-Tools-Internet Options] option; then switch to the [Connection] option and click [Settings]; then cancel the [Automatically detect settings] option Check and click the [Never dial-up connection - LAN settings] button; finally check the [Automatically detect settings] option.
How to cancel the offline work prompt in win7:
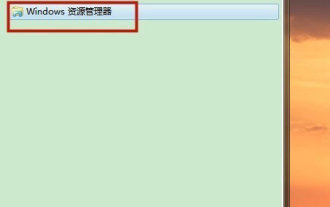
1. Right-click the navigation bar and check [Menu] Bar] Show all menus

2. Open [Internet Options] in the "Tools" menu

3. Switch to the [Connection] tab and click the [Settings] button, as shown below

4. Uncheck the [Automatically detect settings] option, and then click OK to close the window

5. Switch the connection setting to [Never dial-up connection], Then click the [LAN Settings] button

6. Check the [Automatically detect settings] option, and then click OK to complete the settings

##Related learning recommendations:
The above is the detailed content of How to cancel the offline work prompt in win7?. For more information, please follow other related articles on the PHP Chinese website!

Hot AI Tools

Undresser.AI Undress
AI-powered app for creating realistic nude photos

AI Clothes Remover
Online AI tool for removing clothes from photos.

Undress AI Tool
Undress images for free

Clothoff.io
AI clothes remover

AI Hentai Generator
Generate AI Hentai for free.

Hot Article
Hot Tools

Notepad++7.3.1
Easy-to-use and free code editor

SublimeText3 Chinese version
Chinese version, very easy to use

Zend Studio 13.0.1
Powerful PHP integrated development environment

Dreamweaver CS6
Visual web development tools

SublimeText3 Mac version
God-level code editing software (SublimeText3)
Hot Topics


 How to Fix Outlook Email Stuck in Outbox Issue
May 01, 2023 am 10:01 AM
How to Fix Outlook Email Stuck in Outbox Issue
May 01, 2023 am 10:01 AM
Recently, many users have reported the issue of Outlook emails getting stuck in the outbox. Even after several attempts to send the email, the issue was not resolved. When you see this issue and check your outbox folder, the message will be stuck there. Possible reasons for emails getting stuck in Outlook outbox: The attachments in the email exceed the size limit, which slows down the sending process. Outlook account authentication issues with mail server Incorrect send/receive settings in Outlook or mail server offline Outlook. Outlook data files are being used by some other software. Antivirus software scans outgoing emails. If this problem has been bothering you and you are unable to send an email
 The copy of windows7 build 7601 is not genuine. The simplest solution is that the copy of build 7601 is not genuine.
Mar 15, 2024 pm 09:49 PM
The copy of windows7 build 7601 is not genuine. The simplest solution is that the copy of build 7601 is not genuine.
Mar 15, 2024 pm 09:49 PM
Recently, some friends reported that their computer prompts "The copy of Windows 7 internal version 7601 is not genuine." They all want to know if the copy of Windows 7 is not genuine 7601 and affects the use of it. The main reason for this is that the user's system has not been activated. Today I will give it to you. Let’s talk about the simplest solution to the problem that the copy of internal version 7601 is not genuine. Friends in need can come and take a look. The copy of windows7 internal version 7601 is not genuine. Method 1: 1. Press "win r" on the keyboard at the same time, then enter "CMD", and then press "Enter" to confirm. 2. Enter "SLMGR-REARM" in the pop-up window. Please note that there is a space in the middle. Don't miss it. 3. Then press Enter to confirm. A dialog box will pop up and click "Confirm".
 How to open the Explorer window in Win7 system? How to open Explorer in Windows 7
Feb 13, 2024 pm 08:50 PM
How to open the Explorer window in Win7 system? How to open Explorer in Windows 7
Feb 13, 2024 pm 08:50 PM
Some Win7 system users don’t know how to open the computer’s resource manager window. In fact, the operation is not difficult. You need to open the computer’s start menu first, or directly search in the search box and open the resource manager window. In this regard, this article This article has compiled several methods and shared them with everyone. Interested users can continue reading. How to open Explorer in Windows 7: Tutorial 1 1. Click the [Start] icon in the lower left corner and enter [Windows File Explorer] in the search box. 2. In the search results, click the [Windows Explorer] option as shown in the figure below, and click Open. Tutorial 2 1. Find and double-click the [Computer] icon, and click the [▶] icon at the top. 2. In the pop-up menu bar, root
 What are the differences between window10 and 7?
Sep 06, 2023 pm 03:12 PM
What are the differences between window10 and 7?
Sep 06, 2023 pm 03:12 PM
The differences between Windows 10 and 7 include user interface, compatibility and application support, security, performance and speed, updates and support, network and cloud integration, DirectX and game support, etc. Detailed introduction: 1. User interface. Windows 10 introduces a new user interface with a modern look and experience. It uses a tiled Start menu that contains dynamic tiles that can display real-time information and quickly access applications. Windows 7 has a traditional start menu and taskbar, which is more classic and familiar, etc.
 Why can't Windows7 Security Center be opened? How to open Windows 7 Security Center?
Feb 11, 2024 pm 05:21 PM
Why can't Windows7 Security Center be opened? How to open Windows 7 Security Center?
Feb 11, 2024 pm 05:21 PM
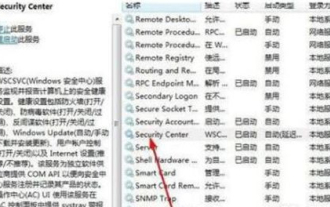
Why can’t Windows7 Security Center be opened? Recently, a user asked this question. The system has a built-in security center function, but it cannot be opened when using it. I don’t know what’s going on. How should I solve it? In response to this problem, this article brings a detailed solution, which is simple to operate and shared with everyone. If you are interested, take a look. How to open Windows 7 Security Center? 1. Open System and Security in the computer control panel. 2. Click Management Tools and click Services. 3. Find the service SecurityCenter, right-click on the properties and select Auto-Open, then open the Security Center to see if it works. 4. If that still doesn’t work, find these two services RemoteProcedureCall (RP
 What does the screen saver do in Windows 7?
Nov 21, 2022 am 11:00 AM
What does the screen saver do in Windows 7?
Nov 21, 2022 am 11:00 AM
In Windows 7, the function of the screen saver is not to "display some content for others to see in order to prevent the computer screen from being idle". The function of the screen saver is to: 1. Protect the screen; 2. Through the screen saver, you can set Password can protect user files when the user leaves the computer; 3. Protect the content displayed on the screen by the current user from being seen by others.
 How does Linux on a virtual machine obtain files on the host Windows 7?
Jan 08, 2024 am 08:06 AM
How does Linux on a virtual machine obtain files on the host Windows 7?
Jan 08, 2024 am 08:06 AM
1. Start VMware Player (also in the VM installation directory, I tried VMware Workstation without success); 2. Start the virtual machine system; 3. Click the setting item in VirtualMachine in the VMware Player menu; 4. Select Option; 5. Select ShareFolders; 6. , add the folder to be shared on the host (the folder is located on the host); 7. Return to the host (win7 system), right-click the folder in 6, select "Share", and select "Homegroup (Read, Write)"; 8. , right-click My Computer and click "Map Network Drive&rdq"
 What is the difference between window10 and 7
Aug 30, 2023 pm 04:49 PM
What is the difference between window10 and 7
Aug 30, 2023 pm 04:49 PM
The differences between Windows 10 and 7 include page design, functionality, performance and security. Detailed introduction: 1. Windows 10 has made major improvements in interface design, introducing a new Start Menu, which combines the traditional Start Menu with the modern UI elements of Windows 8. Windows 7 retains the traditional Start Menu design and is more familiar. and stability; 2. Windows 10 introduces some new features to make the user experience more convenient. One of the important features is virtual desktops and so on.
