

What should I do if the printer displays a problem with the current settings?

Solutions to problems when the printer displays current settings: 1. Check that the USB is in a normal state; 2. Check that the driver is in a normal state; 3. Check the print settings, print properties, check off offline, and set it to default printer.
Solutions to problems with the printer displaying current settings:
1. Check whether the USB cable is normal. You can try Plug it into another computer;
2. Check whether the driver is normal, whether it is included in the program, and whether it is complete. Pay attention to distinguish between 64-bit and 32-bit. If you are not sure, download the driver wizard from the official website or download it;
3. Check the print settings, print properties, check off offline, and set it as the default printer.
The operation of win 7 is in [My Computer--Right-click Management--Service-- Turn on "print spooler];
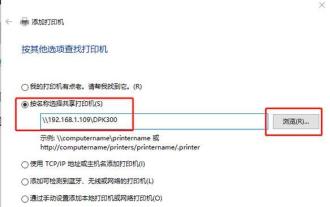
4. If you print over the network, please check the computer in the workgroup to see if it can be connected. If it cannot be connected, there is a problem with the LAN settings. Adjust the settings
The above still does not solve the problem, please take a screenshot or find a local professional to repair it
The above is the detailed content of What should I do if the printer displays a problem with the current settings?. For more information, please follow other related articles on the PHP Chinese website!

Hot AI Tools

Undresser.AI Undress
AI-powered app for creating realistic nude photos

AI Clothes Remover
Online AI tool for removing clothes from photos.

Undress AI Tool
Undress images for free

Clothoff.io
AI clothes remover

Video Face Swap
Swap faces in any video effortlessly with our completely free AI face swap tool!

Hot Article
Hot Tools

Notepad++7.3.1
Easy-to-use and free code editor

SublimeText3 Chinese version
Chinese version, very easy to use

Zend Studio 13.0.1
Powerful PHP integrated development environment

Dreamweaver CS6
Visual web development tools

SublimeText3 Mac version
God-level code editing software (SublimeText3)
Hot Topics
 1386
1386
 52
52

 How to set the scheduled time for publishing works on Douyin? How does it set the video duration?
Mar 27, 2024 pm 06:11 PM
How to set the scheduled time for publishing works on Douyin? How does it set the video duration?
Mar 27, 2024 pm 06:11 PM
Publishing works on Douyin can attract more attention and likes, but sometimes it may be difficult for us to publish works in real time. In this case, we can use Douyin's scheduled release function. Douyin’s scheduled release function allows users to automatically publish works at a scheduled time, which can better plan the release plan and increase the exposure and influence of the work. 1. How to set the scheduled time for publishing works on Douyin? To set a scheduled release time, first go to Douyin's personal homepage, find the "+" button in the upper right corner, and click to enter the release page. There is a clock icon in the lower right corner of the publishing page. Click to enter the scheduled publishing interface. In the interface, you can choose the type of work you want to publish, including short videos, long videos, and live broadcasts. Next, you need to set a time for your work to be published. TikTok provides
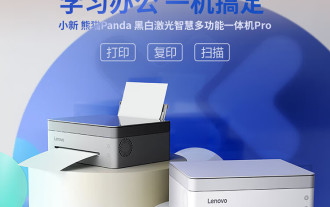 Lenovo Xiaoxin Panda Pro Panda Printer Pro goes on sale on May 6: black and white laser printing, built-in learning resources, 999 yuan
May 01, 2024 am 08:46 AM
Lenovo Xiaoxin Panda Pro Panda Printer Pro goes on sale on May 6: black and white laser printing, built-in learning resources, 999 yuan
May 01, 2024 am 08:46 AM
According to news from this site on April 30, Lenovo Xiaoxin PandaPro Panda Printer Pro is now available on JD.com. This printer will go on sale on May 6. It supports black and white laser printing, has an optional two-color body, and has built-in learning resources. The initial price is 999. Yuan. Lenovo Xiaoxin Panda Printer Pro measures 350x275x141mm and is available in two color options: Xiling White and Qingcheng Gray. This printer supports 2.4GHz/5GHz dual-band Wi-Fi, USB wired and other connection methods. It can print with one click after being configured with the network, and can also achieve NFC one-touch printing. Xiaoxin Panda Printer Pro supports black and white laser printing and can print 22 pages per minute. In addition to printing functions, this model also supports copying and scanning functions, with a color scanning resolution of 4800d.
 Mobile phone directly connected to printer (explore various connection methods of mobile phone connected directly to printer)
Apr 25, 2024 pm 07:31 PM
Mobile phone directly connected to printer (explore various connection methods of mobile phone connected directly to printer)
Apr 25, 2024 pm 07:31 PM
Direct-connection of mobile phone printers has become an increasingly popular printing solution in modern life, as mobile devices become more popular and their functions continue to increase. To quickly print files, we can directly connect to the printer through our mobile phones without the need for a computer. To help you choose the printing solution that best suits your needs, this article will introduce you to the various connection methods for direct connection of your mobile phone to the printer. Wi-Fi direct printing Wi-Fi direct printing is currently one of the most common methods of directly connecting a mobile phone to a printer. By connecting the printer and mobile phone to the same Wi-Fi network, users can easily transfer and print files through the mobile app. Bluetooth direct printing Bluetooth direct printing is a simpler and more convenient way to connect a mobile phone directly to a printer. can realize the file
 The Print Spooler service automatically shuts down and the printer cannot print normally.
Jun 18, 2024 pm 08:20 PM
The Print Spooler service automatically shuts down and the printer cannot print normally.
Jun 18, 2024 pm 08:20 PM
My friend's printer suddenly stopped printing. When WPS was printing, it prompted "The system print service has been closed" and "The system PrintSpooler service has been detected to be closed. Please enable it and try again." The PrintSpooler service executes print jobs in the background and handles interactions with the printer. . If you turn off the service, you cannot print or view the printer. According to the prompts, generally we only need to find the PrintSpooler service in the service, start it and change it to automatic. After my friend's computer started the PrintSpooler service, the service automatically stopped in about a minute and started again, and the same situation occurred. Saw spoolsv.exe and a dl through event viewer
 Where is the Douyin tag set? How can it be tagged so that it can be pushed accurately?
Mar 27, 2024 am 11:01 AM
Where is the Douyin tag set? How can it be tagged so that it can be pushed accurately?
Mar 27, 2024 am 11:01 AM
As one of the most popular short video platforms in the world, Douyin allows everyone to become a creator and share every moment of life. For Douyin users, tags are a very important function. It can help users better classify and retrieve content, and also allows the platform to push appropriate content to users more accurately. So, where are the Douyin tags set? This article will explain in detail how to set up and use tags on Douyin. 1. Where is the Douyin tag set? Using tags on Douyin can help users better classify and label their works, making it easier for other users to find and follow them. The method to set the label is as follows: 1. Open the Douyin APP and log in to your account. 2. Click the "+" sign at the bottom of the screen and select the "Publish" button. 3.
 How to set up scheduled publishing on Weibo_Tutorial on how to set up scheduled publishing on Weibo
Mar 29, 2024 pm 03:51 PM
How to set up scheduled publishing on Weibo_Tutorial on how to set up scheduled publishing on Weibo
Mar 29, 2024 pm 03:51 PM
1. Open the Weibo client, click the three little dots on the editing page, and then click Scheduled Post. 2. After clicking on scheduled posting, there will be a time option on the right side of the publishing time. Set the time, edit the article, and click on the yellow words in the lower right corner to schedule posting. 3. The mobile version of Weibo does not currently support scheduled publishing. This function can only be used on the PC client!
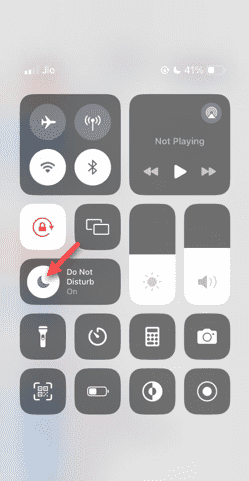 Do Not Disturb Mode Not Working in iPhone: Fix
Apr 24, 2024 pm 04:50 PM
Do Not Disturb Mode Not Working in iPhone: Fix
Apr 24, 2024 pm 04:50 PM
Even answering calls in Do Not Disturb mode can be a very annoying experience. As the name suggests, Do Not Disturb mode turns off all incoming call notifications and alerts from emails, messages, etc. You can follow these solution sets to fix it. Fix 1 – Enable Focus Mode Enable focus mode on your phone. Step 1 – Swipe down from the top to access Control Center. Step 2 – Next, enable “Focus Mode” on your phone. Focus Mode enables Do Not Disturb mode on your phone. It won't cause any incoming call alerts to appear on your phone. Fix 2 – Change Focus Mode Settings If there are some issues in the focus mode settings, you should fix them. Step 1 – Open your iPhone settings window. Step 2 – Next, turn on the Focus mode settings
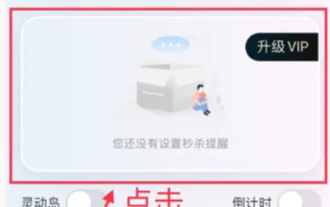 How to set the countdown to grab tickets in Damai
Apr 01, 2024 pm 07:01 PM
How to set the countdown to grab tickets in Damai
Apr 01, 2024 pm 07:01 PM
When buying tickets on Damai.com, in order to ensure that the ticket purchase time can be accurately grasped, users can set a floating clock to grab tickets. The detailed setting method is below, let us learn together. How to bind the floating clock to Damai 1. Click to open the floating clock app on your phone to enter the interface, and click on the location where the flash sale check is set, as shown in the figure below: 2. After coming to the page of adding new records, click on Damai.com Copy the ticket purchase link page copied in. 3. Next, set the flash sale time and notification time below, turn on the switch button behind [Save to Calendar], and click [Save] below. 4. Click to turn on [Countdown], as shown in the figure below: 5. When the reminder time comes, click the [Start Picture-in-Picture] button below. 6. When the ticket purchase time comes