
 Database
Redis
Learn Spring Session and Redis to solve distributed Session cross-domain sharing issues
Database
Redis
Learn Spring Session and Redis to solve distributed Session cross-domain sharing issues
Learn Spring Session and Redis to solve distributed Session cross-domain sharing issues


Use Spring Session and Redis to solve the problem of distributed Session cross-domain sharing
Explanation of the phenomenon:
The front-end and back-end codes in the project are not After separation, when the service is running normally on two instances, a prompt similar to the need to log in again will pop up occasionally, and the background error message

is a processor exception. The reason is not obvious.
After adding a machine instance, when accessing the front-end page, the login page is repeatedly accessed, resulting in page 302. Various signs indicate that it is caused by login configuration issues.
Related topic recommendations: php session (including pictures, texts, videos, cases)
Problem introduction : Session cannot be shared, resulting in polling between different machines requiring login, resulting in final service exception
Solution: Use Spring Session and Redis to solve the problem of distributed Session cross-domain sharing
Solution to configuration:
1 )Add dependency
<dependency>
  <groupId>org.springframework.session</groupId>
  <artifactId>spring-session-data-redis</artifactId>
  <version>1.2.0.RELEASE</version>
</dependency>
<dependency>
  <groupId>org.apache.velocity</groupId>
  <artifactId>velocity</artifactId>
  <version>1.7</version>
</dependency>
2 )Add web.xml configuration file:
<!-- 分布式Session共享Filter -->
<filter>
  <filter-name>springSessionRepositoryFilter</filter-name>
  <filter-class>org.springframework.web.filter.DelegatingFilterProxy</filter-class>
</filter>
<filter-mapping>
  <filter-name>springSessionRepositoryFilter</filter-name>
  <url-pattern>/*</url-pattern>
</filter-mapping>
3) Spring.xml configuration
<!-- 将session放入redis -->
<context:annotation-config/>
<bean id="redisHttpSessionConfiguration"   class="org.springframework.session.data.redis.config.annotation.web.http.RedisHttpSessionConfiguration">
   <property name="maxInactiveIntervalInSeconds" value="120" />
</bean>
<bean class="org.springframework.data.redis.connection.jedis.JedisConnectionFactory">
   <!-- redis 配置 -->
   <property name="hostName" value="192.168.0.48" />
   <property name="port" value="6379" />
</bean>
Analysis:
1. DelegatingFilterProxy class in web: It belongs to the proxy fiter, which will start loading after tomcat starts. When filtering in web.xml, the management of the filter is handed over to the beans in spring. That is, the third step of the configuration introduces RedisHttpSessionConfiguration
2. RedisHttpSessionConfiguration inherits the SpringHttpSessionConfiguration class. This class is very important. SpringHttpSessionConfiguration passes @Bean Inject springSessionRepositoryFilter into the container


SessionRepositoryFilterThis filter is the filter searched for by DelegatingFilterProxy. The SessionRepositoryFilter is the key. How is it related?
springSessionRepositoryFilterThis filter
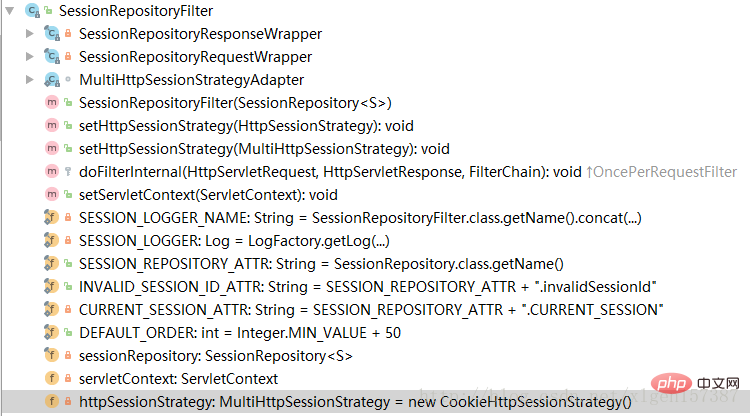
SessionRepositoryFilter is to replace the container's default javax.servlet.http.HttpSession support to org.springframework.session.Session. The main methods and properties of
 ##5. Among them,
, SessionRepositoryRequestWrapper, HttpSessionWrapper is an internal class, which is also very critical. For example, the SessionRepositoryRequestWrapper class
 It can be seen that the SessionRepositoryRequestWrapper inherits the javax.servlet.http.HttpServletRequestWrapper class. We know that the default implementation of the HttpServletRequest interface is HttpServletRequestWrapper, as follows
 6. Because SessionRepositoryRequestWrapper inherits HttpServletRequestWrapper, and HttpServletRequestWrapper implements the HttpServletRequest interface. In SessionRepositoryRequestWrapper, it rewrites some methods in the HttpServletRequest interface, so there are: getSession, changeSessionId, etc. method. At this point, we should roughly understand that the original request and response have been repackaged. We also understand how the original HttpSeesion was replaced by Spring Session.
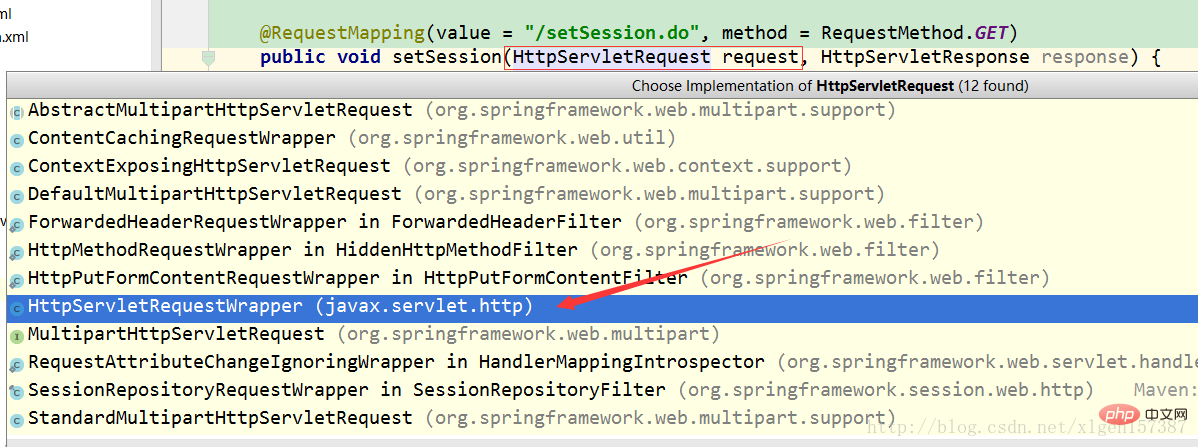
We use the shortcut keys to view the specific implementation of request.getSession(), and we can see that there is already a method overridden by SessionRepositoryRequestWrapper. There are two default implementations above, one is original and the other is implemented by Spring Session. Which one should be selected as the implementation? This is the role of the DelegatingFilterProxy proxy we mentioned above. It will filter each request through DelegatingFilterProxy Each request will also go through the springSessionRepositoryFilter filter. The springSessionRepositoryFilter filter realizes the conversion of the original request to the SessionRepositoryRequestWrapper. This is the specific process!
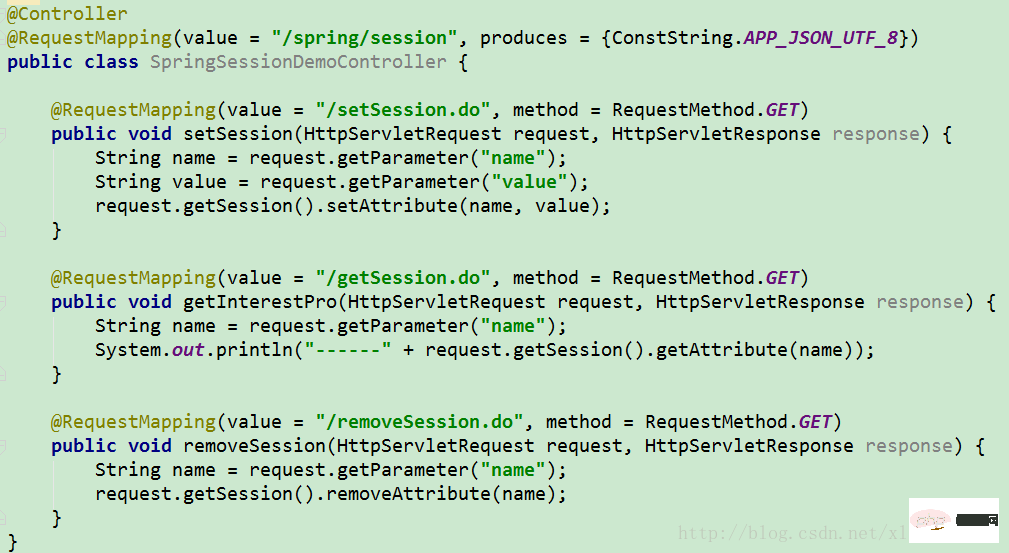
request.getSession().setAttribute(name, value)Implementation: Tracking the code, you can reach the content below
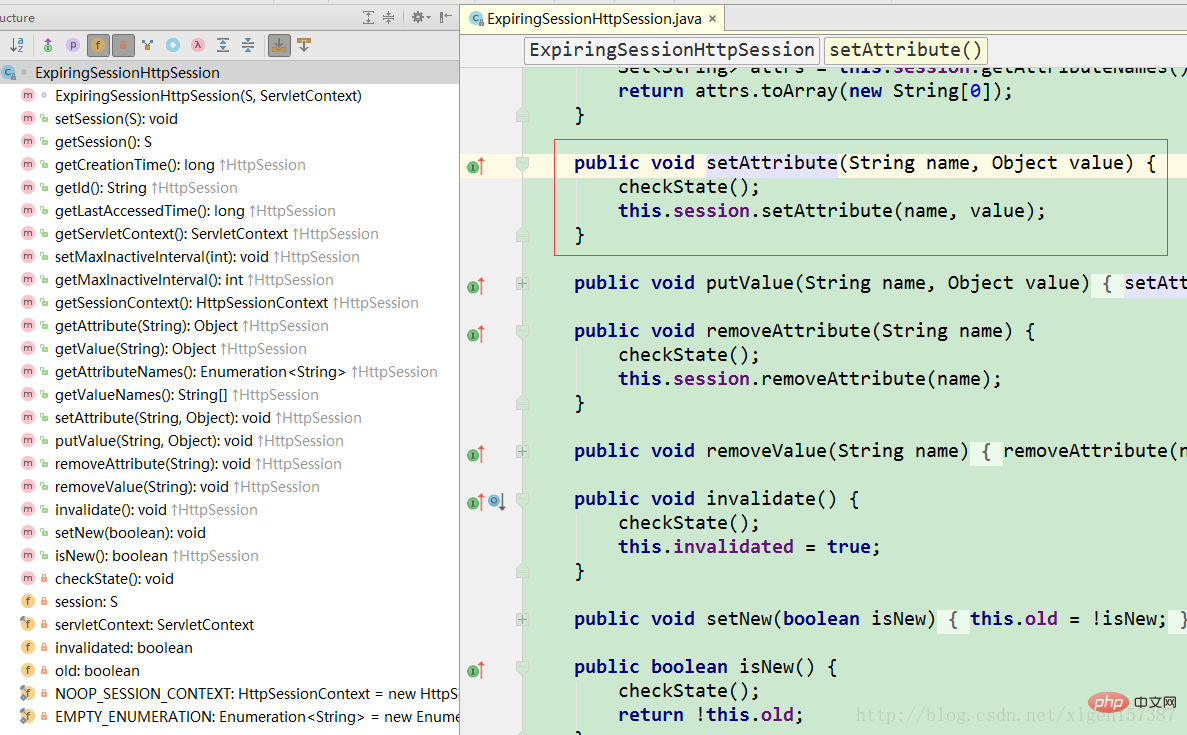 You can see that there are Redis related operate! At this point, we should know how Spring Session works! Although the process below is not introduced again, it is already clearly understood.
Related learning recommendations: redis video tutorial
The above is the detailed content of Learn Spring Session and Redis to solve distributed Session cross-domain sharing issues. For more information, please follow other related articles on the PHP Chinese website!

Hot AI Tools

Undresser.AI Undress
AI-powered app for creating realistic nude photos

AI Clothes Remover
Online AI tool for removing clothes from photos.

Undress AI Tool
Undress images for free

Clothoff.io
AI clothes remover

Video Face Swap
Swap faces in any video effortlessly with our completely free AI face swap tool!

Hot Article
Hot Tools

Notepad++7.3.1
Easy-to-use and free code editor

SublimeText3 Chinese version
Chinese version, very easy to use

Zend Studio 13.0.1
Powerful PHP integrated development environment

Dreamweaver CS6
Visual web development tools

SublimeText3 Mac version
God-level code editing software (SublimeText3)
Hot Topics
 1386
1386
 52
52

 How to build the redis cluster mode
Apr 10, 2025 pm 10:15 PM
How to build the redis cluster mode
Apr 10, 2025 pm 10:15 PM
Redis cluster mode deploys Redis instances to multiple servers through sharding, improving scalability and availability. The construction steps are as follows: Create odd Redis instances with different ports; Create 3 sentinel instances, monitor Redis instances and failover; configure sentinel configuration files, add monitoring Redis instance information and failover settings; configure Redis instance configuration files, enable cluster mode and specify the cluster information file path; create nodes.conf file, containing information of each Redis instance; start the cluster, execute the create command to create a cluster and specify the number of replicas; log in to the cluster to execute the CLUSTER INFO command to verify the cluster status; make
 How to clear redis data
Apr 10, 2025 pm 10:06 PM
How to clear redis data
Apr 10, 2025 pm 10:06 PM
How to clear Redis data: Use the FLUSHALL command to clear all key values. Use the FLUSHDB command to clear the key value of the currently selected database. Use SELECT to switch databases, and then use FLUSHDB to clear multiple databases. Use the DEL command to delete a specific key. Use the redis-cli tool to clear the data.
 How to read redis queue
Apr 10, 2025 pm 10:12 PM
How to read redis queue
Apr 10, 2025 pm 10:12 PM
To read a queue from Redis, you need to get the queue name, read the elements using the LPOP command, and process the empty queue. The specific steps are as follows: Get the queue name: name it with the prefix of "queue:" such as "queue:my-queue". Use the LPOP command: Eject the element from the head of the queue and return its value, such as LPOP queue:my-queue. Processing empty queues: If the queue is empty, LPOP returns nil, and you can check whether the queue exists before reading the element.
 How to use the redis command
Apr 10, 2025 pm 08:45 PM
How to use the redis command
Apr 10, 2025 pm 08:45 PM
Using the Redis directive requires the following steps: Open the Redis client. Enter the command (verb key value). Provides the required parameters (varies from instruction to instruction). Press Enter to execute the command. Redis returns a response indicating the result of the operation (usually OK or -ERR).
 How to use redis lock
Apr 10, 2025 pm 08:39 PM
How to use redis lock
Apr 10, 2025 pm 08:39 PM
Using Redis to lock operations requires obtaining the lock through the SETNX command, and then using the EXPIRE command to set the expiration time. The specific steps are: (1) Use the SETNX command to try to set a key-value pair; (2) Use the EXPIRE command to set the expiration time for the lock; (3) Use the DEL command to delete the lock when the lock is no longer needed.
 How to read the source code of redis
Apr 10, 2025 pm 08:27 PM
How to read the source code of redis
Apr 10, 2025 pm 08:27 PM
The best way to understand Redis source code is to go step by step: get familiar with the basics of Redis. Select a specific module or function as the starting point. Start with the entry point of the module or function and view the code line by line. View the code through the function call chain. Be familiar with the underlying data structures used by Redis. Identify the algorithm used by Redis.
 How to solve data loss with redis
Apr 10, 2025 pm 08:24 PM
How to solve data loss with redis
Apr 10, 2025 pm 08:24 PM
Redis data loss causes include memory failures, power outages, human errors, and hardware failures. The solutions are: 1. Store data to disk with RDB or AOF persistence; 2. Copy to multiple servers for high availability; 3. HA with Redis Sentinel or Redis Cluster; 4. Create snapshots to back up data; 5. Implement best practices such as persistence, replication, snapshots, monitoring, and security measures.
 How to set the redis expiration policy
Apr 10, 2025 pm 10:03 PM
How to set the redis expiration policy
Apr 10, 2025 pm 10:03 PM
There are two types of Redis data expiration strategies: periodic deletion: periodic scan to delete the expired key, which can be set through expired-time-cap-remove-count and expired-time-cap-remove-delay parameters. Lazy Deletion: Check for deletion expired keys only when keys are read or written. They can be set through lazyfree-lazy-eviction, lazyfree-lazy-expire, lazyfree-lazy-user-del parameters.
